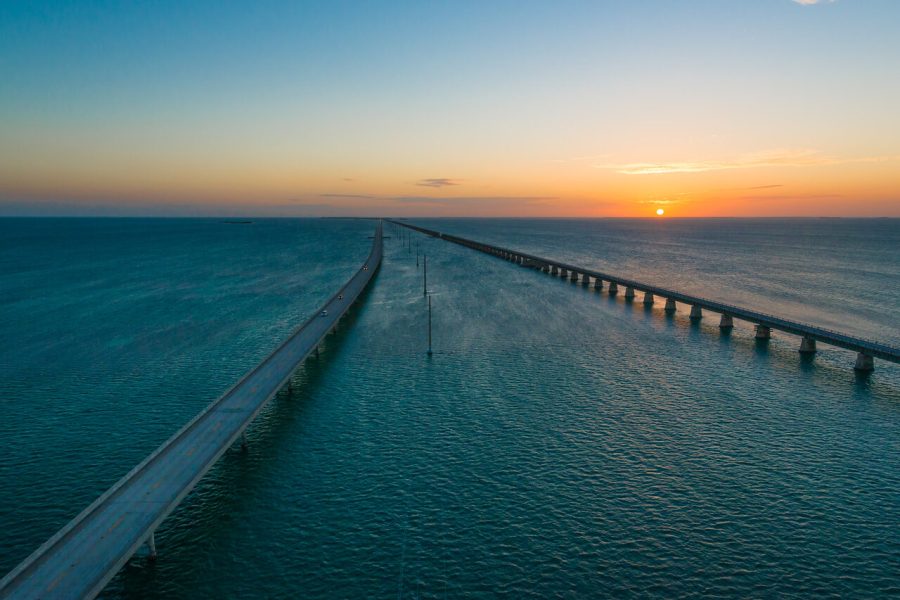
Updated October 2026
Drone photos look easy until you try to make one that works. The wind pushes your drone around, the light is harsh from above, and the screen on your controller does not tell you much about exposure. These 10 tips cover the settings, the angles and the habits that make drone photos sharper, cleaner and more interesting. They apply to most consumer drones, from a small foldable one to a larger camera drone.
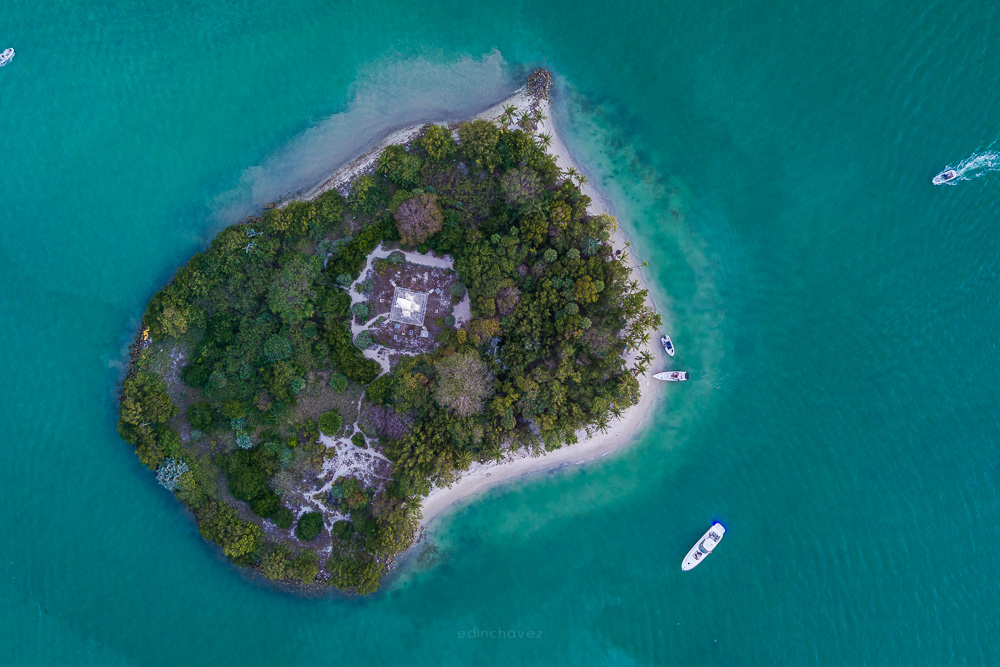
The aerial photos below are from Edin’s own library, taken over South Florida and the Keys.
 Save
SaveTip 1: Shoot RAW
RAW files keep far more data than JPEGs. Drone sensors are small, and skies are often bright while the ground is dark, so you need that extra room. With RAW you can pull back a blown sky, lift shadows, fix white balance and reduce noise without wrecking the image. Most drones can save RAW (often as DNG) to the memory card. It uses more space, so bring a bigger card. Our post on why you should shoot RAW explains the benefits in detail.
Tip 2: Use manual mode
Auto exposure on a drone changes the picture as the camera moves between bright sky and dark ground. Manual mode keeps your exposure steady so you can fly, frame and shoot with the same look. Set your exposure for the scene, then adjust it as the light changes. If the light is harsh, use a faster shutter speed. As it gets darker, slow it down, but not so far that wind or motion causes blur. If you want to practice, the shutter speed course in the Academy explains how shutter speed affects sharpness and motion.
 Save
SaveTip 3: Keep ISO as low as you can
Small sensors get noisy fast. Keep ISO at its base value (usually 100) whenever you can. If the image is too dark, slow the shutter a little first, or wait for better light, before raising ISO. Many drones have a fixed aperture, so shutter speed and ISO are your main controls. For more on how ISO affects noise, the ISO course in the Academy goes through it step by step.
Tip 4: Use filters
A polarizing filter cuts glare and reflections, deepens blue skies and makes colors richer, and it is especially useful over water. Neutral density (ND) filters let you use a slower shutter speed in bright light, which is useful for video and for smoother water. Many drone filters are sold in sets that clip onto the gimbal camera. Check that a set fits your exact model and does not make the gimbal unbalanced. Some starting points are in the gear box at the bottom of this post.
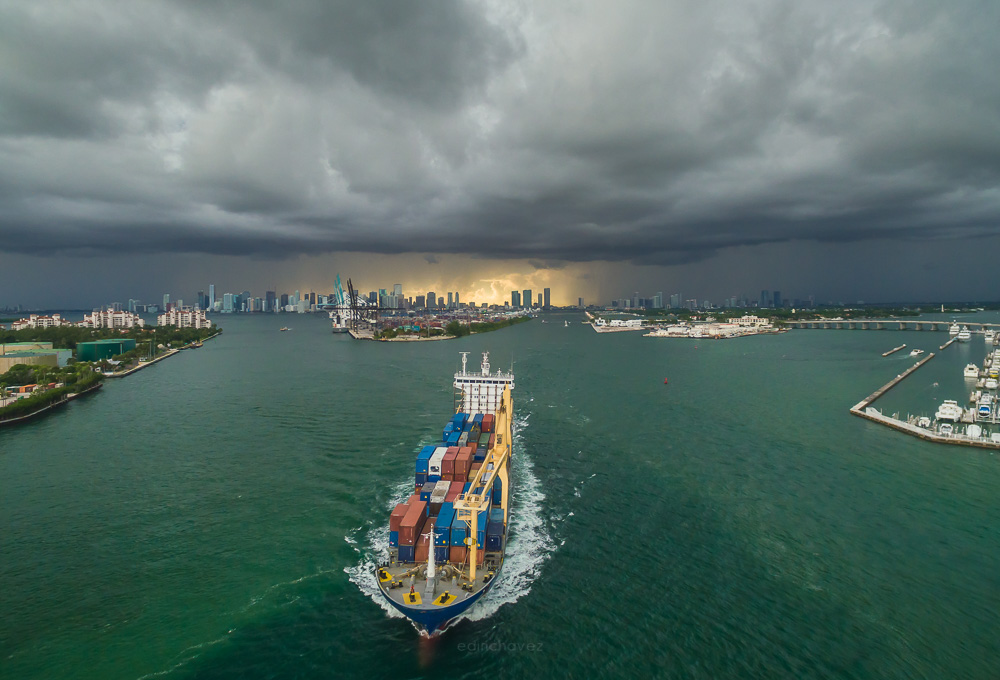
Tip 5: Fly low
Most drone photos are taken from high up, and many look alike. Dropping low to the ground or the water puts the viewer in the scene and gives a sense of scale, as in the ship photo above. Only do this in a safe, open area, away from people, and keep the drone in your line of sight at all times.
 Save
SaveTip 6: Shoot straight down
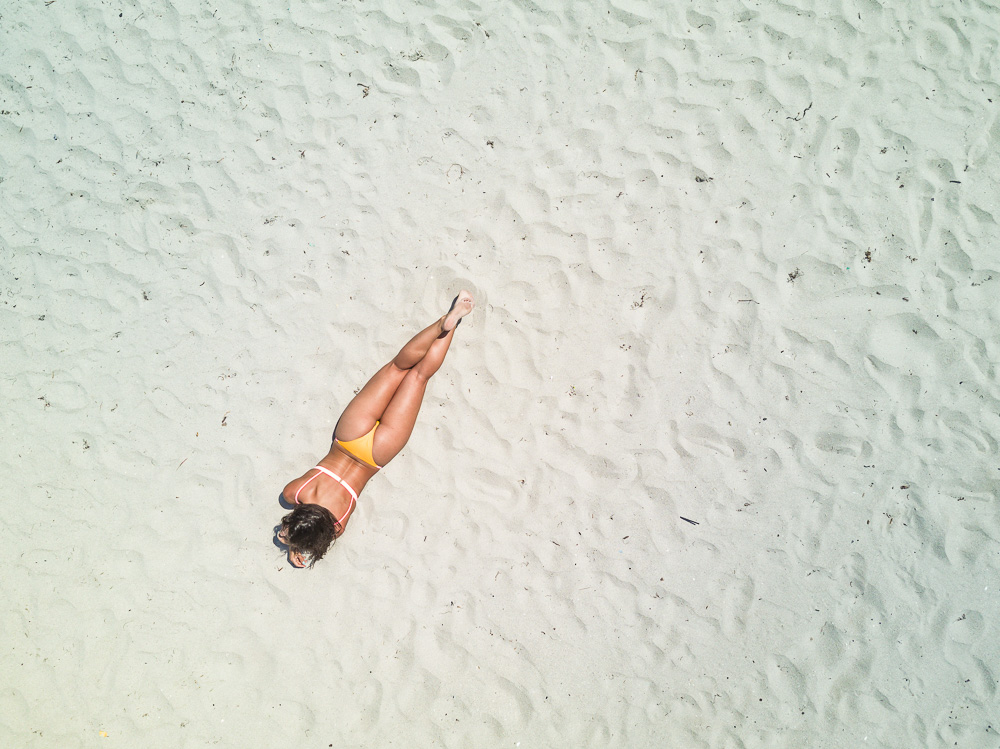
Tilt the gimbal 90 degrees and look straight down. Without a horizon, the picture turns into shapes, lines and color. Sand ripples, waves, roads, boats and umbrellas make strong subjects. It also removes the sky problem, since the light is more even across the frame. Look for contrast between the subject and the background, and keep the shadows in mind, because the sun’s angle affects the shape of everything on the ground.
Tip 7: Choose low wind
Wind is the enemy of sharp drone photos. Even a light breeze at altitude can shake the aircraft and blur longer exposures. Check the forecast, and look at wind speed at altitude, not just on the ground. Evening and early morning are often calmer. At dusk, when the shutter has to be slow, low wind is even more important. If your drone struggles to hold position, land it.
 Save
SaveTip 8: Add color
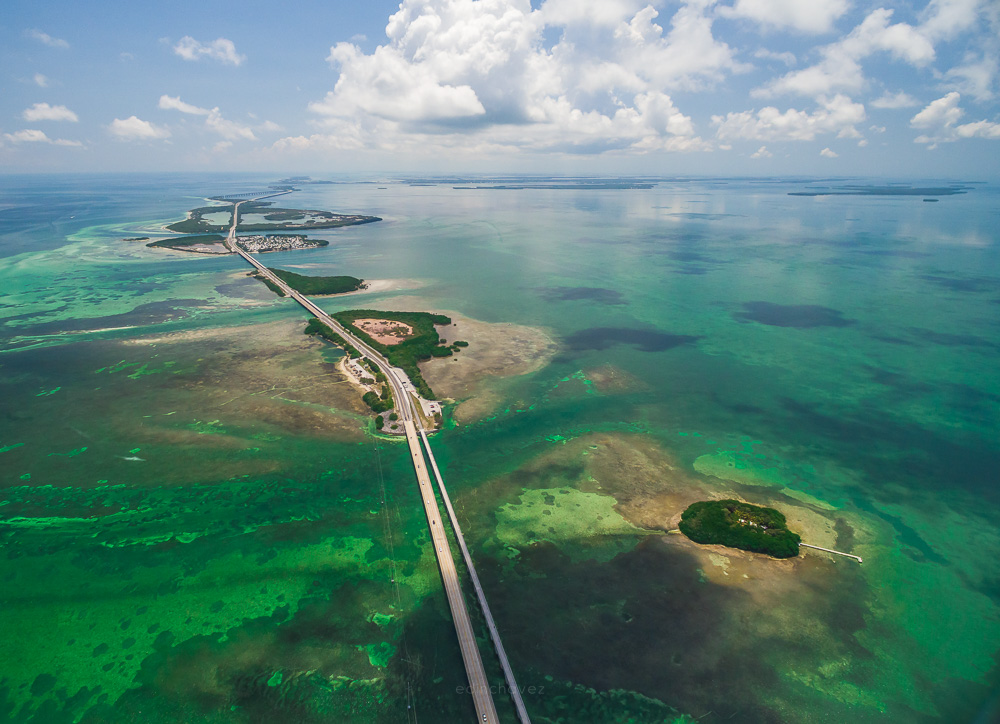
Color gives drone photos their punch. Turquoise shallows, a red boat, a row of bright umbrellas or a green island against dark water all draw the eye. Plan your flight around color, and use a polarizing filter to boost it. In editing, raise vibrance first and saturation second, and keep the result believable.
Tip 9: Look for patterns
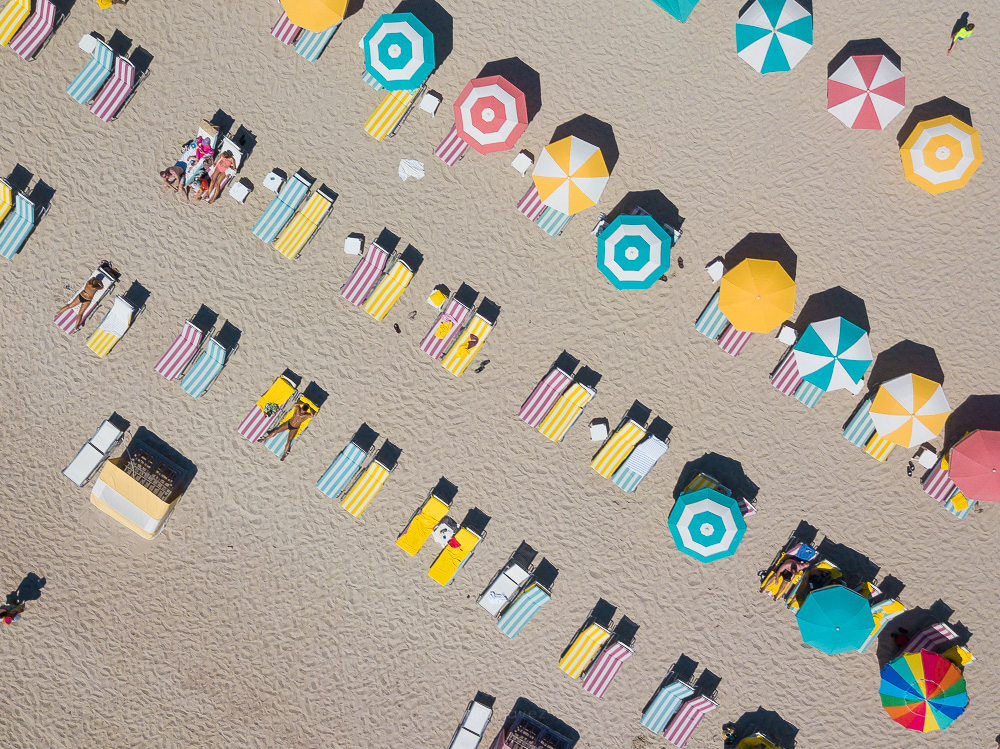
The view from above reveals patterns that you cannot see from the ground: rows of beach umbrellas, crowds, boat wakes, fields, rooftops and parking lots. Look for repetition and for the one object that breaks it. Patterns work best when the light is soft and the shadows are short.
 Save
Save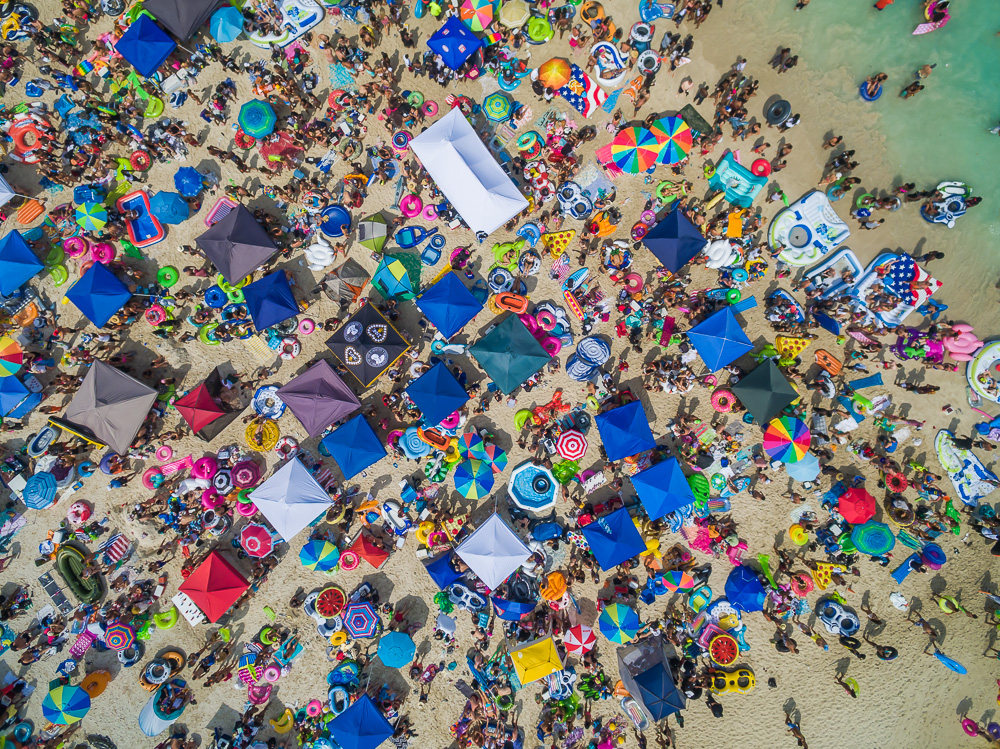 Save
SaveTip 10: Edit your photos
A drone photo is rarely finished in the camera. Straighten the horizon, correct white balance, recover highlights, lift shadows and add contrast. A few small adjustments, applied with a consistent look, can make a set of photos feel like a series. The Lightroom editing course in the Academy walks through a full workflow, and our guide on how to edit a sunrise photo using Lightroom shows the same steps on a real image. Edin also sells Lightroom presets if you want a faster starting point.
A starting settings cheat sheet
These are starting points, not rules. Adjust them to your drone and the light.
- Bright daylight, photo: RAW, ISO 100, shutter 1/500 or faster, and a polarizer if the scene has water or sky.
- Golden hour, photo: RAW, ISO 100 to 200, shutter 1/200 to 1/100, and check for blur at 100% zoom after the first frames.
- Dusk or storm light: RAW, ISO 200 to 400, shutter 1/60 or slower only if the wind is calm, and consider bracketing.
- Video in sun: Use an ND filter so your shutter speed is about double your frame rate, for a natural motion look.
Composition from the air
The same rules that work on the ground work in the sky, but they feel different from above. Use leading lines like roads, shorelines and wakes to pull the eye through the frame. Place your subject off-center, and give it breathing room. Use scale: a small boat, a person or a car next to a large landscape shows how big the place is. Watch your shadows, since the drone’s own shadow or the shadow of a tree can fall into the frame at some angles. Finally, vary your altitude. Take the same scene at three heights and pick the best later.
Weather and light
Clouds give the sky texture, as in the storm photo above, but they also bring wind and rain. Do not fly in rain, fog that hides the drone, or strong gusts. Cold weather drains batteries faster, so keep them warm until you need them. Hot weather can cause overheating, so give the drone shade between flights. Check the forecast for sunrise and sunset times, and plan to arrive early so you are ready when the light changes.
Know the rules before you fly
Drone rules vary by country and change over time. In the United States, the FAA publishes the current requirements for recreational and commercial flying, including registration, the altitude limit, keeping the drone within line of sight and flying near airports. Read the current rules at the FAA drone page, or look up your own country’s aviation authority. Check local park and beach rules too, because many places ban drones even when national rules allow them. Do not fly over crowds or people who have not agreed to it, and respect other people’s privacy.
A simple pre-flight checklist
- Batteries for the drone and the controller are charged, and you have spares.
- The memory card has room, and it is set to shoot RAW.
- Propellers are in good shape and firmly attached.
- The firmware and the app are up to date.
- The compass and GPS are ready, and the home point is set.
- The wind and weather are within your limits.
- You have checked the airspace and the local rules for your location.
- The lens is clean and the gimbal cover is off.
Plan your shots from above
A few minutes of planning gives better pictures than an hour of random flying. Look at the location on a map or satellite view before you go, and pick two or three compositions: one high and wide, one low and close, one straight down. Think about where the sun will be. Side light shows texture, and low sun makes long shadows that add shape to a flat scene. Midday light is harsh, but top-down shots of water and sand can still work. When you arrive, take a test shot, check the histogram on the controller if it has one, and set the exposure before you start framing.
Common drone photography mistakes
- Flying too high. Everything looks small and flat. Try lower and closer.
- Auto exposure. The brightness shifts from frame to frame.
- Tilted horizon. Check the horizon and fix it in editing.
- Ignoring the edges. Look at the corners of the frame for clutter, such as boats, people or shadows.
- Skipping the battery warning. Land with a margin. Wind can drain a battery fast on the way back.
- Not backing up. Copy files off the card soon after the flight.
Grow your skills with the Academy
The Shut Your Aperture Academy, taught by Edin Chavez, teaches the skills that make aerial photos better: exposure, composition and editing, with lifetime access. Landscape Photography covers composition and light, and Lightroom Editing takes you through the whole editing workflow in 10 modules and 42+ parts. Browse everything at the Academy home.
For more, read our guide on how to shoot the perfect sunset, which applies well to drone work at golden hour.
Frequently asked questions
What camera settings are best for drone photography?
Shoot RAW in manual mode with the lowest ISO you can, and set the shutter speed for the light. Use a polarizer or ND filter if you need to control glare or slow the shutter.
Do I need filters on a drone?
They are not required, but a polarizing filter helps with glare on water and richer colors, and ND filters help in bright light, especially for video.
What is the best time of day to fly a drone for photos?
The hours near sunrise and sunset have softer light and often lighter wind. Midday works for top-down shots of water and sand.
Why are my drone photos blurry?
Common causes are wind, a shutter speed that is too slow, a dirty lens and focus problems. Fly in lower wind, use a faster shutter and clean the lens.
Do I need to register my drone?
Rules depend on your country and the weight of the drone. In the United States, check the current FAA requirements before flying. Look up your national aviation authority elsewhere.
Should I shoot photos or video with a drone?
Both are possible, but settings differ. For photos, shoot RAW and use a low ISO. For video, use ND filters to keep shutter speed natural.
Gear box: drone photography starting points
These are research starting points, not rankings. Check current specs, compatibility with your drone model, reviews and prices before you buy.
- Polarizer and ND filter sets for your drone: Browse filter sets at B&H or on Amazon.
- Extra batteries and a charging hub: See options at B&H.
- Fast memory cards: Browse microSD cards on Amazon.
- A landing pad: See landing pads on Amazon.
Affiliate disclosure: some links above are affiliate links. If you buy through them, Shut Your Aperture may earn a small commission at no extra cost to you.