Today, the art of photography extends beyond just capturing moments through a lens; it’s also about the magic we can create afterwards on our screens. With tools like Photoshop, there’s a whole new world of possibilities to enhance and transform our images. Among these, editing the sky in our photographs is a technique that holds the power to dramatically change the feel and look of our shots. This article will guide you through the intricacies of using layers and masks in Photoshop to master the art of dynamic sky editing, a skill that can take your images from good to breathtaking.
Understanding Layers and Masks in Photoshop
Mastering Dynamic Sky Editing in Photoshop with Layers and Masks
Understanding the Basics: Dynamic Sky Editing in Photoshop
In today’s digital age, crafting the perfect photograph is often achieved not only behind the camera but also in front of the computer screen, with tools like Photoshop. One of the most impactful techniques you can use to enhance your images is dynamic sky editing. This technique leverages the power of layers and masks in Photoshop, providing you with the flexibility to adjust the sky in your images without affecting the rest of the scene. Let’s dive into how layers and masks facilitate dynamic sky editing.
Step 1: Introducing Layers for Sky Editing
Think of layers as different sheets of paper stacked on top of each other, where each sheet represents a different part of your image. For dynamic sky editing, you initially work with two layers: your original image and a layer for the new sky you want to introduce.
- Open your image in Photoshop.
- Import an image of the sky that matches the lighting and perspective of your original photo. Place this sky image as a new layer above your original image. Now, you have the groundwork to start blending these layers for a realistic effect.
Step 2: Leveraging Masks for Seamless Integration
Masks come into play to seamlessly blend the new sky with your original image. Imagine a mask as a magical eraser; it allows you to hide parts of the layer it’s applied to without deleting anything permanently. This means you can blend the new sky into your original image without losing the ability to adjust it later if needed.
- With your sky layer selected, add a layer mask by clicking the “Add layer mask” icon at the bottom of the layers panel. You’ll see a white box appear next to your sky layer thumbnail.
- Select the Brush tool, and make sure your foreground color is set to black. Using a soft brush, paint over the areas where you want the original sky to show through. As you paint with black on the mask, the new sky will be hidden in those areas, revealing the original image beneath.
- If you make a mistake, simply switch your foreground color to white and paint over the area to reveal the new sky again. This non-destructive technique allows for flexibility and experimentation.
Step 3: Adjusting for Realism
With the new sky in place and blended, it’s crucial to ensure the lighting and color match between the sky and the original scene. This step involves adjusting the sky layer to harmonize with your original image.
- Select your sky layer and adjust its color balance, brightness, and contrast using adjustment layers. You can find these options under the “Layer” menu, then “New Adjustment Layer”. Choose the type of adjustment you’d like to apply and tweak as necessary.
- It’s important to clip each adjustment layer to your sky layer so that only the sky is affected by these changes. To do this, hover between the sky layer and an adjustment layer while holding down the Alt or Option key. When the cursor changes, click to create a clipping mask.
Balancing the Adjustment:
Adjustment layers and clipping masks help you fine-tune the sky’s appearance, ensuring it complements the rest of your photograph naturally. Experiment with different levels of adjustments until you find the perfect balance that makes your sky look as though it was always part of the original image.
Conclusion:
Dynamic sky editing in Photoshop is a powerful technique to enhance the mood and impact of your photographs. By understanding and using layers and masks, you have complete control over how the sky interacts with the rest of your image. This process not only boosts your creative flexibility but also ensures your edits are non-destructive, allowing for endless experimentation. Remember, the key to mastering dynamic sky editing lies in practice and experimentation, so dive in and explore the vast possibilities Photoshop offers.
 Save
SaveSelecting and Replacing Skies
Sky Replacement Feature in Photoshop: A Step-by-Step Guide
In the realm of digital enhancement, Adobe Photoshop remains the gold standard for altering and perfecting images. Among its vast array of tools, the Sky Replacement feature stands as a pivotal advancement, especially for photographers and designers striving to boost the visual impact of their landscapes or outdoor portraits. This feature not only streamlines the sky alteration process but also ensures that the final product looks natural and convincing to the viewer. Let’s delve into the most efficient method for selecting and replacing skies using this innovative feature.
Step 1: Open Your Image
Launch Adobe Photoshop and open the image you wish to edit. For this exercise, select a photo where the sky is prominent and could benefit from enhancement or a dramatic change.
Step 2: Accessing the Sky Replacement Feature
Navigate to the top menu, click on “Edit,” and then select “Sky Replacement” from the dropdown options. This action opens a new dialog box specifically designed for sky editing.
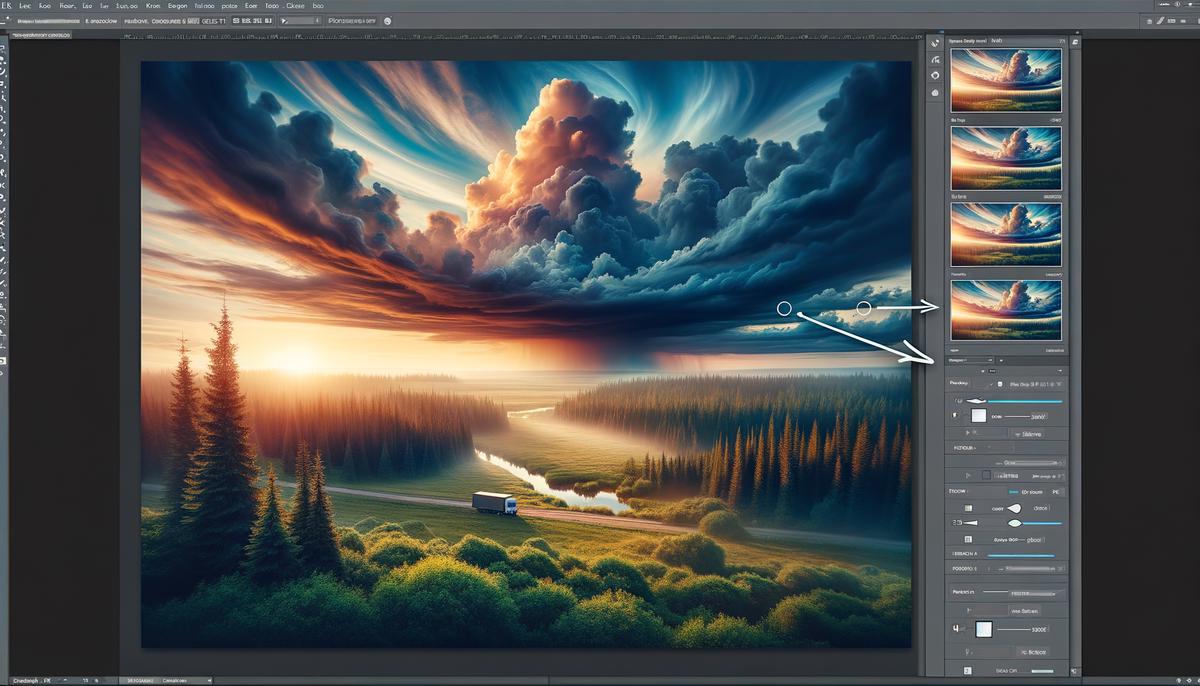
Step 3: Choose a New Sky
Within the Sky Replacement dialog box, you will encounter a variety of preloaded sky options ranging from sunsets to clear blue skies. Click on the dropdown menu labeled “Sky” to peruse the collection. Select the sky that best matches your image’s mood or the effect you aim to achieve. If none of the pre-existing skies suits your needs, you can import your own by clicking the plus (+) icon next to the sky preview.
Step 4: Adjusting the Sky
Once you have selected your new sky, it’s time to make adjustments to ensure a seamless blend with your original image. Photoshop offers a set of sliders to refine the fit and appearance:
- Shift Edge: This slider allows you to fine-tune where the new sky meets the original horizon line. Adjust it to avoid any unnatural hard edges.
- Fade Edge: Use this slider to soften the edge transition between the new sky and your landscape, creating a more blended appearance.
- Brightness: Adjust the brightness of your new sky to match the lighting conditions of your original photo. This is crucial for maintaining realism.
- Temperature: This slider modifies the warmth or coolness of the new sky, enabling it to fit better with the overall color scheme of your image.
Step 5: Finalize the Replacement
After adjusting the sky to your liking, click “OK” to apply the changes. Photoshop smartly handles the blending, taking into account the original image’s lighting, colors, and even reflecting the new sky’s colors onto the scene for added realism. At this point, the Sky Replacement layer is added non-destructively, allowing you further refinement.
Step 6: Tweaking and Perfecting
Photoshop automatically generates a new layer group named “Sky Replacement” once you apply your changes. Within this group, you find layers for the sky itself, the lighting adjustment, and the color adjustment. You can tweak these layers individually to perfect the sky’s integration into your image. For instance, you might want to fine-tune the mask on the sky layer to correctly cover complex shapes in your landscape or adjust the opacity of the adjustment layers to better match the original scene’s mood.
By following these steps, you can transform the sky in your images, adding drama, beauty, or even a surreal touch with unprecedented ease. The Sky Replacement feature in Photoshop makes it possible to achieve professional-looking results without manual masking and blending, enabling creatives to explore new heights in their photographic and design projects.
 Save
SavePhoto by taylorvanriper925 on Unsplash
Adjusting Color and Lighting
Step 7: Blend Color for Cohesion
To ensure your new sky integrates seamlessly with the original scene, you must adjust its colors to match. Begin by targeting specific hues in the sky. Use the ‘Hue/Saturation’ adjustment layer, found under the ‘Layer’ menu, then ‘New Adjustment Layer.’ Here, you can slide controls to fine-tune the sky’s hue, making it warmer or cooler to match the scene. A crucial tip is to observe the original image’s overall color temperature. If your scene was captured during golden hour, aim for warmer tones in your sky.
Step 8: Harmonize Lighting
Lighting plays a pivotal role in creating a believable composite. Assess the direction and quality of light in your original scene. If the light source, such as the sun, is apparent, ensure your new sky reflects this positioning. Navigate to the ‘Curves’ adjustment layer to modify the lighting subtly. This tool allows for precise control over the image’s highlights and shadows, adjusting them to mirror the scene’s natural lighting. Remember, consistency is key; your sky should illuminate the scene as if it were the original.
Step 9: Enhance Details and Contrast
For a truly convincing sky replacement, the devil is in the details. Enhance your sky’s visual appeal by increasing its contrast and clarity. Access the ‘Levels’ adjustment layer and focus on refining the depth of the clouds and the sky’s overall dynamic range. Adjusting these levels can bring a dramatic or subtle effect, depending on the original scene’s requirement. Pay attention not to overdo it; the goal is to maintain a natural look that complements your image.
Step 10: Apply Finishing Touches
In this final step, scrutinize your work for any discrepancies that might detract from its realism. It might be beneficial to zoom out to view the whole image, ensuring the new sky doesn’t overpower the scene but rather enhances it. You may find that slight opacity adjustments in the sky layer, or additional minor color corrections, are necessary for perfect harmony.
Remember, mastery comes with practice. As you familiarize yourself with these tools and techniques, blending skies and scenes will become an intuitive part of your editing process. With patience and attention to detail, you can achieve stunningly realistic and beautiful compositions that push the boundaries of your creative expression.
By meticulously adjusting color, lighting, and details – and critically evaluating your work – you can seamlessly integrate a new sky into any scene, breathing new life and emotion into your images, and elevating your photographic artistry to new heights.
 Save
SaveThrough the steps and techniques explored, we’ve unlocked the potential of Photoshop’s layers and masks, transforming ordinary images into stunning masterpieces. The ability to change skies, adjust colors, and manipulate lighting opens up endless opportunities for creativity. By applying these principles, you not only enhance the visual appeal of your photographs but also give them new life and emotion. As you continue to experiment and refine your skills, remember that each click and adjustment is a step toward perfecting your art. Embrace the power of Photoshop, and let your creativity soar to new heights, making every image a testament to your artistic vision.


