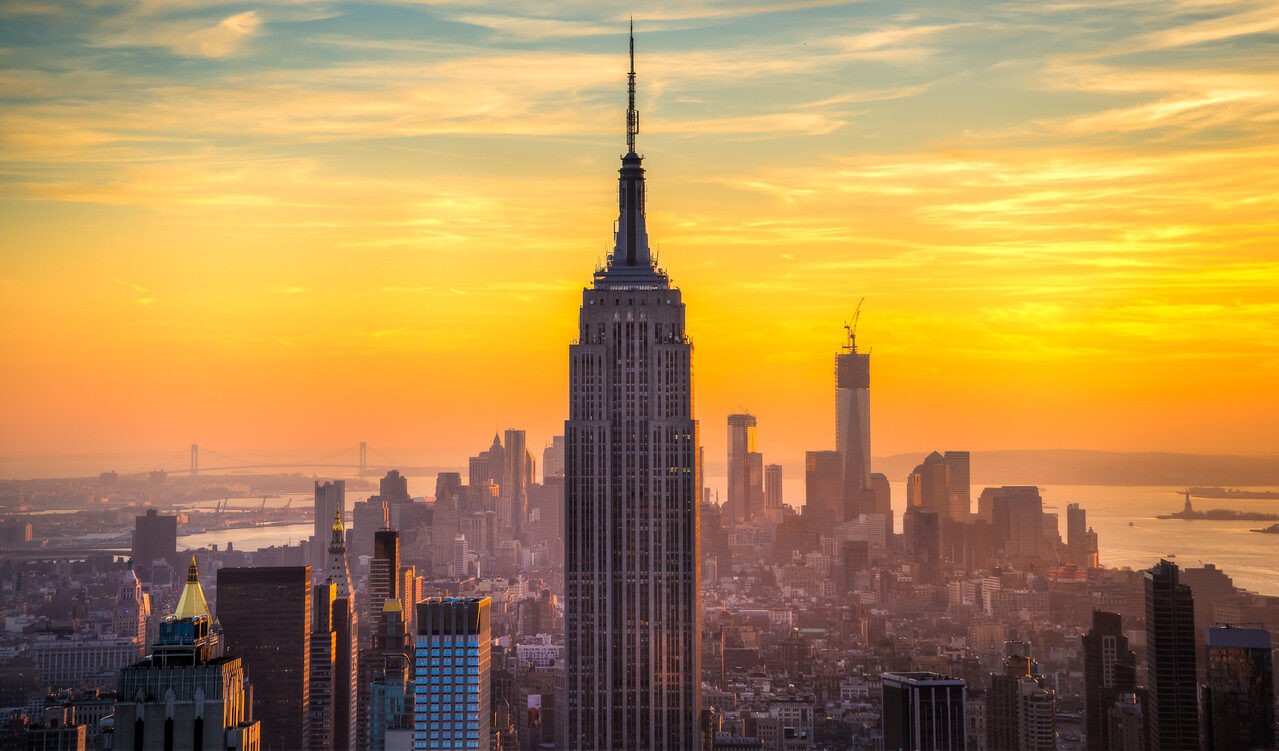
This post covers editing an amazing sunrise over New York City. The goal with this shot was to bring out the golden tones in the buildings and make the sky pop by pulling out the blues. Here is the full Lightroom workflow, step by step.
1. Set the white balance for mixed city light
A city sunrise is a tug of war between warm sun on the buildings and cool blue sky above. Start with a neutral white balance, then push temperature slightly warm. You want the lit faces of the buildings to glow without turning the whole frame orange.
2. Build the base exposure
In the basic panel, bring highlights down to protect the sky and lift shadows until the bridge structure and the shaded sides of the buildings show detail. Cities at sunrise are high contrast, so expect bigger shadow recovery than a landscape shot.
3. Split the frame with a sky mask
Add a graduated mask over the sky and drop its exposure a fraction of a stop. This is where the blues come from: deepen the sky in the mask, not globally, so the golden buildings stay warm underneath it.
4. Work the HSL for gold versus blue
In HSL, push orange and yellow saturation up a touch for the sunlit buildings, then pull blue luminance down slightly to give the sky depth. This color separation, warm against cool, is what makes a city sunrise read as epic instead of flat.
5. Cut the haze, keep it real
City atmospheres are hazy at sunrise. A small amount of dehaze (around +10 or less) inside the sky mask restores contrast. Any more and the skyline goes crunchy. Finish with texture on the buildings, level the horizon, and sharpen for web.
Please let me know if you have any questions in the comments below. For a faster start on edits like this, see our Lightroom presets guide.