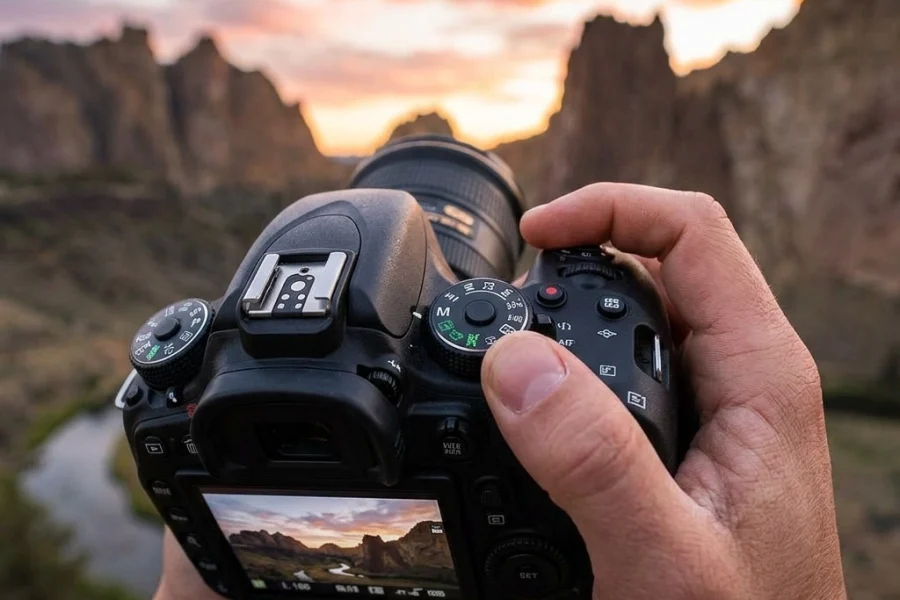
Listen, I get it. That little “M” on your camera dial looks intimidating. It’s like a secret club where everyone speaks a different language involving numbers, fractions, and weird terms like "bokeh." Most beginners stick to Auto mode because, hey, the camera is smart, right?
Well, yes and no. Your camera is a sophisticated piece of tech, but it’s a computer. It doesn’t have an artistic eye. It doesn’t know if you want that waterfall to look like silky ribbons or if you want to freeze a bird mid-flight. To get the shots you actually see in your head, you have to take the steering wheel.
Welcome to Manual Mode 101. We’re going to strip away the jargon and show you exactly how to master your settings so you can finally stop fighting your gear and start making art.
The Big Three: Understanding the Exposure Triangle
If you want to master manual mode, you have to understand the Exposure Triangle. Think of it as a three-legged stool. If one leg is too short or too long, the whole thing tips over. The three legs are Aperture, Shutter Speed, and ISO.
Every photo you take is just a measurement of light. Manual mode is simply you deciding how that light reaches the sensor.
1. Aperture: The Eye of the Camera
Aperture is the opening in your lens. Think of it like the pupil of your eye. In the dark, your pupil gets bigger to let in more light. In bright sun, it shrinks.
In photography, we measure this in "f-stops" (like f/2.8 or f/11). This is where it gets a little counter-intuitive:
- Small number (f/1.8, f/2.8): Wide opening, lots of light, blurry background (shallow depth of field).
- Large number (f/11, f/16): Small opening, less light, everything is sharp from front to back.
If you’re out shooting ethereal landscapes, you’ll likely want a higher f-stop to keep those mountains and the foreground crisp. If you’re shooting a portrait, you’ll want a lower f-stop to make your subject pop against a soft background.

2. Shutter Speed: The Gatekeeper of Time
While aperture is about the size of the hole, shutter speed is about how long that hole stays open. It’s measured in fractions of a second.
- Fast Shutter Speed (1/1000 or faster): Freezes motion. Perfect for sports or kids running around.
- Slow Shutter Speed (1/30, 1 second, or longer): Blurs motion. This is how you get those "creamy" water shots.
When you’re practicing water photography, shutter speed is your best friend. You can make a crashing wave look like a solid sculpture or a gentle stream look like mist. Just remember: if your shutter is open for a long time, any movement from your hands will blur the whole photo. That’s when you need a tripod.
3. ISO: The Sensor’s Sensitivity
ISO is your camera sensor’s sensitivity to light.
- Low ISO (100-400): Best for bright daylight. It produces the cleanest, highest-quality images.
- High ISO (1600-6400+): Necessary for low-light situations like urban photography at night.
The trade-off? The higher the ISO, the more "noise" or grain you get in your photo. Modern cameras are getting better at handling high ISO, but as a rule of thumb, always try to keep your ISO as low as possible. If your photo is too dark and you can’t change your aperture or shutter speed anymore, then you bump the ISO.

How to Actually Set Your Camera (The Workflow)
Now that you know what the buttons do, how do you actually use them in the wild? You don’t just start spinning dials randomly. You need a workflow.
Step 1: Set Your ISO
Start with ISO 100 if you’re outside or in a well-lit room. If it’s cloudy or you’re indoors, maybe start at 400. Set it and forget it for a moment.
Step 2: Choose Your Aperture
Ask yourself: "What do I want the focus to look like?" If you want a blurry background, go as low as your lens allows (f/1.8 or f/2.8). If you’re shooting picturesque coastal escapes, you’ll want f/8 or f/11.
Step 3: Dial in Shutter Speed
Look through your viewfinder. You’ll see a little bar with a "0" in the middle and a scale going to -3 and +3. That’s your Light Meter. Adjust your shutter speed until the little tick mark hits the "0."
Step 4: Take a Test Shot and Adjust
Check your screen. Is it too dark? Slow down the shutter speed or raise the ISO. Is it too bright? Speed up the shutter.
Reading the Light Meter
Your camera’s light meter is its best guess at what a "correct" exposure looks like. It tries to turn everything into a neutral gray.
- Underexposed (-): The meter is to the left. The image is too dark.
- Overexposed (+): The meter is to the right. The image is too bright.
However, sometimes the camera is wrong. If you’re shooting a majestic sunset, the camera might try to make the dark silhouettes look bright, which ruins the mood. In manual mode, you have the power to ignore the meter and keep the shadows dark.

Why Manual Mode is Better Than "Auto"
In Auto mode, the camera makes a compromise. It might choose a shutter speed that’s too slow, causing your photo to be blurry, or an ISO that’s too high, making it grainy.
When you go manual, you decide what’s important. For example, when shooting landscapes for captivating shots, you might decide that a sharp image is more important than a fast shutter speed. You can put the camera on a tripod, set a low ISO, a narrow aperture, and let the shutter stay open for as long as it needs to. Auto mode would never make that creative choice for you.
Getting Creative with Manual Settings
Once you get the hang of the basics, you can start doing the cool stuff.
Long Exposure
This is where manual mode really shines. By using a very slow shutter speed (30 seconds or more), you can turn moving clouds into streaks and busy city streets into light trails. This is a staple for professional travel photography. You can find more advanced tips on this over at PhotoGuides.org.
Shallow Depth of Field
Want that professional "creamy" background? Open your aperture all the way. This is great for street photography where you want to highlight a specific person or object in a crowded hidden gem location.

The Secret Ingredient: Shooting in RAW
If you’re going to go through the effort of shooting in manual, you must change your file format from JPEG to RAW.
A JPEG is a finished meal: the camera has already "cooked" the data and thrown away what it didn't use. A RAW file is the ingredients. It stores all the data the sensor captured, giving you way more room to fix mistakes later.
If you accidentally underexpose a shot, a RAW file allows you to bring back the details in the shadows during editing. For post-processing, I highly recommend using Luminar. It’s intuitive and uses AI to help you enhance the manual choices you made in the field without making the process feel like a chore.
Common Mistakes Beginners Make
Even with a guide, you’re going to mess up. That’s part of the process. Here are the most common pitfalls:
- Forgetting to Check ISO: You might spend the whole day shooting at ISO 3200 because you forgot to change it after a night shoot. Always check your ISO first.
- Too Much Shutter Blur: You might set your shutter speed to 1/30 because the light is low, but if you’re hand-holding the camera, your heartbeat is enough to shake the lens and blur the photo. Keep it above 1/60 for handheld shots.
- Trusting the Screen: Your camera screen is bright and pretty, but it lies. Always look at your histogram or light meter. What looks bright on the screen might actually be a dark file.
For a deeper dive into these technical nuances, check out the ultimate guide to photography tutorials on our site.
Practice Makes Perfect
You don’t need a fancy trip to a secluded paradise to practice manual mode. You can do it in your living room.
The "Fruit" Exercise:
- Put a piece of fruit on a table near a window.
- Set your camera to Manual.
- Try to take one shot with a blurry background (wide aperture).
- Try to take one shot where every detail of the fruit is sharp (narrow aperture).
- Try to take a "dark and moody" version by adjusting only your shutter speed.
The more you do this, the more it becomes muscle memory. Eventually, you won't even think about the "Exposure Triangle." You’ll just feel the light and move your fingers to the right dials.

Final Thoughts
Mastering manual mode isn't about being a "purist." It’s about freedom. It’s about the difference between taking a snapshot and creating a photograph.
If you want to see how these settings look in action, I’ve posted some of my favorite manual-shot pieces over at Edin Fine Art. Seeing the final result of a well-balanced exposure is the best motivation to keep practicing.
Don't be afraid of the "M" dial. It’s not there to judge you; it’s there to help you tell better stories. For more tips on gear and advanced techniques, keep an eye on blog.edinchavez.com.
Now, get out there, shut your aperture (or open it!), and start shooting.