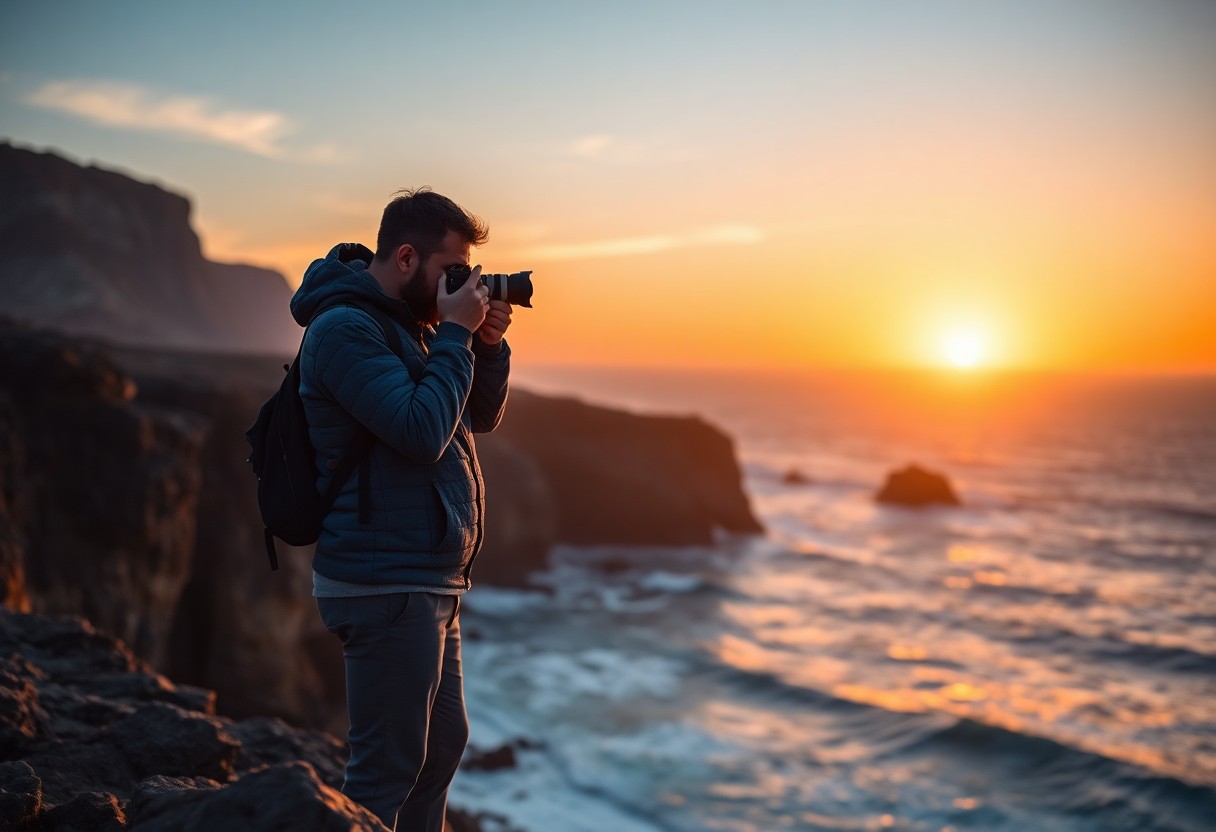
Nature offers a breathtaking canvas for photography, especially in lush forests where vibrant greens and intricate textures abound. If you’re eager to capture the enchanting beauty of these thriving ecosystems, this guide will equip you with seven creative steps to elevate your travel photography skills. From understanding light and composition to experimenting with angles and perspectives, you’ll learn how to showcase the forests in a way that truly reflects their splendor. Get ready to enhance your photographic journey and bring the lushness of the woods to life through your lens. For practitioners, see our breakdown of Lightroom dehaze for hazy skylines. For practitioners, see our breakdown of low-noise high ISO settings.

Understanding the Forest Environment
While commenceing on a journey through lush forests, it’s crucial for you to grasp the environment that surrounds you. Each forest is a living entity, brimming with intricate ecosystems and diverse flora and fauna. Appreciating these unique characteristics will not only enhance your photographic endeavors but also deepen your connection to nature. Understanding the subtleties of light, shadow, and composition in this verdant setting empowers you to capture its essence in stunning detail.
What Makes Forests Unique
Unique ecosystems flourish within forests, ranging from towering trees to the underbrush filled with ferns and wildflowers. These diverse layers create multiple levels of texture and depth, giving your photographs a multidimensional quality. Additionally, the interdependence of plant and animal life within these ecosystems provides a rich narrative that you can showcase in your travel photography.
Forests are also dynamic environments, reflecting the impact of human interaction, seasonal changes, and natural phenomena. The interplay of different species, as well as their adaptation strategies, allows you to capture compelling stories about survival and coexistence. Each forest has its own personality, often influenced by geographical location and climate, allowing you to explore various angles and compositions that highlight their uniqueness.
The Role of Seasonality in Forest Photography
Environment plays a significant role in how you experience and photograph forests, particularly through the changing seasons. Each season offers a fresh palette of colors and moods, transforming the landscape dramatically. In spring, for example, vibrant blossoms and lush greenery punctuate the scenery. Summer brings a dense canopy that filters sunlight beautifully, while autumn captivates with warm hues of red, orange, and yellow. Winter, on the other hand, unveils a stark beauty with snow-dusted branches and a serene stillness that can evoke deep emotions in your photographs.
To capture the essence of a forest throughout the seasons, it’s important to plan your visits accordingly. Each season presents unique opportunities to showcase the forest’s character, and your ability to adapt your photography techniques to these shifting elements will greatly influence the outcome of your images. Be mindful of how light changes with the seasons; for instance, the low angle of winter sunlight can create long shadows that add drama to your shots.
The Impact of Weather Conditions
On your photography journey, the weather can dramatically alter the mood and atmosphere of the forests you explore. Overcast days often yield softer light, which is perfect for capturing the intricate details of foliage without harsh shadows. Conversely, bright sunny days can produce vibrant colors and spectacular contrasts, particularly in the midst of a lush forest. The glow of sunlight filtering through leaves and the interplay of light and shadow can create enchanting photos that evoke a sense of wonder.
Plus, weather conditions can also add depth to your images. Mist and fog can provide an ethereal quality to your photographs, while recent rain can leave glistening droplets on leaves, enhancing their textures. Changing weather patterns can also create dramatic scenes, with stormy skies adding an element of intensity. By being attuned to the weather, you can transform simple forest scenes into extraordinary visual narratives that resonate with viewers. Embrace these conditions to reveal the enchanting beauty of forests in your travel photography.

Preparing Your Gear
You want to ensure that your photography gear is ready for capturing the stunning beauty of lush forests. These environments can be challenging due to varying light conditions, dense foliage, and unpredictable weather. So, before you commence on your adventure, take the time to prepare your equipment meticulously. This preparation can make the difference between a mediocre shot and a breathtaking one.
Essential Camera Equipment
One of the first steps in preparing your gear is to gather the crucial camera equipment you’ll need for photographing forests. Start with a high-quality DSLR or mirrorless camera that offers flexibility in settings, such as manual controls and excellent low-light performance. A tripod is also recommended, as it provides stability for long exposure shots in dimly lit forest environments and minimizes camera shake.
Additionally, you should ensure you have extra batteries and memory cards on hand. Forests can be expansive, and you don’t want to miss capturing a perfect moment because your battery dies or you run out of storage space. A weather-sealed camera body can be an asset, as it will help protect your gear against moisture and dirt, which are prevalent in lush forest settings.
Recommended Lenses for Forest Photography
Camera lenses play a crucial role in the quality of your images. While various lenses can be suitable for forest photography, you should consider bringing both a wide-angle lens and a telephoto lens. A wide-angle lens allows you to capture the grandeur of the forest, showcasing vast scenes filled with towering trees and sprawling undergrowth, while a telephoto lens is ideal for isolating details and capturing wildlife without disturbing them.
With wide apertures available on many lenses, you can also achieve that beautiful bokeh effect, emphasizing your subject against a soft, blurred background. Because the light can often be quite dappled under the forest canopy, make sure your lenses can perform well in lower light conditions, providing sharp images even in challenging lighting scenarios.
Accessories to Enhance Your Shots
Preparing additional accessories can significantly enhance your photographic experience in the forest. Consider bringing along a polarizing filter, which can reduce glare from wet surfaces and deepen the colors of the foliage. A circular polarizer can help make the greens of the leaves and the blues of the sky pop, adding more vibrancy to your images. Additionally, a neutral density filter can be invaluable for long exposure shots, allowing you to create a sense of motion in flowing water or passing clouds.
Gear such as a remote shutter release and lens cleaning kit is also handy to keep your workflow smooth and your equipment spotless. A remote shutter release prevents vibrations that may occur when pressing the camera button, ensuring that your shots remain as crisp as possible, particularly during longer exposures where even the slightest movement can cause blurriness.
Composition Techniques
Keep in mind that composition is crucial when photographing lush forests, as it is what helps bring your images to life and captivates viewers. By applying a few well-established techniques, you can elevate your travel photography, drawing the viewer’s eye into the mesmerizing depths of the forest. Experimenting with different compositions not only enhances the visual interest of your images but also conveys the serene beauty of nature in a compelling way.
The Rule of Thirds in Forest Scenes
Rule of thirds is one of the fundamental guidelines in photography that can significantly improve your forest images. By dividing your frame into a 3×3 grid, you can strategically place focal points along the intersecting lines or at their intersections. In lush forest scenes, consider positioning prominent trees, interesting foliage, or the horizon along these lines to create more engaging and balanced photographs. This technique allows for a natural flow in your composition, preventing it from feeling too flat or static.
In forest photography, utilizing the rule of thirds helps to create depth and perspective, encouraging viewers to explore every corner of your image. You can be more creative by incorporating natural elements such as overhanging branches or distant tree lines, which not only adhere to this compositional guideline but also enhance the aesthetic appeal of your photograph. Ensure you take a moment to consider where your key subjects will fall within the grid when framing your shot, allowing nature’s beauty to really shine through.
Utilizing Leading Lines to Guide the Eye
Forest photography presents ample opportunities for utilizing leading lines, which can effortlessly guide the viewer’s gaze from one part of the image to another. Nature provides many elements that create these lines, such as pathways, riverbanks, or fallen logs. By incorporating such features, you can build a structured composition that leads the eye deeper into the scene, allowing viewers to explore your image and absorb its enchanting details.
With a keen eye, look for natural pathways formed by trails or the lines created by the arrangement of tree trunks and branches. The diagonal lines can be powerful tools for creating a sense of dynamism and movement in your photography, as they naturally draw the eye toward the key focal points of the image. When you harness these lines effectively, they not only reinforce the story you want to tell but also add layers of depth and intrigue, inviting your audience to get lost in the lush environment.
Framing with Natural Elements
Composition plays a vital role in capturing the vastness of lush forests, and one effective technique is to frame your subject with natural elements. Use branches, leaves, or other forest features to encircle or contrast with your primary subject, creating an inviting vignette effect. This technique provides context and depth, making your images more immersive and compelling to potential viewers.
Techniques for framing with natural elements often include incorporating overhanging branches or foliage from the foreground. You can draw attention to the main subject while simultaneously showcasing the surrounding beauty of the forest. Experiment with different angles and perspectives until you find a unique frame that captures both your subject and the enchanting atmosphere of the lush environment. Engaging with the natural elements around you will not only improve your composition skills but will also deepen your connection with the majestic surroundings you’re photographing.
Utilizing Natural Light
Many photographers underestimate the power of natural light when capturing the serene beauty of lush forests. By harnessing natural light effectively, you can create stunning images that highlight the vibrant colors and intricate details of your surroundings. Understanding how different types of light affect your photographs is crucial, so let’s examine into that.
The Best Times for Forest Photography
For the best results in forest photography, timing is everything. Early mornings and late afternoons offer the most flattering natural light, as the sun’s position creates softer shadows and enhances the richness of colors in your images. These “golden hours” can transform a mundane scene into a visually captivating experience. Additionally, overcast days can be advantageous too, offering diffused light that minimizes harsh contrasts and highlights the lushness of the greenery in the forest.
How to Work with Diffused Light
Light plays an crucial role in photography, particularly in lush forest environments where dappled sunlight can create both challenges and opportunities. When you find yourself in a forest with diffused light, the key is to embrace it. This type of lighting can help create a soft, even exposure that enhances the serene, enchanting atmosphere of the woods. You can use a polarizing filter to eliminate glare from leaves and add depth to colors, resulting in a more vibrant photograph that showcases the detail of your surroundings.
Forest landscapes are unpredictable, but knowing how to adapt can lead to stunning captures. Look for areas where the light is filtering through the leaves, creating a natural spotlight effect. Experiment with different angles, as even a slight change can dramatically alter the composition of your photograph, allowing you to utilize the unique textures and colors present in the forest.
Capture the Magic of Golden Hour
Work on perfecting your timing to capture the magical moments during the golden hour. This is the time just after sunrise or before sunset, when the sun casts a warm glow that enhances the beauty of any scene, especially lush forests. The low angle of the sun adds depth and dimension to your photographs, accentuating the textures of tree bark, ferns, and moss. You’ll find that the soft, golden light creates a dreamlike quality that can transform ordinary landscapes into breathtaking images.
As you venture into the forest during these crucial times, keep an eye on how different segments of the landscape interact with the light. You can use backlighting to create silhouettes of trees against the golden sky or side lighting to bring out the details of the foliage. Every perspective opens up new opportunities to showcase the forest’s beauty.
It’s crucial to plan your outings around these moments to fully leverage this excellent natural light. If the weather permits, return to the same spot during both sunrise and sunset. This way, you can compare the effects of different lighting conditions on your composition and develop a deeper understanding of how each influences the feel of your photographs.
Experimenting with Perspectives
After capturing the allure of lush forests through your lens, don’t be afraid to shake things up by experimenting with your perspective. The way you position yourself in relation to your subject can significantly influence the mood and composition of your photographs. By exploring various angles, you draw out different aspects of the forest’s beauty that might otherwise go unnoticed. Your goal is to merge the forests’ vastness with your artistic vision, enabling your viewers to feel as if they’re stepping into the scene alongside you.
Low Angle Shots for Dramatic Effects
On your next expedition into the forest, consider adopting a low-angle perspective. Shooting from a lower vantage point not only highlights the towering trees above you but also creates an uplifting feeling within the frame. By pointing your camera upward, you can capture the intricate details of leaves and branches, framing them against the sky. This technique can evoke a sense of awe and grandeur, making your viewer feel small in comparison to the vast woodland around them.
Furthermore, low-angle shots add a dramatic flair to your photography by producing leading lines that guide the viewer’s eye through the image. The interplay of light filtering through the canopy can create mesmerizing patterns, enhancing the emotional depth of your shot. Don’t shy away from getting creative with your positioning; use the forest floor, moss, or rocks in the foreground to elevate your composition even further.
Aerial Photography Opportunities in Forests
An excellent way to capture the forest’s expanse is through aerial photography. Utilizing drones or other flying technology grants you a perspective that simply isn’t achievable from the ground. You can exhibit the intricate patterns of trees sprawling in every direction, revealing stunning textures and colors that create visual interest from above. Photographs taken from this height can showcase the scale and scope of the forest, inviting viewers to appreciate the intricate relationship between trees, underbrush, and open spaces.
Photography from the air can also allow you to capture unique aspects of the forest, such as clearings, winding rivers, or even animal movements, all of which contribute to the narrative of your travel photography story. When flying your drone, pay attention to the times of day, as sunlight can influence the colors and shadows captured. With a little creativity, aerial perspectives can elevate your photographs to new heights, both literally and figuratively.
Creating Depth with Foreground Elements
To add dimension to your forest photographs, consider incorporating foreground elements into your composition. By placing objects like colorful flowers, interesting rocks, or even fallen branches in the foreground, you create layers that draw the viewer’s eye deeper into the scene. This technique not only enhances the visual appeal of your image but also guides the viewer on a journey through the photograph, resulting in a more immersive experience.
Additionally, using elements in the foreground serves to frame the forest scene, establishing context and enhancing the viewer’s engagement with your photograph. Experiment with different subjects to find the perfect balance between the foreground and the lush backdrop you’re capturing. Understanding how to effectively utilize foreground elements can transform your travel photography and turn ordinary snapshots into stunning visual narratives.

Post-Processing Tips
Now that you’ve captured stunning photographs of lush forests, it’s time to refine your images through post-processing. This phase is crucial for elevating your travel photography to the next level. Here are some imperative tips to get you started:
- Learn to use editing software like Adobe Lightroom or Photoshop.
- Don’t over-saturate colors; maintain a natural look.
- Experiment with both global and local adjustments.
- Utilize gradients and brushes to enhance specific areas.
- Don’t forget to check your histogram for exposure.
This will help you achieve a more polished and professional appearance in your forest photography.
Enhancing Colors and Contrast
Tips for enhancing colors and contrast should revolve around striking a balance. Start by adjusting the white balance to make sure the greens of the forest appear vibrant and true-to-life. Increasing contrast can add depth to your images but be mindful not to detract from the natural beauty of the scene. You might also want to try pulling down highlights to recover details in brighter areas and boost shadows to reveal richness in the darker parts of your photos.
Additionally, applying a slight vignette can help to guide the viewer’s eye toward the center of your composition. A subtle increase in saturation can breathe life into the lush greenery while maintaining the scene’s authenticity. Recall, the goal is to enhance the natural colors already present in the forest, not overshadow them with artificial vibrancy.
Techniques for Adding Depth and Dimension
With a few strategic editing techniques, you can make your forest photos feel more immersive. Start by applying a slight blur to the background to simulate a shallow depth of field, emphasizing the details of your subjects in the foreground. Layered editing allows for multiple exposure adjustments, which can create a sense of three-dimensionality in your images.
Using leading lines or pronounced textures can also enhance the depth and dimension of your photographs. Techniques such as dodging and burning can draw attention to specific areas, giving them a more pronounced contrast while subtly enhancing other parts of the composition to maintain balance.
A well-structured photograph can truly change the viewer’s experience. By focusing on contrasting elements, you can guide the eye through the image, allowing for a more engaging visual journey within your lush forest scenes.
Maintaining Natural Integrity in Edits
Enhancing your forest images doesn’t mean straying too far from reality. It’s crucial to maintain the natural integrity of your photographs. While it’s tempting to push the boundaries with artistic edits and dramatic effects, a grounded approach ensures that your forest photos resonate with authenticity. Aim to replicate the experience you had when taking the photograph. This is particularly important when capturing the subtleties of light filtering through the leaves or capturing the real spirit of a quiet, misty morning.
In the pursuit of editing, remember to regularly revert to the original image to ensure that you’re not sacrificing the natural beauty of your scenes. Each adjustment should enhance rather than overshadow the vivid atmosphere you experienced in the forest. The art of preservation lies in knowing when to edit and when to leave things as they are.
For instance, if you find a particular hue of green in your photo that reminds you of the forest’s tranquil atmosphere, make minor adjustments around that color to enhance it while keeping the overall image true to life. This way, you respect the integrity of the forest and the experience you want to convey, allowing your viewers to appreciate its splendor as much as you did.
Summing up
From above, it’s clear that photographing lush forests requires a combination of creativity and technique to truly capture the magic of nature. By following the seven creative steps outlined, you can elevate your travel photography portfolio and share stunning images that evoke the sense of adventure and tranquility that forests offer. Remember to experiment with different angles, use natural light strategically, and tap into the uniqueness of your surroundings to bring your forest photography to life.
Ultimately, your journey to mastering forest photography is one of exploration and personal expression. Embrace the challenges and allow your passion for the outdoors to shine through in your compositions. With practice and attention to detail, your photographs will not only depict the beauty of lush landscapes but also resonate with viewers on a deeper level, encouraging them to appreciate and protect these natural wonders. So grab your camera and immerse yourself in the tranquility of the forest—the possibilities are endless!
What to Pack
A focused landscape kit handles every shot at 7 Creative Steps To Photograph Lush Forests In Travel without breaking your back. Here is the working photographer's pack list — every link goes to B&H Photo Video (our primary supplier) or Amazon (for accessories and same-day delivery in the US).
| What & Why | B&H | Amazon |
|---|---|---|
Wide-angle zoom (14-35mm range) The single most important lens for sweeping vistas. Pair with a circular polarizer for skies and water. | Shop B&H → | Shop Amazon → |
Sturdy travel tripod Carbon fiber, packs to 15 inches, holds steady in wind off the coast. Essential for blue-hour and long-exposure work. | Shop B&H → | Shop Amazon → |
Circular polarizer (77mm or 82mm) Cuts haze, deepens sky, reveals texture in water. Non-negotiable for landscape work. | Shop B&H → | Shop Amazon → |
10-stop ND filter For 30-second exposures that turn moving water and clouds into silk. | Shop B&H → | Shop Amazon → |
Extra batteries (3 minimum) Cold weather and long exposures eat batteries. Carry triple what you think you need. | Shop B&H → | Shop Amazon → |
Fast SD/CFexpress cards V90 or CFexpress depending on your body. Two cards minimum so a failure mid-trip is recoverable. | Shop B&H → | Shop Amazon → |
Microfiber lens cloths Salt spray, mist, and dust will ruin every shot if you don't carry a cloth. | Shop B&H → | Shop Amazon → |
B&H and Amazon links are affiliate links. We earn a small commission on purchases at no extra cost to you. We only recommend gear we use or would buy ourselves.