So, you bought a camera. It’s shiny, it’s expensive, and it has more buttons than a cockpit. You’re currently stuck on "Auto" mode, and while the photos look okay, they don't look like the epic shots you see on Instagram or in galleries. You want that creamy background blur, that crisp detail in the stars, and the ability to capture motion like a boss.
Welcome to the club. We’ve all been there.
Turning pro isn't about owning the most expensive gear; it’s about mastering the gear you have. That’s where photography tutorials come in. But let’s be real: the internet is a mess of bad advice. At Shut Your Aperture, we’re here to cut through the noise and give you the roadmap to becoming a professional. Consider this your ultimate guide to the best photography school online experience you can get without the student loans.
Why You Need a Structured Path
Most people learn photography like a game of Whack-A-Mole. They look up "how to blur a background" one day and "how to shoot the moon" the next. They end up with a bunch of random facts but no foundation.
If you want to go pro, you need a system. You need to understand the why behind the how. Professional photography is 10% clicking the shutter and 90% preparation, technical mastery, and post-processing. To get started, you might want to check out some professional insights from Edin Chavez to see how the pros actually think when they’re out in the field.
Step 1: Mastering the Exposure Triangle
Before you can break the rules, you have to know them. The exposure triangle is the foundation of everything. It’s the relationship between Aperture, Shutter Speed, and ISO.
Aperture (The F-Stop)
Think of aperture as the pupil of your eye. The wider it is (lower f-number like f/1.8), the more light comes in and the shallower your depth of field. This is how you get those beautiful, blurry backgrounds in portraits.
Shutter Speed
This is how long your "eye" stays open. Want to freeze a bird in flight? You need a fast shutter speed (1/1000s or faster). Want to make a waterfall look like silk? You need a slow shutter speed (several seconds). For a deep dive into this, our guide on water photography techniques covers exactly how to manipulate time with your shutter.
ISO
This is your camera's sensitivity to light. In bright daylight, keep it low (ISO 100). In a dark club or at night, you’ll need to bump it up, but be careful: high ISO leads to "noise" or graininess in your photos.
 )
)
Alt Text: Close up of a photographer adjusting the manual mode dial on a professional camera for a photography tutorial.
Step 2: How to Use Manual Mode Camera Like a Pro
If you take one thing away from this guide, let it be this: stop using Auto mode. Now.
Learning how to use manual mode camera is the moment you stop taking pictures and start making them. In Manual (M), you are the boss. You tell the camera exactly what to do.
The Manual Mode Workflow:
- Check your light: Is it bright? Dark? Overcast?
- Pick your Aperture: Do you want everything in focus (f/8 or higher) or just your subject (f/2.8 or lower)?
- Pick your Shutter Speed: Are things moving? Are you on a tripod?
- Balance with ISO: Use ISO as your "safety net" to make sure the exposure meter hits zero.
Mastering this takes practice. It’s frustrating at first. You’ll underexpose, you’ll overexpose, and you’ll miss shots. But once it clicks, you’ll never go back. If you’re still deciding on the right gear to start this journey, take a look at our comparison of the Panasonic Lumix S5 II vs Sony A7 IV to see which body handles manual controls best for your style.
Step 3: Understanding Light and Composition
A great camera in bad light still produces a bad photo. Photography literally means "writing with light."
Golden Hour vs. Blue Hour
Every landscape photographer lives for the Golden Hour: the hour after sunrise and the hour before sunset. The light is soft, warm, and flattering. But don’t sleep on the Blue Hour (just before sunrise/after sunset), which offers a cool, moody vibe that’s perfect for majestic sunset photography.
Composition Rules (and when to break them)
- Rule of Thirds: Imagine a grid on your screen. Place your subject on the intersections.
- Leading Lines: Use roads, fences, or shorelines to lead the viewer’s eye into the frame.
- Framing: Use windows or trees to "frame" your subject.
 )
)
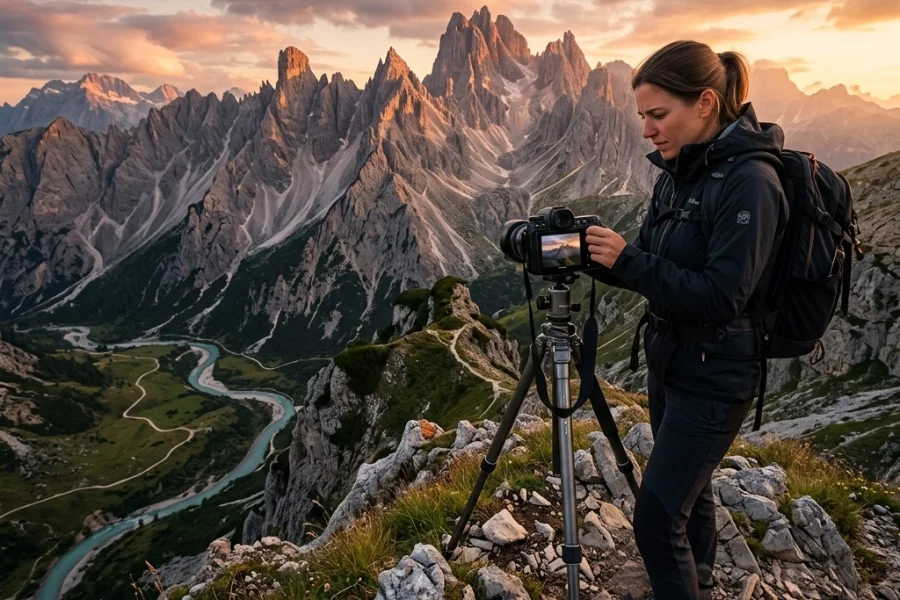
Alt Text: A professional landscape photo illustrating composition and golden hour lighting for a photography tutorial.
Step 4: Post-Processing – The Digital Darkroom
Taking the photo is only half the battle. To turn pro, you need to master editing. This is where you develop your "look."
Raw files are flat and boring on purpose: they hold all the data so you can manipulate it later. While Adobe Lightroom is the industry standard, many pros are moving toward faster, AI-driven tools. We highly recommend using Luminar for its incredible ability to enhance skies, skin, and lighting with a single click. It’s a game-changer for anyone looking to speed up their workflow without sacrificing quality.
Editing isn't about "faking" a photo; it’s about bringing it closer to what your eyes actually saw: or what your heart felt: at the moment.
Step 5: Finding Your Niche
To become a professional, you eventually have to specialize. Are you a wedding photographer? A street photographer? A travel junkie?
Travel and Landscape
If you’re into travel, you need to find locations that haven't been shot a billion times. We’ve put together a guide on finding hidden gems for travel photography to help you build a portfolio that stands out from the crowd.
Urban and Street
Street photography is about the "decisive moment." It’s gritty, fast-paced, and requires a different set of skills. You have to be invisible yet present. Check out our tips on enchanting urban photography to master the concrete jungle.
Water and Nature
From the ocean to lakes, water is one of the most dynamic subjects. Mastering water photography in any environment will teach you more about shutter speed than almost any other genre.
 )
)
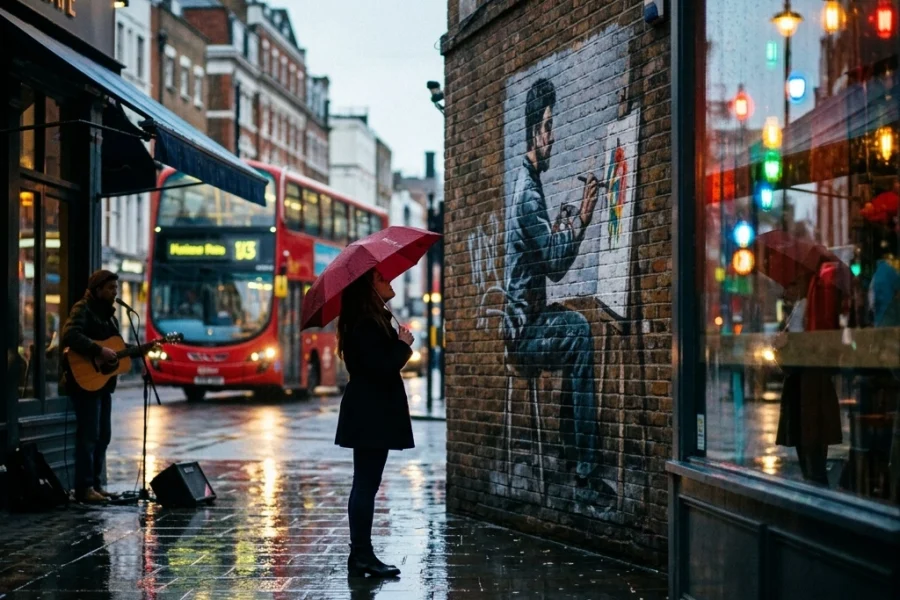
Alt Text: Professional street photography capturing motion blur and neon lights in a city.
Step 6: The Business of Photography
Here is the cold, hard truth: being a great photographer doesn't mean you'll be a successful pro. To "turn pro," you need to understand the business.
- Build a Portfolio: Don't put everything on your website. Only put your best 15-20 shots. Quality over quantity, always.
- Marketing: Use social media, but don't rely on it. Build an email list and a network.
- Workflow: You need a solid system for backing up files, delivering photos to clients, and managing your time. This is where tools like proshoot.io can come in handy for streamlining your professional life.
Why Shut Your Aperture?
There are a million places to find photography tutorials, so why stick with us? Simple. We don't just teach you how to push buttons. We teach you how to see.
Shut Your Aperture is designed to be the number one photography school online by focusing on real-world application. We don't care about gear snobbery or overly technical jargon that makes your head spin. We care about the final image. We want you to go from "clueless with a camera" to "confident professional."
Whether you’re looking for rare textures to add aesthetic depth to your shots or searching for secluded paradises for your portfolio, we have the resources to get you there.
 )
)
Alt Text: A professional photography editing workspace representing the business and post-processing side of photography.
Practical Tips to Get You Started Today
If you want to turn pro by this time next year, start these habits today:
- Shoot every single day. Even if it’s just your cat or your coffee.
- Critique your own work. Look at your photos and ask, "Why does this suck?" or "Why does this work?"
- Follow the masters. Look at the work of legends like Ansel Adams or modern masters like the team over at PhotoGuides.org.
- Invest in your education. Stop buying new lenses and start buying courses or spending time on high-quality tutorials.
Final Thoughts
The journey from beginner to pro is a marathon, not a sprint. You will have days where you feel like a genius and days where you want to throw your camera in a lake. That’s normal.
The difference between those who make it and those who don't is the willingness to keep learning. Use this guide as your starting point. Dive into the exposure triangle, master how to use manual mode camera, experiment with Luminar, and keep pushing your creative boundaries.
Photography is a gift. It allows you to freeze time and show the world how you see it. Now, get out there and start shooting. The world is waiting for your perspective.