

Let’s be honest: taking a photo of a person should be the easiest thing in the world, right? You point the camera, tell them to smile, and click. But then you look at the back of the screen and realize your best friend looks like they have a giant nose, or the background is growing out of their head, or: even worse: the eyes are blurrier than a Bigfoot sighting.
Portrait photography is an art form that seems simple on the surface but has a million tiny ways to go wrong. Whether you’re shooting with a high-end mirrorless setup or just trying to get a decent shot for your portfolio, these common blunders are likely holding you back.
At Shut Your Aperture, we’re all about making high-level photography accessible. We’ve seen it all, from the "accidental wide-angle distortion" to the "stiff as a board" pose. If you want to stop taking snapshots and start creating professional-grade imagery, you need to identify these seven common mistakes and, more importantly, learn how to fix them for good.
1. The Wide-Angle Trap
One of the most common mistakes beginners make is using whatever lens is already on the camera: which is often a wide-angle or a standard zoom set to its widest point. While a 24mm or 35mm lens is great for vistas and perspectives, it can be a disaster for close-up portraits.
Wide-angle lenses distort things that are close to the glass. If you get close to your subject with a 24mm lens, their nose will look larger, their forehead might stretch, and their overall facial proportions will feel "off." It’s a subtle distortion that makes people feel self-conscious about how they look in your photos.
The Fix:
Stick to the "portrait lengths." For the most flattering results, you want to stay between 55mm and 85mm. If you’re shooting full-body, a 35mm or 50mm is fine, but for headshots or tight crops, 85mm is the gold standard. It flattens the features and provides a much more natural representation of the human face. If you find yourself needing to get closer, don’t move the camera physically closer with a wide lens: switch to a longer focal length and step back. Your subject will thank you.

2. The "Ghost" Headroom (Empty Space Above)
Composition is where many portraits go to die. A very common habit for new photographers is to place the subject’s eyes right in the middle of the frame. Because the eyes are the focal point, we naturally want to center them. The problem? This leaves a massive amount of "dead air" or empty space above the subject's head.
This excess headroom makes your subject look small, lost, and unimportant. It’s a waste of prime real estate in your frame. Unless you are intentionally trying to show off a massive architectural ceiling or a dramatic sky, that space is doing nothing for you.
The Fix:
Tighter is usually better. Follow the rule of thirds and place the subject's eyes in the top third of the frame. Don’t be afraid to "cut" the top of the hair if you’re going for a really tight, intimate headshot. By eliminating unnecessary headroom, you force the viewer’s eye exactly where it needs to be: on the person. If you're struggling with composition, checking out resources on PhotoGuides.org can help you master the fundamentals of framing.
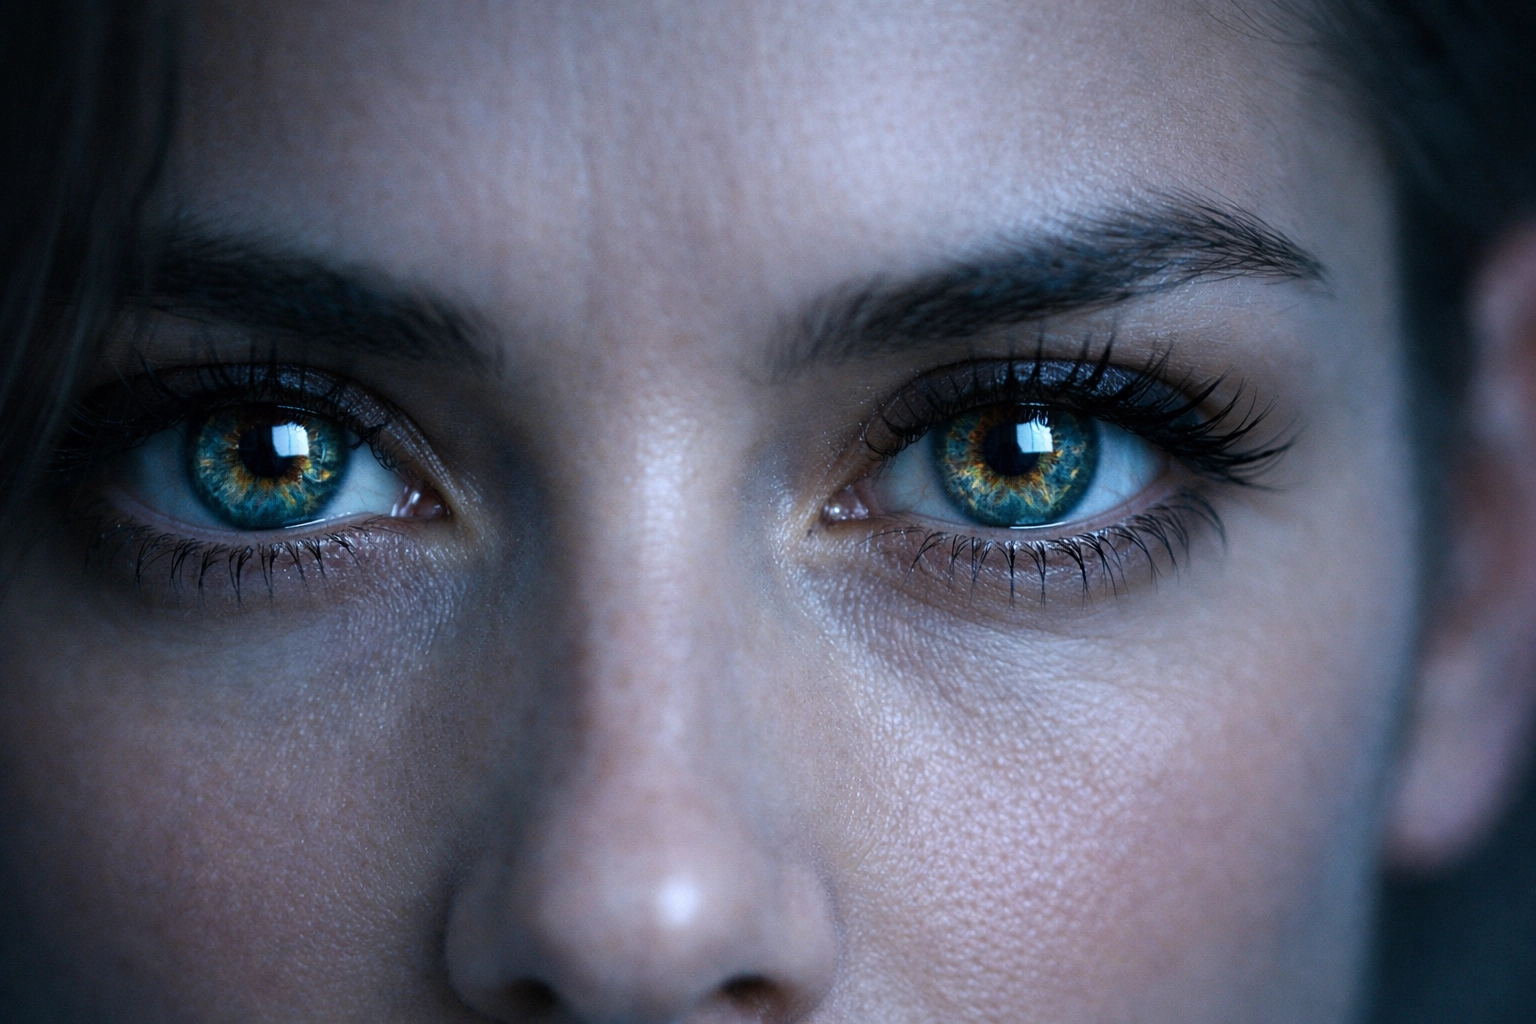
3. Missed Focus on the Eyes
In portraiture, if the eyes aren't sharp, the photo is a "delete." You can have the best lighting, the most beautiful model, and a stunning location, but if the focus landed on the tip of the nose or the earlobe, the connection is lost. The eyes are the "soul" of the portrait, and our brains are hardwired to look for them first.
When you're shooting at wide apertures like f/1.8 or f/2.8 to get that creamy background blur, the depth of field is incredibly thin. Even a slight lean forward by the subject can throw the eyes out of focus.
The Fix:
Always, always, always focus on the eye closest to the camera. Most modern cameras have "Eye-AF" (Auto Focus) technology: turn it on and use it. If you’re shooting manually or with an older camera, use a single focus point and place it directly on the pupil.
If you realize after the fact that the focus is just a tiny bit soft, you can sometimes save it in post-processing. Software like Luminar has incredible AI-driven sharpening and eye-enhancement tools that can bring a dull gaze back to life. However, nothing beats getting it right in-camera.
4. Shutter Speed Sabotage
Have you ever looked at your portraits and noticed they look just a little "soft"? It’s not quite out of focus, but it’s not tack-sharp either. This is usually caused by a shutter speed that is too slow.
People move. Even when they try to sit perfectly still, they breathe, they blink, and they micro-sway. If your shutter speed is too slow, that movement creates motion blur. If you are shooting handheld, your own hand tremors add to the problem.
The Fix:
A good rule of thumb for portraits is to keep your shutter speed at a minimum of 1/250th of a second. If you’re working with a high-resolution camera or a long lens (like a 200mm), you might even want to go up to 1/500th. Don't be afraid to bump up your ISO slightly to achieve a faster shutter speed. A little bit of digital noise is much easier to fix than a blurry face. For more technical deep dives on gear settings, www.proshoot.io is a great place to level up your technical knowledge.
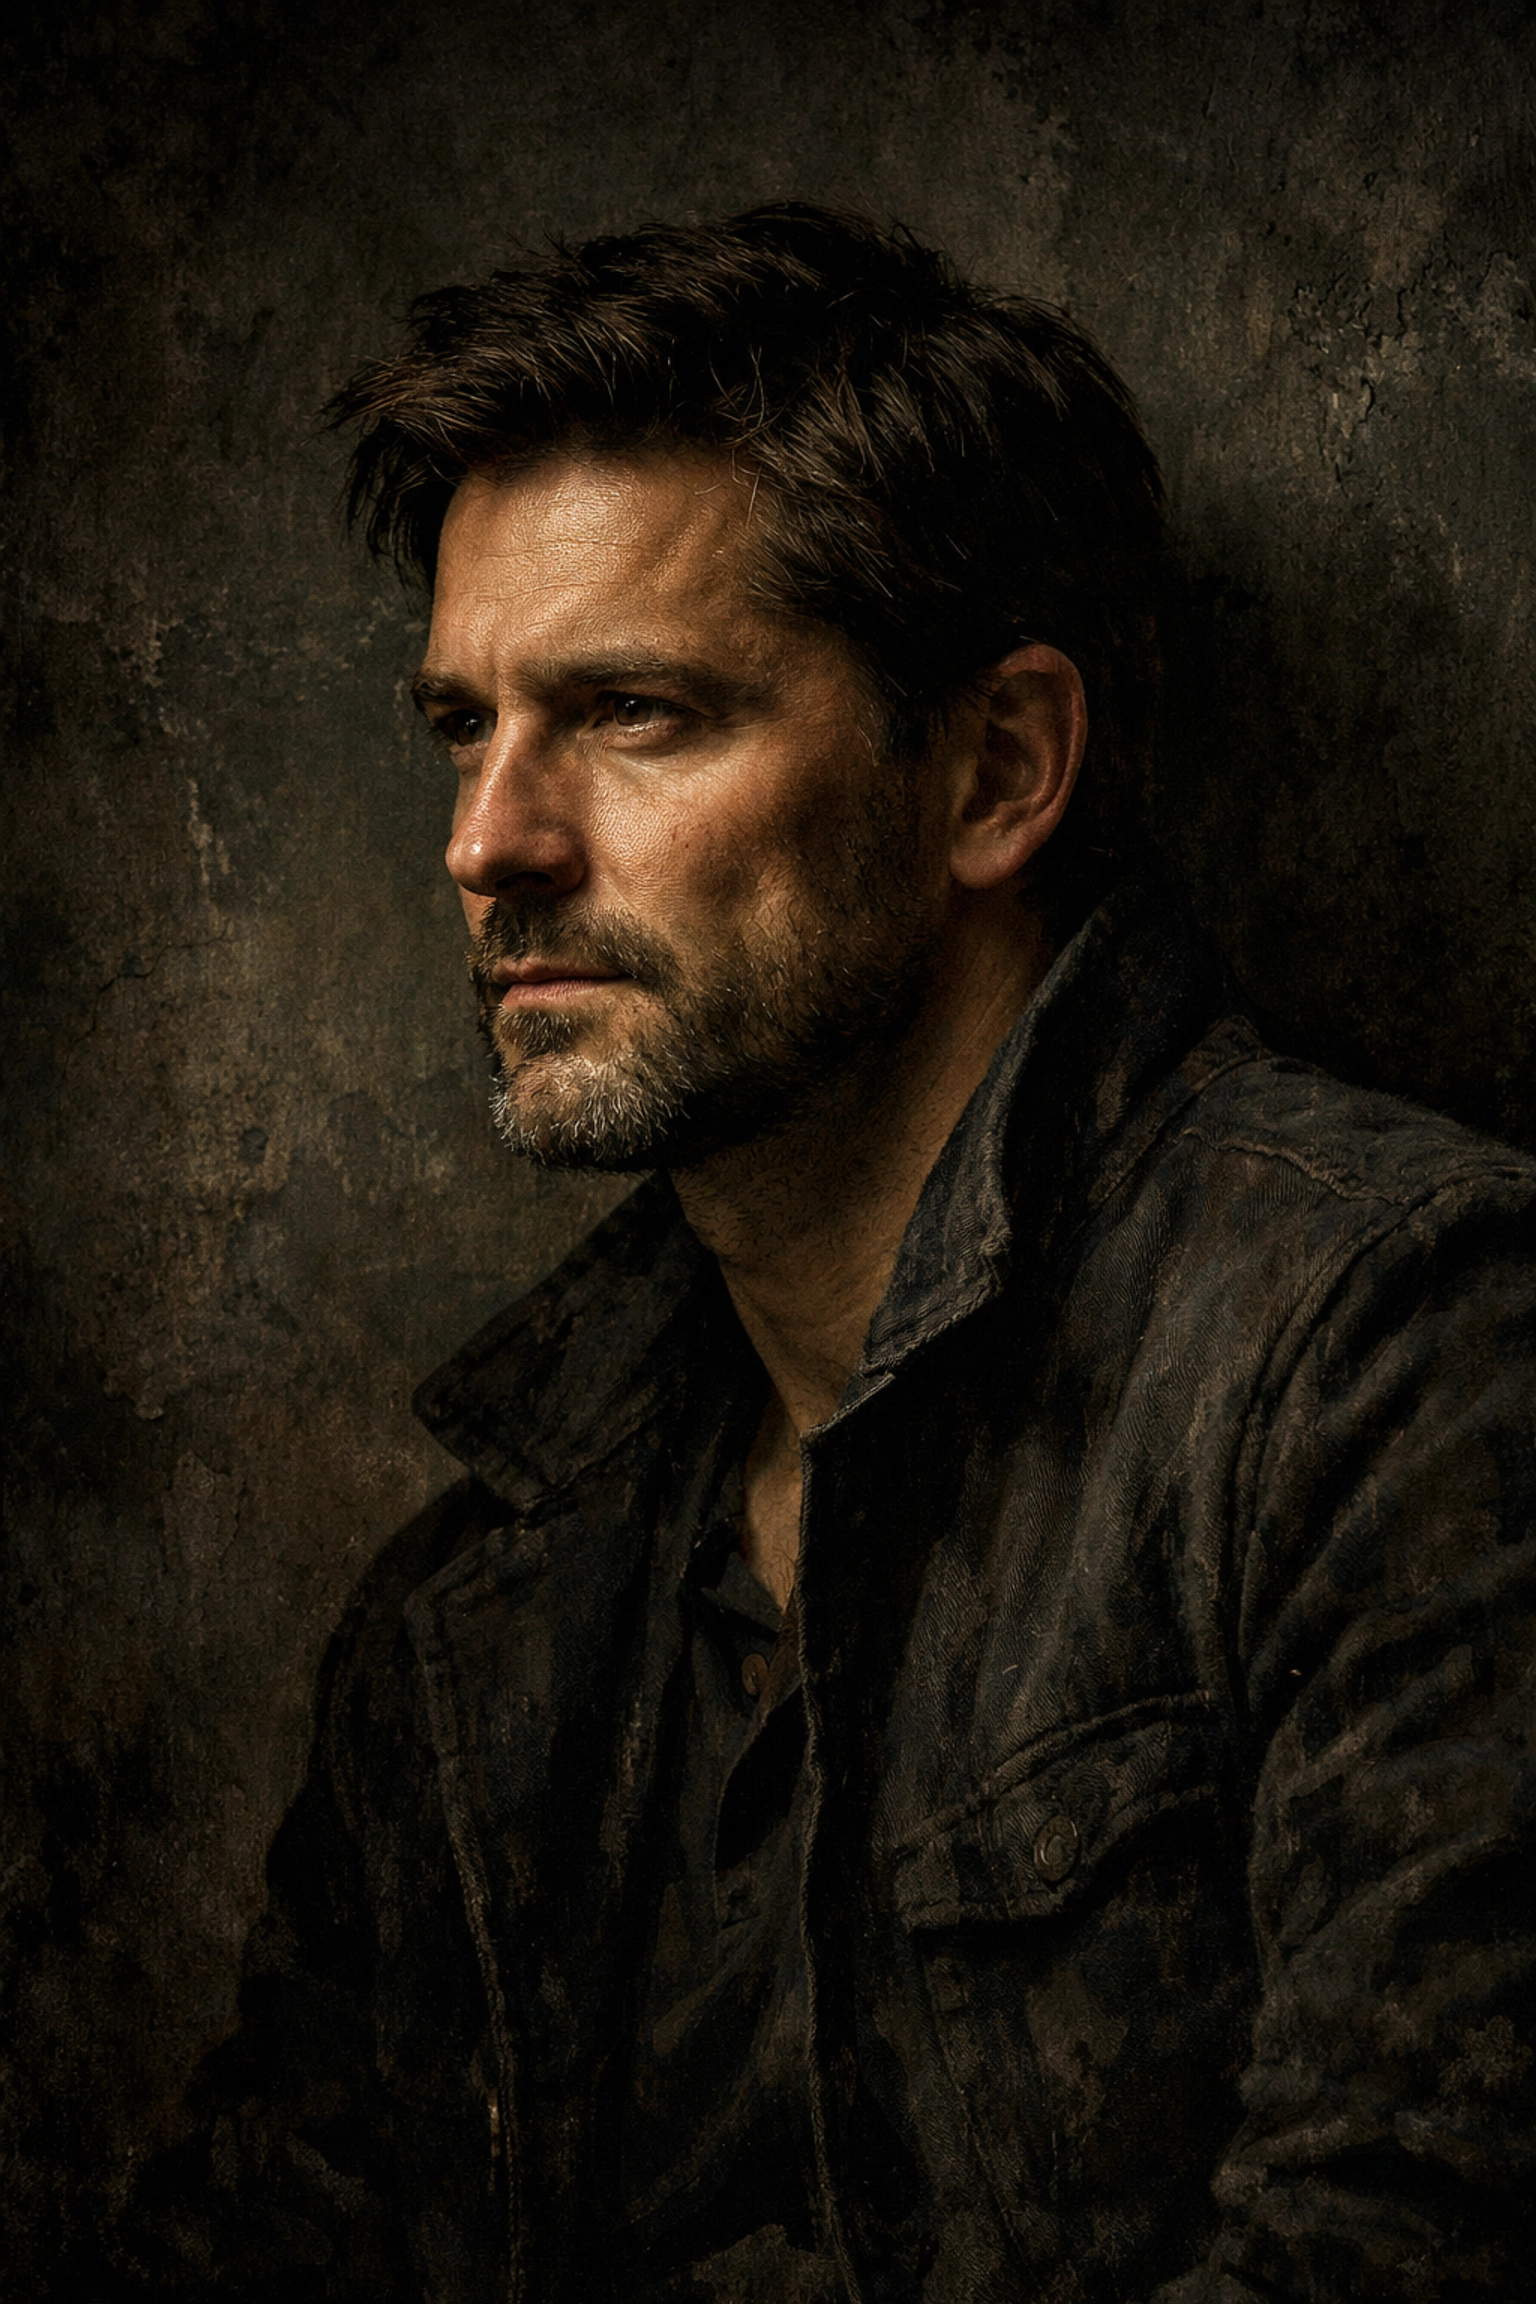
5. Lighting That Doesn't Match the Mood
Lighting is the "make or break" element of any photograph. A common mistake is using "flat" lighting (like direct midday sun or a flash pointed straight at the face) for a dramatic portrait, or using high-contrast, "moody" lighting for a soft, cheerful corporate headshot.
If your lighting is too harsh, you’ll get "raccoon eyes" (dark shadows in the eye sockets) and highlights that look like shiny grease on the skin. If it’s too flat, the subject looks two-dimensional and boring. Understanding the role of luminosity isn't just for buildings; it’s the core of human subjects too.
The Fix:
Think about the story you’re trying to tell. If you want a soft, feminine, or welcoming look, use a large light source (like a big softbox or a window with sheer curtains). If you want something powerful, athletic, or mysterious, use a smaller, more directional light source to create shadows. Shadows aren't the enemy: they provide shape and depth. Always look at how the light is falling on the subject's face before you start clicking. If the light is too harsh, move to the shade or wait for a cloud to pass.
6. Background Chaos
You’ve found the perfect person and the perfect light, but you forgot to look behind them. Distracting backgrounds are the silent killer of great portraits. A stray tree branch that looks like it’s growing out of the subject's ear, a bright red "Exit" sign, or a busy street with moving cars can all pull the viewer's attention away from the subject.
Many photographers think that just because they are shooting at f/1.8, the background will disappear. While bokeh helps, it doesn't make a messy background go away completely. The colors and shapes still remain.
The Fix:
Simplicity is key. Before you press the shutter, do a quick scan of the edges of your frame. Is there anything distracting? If so, move yourself or the subject. Sometimes a simple step to the left or right can completely clean up the shot.
If you’re looking for inspiration on how to handle complex environments, take a look at Peter Lik’s photographs or his landscape lessons. Even though he shoots landscapes, his use of clean lines and lack of clutter is something every portrait photographer should study. For high-end fine art inspiration, www.edinfineart.com showcases how clean backgrounds create timeless images.
7. The "Deer in Headlights" Pose
Even if everything else is perfect, a stiff, uncomfortable subject will ruin a photo. Most people aren't professional models; they feel awkward in front of a lens. If you just stand there and don't give them direction, they will default to a "mugshot" pose: shoulders square to the camera, chin tucked, and a forced, "cheese" smile.
When someone is square to the camera, they look wider. When they are uncomfortable, it shows in their eyes and their hands.
The Fix:
You aren't just a photographer; you’re a director.
- Angle the body: Ask them to turn their shoulders about 45 degrees away from the camera.
- Lean in: Have them lean their chest slightly toward the lens to create a sense of engagement.
- Give the hands a job: Hands are the most awkward part of the body. Give them a prop, tell them to put them in a pocket, or have them touch their hair/clothing.
- Talk to them: Keep the conversation flowing. Ask them about their day or tell a bad joke. The best expressions happen in the seconds after they laugh.
Check out Edin Chavez’s personal blog for stories on how to interact with people and capture their true essence in the field.

Bonus Tip: The Power of Post-Processing
Even a perfectly executed portrait can be elevated with a little bit of digital love. The goal of editing shouldn't be to make someone look like a plastic doll; it should be to enhance the mood you captured.
This is where Luminar really shines. Instead of spending hours masking skin or trying to brighten eyes manually, you can use AI tools to subtly enhance features. You can adjust the "Face Light" to mimic a reflector you forgot to bring, or use "Skin AI" to remove temporary blemishes while keeping the natural texture intact.
The best portraits feel organic. They tell a story about who the person is in that specific moment. By avoiding these seven mistakes, you’re moving away from "taking a picture" and moving toward "creating a portrait."
Portraiture is a journey of constant learning. If you want to see how we apply these techniques to other fields, like property showcases, check out our post on cinematic techniques for real estate. The principles of light, composition, and focus remain the same whether you're shooting a person or a penthouse.
Conclusion: Practice Makes Permanent
None of these fixes happen overnight. The next time you have a session: even if it’s just with a family member in the backyard: pick one of these mistakes to focus on. Maybe this week you master the 85mm focal length. Next week, you focus entirely on the "eyes-on-top-third" rule.
If you’re looking to professionalize your workflow further, www.edinstudios.com is a great resource for seeing how professional environments are staged.
Photography is about capturing a feeling. When you remove the technical distractions (like bad focus or messy backgrounds), the feeling is all that’s left. So grab your camera, find a subject, and stop making these mistakes today. Your portfolio: and your subjects( will thank you for it.)


