

Let’s be real: portrait photography is one of those things that looks incredibly easy from the outside. You just point a lens at a person, tell them to smile, and click the button, right? Well, if you’ve tried it, you know that’s a total lie.
Getting a portrait that actually says something: a photo that captures a person’s soul or makes them look like a rockstar: takes more than just a fancy camera. It takes a solid understanding of light, angles, and human psychology. Even the pros mess up from time to time. But if you’re seeing your photos and thinking, "Why does this look like a bad driver's license photo?" you're likely falling into one of the common traps.
I’ve been there. We’ve all been there. The good news? These mistakes are easy to fix once you know what to look for. Let’s dive into the seven biggest mistakes you’re making with your portrait photography and how you can flip the script to start taking shots that actually wow your clients (and your Instagram followers).
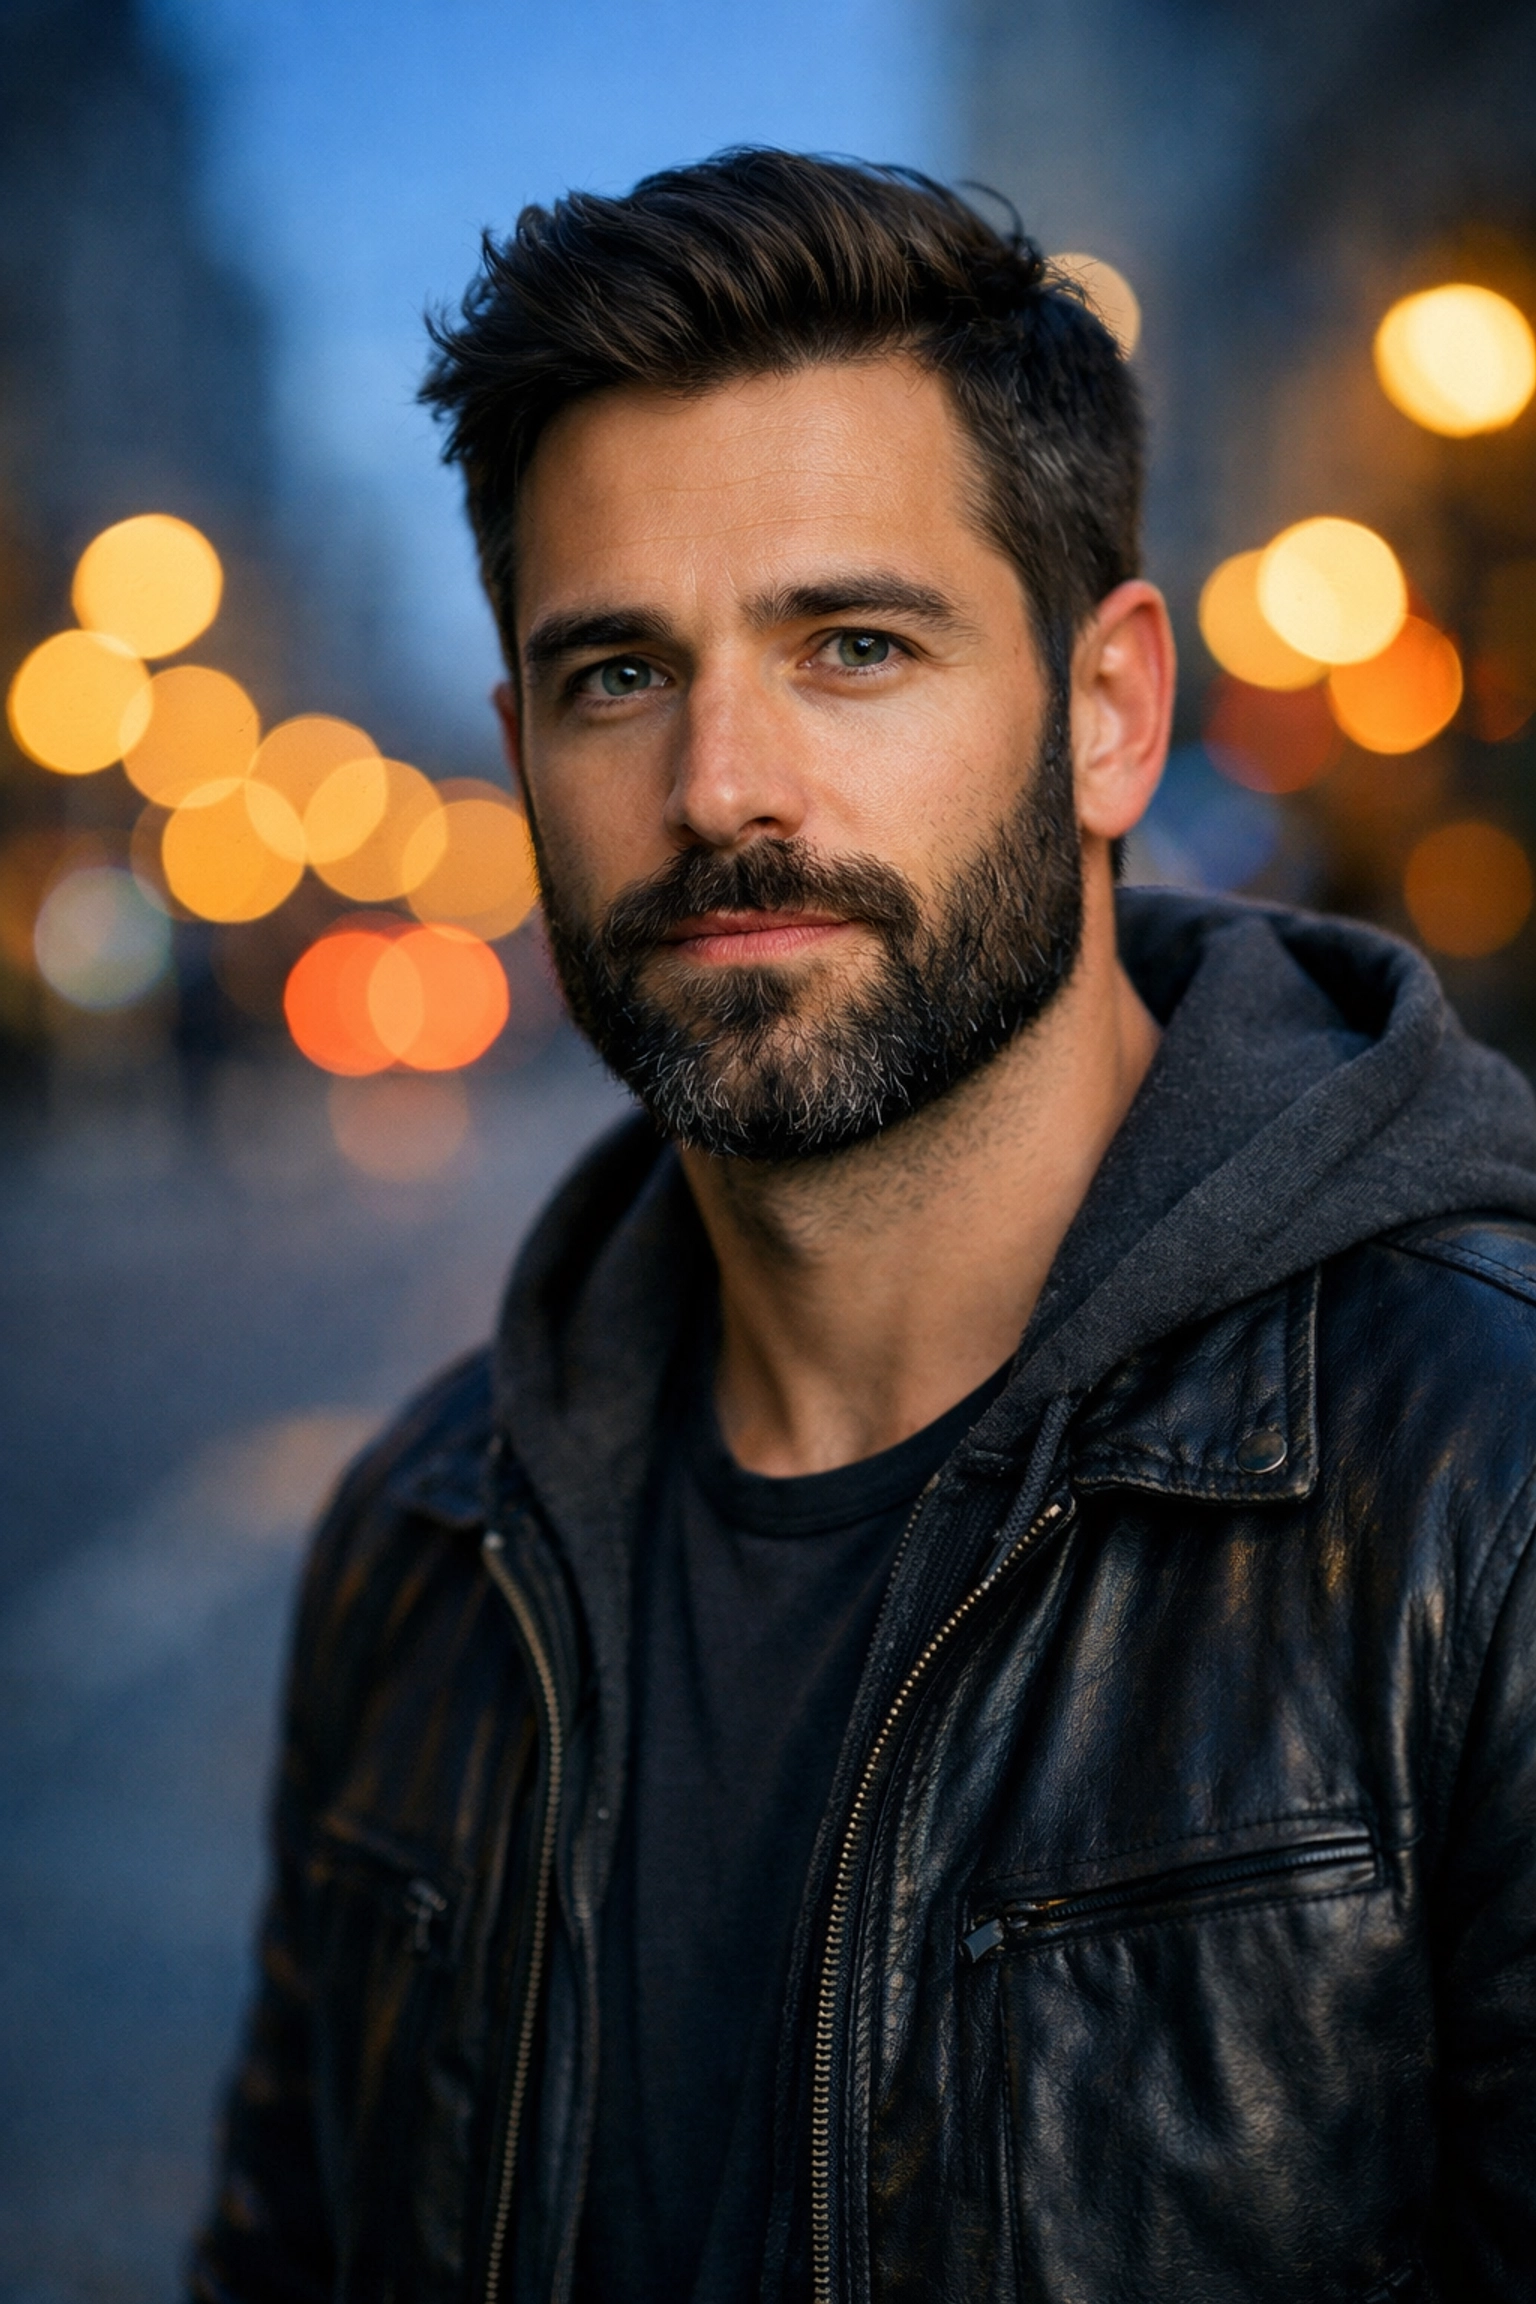
1. The "Mugshot" Trap: Positioning Subjects Square to the Camera
One of the most common mistakes beginners make is having their subject stand flat, shoulders perfectly parallel to the camera. This is what I call the "Mugshot" look. Unless you’re shooting for the local police department, you probably want to avoid this.
When a person stands square to the camera, it makes them look wider and, frankly, a bit static and boring. It lacks depth and visual interest. Humans aren't flat objects; we have curves, angles, and dimensions.
How to Fix It:
Angle the body. Ask your subject to turn their shoulders about 45 degrees away from the lens while keeping their face toward you. This immediately slims the profile and creates a more dynamic, flattering shape. It creates a sense of movement and "flow" in the image.
Think about how leading lines work in other genres. Just like we discuss in mastering photography 10 essential tips, the way you direct the viewer's eye matters. An angled body creates a natural line that the eye follows. If you need more inspiration on how to direct the viewer's gaze, check out the techniques behind Peter Lik’s landscape photography, where composition is king.

2. High Noon Horror: Dealing with Harsh Lighting
We’ve all heard it: "The sun is out, let's go take photos!" While a sunny day feels great, it’s often a nightmare for portrait photographers. Shooting at high noon when the sun is directly overhead creates "raccoon eyes": those deep, dark shadows in the eye sockets: and highlights that are so blown out they look like white blobs on the skin.
Light is everything in photography. If you don't get the light right, no amount of editing in Luminar can fully save a poorly lit shot.
How to Fix It:
Timing is your best friend. Aim for the "Golden Hour": that magical window of time just after sunrise or just before sunset. The light is soft, warm, and much more forgiving. If you have to shoot in the middle of the day, find some "open shade." This is an area under a tree or the shadow of a building where the light is still bright but diffused.
If you’re stuck in the sun, use a reflector to bounce some light back into those dark shadows. Understanding how light interacts with your subject is a skill that crosses over into all types of photography, including real estate. You can see how we handle these challenges in our post on the role of luminosity in real estate photography.
3. The Bokeh Obsession: Shooting at Ultra-Wide Apertures Constantly
Look, I love a blurry background as much as the next guy. Shooting at f/1.2 or f/1.8 creates that creamy "bokeh" that makes the subject pop. But here’s the problem: when your depth of field is paper-thin, it’s incredibly easy to miss the focus.
If you’re shooting at f/1.4, you might get the person’s eyelashes in focus, but their pupils (the most important part) will be blurry. Or, you might get one eye sharp and the other one soft. While it looks "artsy" to some, it often just looks like a mistake to everyone else.
How to Fix It:
Stop down a bit. Try shooting at f/2.8 or even f/4. You’ll still get a nice, separated background, but you’ll have a much higher "keeper" rate because more of your subject's face will be in focus.
Portraits aren't just about the person; they're about the environment, too. Sometimes, showing a bit of the background gives the viewer context about who the person is. This is a lesson often learned in landscape work, as noted in our piece on 7 mistakes you’re making with landscape photography. Context matters.
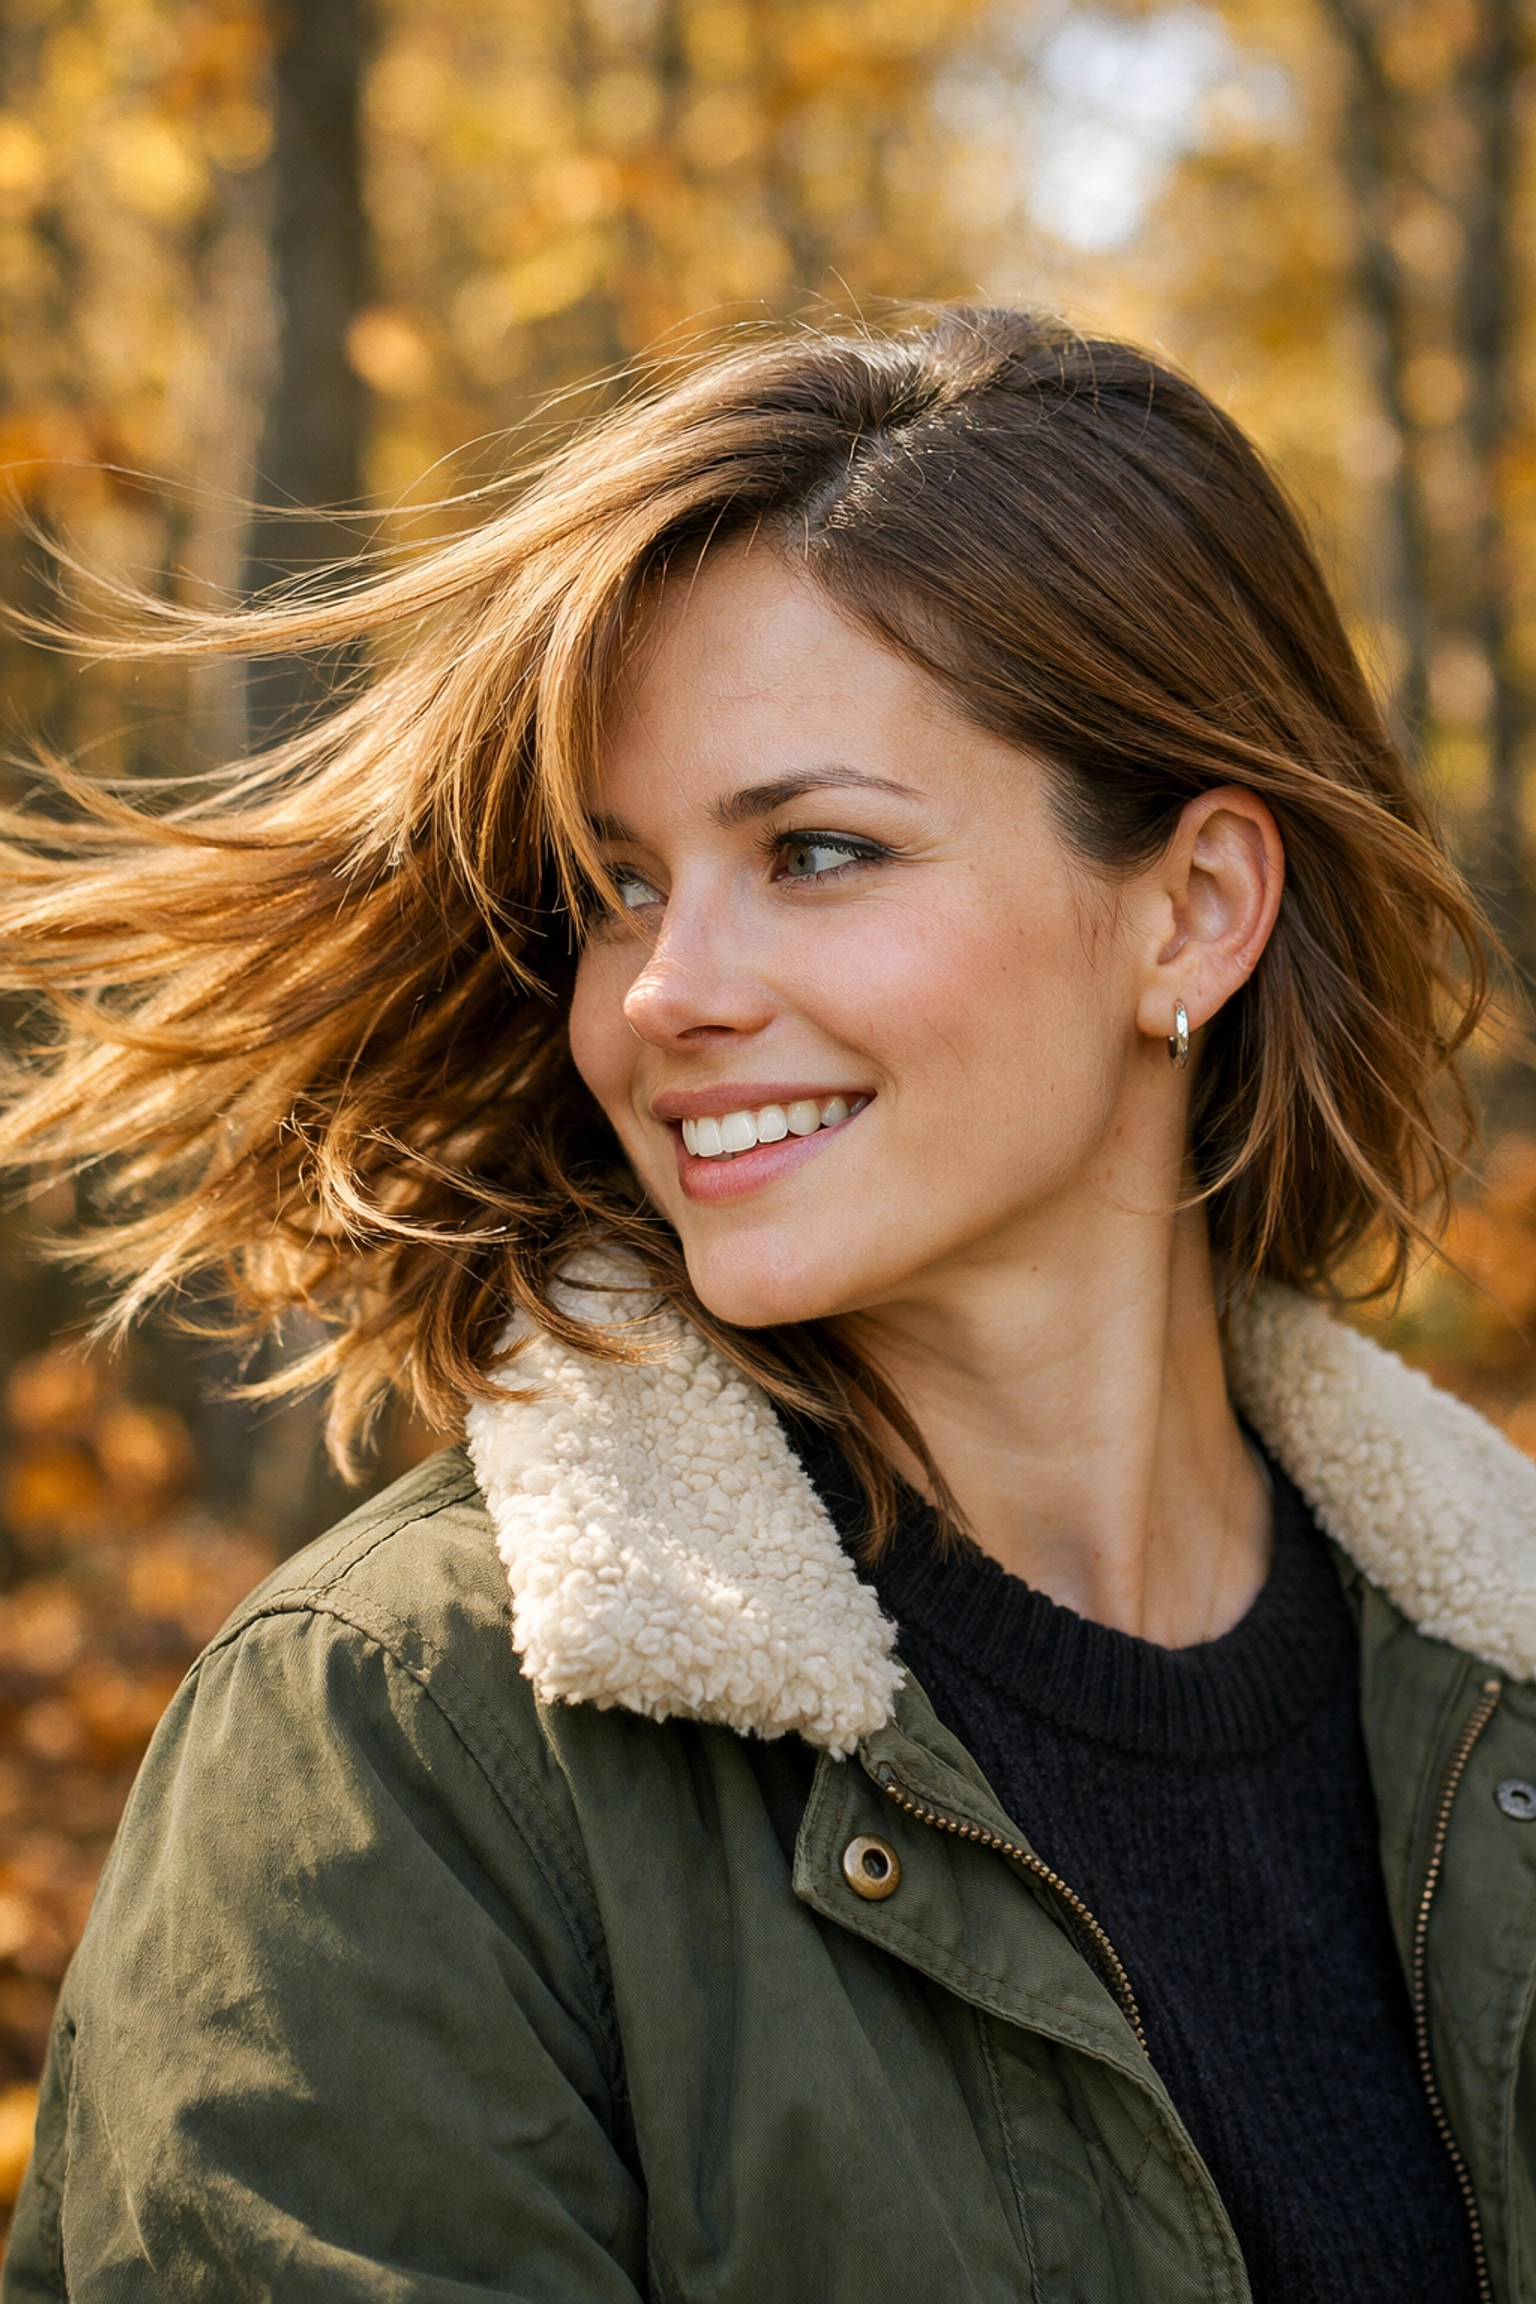
4. Lazy Cropping and Framing
Where you "cut" your subject can make or break the photo. A common mistake is leaving way too much "dead air" above the person's head, which makes them look like they're sinking to the bottom of the frame. On the flip side, cutting people off at the joints: ankles, knees, or wrists: makes it look like they’ve had a tragic accident.
Good framing creates a sense of balance. If you're not paying attention to the edges of your frame, you're missing half the battle.
How to Fix It:
Follow the "Rule of Thirds" but don't be a slave to it. Place your subject's eyes on one of the top intersections. When it comes to cropping, the rule of thumb is: never crop at a joint. Crop at the mid-thigh, the waist, or the mid-upper arm.
Also, get closer! Sometimes the best portrait is a tight crop that focuses purely on the face. If you find yourself always standing ten feet away, try moving in. For more technical guides on framing, PhotoGuides.org has some killer resources on compositional theory.
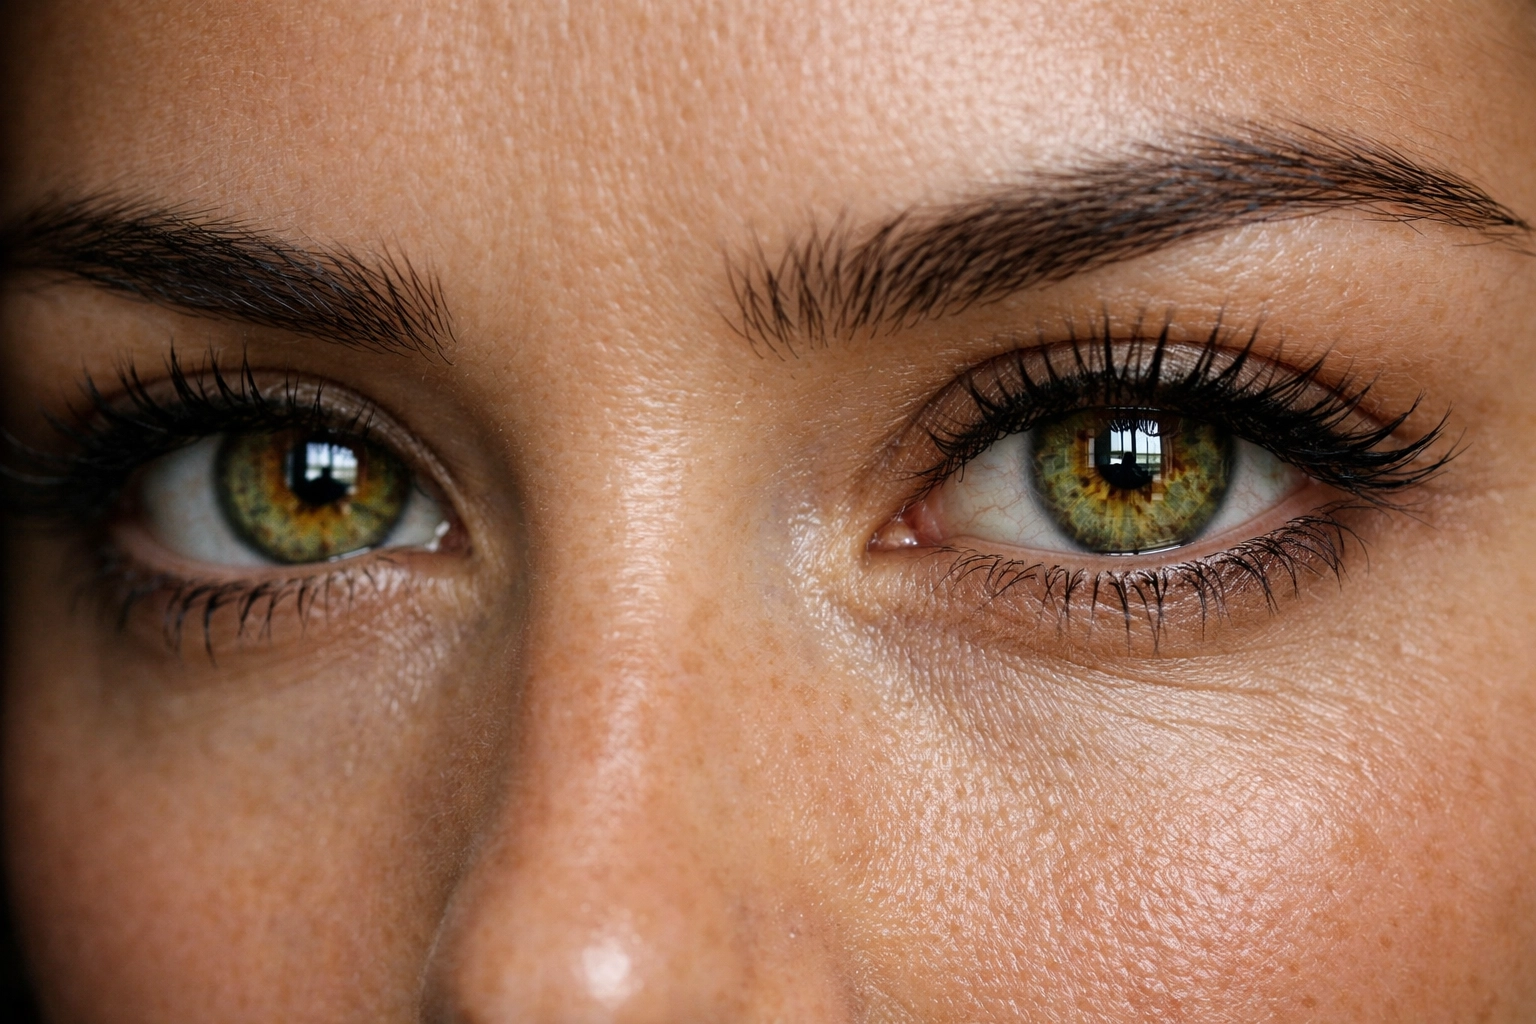
5. Forgetting the Soul: Missing Focus on the Eyes
They say the eyes are the windows to the soul, and in portraiture, that is 100% true. If the eyes aren't sharp, the photo is a bin job. Period. You can have the perfect pose, the perfect light, and the perfect outfit, but if the focus landed on the tip of the nose or the ear, the viewer will feel a "disconnect" from the image.
How to Fix It:
Use a single focus point and place it directly on the eye closest to the camera. If your camera has "Eye-AF" (Eye Auto Focus), turn it on! It’s a game-changer. Modern mirrorless cameras are insanely good at tracking eyes, even if the person is moving.
If you find your focus is still hitting the wrong spot, it might be time to check your shutter speed (more on that in a minute) or consult a professional gear site like proshoot.io to see if your lens needs calibration.
6. Background Chaos: The Pole-Growing-Out-Of-Head Syndrome
You’re so focused on your subject’s smile that you don't notice the telephone pole behind them that looks like it’s growing out of the top of their head. Or the bright red trash can in the distance that’s drawing the viewer’s eye away from your subject.
Background distractions are the silent killers of great portraits. A messy background makes the whole image feel amateurish and cluttered.
How to Fix It:
Do a "perimeter check" before you press the shutter. Look at the edges of the frame and look behind your subject. If there's something distracting, move your subject or move yourself. Sometimes just stepping two feet to the left can completely hide a distraction or replace a messy background with a clean one.
Think of it like real estate photography. You wouldn't photograph a luxury mansion with a pile of laundry in the corner, right? We talk about this in distinctive elements of real estate photography: the environment must complement the subject, not compete with it. If you do have a busy background you can't escape, use Luminar to blur it further or use their AI tools to remove small distractions.
7. Shutter Speed Sluggishness: The Blur You Didn't Want
Even if your subject is standing still, they aren't actually still. They breathe, they blink, they shift their weight. And you? You aren't a tripod. If your shutter speed is too slow, you’re going to get "micro-blur." The photo might look okay on your tiny camera screen, but once you get it on a big monitor, it’s soft.
This is especially true if you're using a long lens, like an 85mm or a 200mm, which magnifies every tiny shake of your hand.
How to Fix It:
Follow the "Reciprocal Rule." If you’re shooting with an 85mm lens, your shutter speed should be at least 1/100th of a second (ideally 1/160th or faster). If you’re working with kids or someone who moves a lot, don't be afraid to crank that shutter speed up to 1/400th or higher.
Don't be afraid of high ISO. A little bit of grain (which you can easily clean up with modern software) is a thousand times better than a blurry photo. Sharpness is non-negotiable in professional portraits.
Bonus Tip: Communicate Like a Pro
The biggest mistake isn't actually technical: it’s social. If you’re silent behind the camera, your subject is going to get awkward. They’ll start wondering if they look weird, if their hair is messed up, or if you’re just a bad photographer. That awkwardness shows up in their face and their posture.
How to Fix It:
Talk! Even if you’re just saying "You’re doing great," "That look was awesome," or "Let’s try tilting your chin down a bit," keep the conversation flowing. Give them specific directions. Instead of saying "Do something different," say "Put your hand on your hip" or "Look over my shoulder at that tree."
When a subject feels comfortable, they relax, and that’s when the "real" person comes out. For more tips on the business and personal side of photography, I share a lot of my personal experiences over at blog.edinchavez.com.
Putting It All Together
Portrait photography is a journey. You’re going to make mistakes: I still do. But the key is to learn from them. Next time you’re out on a shoot, run through this mental checklist:
- Is their body angled?
- Is the light soft or harsh?
- Is my aperture too wide?
- Did I crop at the joints?
- Are the eyes sharp?
- What’s happening in the background?
- Is my shutter speed fast enough?
If you can nail those seven things, you’re already ahead of 90% of the people out there with a camera. Don't forget that the gear is just a tool. Whether you're using a top-of-the-line mirrorless or an old DSLR, these techniques stay the same.
If you're interested in how these same principles apply to other fields, like how composition affects buyers in property listings, take a look at shot compositions impact on buyer attraction. It’s all connected.
Now, get out there, stop making these mistakes, and go take some killer portraits! And when you get back to the computer, give Luminar a spin to add that final professional polish to your shots. You've got this.


