
You’ve seen the shots. Those epic, sweeping vistas that make you want to sell your house, buy a van, and live in the mountains forever. You head out with your camera, wait for the perfect light, and click the shutter. But when you get home and pull the images up on your computer, they look… flat. Empty. Just a bit "meh."
Don't worry, you aren’t alone. Landscape photography is arguably one of the most accessible genres of photography, but it’s also one of the hardest to master. It’s not just about pointing a camera at something pretty; it’s about storytelling, technical precision, and avoiding the common pitfalls that trap even experienced shooters.
I was chatting with Sonny, our Social Media Manager, about this last week. He’s seen a huge uptick in landscape submissions on our feeds, but many of them fall into the same trap: they lack that "wow" factor because of a few simple, fixable errors.
If you want to level up your game, you need to stop making these seven mistakes. Here is how to fix them and start capturing the world the way you actually see it.
1. The Wide-Angle Trap: Standing Too Far Back
When people get their first wide-angle lens, the instinct is to try and fit everything into the frame. You see a mountain range, a lake, and a forest, and you want it all. So, you stand back and zoom out to 16mm.
The problem? Everything in your photo becomes tiny. That massive mountain now looks like a pebble on the horizon, and the foreground is just a vast, empty stretch of dirt. Ultra-wide lenses aren't meant for "fitting everything in"; they are meant for emphasizing the relationship between the foreground and the background.
The Fix:
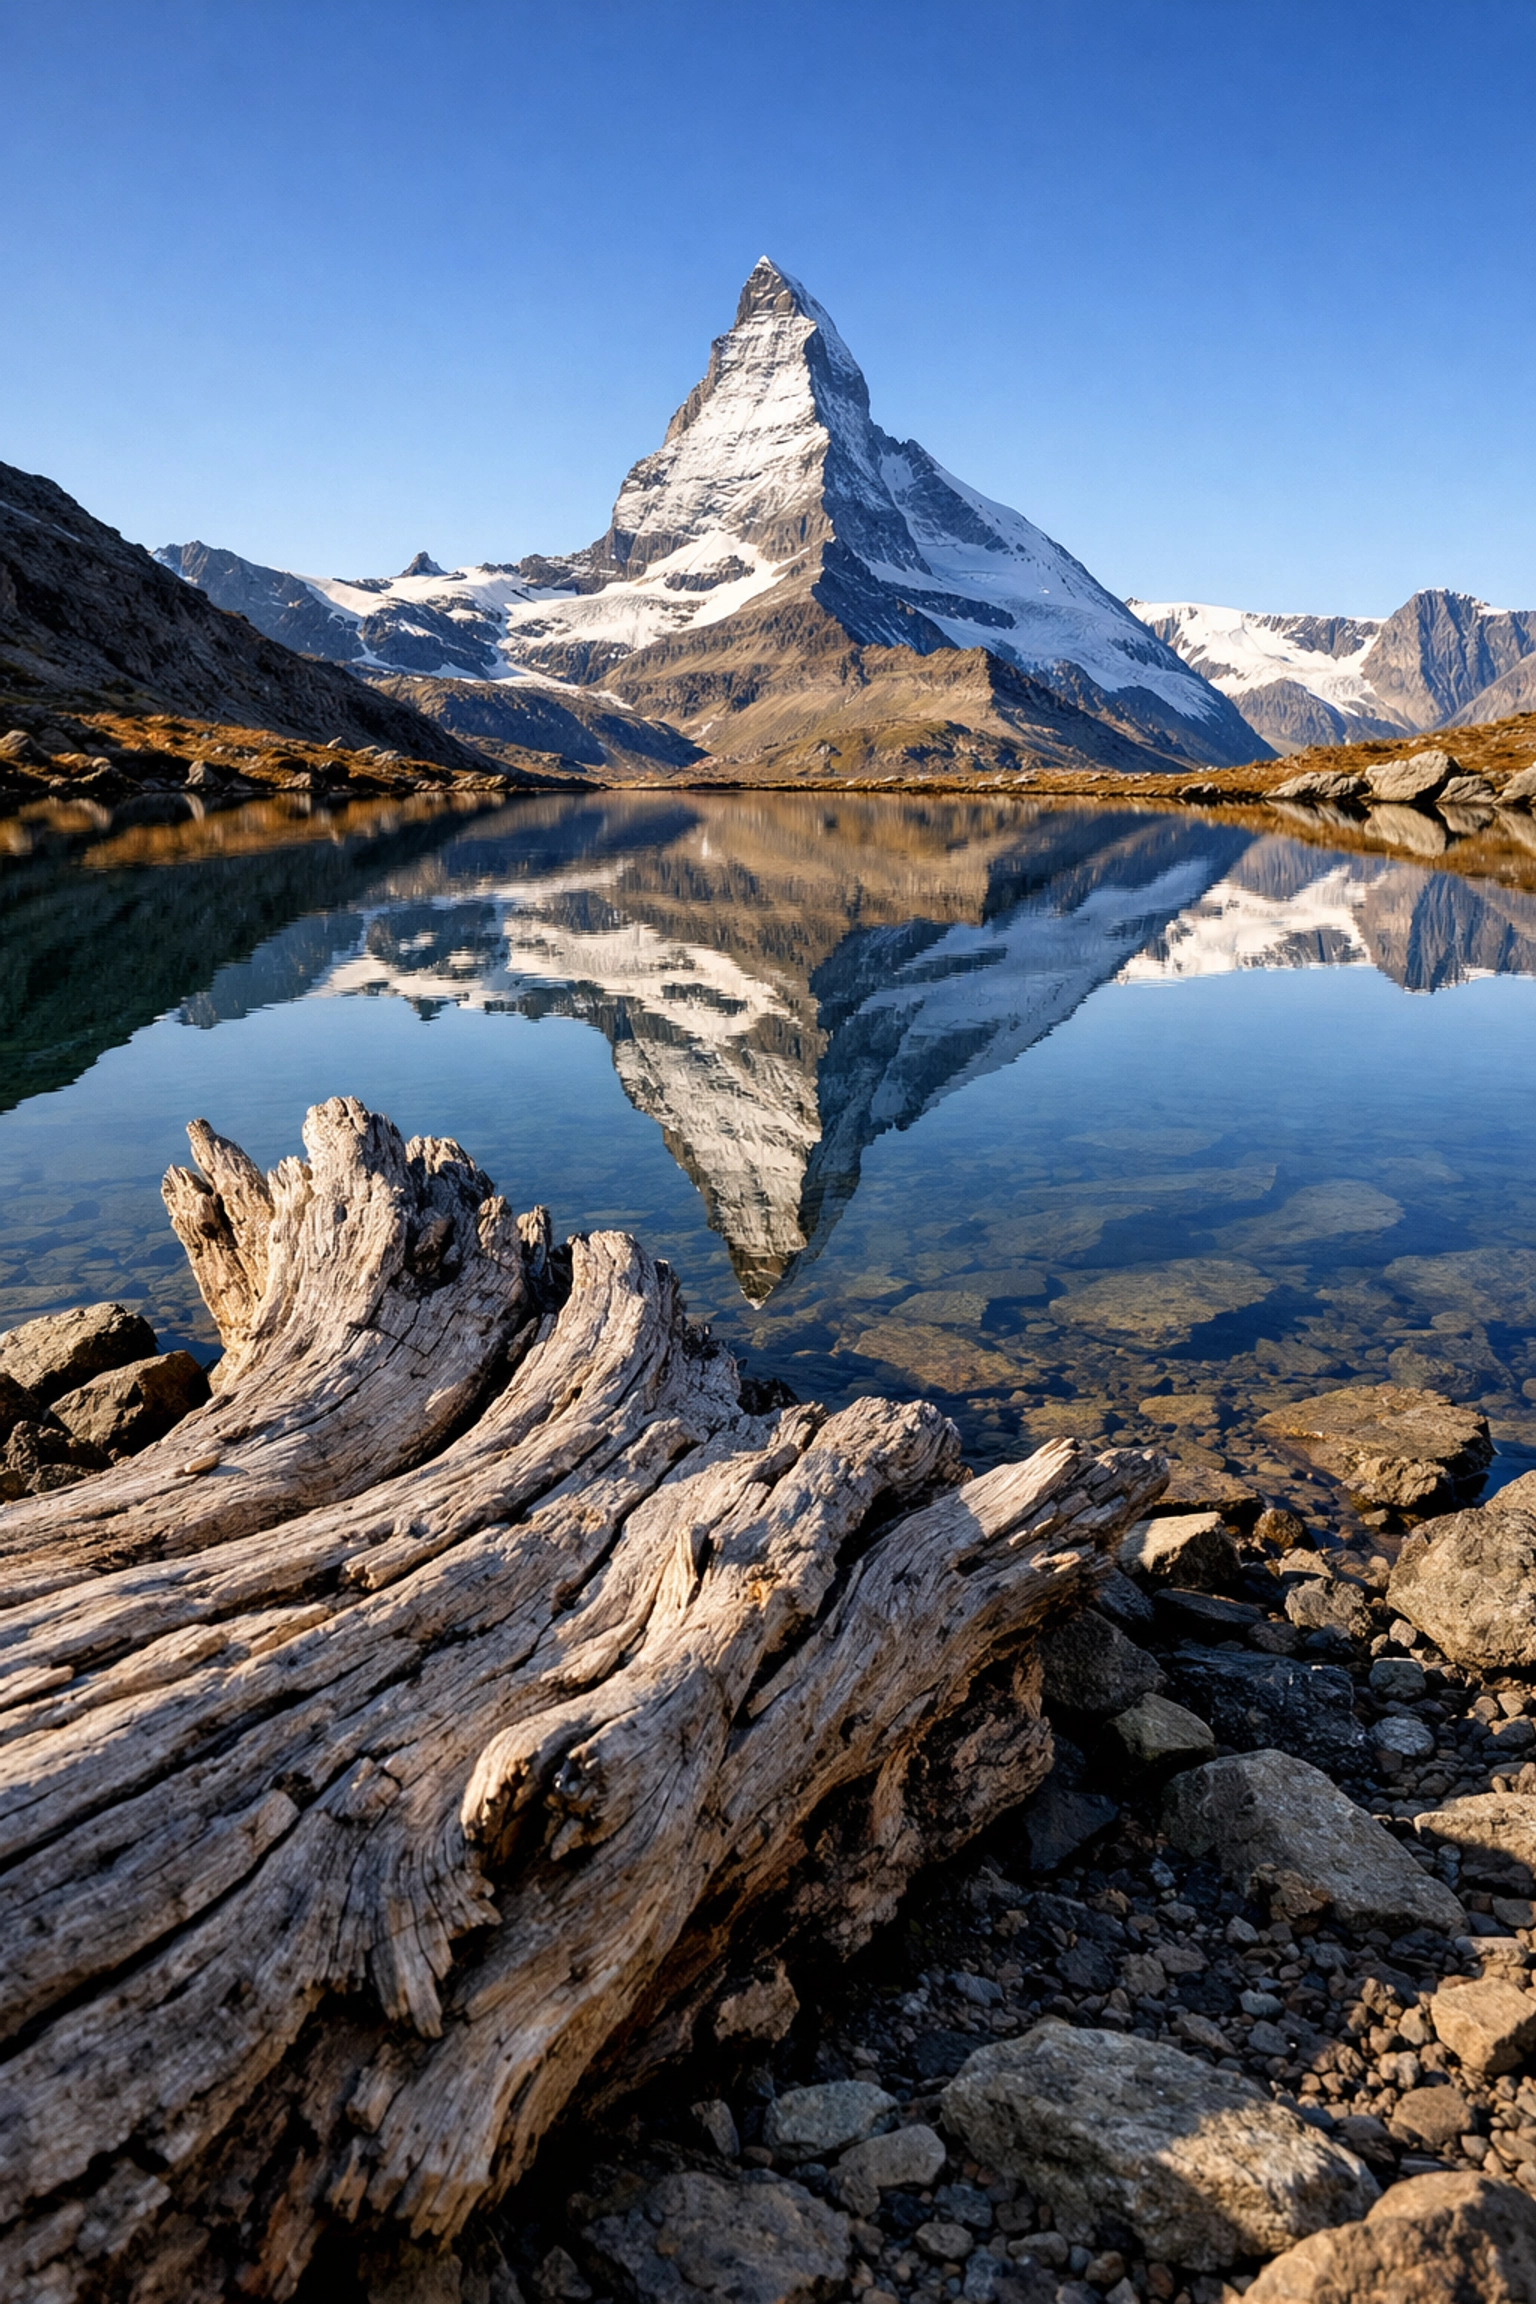
Stop standing so far away. If you’re using a wide-angle lens, you need a foreground subject, a rock, a flower, a piece of driftwood, and you need to get physically close to it. This creates a sense of scale and leads the viewer’s eye into the scene.
Alternatively, don't be afraid to use a telephoto lens for landscapes. Sometimes, isolating a single peak or a specific grove of trees creates a much more powerful image than a wide shot that lacks focus. You can see some great examples of this isolated style on Edin Fine Art.
2. Forgetting That Aperture is a Creative Choice
Most beginners are told that landscapes should be shot at f/8 or f/11 to keep everything sharp. While that’s a good baseline, treating aperture like a "set it and forget it" math problem is a huge mistake.
Aperture determines your depth of field, which is your primary tool for telling the viewer where to look. If you’re shooting an intimate landscape, like a single leaf on a frost-covered branch, using f/11 might actually ruin the shot by making the messy background too sharp and distracting.
The Fix:
Think about the story you’re telling. If you want that classic "everything in focus" look, then yes, stop down. But if you want to draw attention to a specific detail, open up that aperture. If you're still struggling with the technical side of things, check out our Manual Mode 101 guide to get a better handle on how your camera actually thinks.
3. The Blurry Foreground (Not Stopping Down Enough)
Wait, didn't I just say don't always use a small aperture? Yes, but here is the flip side: when you do want front-to-back sharpness, many photographers don’t go far enough.
If you have a cool rock just two feet from your lens and a mountain five miles away, f/8 isn’t going to cut it. Your foreground will be a blurry mess, and in landscape photography, a blurry foreground usually just looks like an accident.
The Fix:
Don’t be afraid of f/11, f/16, or even focus stacking. Many people worry about "diffraction" (a slight loss in sharpness at very small apertures), but a tiny bit of diffraction is way better than a completely out-of-focus foreground. Take a test shot, zoom in on your LCD, and make sure those pebbles at your feet are tack sharp. For more technical deep dives, PhotoGuides.org has some killer resources on hyperfocal distance.
4. Including Too Much Negative Space (The "Boring Sky" Syndrome)
We’ve all been there. The landscape is beautiful, but the sky is just a flat, featureless blue or a solid grey sheet of clouds. Yet, we still put the horizon line right in the middle of the frame, giving half the photo to a sky that offers absolutely nothing to the viewer.
Negative space can be a powerful tool, but only if it adds to the atmosphere. If the sky is boring, it’s just empty calories for your composition.
The Fix:
Evaluate every inch of your frame. If the sky is "bald" (no clouds, no color), tilt your camera down. Make the landscape the star and only give the sky the top 10-20% of the frame. Conversely, if you have an insane sunset with "fire" clouds but the ground is just a muddy field, tilt up and let the sky take over. If you're looking for more inspiration on how to frame your shots, our Ultimate Guide to Photography Tutorials covers composition in detail.
5. Failing to Include a Clear Subject
This is the biggest mistake I see in the "Looking for the latest photography trends" circles. A beautiful view is not a subject. A "view" is a collection of elements, but a "photo" needs a focal point.
If a viewer looks at your photo and their eyes wander around aimlessly without landing on anything specific, they’ll lose interest in about two seconds. You need a hero.
The Fix:
Ask yourself: "What am I actually taking a picture of?" Is it that specific tree? The way the light hits that one ridge? The winding path of the river? Once you identify the subject, use leading lines, framing, and light to point the viewer directly at it. If you can't find a subject, you don't have a photo yet, you just have a nice walk in the woods.
6. The "Drunk" Horizon
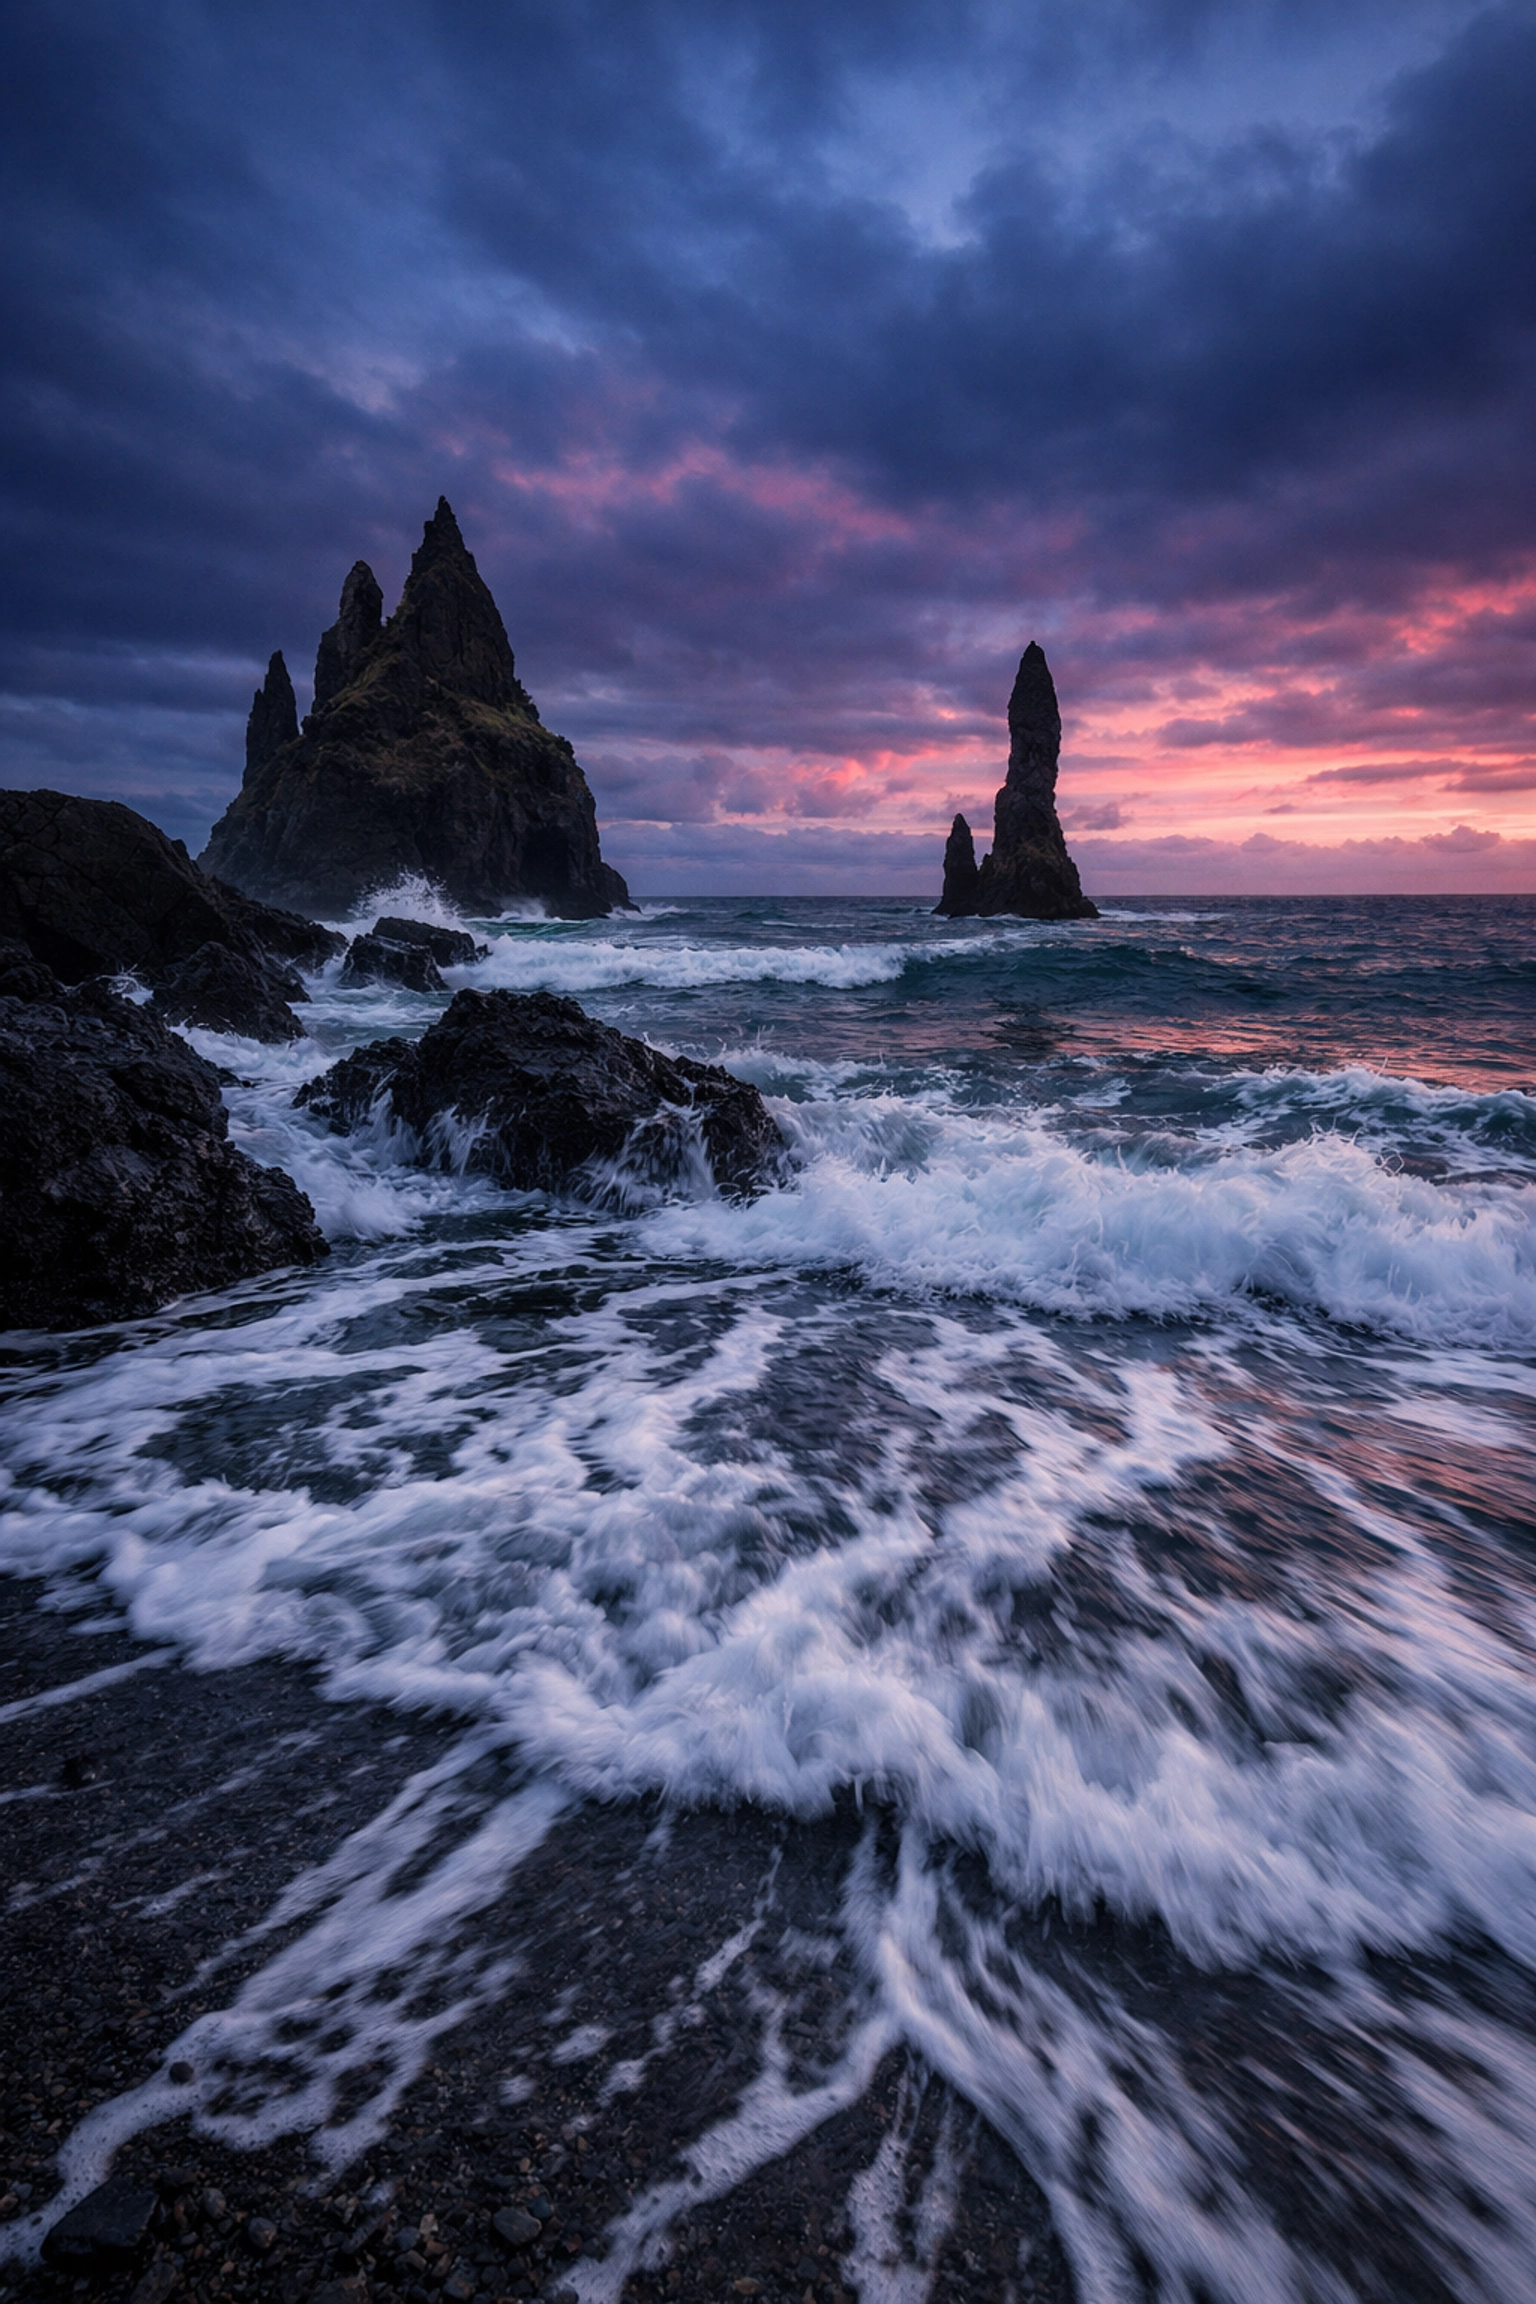
There is nothing, and I mean nothing, that ruins a professional-looking landscape faster than a horizon line that is slightly tilted. It’s physically uncomfortable to look at. It makes the viewer feel like the ocean is about to leak out of the side of the frame.
The Fix:
Turn on the electronic level in your viewfinder. Most modern mirrorless and DSLR cameras have one. If yours doesn't, use the grid lines. While you can fix this in post-processing, you’ll end up having to crop your image, which means losing resolution and potentially cutting off part of your carefully planned composition. Do it right in the field. If you need professional gear advice to ensure your tripod is level, check out ProShoot.io.
7. Over-Processing: The "Deep-Fried" Look
We’ve all seen them: the photos where the grass is neon green, the sky is a bruised purple, and every single detail has been cranked up so high it looks like a CGI video game from 2005. Over-processing: especially with the Saturation and Clarity sliders: is the hallmark of a beginner trying too hard.
Landscape photography should feel grounded in reality, even if it's an enhanced version of it.
The Fix:
Less is more. When you’re editing, try these rules of thumb:
- Saturation: Rarely go above +10. Use "Vibrance" instead, as it’s more subtle.
- Clarity: Use it sparingly. If you overdo it, your photo will look "crunchy" and unnatural.
- Shadows: Don’t feel like you have to reveal every single detail in the dark areas. Shadows create depth and mystery.
If you want a powerful but user-friendly way to edit without going overboard, I highly recommend using Luminar. It has some incredible AI-driven tools that help enhance the natural beauty of a landscape: like the "Golden Hour" or "Sky Enhancer" filters: without making it look fake. Just remember to keep the sliders under control.
Bonus: Understanding Light (The Secret Sauce)
If you fix all seven of the mistakes above but still shoot at 12:00 PM on a Tuesday, your photos are probably still going to look flat. Light is the most important element in landscape photography. Harsh, midday sun creates deep, ugly shadows and blown-out highlights.
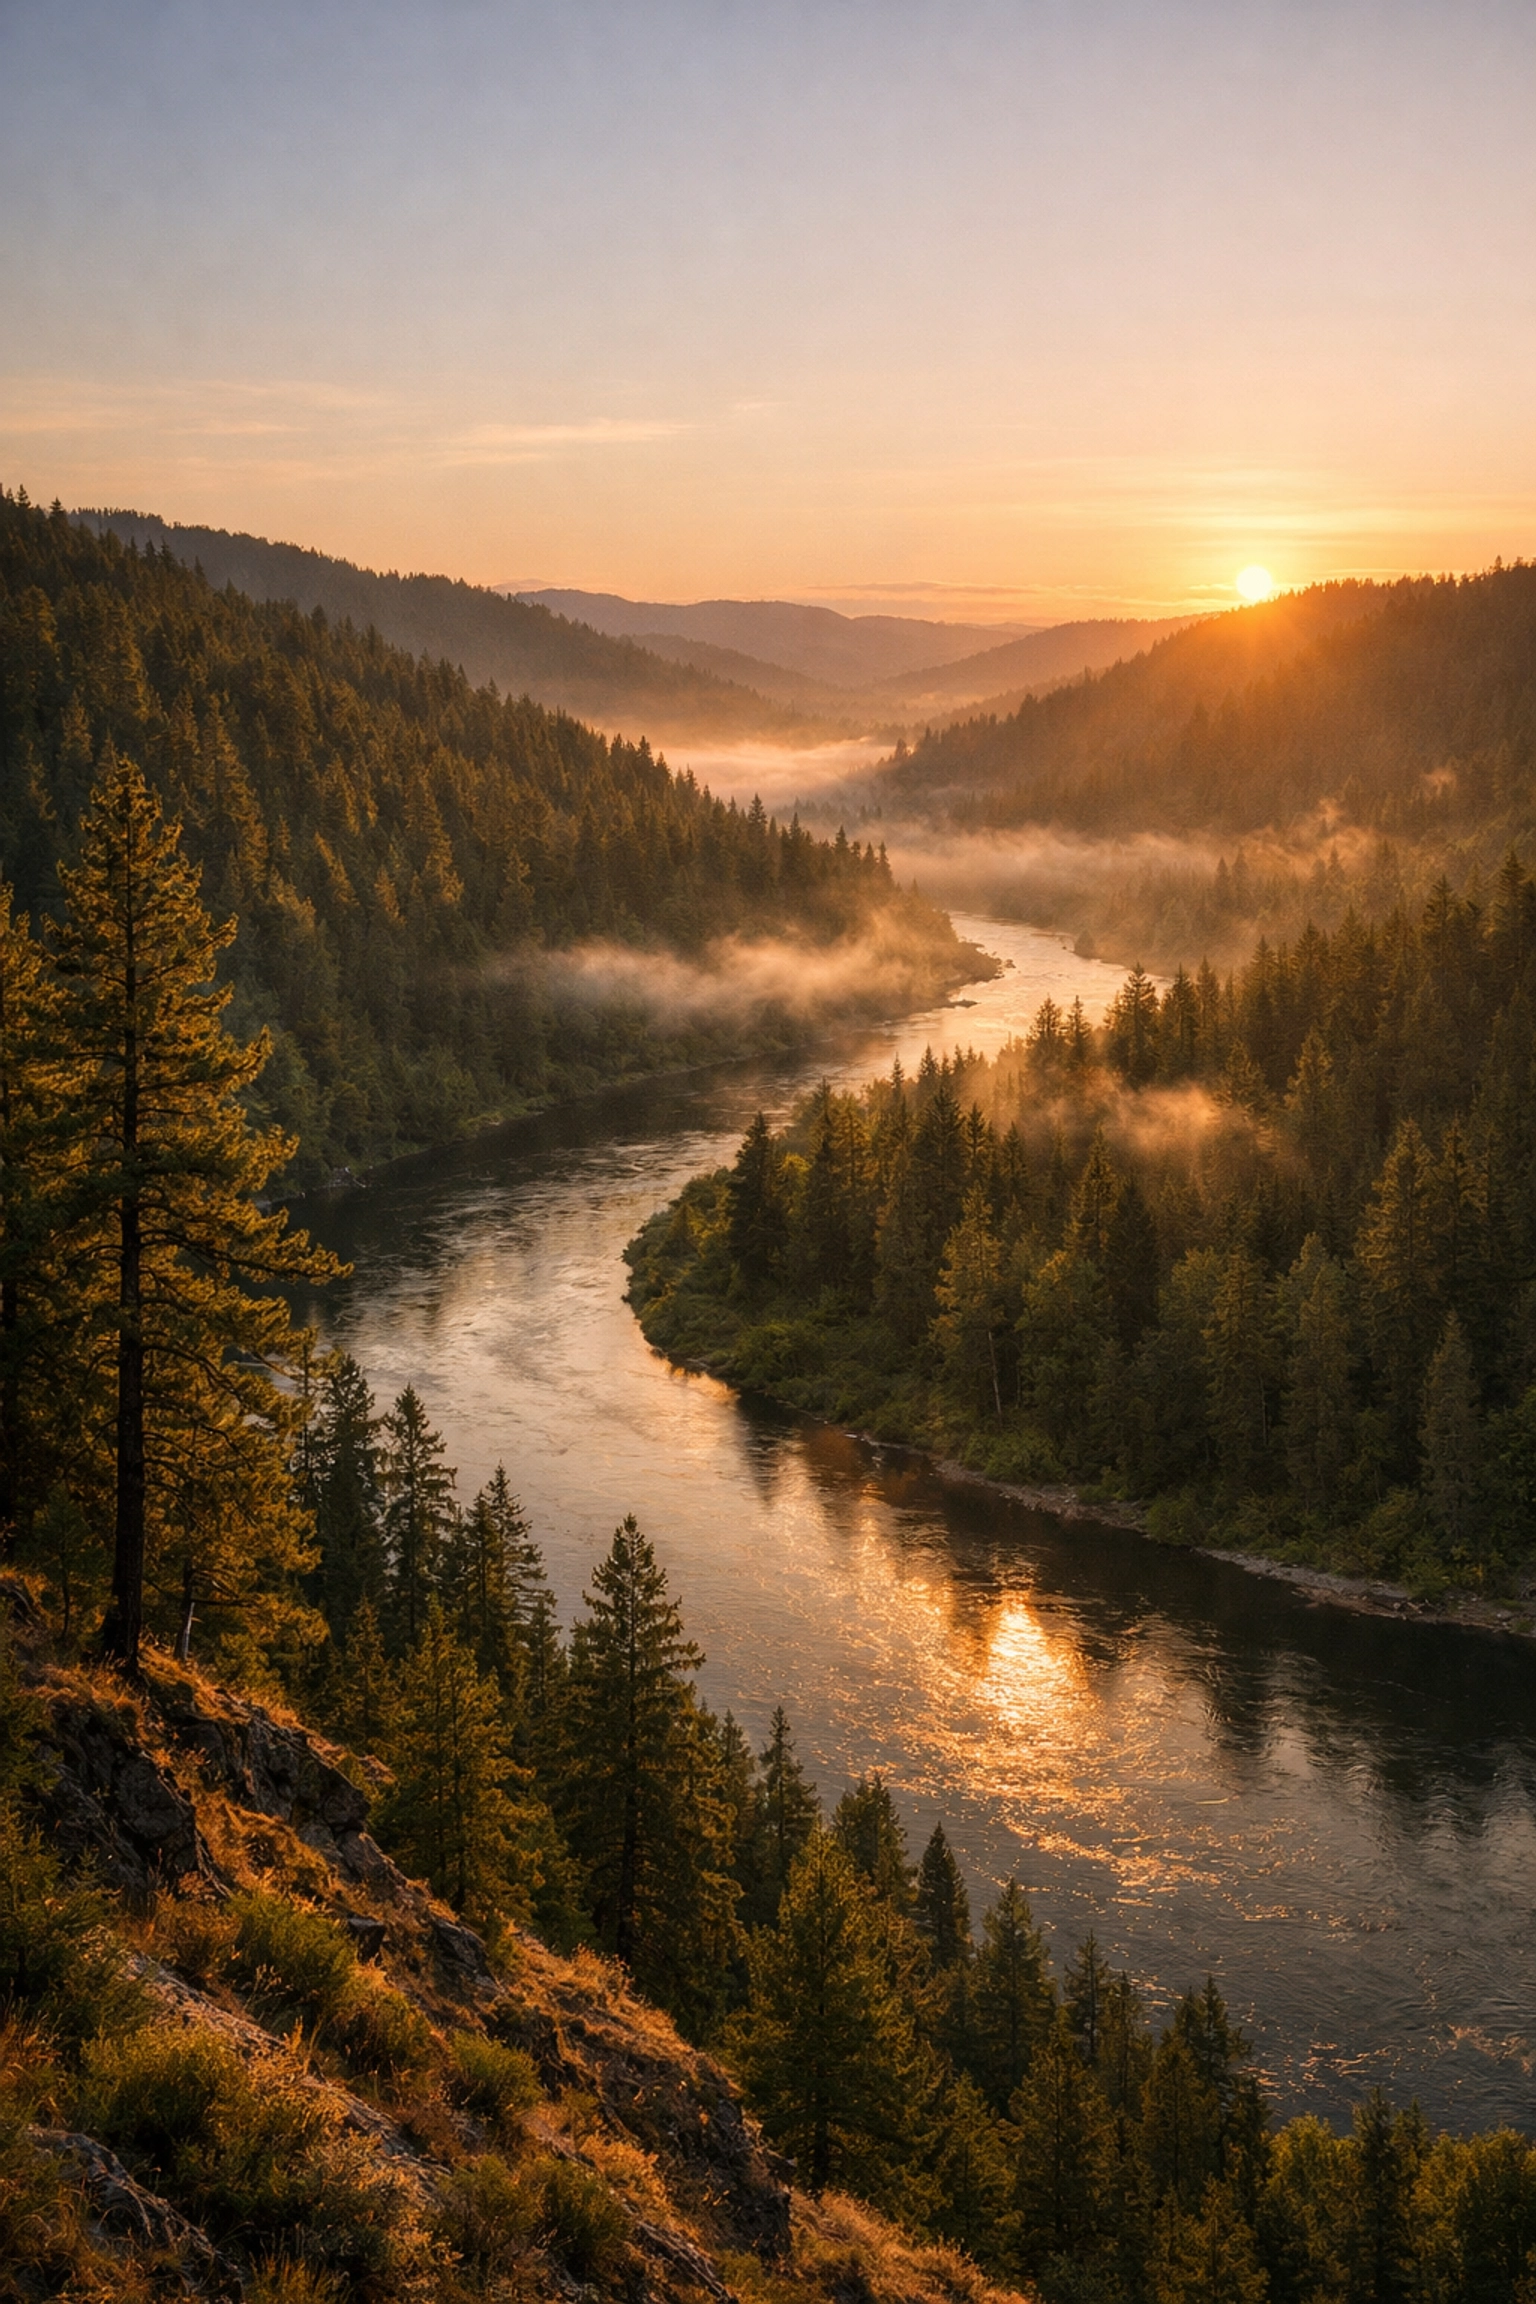
The best landscape photographers are essentially professional "waiters." They wait for the Golden Hour (shortly after sunrise or before sunset) or the Blue Hour (the twilight period). They wait for storms to break or for fog to roll in.
If you want to see how lighting can transform even basic subjects, take a look at the portfolio work over at Edin Studios or read more about professional techniques on Edin’s personal blog.
Putting It All Together
Landscape photography is a journey. You’re going to mess up. You’re going to forget to level your tripod, or you’re going to get home and realize your favorite shot was taken at f/2.8 by mistake.
The key is to slow down. Before you press that shutter button, run through a mental checklist:
- Is my horizon straight?
- Do I have a clear subject?
- Is my foreground sharp?
- Is the light doing something interesting?
- Am I too far away?
If you can answer those questions, you're already ahead of 90% of the people out there with a camera. Don't forget to coordinate your shoots with the seasons: sometimes the best landscape is just waiting for a little bit of snow or autumn color to make it pop.
Keep shooting, keep failing, and eventually, you’ll stop taking "pictures" and start creating art. See you out there on the trails!


