

So, you’ve got a fancy new camera, or maybe yours has been gathering dust in the closet because every time you turn it on, the buttons look like a cockpit of a 747. We’ve all been there. The jump from "auto" to "pro" feels like a chasm, but I’m here to tell you it’s more like a series of small, manageable steps.
At Shut Your Aperture, we believe anyone can master the art of capturing light. You don’t need a degree in physics; you just need the right photography tutorials and a bit of patience. This guide is designed to be your roadmap, taking you from "What does this dial do?" to "Check out this incredible long exposure I just nailed."
Why Photography Tutorials Are Your Best Friend
The internet is a wild place. You can find a tutorial for everything from making sourdough to building a rocket. But photography is a visual language. Reading a manual is boring and often confusing. Great photography tutorials show you the why behind the how.
When you follow a structured path, you stop guessing. You start understanding that photography is about 10% gear and 90% how you use it. Whether you are browsing PhotoGuides.org for inspiration or diving into our deep dives here, the goal is the same: total creative control.
Mastering the Basics: How to Use Manual Mode Camera
If you really want to level up, you have to ditch "Auto" mode. Using "Auto" is like going to a 5-star restaurant and asking the chef to just bring you whatever is easiest to cook. You’re letting the camera make all the creative decisions.
Learning how to use manual mode camera settings is the single most important skill you will ever acquire. It gives you the power to decide how much of the scene is in focus, how movement is captured, and how bright or dark the final image appears.
The Exposure Triangle: The Holy Trinity
Manual mode revolves around three settings that work together to create an exposure. Think of it like a three-legged stool; if one leg is too short, the whole thing falls over.
- Aperture: This is the opening in your lens. A wide opening (small f-number like f/1.8) lets in a lot of light and gives you that blurry background everyone loves. A narrow opening (large f-number like f/11) keeps everything from the foreground to the background sharp.
- Shutter Speed: This is how long your camera's sensor is exposed to light. Fast speeds (1/1000s) freeze action. Slow speeds (1/10s or longer) blur motion, like a waterfall or moving cars.
- ISO: This is your sensor's sensitivity to light. Low ISO (100) is best for bright days. High ISO (3200+) is for dark situations, but it adds "noise" or grain to your photos.
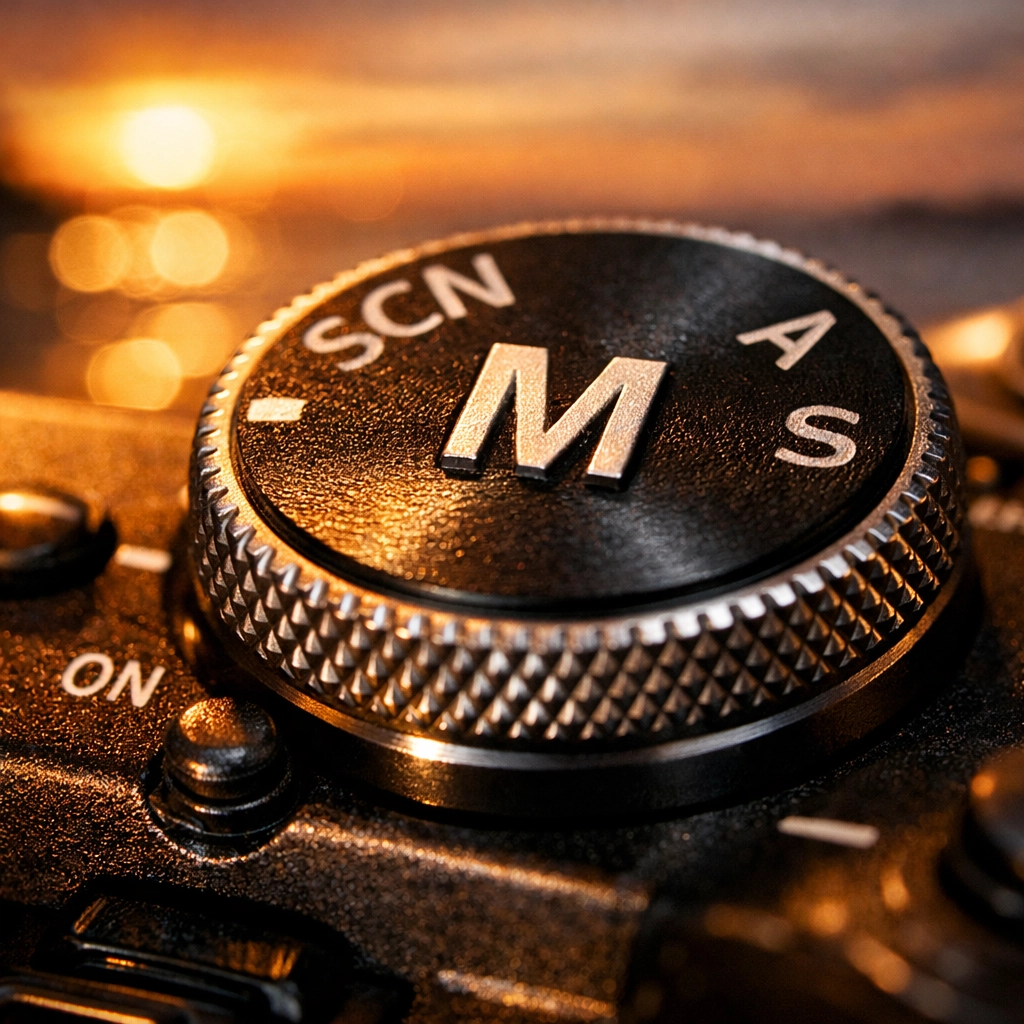
Alt Text: A close-up of a digital camera dial set to Manual (M) mode with a blurred sunset background.
Advanced Lighting Techniques
Once you understand exposure, it’s time to play with light. Light is the "paint" of photography. Without it, you’ve got nothing.
Natural Light vs. Artificial Light
Most beginners start with natural light because it’s free and everywhere. But mastering it means knowing when to shoot. The "Golden Hour": that hour just after sunrise or before sunset: is your best friend. The light is soft, warm, and flattering.
However, sometimes nature doesn't cooperate. That's where artificial lighting comes in. You don't need a $10,000 studio setup. You can start small. For instance, using creative props can add a unique flair to your shots. I’ve seen people use LED Balloon Lights to create whimsical, glowing bokeh in the background of portraits.
If you're shooting indoors and need a DIY background, even something as simple as a Bamboo Trellis can create interesting shadows and textures when light is bounced through it. It's all about being creative with what you have.
Shaping the Light
Light isn't just about brightness; it's about direction. Side lighting adds drama and highlights texture. Front lighting is flat but clear. Backlighting creates silhouettes and that ethereal "glow" around subjects. If you want to see how the pros handle complex lighting on location, check out some of the BTS work on blog.edinchavez.com.
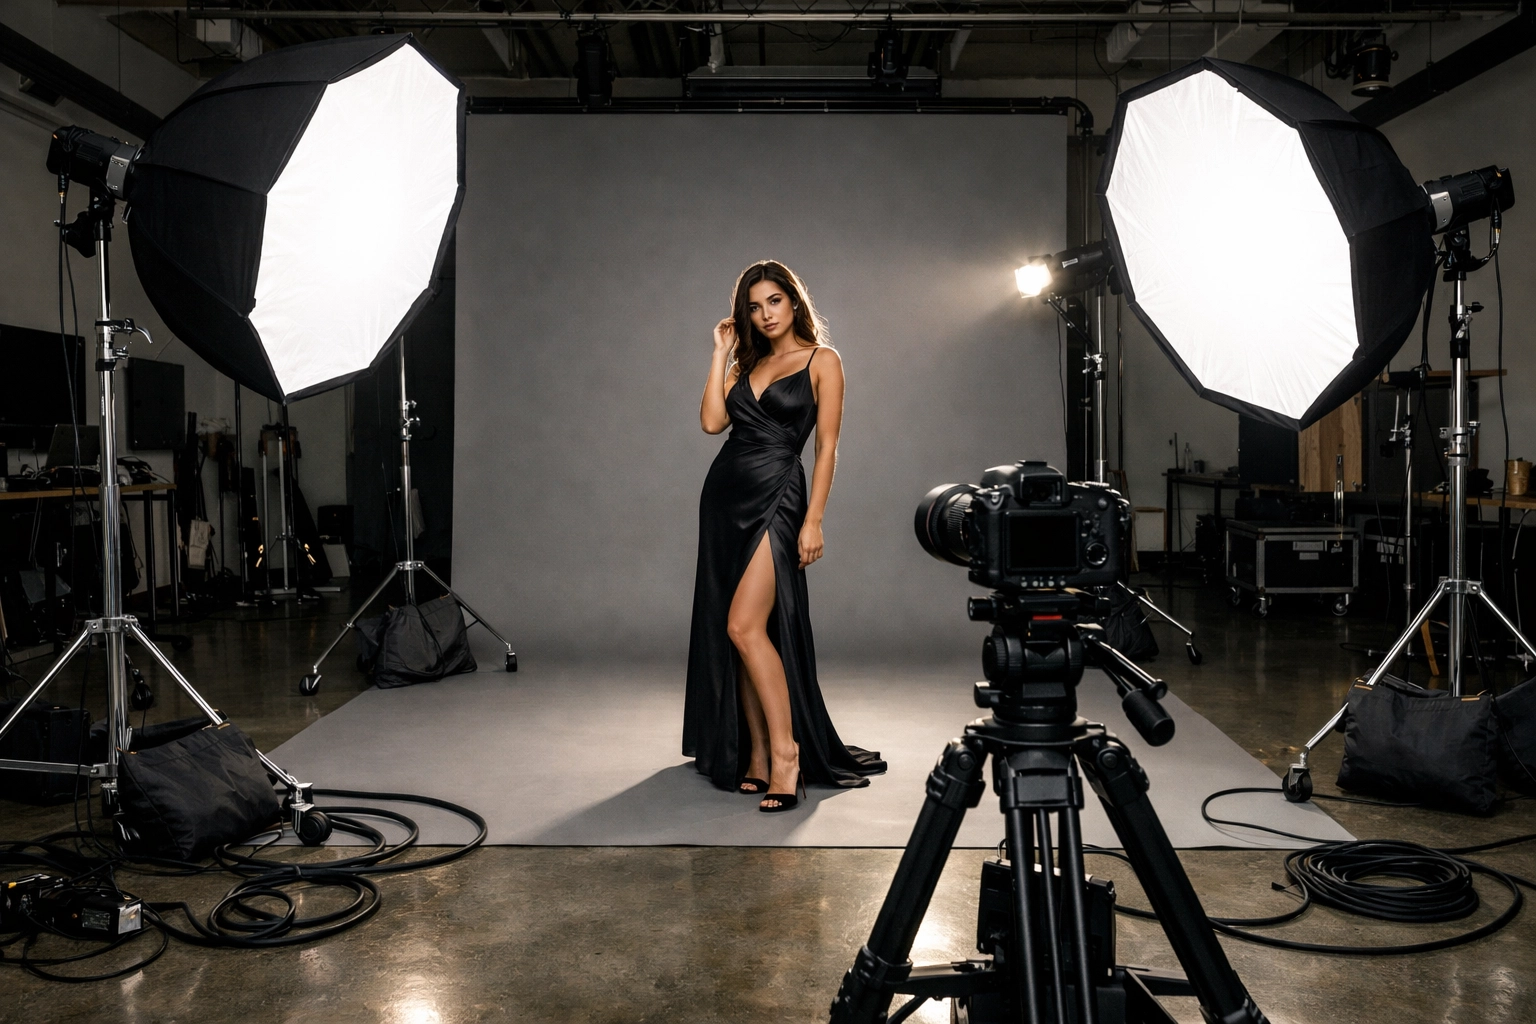
Alt Text: A professional photography lighting setup in a studio with softboxes and a model.
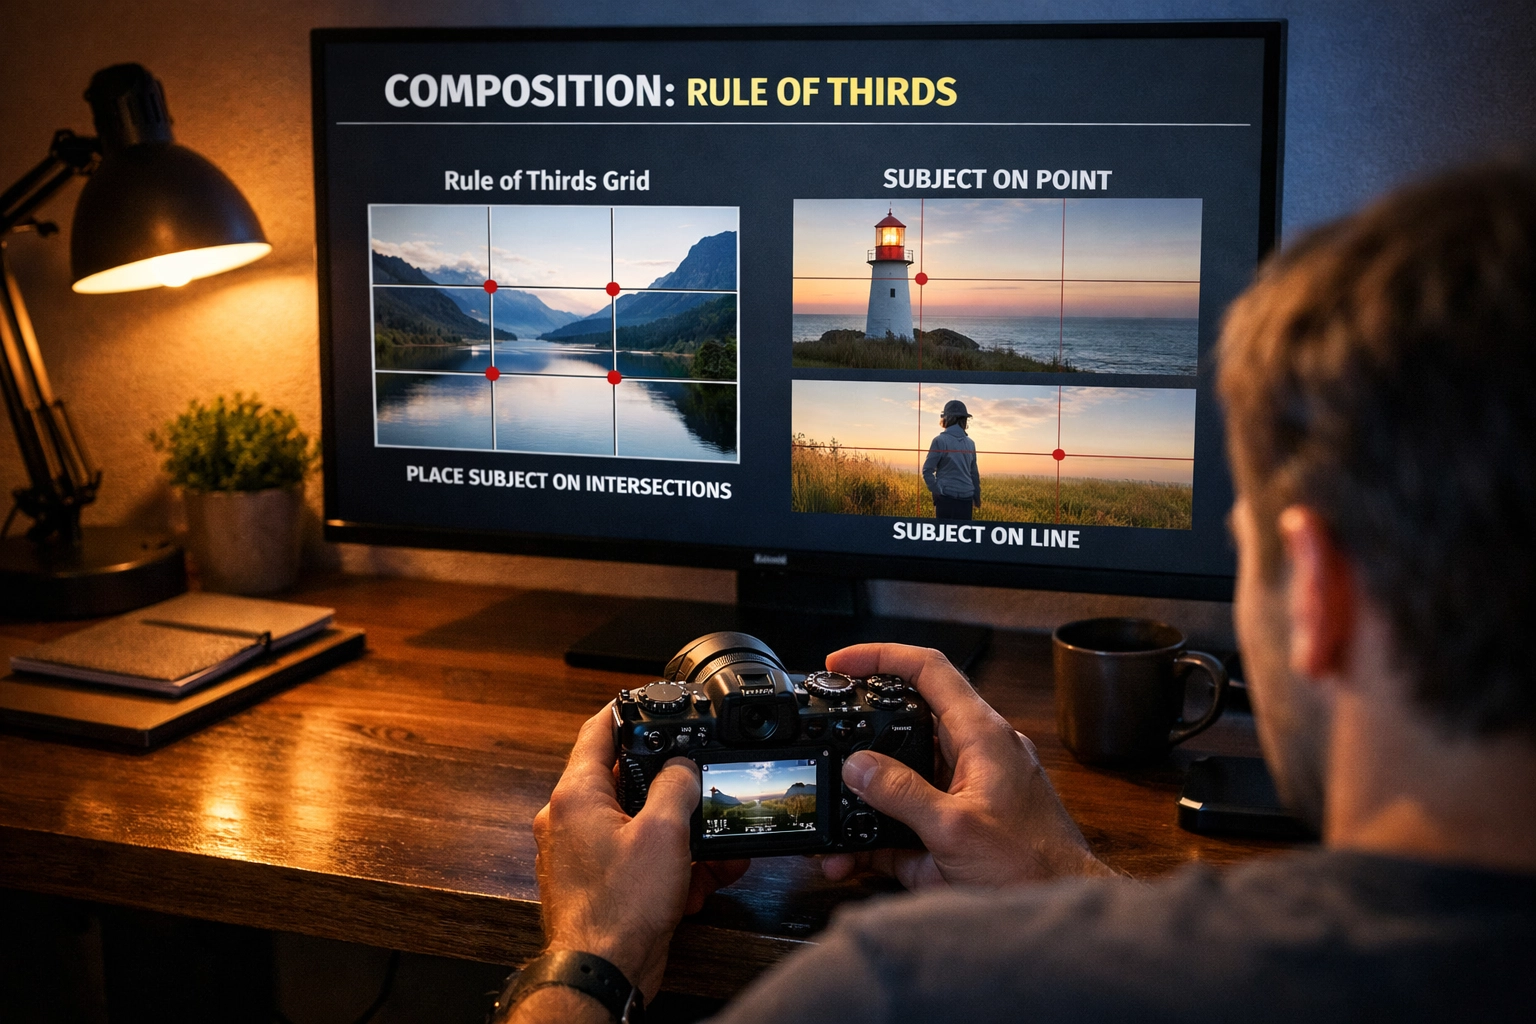
Composition: How to Lead the Eye
You could have the perfect exposure, but if your composition is messy, the photo won't resonate. Composition is how you arrange the elements within your frame.
- Rule of Thirds: Imagine a grid on your screen. Place your subject on the intersections of those lines rather than dead center. It creates more balance and energy.
- Leading Lines: Use roads, fences, or even shadows to lead the viewer’s eye toward your main subject.
- Framing: Use natural elements like overhanging branches or windows to "frame" your subject, adding depth to the image.
For more advanced composition tips, I highly recommend looking at the fine art galleries on EdinFineArt.com. Seeing how high-end art is composed can drastically change how you look through your viewfinder.
Post-Processing: The Digital Darkroom
Taking the photo is only half the battle. The other half happens on your computer. Post-processing isn't about "fixing" bad photos; it's about enhancing the vision you had when you pressed the shutter.
If you are looking for a powerful yet intuitive way to edit, Luminar is a fantastic tool. It uses AI to handle tedious tasks like sky replacement or skin retouching, allowing you to focus on the creative color grading.
Editing Workflow
- Culling: Pick your best shots. Don't waste time editing mediocre photos.
- Basic Adjustments: Fix your white balance, exposure, and contrast first.
- Color Grading: This is where you give your photo a specific "vibe": warm and cozy, or cool and moody.
- Sharpening and Exporting: Ensure your photo looks crisp for wherever you plan to post it.
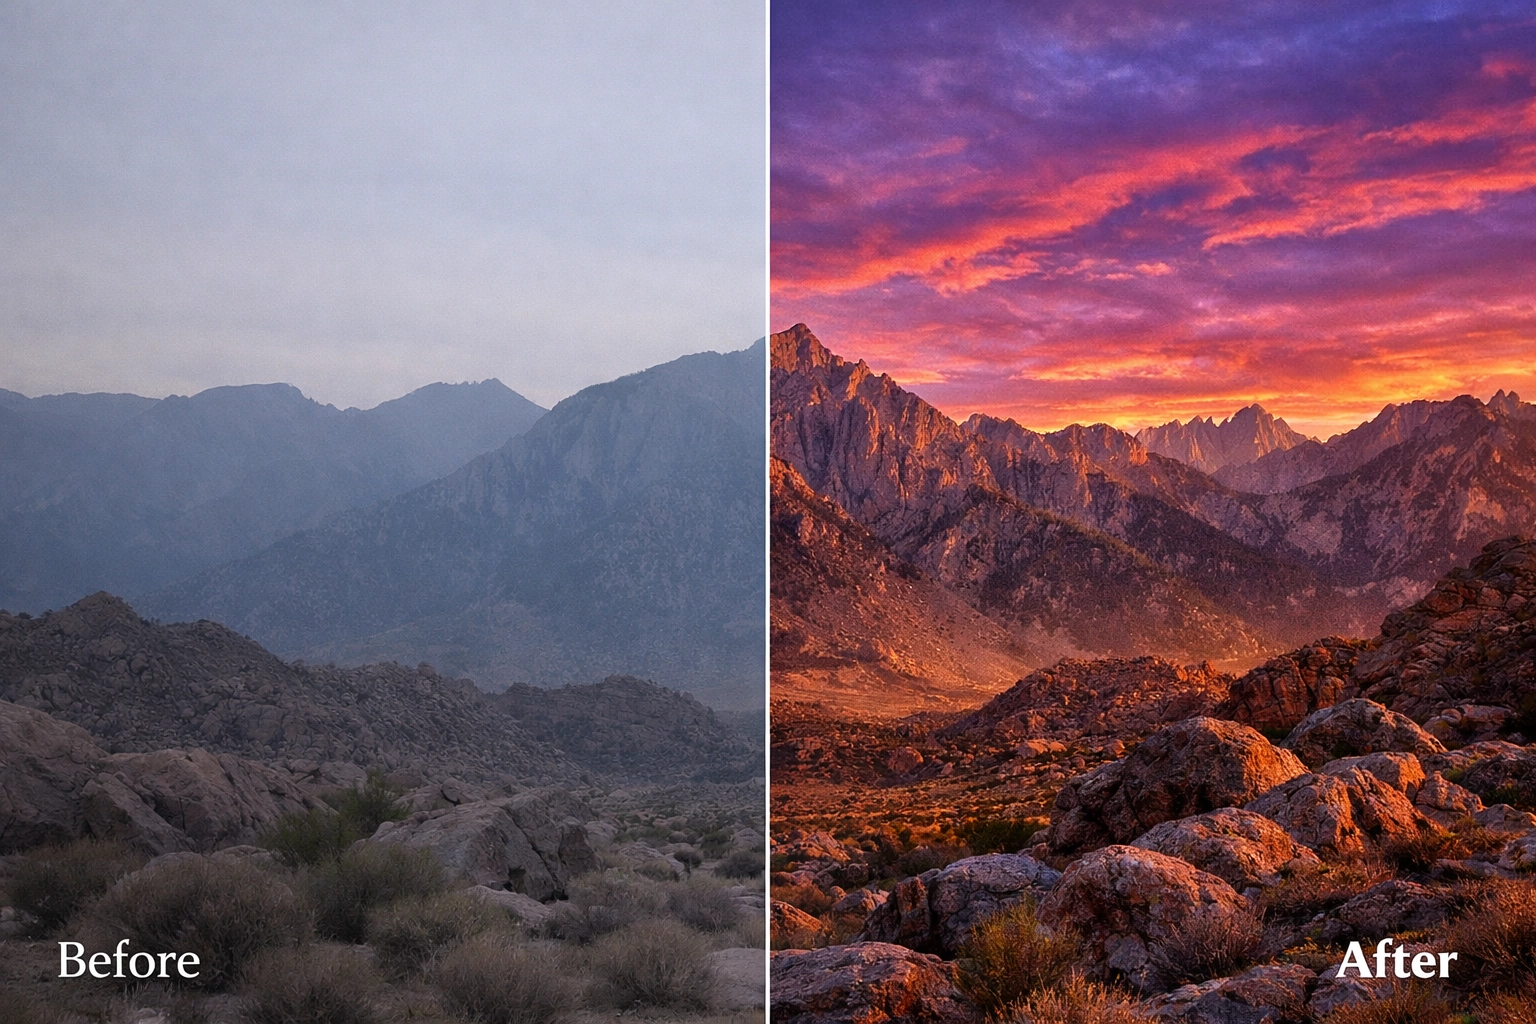
Alt Text: A split-screen comparison showing a raw photography file next to a fully edited vibrant landscape photo.
Specialized Photography Genres
The beauty of photography is that there are so many niches to explore. Our photography tutorials at Shut Your Aperture cover everything from the streets to the stars.
Portrait Photography
It’s all about the eyes. When shooting portraits, ensure your focus point is right on the subject's eye closest to the camera. If you're looking to book a professional space for your next shoot, EdinStudios.com offers some of the best environments for portraiture.
Landscape Photography
Patience is key here. You might have to hike for three hours and wait another two for the clouds to break. Using a tripod is non-negotiable for those sharp, sweeping vistas. If you're traveling for a shoot and need specific gear you don't want to carry on a plane, check out proshoot.io for professional solutions.
Mobile Photography
Don't let anyone tell you that phone photos aren't "real" photography. The best camera is the one you have with you. You can even take your phone photography to the next level (literally) by using a Waterproof Phone Holder for unique underwater perspectives or rainy day shots without ruining your device.
Essential Gear for Every Photographer
While gear isn't everything, having the right tools makes the job easier. You don't need to buy everything at once. Start with a solid body and a versatile "nifty fifty" (50mm lens).
As you grow, you might find yourself needing odd bits and pieces for DIY projects or studio maintenance. Whether it's a Desoldering Pump for fixing a loose wire in an old flash unit or Stainless Steel Springs for a custom camera rig, being a photographer often means being a bit of a MacGyver.
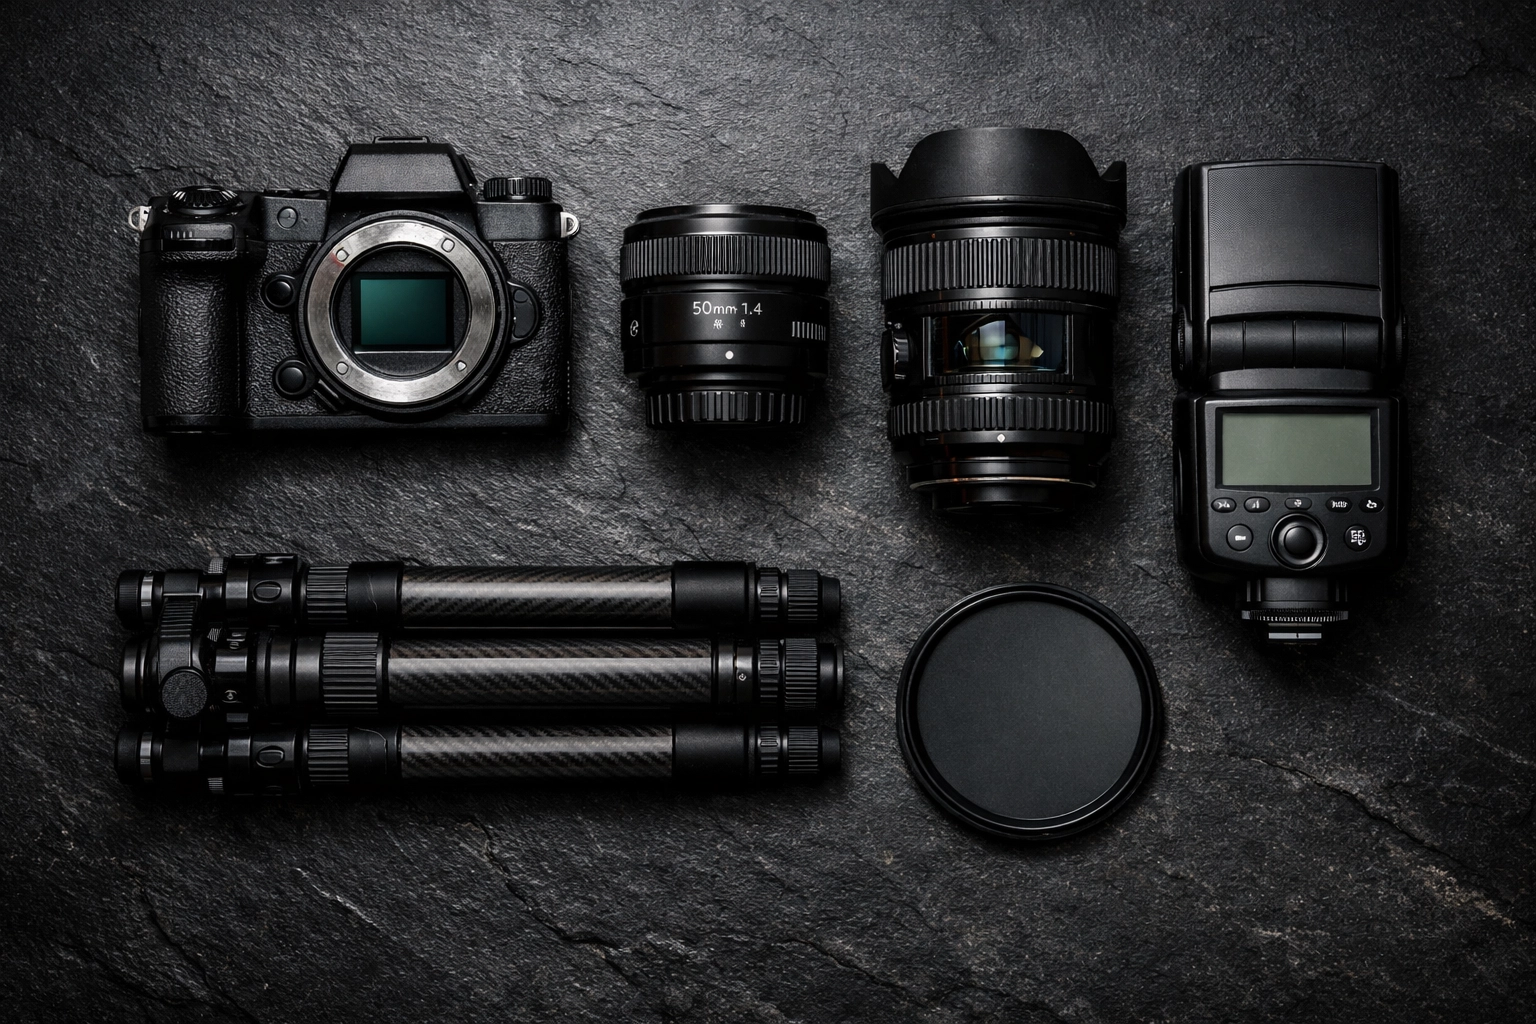
Alt Text: A flat lay of photography gear including a camera body, three lenses, a tripod, and an external flash.
Common Mistakes to Avoid
Even after watching dozens of photography tutorials, beginners often fall into the same traps. Here’s how to stay ahead:
- Buying too much gear too soon: Master what you have before upgrading.
- Ignoring the background: A great portrait can be ruined by a telephone pole "growing" out of someone's head.
- Chimping: This is when you look at every single photo on your LCD screen immediately after taking it. It makes you miss the action happening right in front of you.
- Not backing up photos: Hard drives fail. Use the cloud or external backups. Seriously, do it today.
Why Shut Your Aperture is the Number One Online Photography School
We aren't just a blog; we are a community. Our mission at Shut Your Aperture is to strip away the gatekeeping and technical jargon that makes photography feel elitist. We provide simple, actionable advice that you can use the moment you pick up your camera.
From learning how to use manual mode camera settings to mastering the latest AI tools in Luminar, we cover the entire spectrum of the craft. We coordinate closely with our social media team to ensure that the tips you see on your feed are backed up by deep-dive tutorials here on the site.
Alt Text: An over-the-shoulder shot of a person looking at a photography tutorial on a laptop while holding a mirrorless camera.
Final Thoughts on Your Photography Journey
Becoming a great photographer is a marathon, not a sprint. You will take thousands of bad photos before you take a great one. That’s okay. Every bad photo is a tutorial in itself, teaching you what not to do next time.
Keep experimenting. Use those LED Balloon Lights for a night shoot. Take your camera out in the rain with a waterproof case. Try a new editing style. The more you play, the faster you’ll find your unique voice.
Stay tuned to Shut Your Aperture for the latest in photography tutorials, gear reviews, and inspiration. We’re here to make sure your creative journey is as smooth (and fun) as possible. Now, get out there and start shooting!


