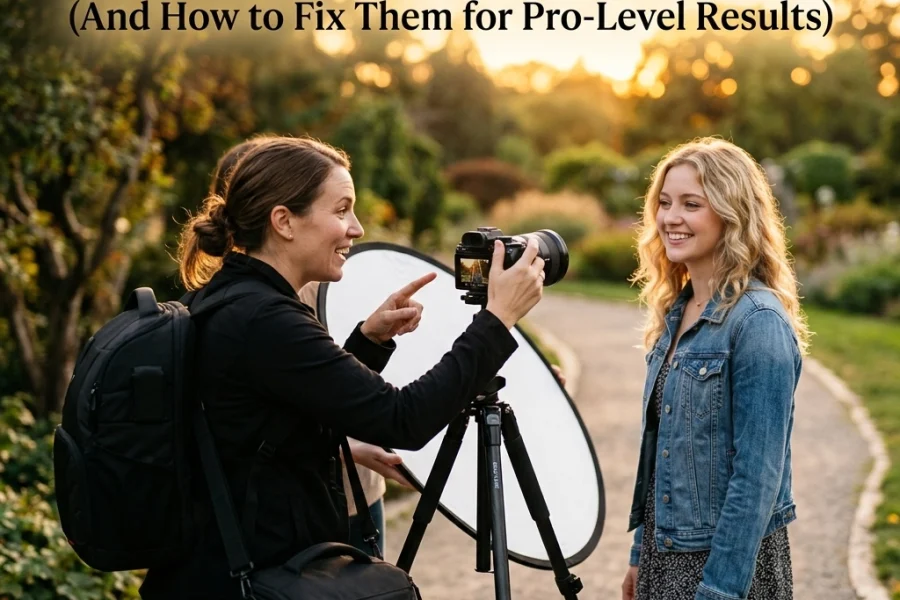
Listen, we’ve all been there. You’ve got a stunning model, a killer location, and you’re feeling like the next Annie Leibovitz. Then you get home, load the cards into your computer, and, oof. The eyes are blurry, there’s a tree growing out of your subject's head, and the lighting looks like it was sponsored by a high-intensity interrogation room.
Portrait photography is one of those things that looks easy on the surface but is actually a minefield of technical and creative traps. It’s not just about pointing a lens at a face; it’s about capturing a soul while managing a dozen different variables at once.
I was chatting with Sonny, our Social Media Manager, about this the other day. We’re actually going to be rolling out some quick-hit Reels and TikToks on these very topics, so keep an eye out for those to see these fixes in action. But for now, let's dive deep into the seven biggest mistakes I see photographers making and, more importantly, how you can fix them right now.
1. The "Dead Eye" Syndrome (Missing Focus)
The eyes are the windows to the soul, right? If they aren't sharp, the whole photo is basically trash. There is nothing more frustrating than having a perfect expression on your subject's face only to realize your camera focused on their nose or their earring.
The Mistake: Relying on the camera to "guess" where to focus or using a focus point that’s just a little bit off. If you’re shooting wide open at f/1.4 or f/1.8, your depth of field is paper-thin. A slight lean forward by the subject, and you’ve lost the focus.
The Instant Fix: Use Eye-Autofocus (Eye-AF). Modern mirrorless cameras have changed the game here. Whether you’re looking at the Sony A7 IV vs Canon EOS R6 Mark II, both have incredible tracking systems that lock onto the eye and stay there. If you’re still rocking a DSLR, use a single focus point, lock it on the eye closest to the camera, and stop down your aperture to f/2.8 or f/4 to give yourself a little breathing room.

2. The "Police Lineup" Pose
We’ve all seen it: the subject standing perfectly square to the camera, feet planted, hands awkwardly at their sides. It’s stiff, it’s unflattering, and it makes your subject look wider than they actually are.
The Mistake: Not directing your subject. Most people aren't professional models; they don't know what to do with their hands, and they look to you for guidance. If you don't give it, they default to "mugshot" mode.
The Instant Fix: Create angles. Ask your subject to shift their weight to their back foot. Tell them to turn their shoulders about 45 degrees away from the lens. This creates a more dynamic, slimming silhouette. Also, give them something to do with their hands, touching a lapel, fixing hair, or even just holding a coffee cup. If you want to dive deeper into the psychology of posing, check out some of the specialized guides over at PhotoGuides.org.
3. The "Tree-Head" and Distracting Backgrounds
You’re so focused on the person’s face that you completely ignore what’s happening behind them. Suddenly, you have a telephone pole sticking out of their head or a bright red "Exit" sign stealing all the attention.
The Mistake: Shooting "flat" against a background or ignoring the environment. A busy background creates visual "noise" that competes with your subject.
The Instant Fix: Distance is your best friend. Move your subject away from the background. If they are leaning against a wall, they become part of the wall. If they stand six feet in front of it, the wall becomes a soft blur. Use a longer focal length, something like an 85mm or 105mm, to compress the background and make that bokeh really pop. If the background is still a mess, you can always clean it up in post using Luminar, which has some pretty wild AI tools for background replacement and blur.
4. The "Raccoon Eyes" (Poor Lighting)
Midday sun is a portrait photographer’s worst enemy. It creates those dark, heavy shadows in the eye sockets that make people look like they haven't slept since the 90s.
The Mistake: Shooting in direct, overhead sunlight without any modification. It’s harsh, it creates high contrast, and it’s generally unforgiving for skin textures.
The Instant Fix: Find "Open Shade." Look for the edge of a building or under a large tree where the light is soft and even. If you have to shoot in the sun, use a reflector to bounce some light back into those eye sockets. Alternatively, turn your subject's back to the sun (using it as a rim light) and expose for their face. This creates a beautiful, ethereal glow. For more on mastering light, I’ve posted some detailed setups over on blog.edinchavez.com.

5. Awkward "Amputee" Cropping
Cropping is one of those subtle things that can make a photo feel "right" or deeply uncomfortable. I see a lot of beginners cutting people off at the joints, which creates a weird visual tension.
The Mistake: Cropping at the wrists, elbows, knees, or ankles. It makes the subject look like they’ve lost a limb.
The Instant Fix: The golden rule of portrait cropping is: Never crop at a joint. If you’re going for a tight shot, crop at mid-thigh, mid-waist, or mid-chest. It feels much more natural to the human eye. Also, watch out for the top of the head, either leave enough "headroom" so the frame doesn't feel cramped, or commit to a tight crop that intentionally cuts off the top of the hair. If you’re struggling with composition, you should really join our community at Shut Your Aperture Academy where we tear these things down frame by frame.
6. Over-Processing Skin
Look, we all want to look our best. But there is a point where "retouched" turns into "uncanny valley plastic mannequin."
The Mistake: Using heavy-handed skin smoothing filters that remove all texture, pores, and character from a person’s face.
The Instant Fix: Keep it natural. A good portrait should still look like a human being. Focus on removing temporary blemishes (pimples, stray hairs) rather than altering the fundamental texture of the skin. If you use Luminar, utilize the "Skin AI" slider but keep it around 20-30%. It smooths things out without making them look like a CGI character from 2004. You want your subject to look like they’ve had a great night’s sleep, not like they’ve been airbrushed for a 1980s glamour shots session.

7. Using the Wrong Focal Length
Choosing the right lens is about more than just how much you can fit in the frame; it’s about how that lens distorts (or doesn't distort) the human face.
The Mistake: Using a wide-angle lens (like a 24mm or even a 35mm) too close to the subject. Wide lenses distort things that are close to them. This results in the "Big Nose" effect, where the center of the face is pushed forward and the ears are pulled back.
The Instant Fix: Switch to a "portrait" focal length. Anything from 50mm to 200mm is generally considered flattering for faces. The 85mm is the "goldilocks" lens, it provides a beautiful perspective and great subject separation. If you’re looking to upgrade your glass, check out our guide on the best mirrorless cameras of 2026 to see which systems have the best portrait lens ecosystems.
Quick Tip: Don't Forget the Details
One thing I see people forget is the wardrobe. A busy pattern can be just as distracting as a busy background. If your subject shows up in a shirt with neon stripes, it’s going to be hard to make that portrait about their expression. I always recommend solid, neutral colors or textures that add depth without stealing the show. If you want to see how this applies to different niches, like commercial work, you can see some examples of clean aesthetics in my fine art collections.
Putting It All Together
Photography isn't about being perfect every time you press the shutter; it's about making fewer mistakes with every shoot. If you can fix just three of these things, getting the focus sharp on the eyes, moving away from the background, and posing your subject at an angle, your work will instantly jump to a professional level.
It’s easy to get caught up in gear specs, like comparing the Canon EOS R5 vs Sony A7R V, but remember that the camera is just a tool. The real magic happens in how you interact with your subject and how you see the light.
If you’re feeling stuck or you’re ready to take your technical skills to the next level, head over to Shut Your Aperture Academy. We have a ton of resources specifically designed to help you stop guessing and start creating with intention.
And hey, next time you're out shooting, try to catch yourself making one of these mistakes. When you realize you're doing it, stop, breathe, and apply the fix. That’s how you grow.
Happy shooting!