Let’s be real for a second. Mention the word "AI" in a room full of photographers, and you’ll get one of two reactions: a terrified look like you just suggested shooting a wedding on an iPhone 4, or an excited rant about how they saved six hours on their last edit.
It’s April 2026, and the "AI is going to take our jobs" panic has mostly settled into a "How do I use this without my photos looking like plastic garbage?" reality. We’ve all seen those AI-generated images where people have seventeen fingers or the sky looks like it belongs on a different planet. That’s not what we’re after. We want the speed of a supercomputer with the soul of a storyteller.
Integrating AI into your workflow isn’t about letting a machine take the wheel; it’s about hiring a digital intern who’s really, really fast at the boring stuff. Here is how you do it while keeping your artistic integrity intact.
The Secret Sauce: AI in the Camera
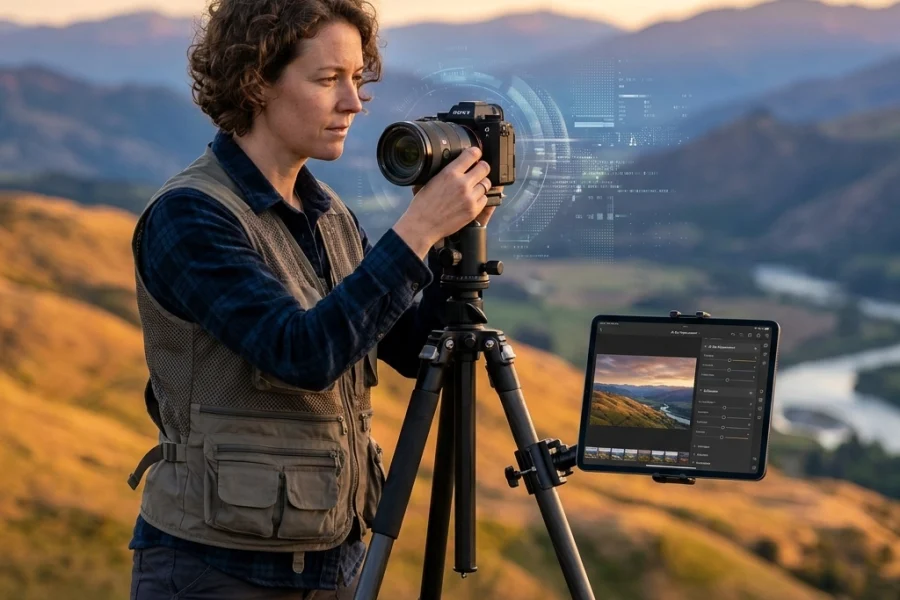
Before you even get to the computer, AI is already working for you, or at least it should be. If you’ve looked at the best mirrorless cameras of 2026, you know that subject recognition has gone from "hey, that's a face" to "I am tracking the left eyeball of that specific hummingbird."
Take a look at the Sony A7R V vs Canon R5 debate. These cameras use dedicated AI processing units to predict movement. This isn't "fake" photography; it’s a tool that ensures you actually nail the shot you intended to take. When the camera handles the technical heavy lifting of focus, you are free to focus on composition and timing.
If you’re shooting something specific, like fast-moving objects, getting your settings right is still half the battle. Even with AI, you need a solid foundation. For example, check out these OM System OM-1 Mark II settings for sports photography to see how to blend high-tech tracking with manual control.

Culling: The Great Time Thief
We have all been there. You come home from a shoot with 3,000 photos, and the thought of looking at every single one makes you want to sell your gear and take up knitting. This is where AI culling tools are a total godsend.
Software like Aftershoot or Narrative Select uses AI to group similar shots, flag the ones where someone blinked, and highlight the sharpest images. The "robotic" way to do this is to let the software auto-delete everything it doesn't like. Don't do that.
Instead, use the AI to do a "first pass." Let it hide the obvious junk (out of focus, eyes closed, accidental shot of your foot), and then you go through the "winners." You still have the final say. Sometimes a slightly soft image has a mood that the AI can't understand. Use the machine to save time, but keep your thumb on the scale.
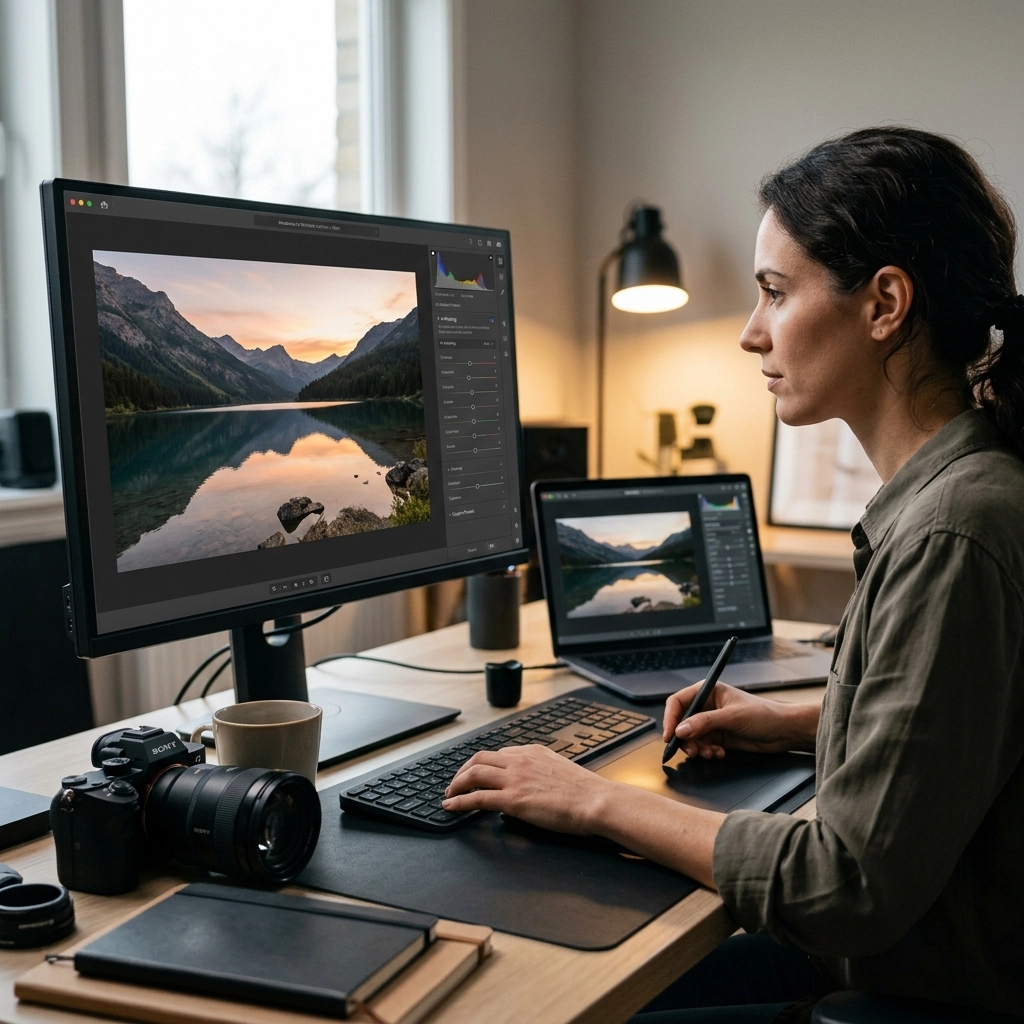
Editing Without the "Uncanny Valley"
This is where things usually go wrong. We’ve all seen the "AI Portrait" look, skin so smooth the person looks like a wax figure from a horror movie. To avoid this, you need to use AI-powered editing tools as a starting point, not the finish line.
Luminar has been a leader in this for a while. Their "Structure AI" and "Sky Replacement" tools are incredible, but the trick is the opacity slider. If the AI suggests a setting of 100, try 30. You want to enhance what’s there, not paint over it. For more in-depth techniques on balancing these tools, check out the resources at learn.shutyouraperture.com.
Masking: The True Game Changer
If you aren't using AI masking in Lightroom or Luminar, you are working too hard. Being able to click "Select Subject" or "Select Sky" and have a near-perfect mask in seconds is revolutionary.
The key to keeping it human? Feathering. AI masks can sometimes be a bit too "crunchy" around the edges. Always check your mask edges and manually brush out areas that look unnatural. If you're comparing older tech to the new stuff, you'll see a massive jump in how these masks handle hair and fine details. Just look at the progress in the Sony A7 IV vs Canon EOS R6 Mark II comparison to see how far the on-board and software integration has come.

Generative Fill: Fixing, Not Faking
Adobe’s Generative Fill and similar tools in other suites are controversial. Some people think it’s cheating. I think it’s just a really advanced "Clone Stamp" tool.
If I’m shooting a beautiful landscape and there’s a bright orange trash can in the corner, I’m going to remove it. In the old days, that took fifteen minutes of careful cloning. Now, it takes five seconds. That’s not "robotic", that’s just efficient.
The "Robot Look" happens when you start adding things that weren't there. Adding a mountain range to a flat field? Yeah, people are going to notice. Adding a dramatic lightning bolt to a sunny day? It looks fake because the lighting on the ground doesn't match. If you want to see how high-end pros handle "real" vs "enhanced" art, take a look at the work over at www.edinfineart.com. You'll notice that the best art always feels grounded in reality, even when it’s been optimized.
Denoising and Upscaling
This is perhaps the most "invisible" and useful way to use AI. Tools like Topaz Photo AI or the built-in Denoise in Lightroom can save a photo that was shot at ISO 12,800.
Back in the day, high ISO meant grainy, muddy messes. Now, AI can look at that noise and intelligently figure out what is a "pixel" and what is "grain." It’s like magic. Again, the danger is "over-smoothing." If you take away all the grain, the photo starts to look like a CGI render. Keep a little bit of that texture. It’s what makes a photo feel like a photo.
If you’re struggling with getting the right settings for tricky lighting, especially in product shots, head over to PhotoGuides.org for some solid advice on getting it right in-camera first, so the AI doesn't have to work so hard. You can also check out our specific guide on OM System OM-1 Mark II settings for product photography for a masterclass in precision.

Creating Your Own AI Style
One of the coolest developments in the last year is the ability to "train" AI on your own editing style. Platforms like Imagen or Personal AI allow you to upload 5,000 of your previously edited photos. The AI then learns exactly how you handle contrast, warmth, and shadows.
When you apply this to a new wedding or event gallery, the AI does a "rough draft" that actually looks like you did it. It’s not a generic filter; it’s your filter. This is the ultimate way to stay human. You are essentially cloning your own artistic brain.
Once the AI applies your style, you still go in and do the fine-tuning. Maybe the AI missed the "vibe" of a specific candid moment. You fix it. You are the conductor; the AI is just the orchestra. For more thoughts on maintaining a personal brand in a digital world, Edin has some great insights over at blog.edinchavez.com.
The 80/20 Rule of AI
If you want to stay relevant and keep your photos looking authentic, follow the 80/20 rule. Let AI do 80% of the heavy lifting: the culling, the initial exposure correction, the denoising, and the basic masking. But that last 20%? That has to be you.
That 20% is where the "art" lives. It’s the slight crop that changes the tension of the image. It’s the local adjustment that draws the eye to the subject’s expression. It’s the decision to leave a little bit of "imperfection" in the frame because it makes the photo feel real.

Why We Still Need the Human Eye
At the end of the day, AI doesn't know why a photo is good. It knows what a "correct" exposure looks like, but it doesn't know why an underexposed, moody portrait might be more emotionally resonant. It knows how to make a sky blue, but it doesn't know that the slightly grey, depressing sky was actually the point of the story you were telling.
Use the tools. Embrace the speed. Don't be the photographer who is still hand-masking every leaf on a tree while your competition is out shooting their next project. But don't lose your soul in the process.
If you’re ready to master these tools without losing your creative spark, definitely check out the tutorials at learn.shutyouraperture.com. We dive deep into making these machines work for you, not the other way around.
Photography has always been a blend of technology and art. From the first darkrooms to the first digital sensors, we’ve always used "magic" to help us see better. AI is just the latest version of that magic. Just remember: a camera (or a computer) is just a box. You are the one who tells it what to see.
Now, go out there, shoot something awesome, and let your digital intern handle the boring stuff.