

Let’s be honest: most corporate headshots are boring. You know the ones: flat lighting, grey backgrounds, and a CEO who looks like they’re waiting for a root canal. But then you see those high-end portraits in Forbes or Vanity Fair. There’s a weight to them. They feel expensive. They scream "authority."
The secret isn’t the camera. It isn’t even the suit. It’s the light.
At Shut Your Aperture, we believe that understanding the best lighting for executive portraits is the difference between looking like an intern and looking like the boss. Most professional photographers hold these secrets close to their chests because, frankly, they aren't that complicated once you know the "why" behind the "how."
In this guide, we’re pulling back the curtain. We’ll show you how to set up like a pro, what gear actually matters, and how to make sure your subject looks like a million bucks (even if they’ve only had four hours of sleep).
The Psychology of the "Power Look"
Before we move a single light stand, we have to talk about psychology. Executive portraits aren't just about showing what someone looks like; they are about communicating a message.
In the corporate world, you’re usually trying to balance two things: Approachability and Authority.
If the lighting is too soft and front-on (like a passport photo), you get approachability, but zero authority. If the lighting is too dramatic and moody (think film noir), you get authority, but you look like you’re about to fire the entire marketing department.
The pros find the middle ground. They use shadows to define the jawline and create depth, but they keep the shadows "open" so the viewer doesn't feel intimidated. If you want to dive deeper into why some photos fail, check out our post on the 7 mistakes you’re making with professional corporate headshots.
The Standard: The One-Light Masterclass
You don’t need a dozen lights to create a world-class portrait. In fact, most pros use a single, large light source for about 90% of their work. This is the ultimate "workhorse" setup.
The key here is a large modifier, like an octabox or a deep umbrella. The larger the light source, the softer the light. Soft light is your best friend because it wraps around the face, smoothing out skin textures and minimizing wrinkles.
How to set it up:
- Place your light at a 45-degree angle to the subject.
- Raise it slightly above eye level, pointing down.
- Use a large white reflector on the opposite side to bounce a little light back into the shadows.
This creates a "Rembrandt" lighting pattern: the classic triangle of light on the cheek. It’s timeless, it’s flattering, and it’s the cornerstone of professional corporate headshot tips.
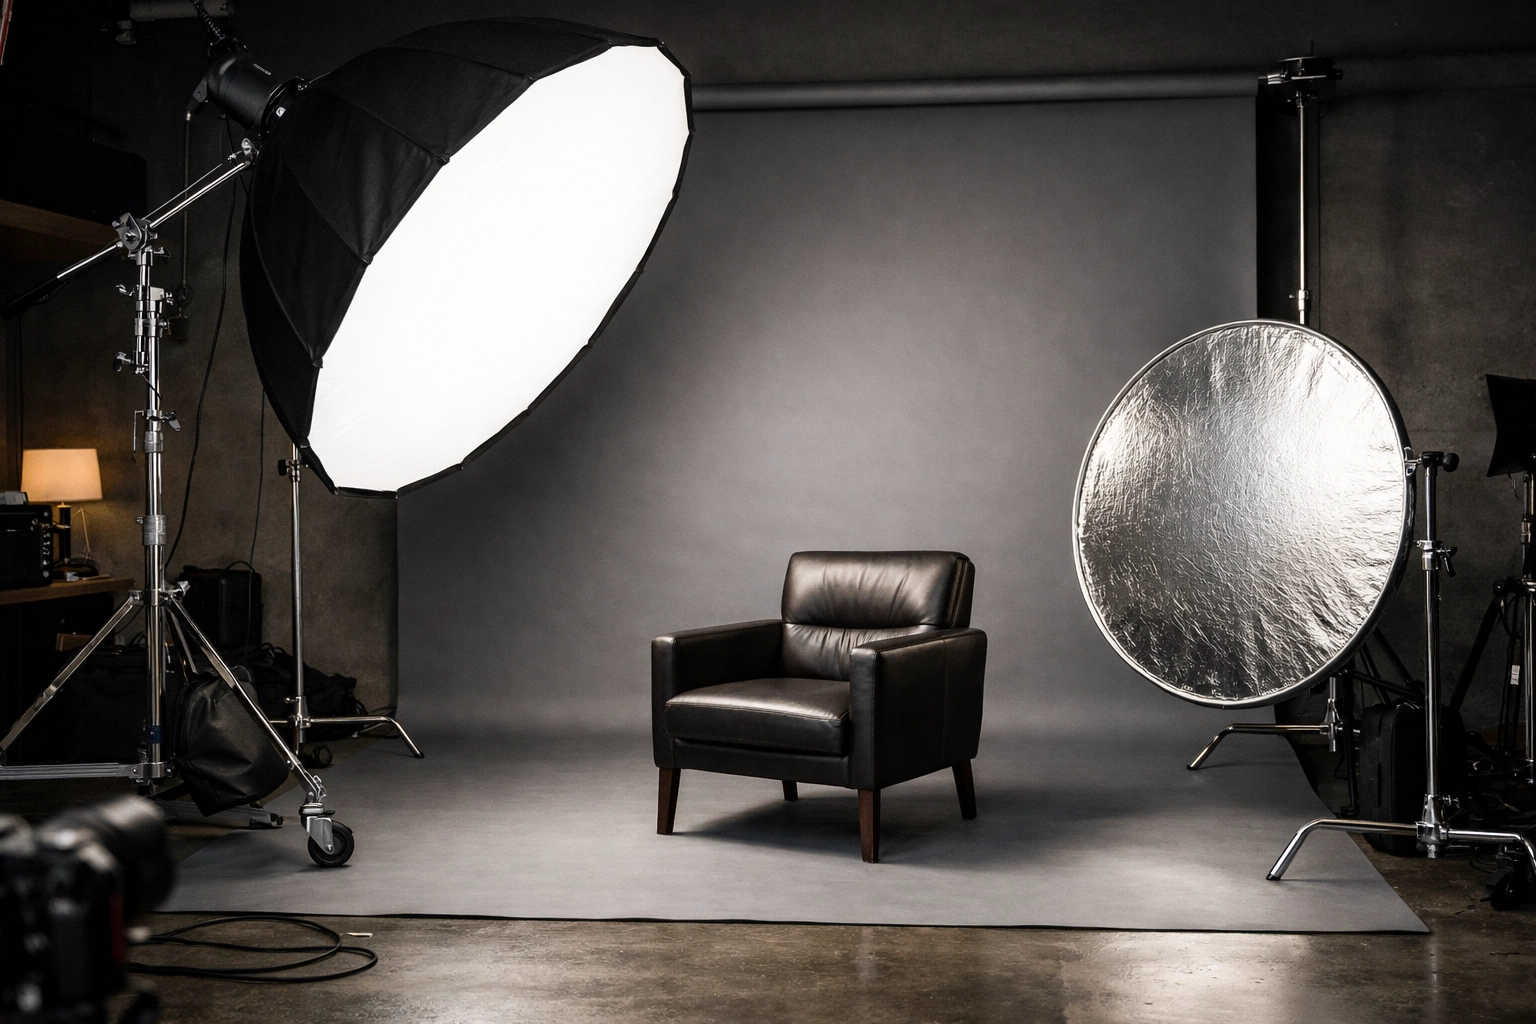
Alt text: A professional one-light setup for an executive portrait using a large octabox and a silver reflector to create soft, authoritative shadows.
The "Executive Rim": The Two-Light Setup
If you want to take things up a notch, you add a second light. This is where you move from "good" to "editorial."
The biggest problem with a one-light setup is that the subject can sometimes blend into the background, especially if they have dark hair or are wearing a dark suit. The second light, often called a "rim light" or "hair light," solves this.
By placing a small, controlled light behind the subject and to the side (hidden from the camera’s view), you create a thin line of light along their shoulder and hair. This separates them from the background and adds a 3D quality to the image.
When you see a portrait that looks "high-definition," it’s usually because of this separation. For more technical breakdowns on gear, PhotoGuides.org is a fantastic resource for keeping your kit updated.
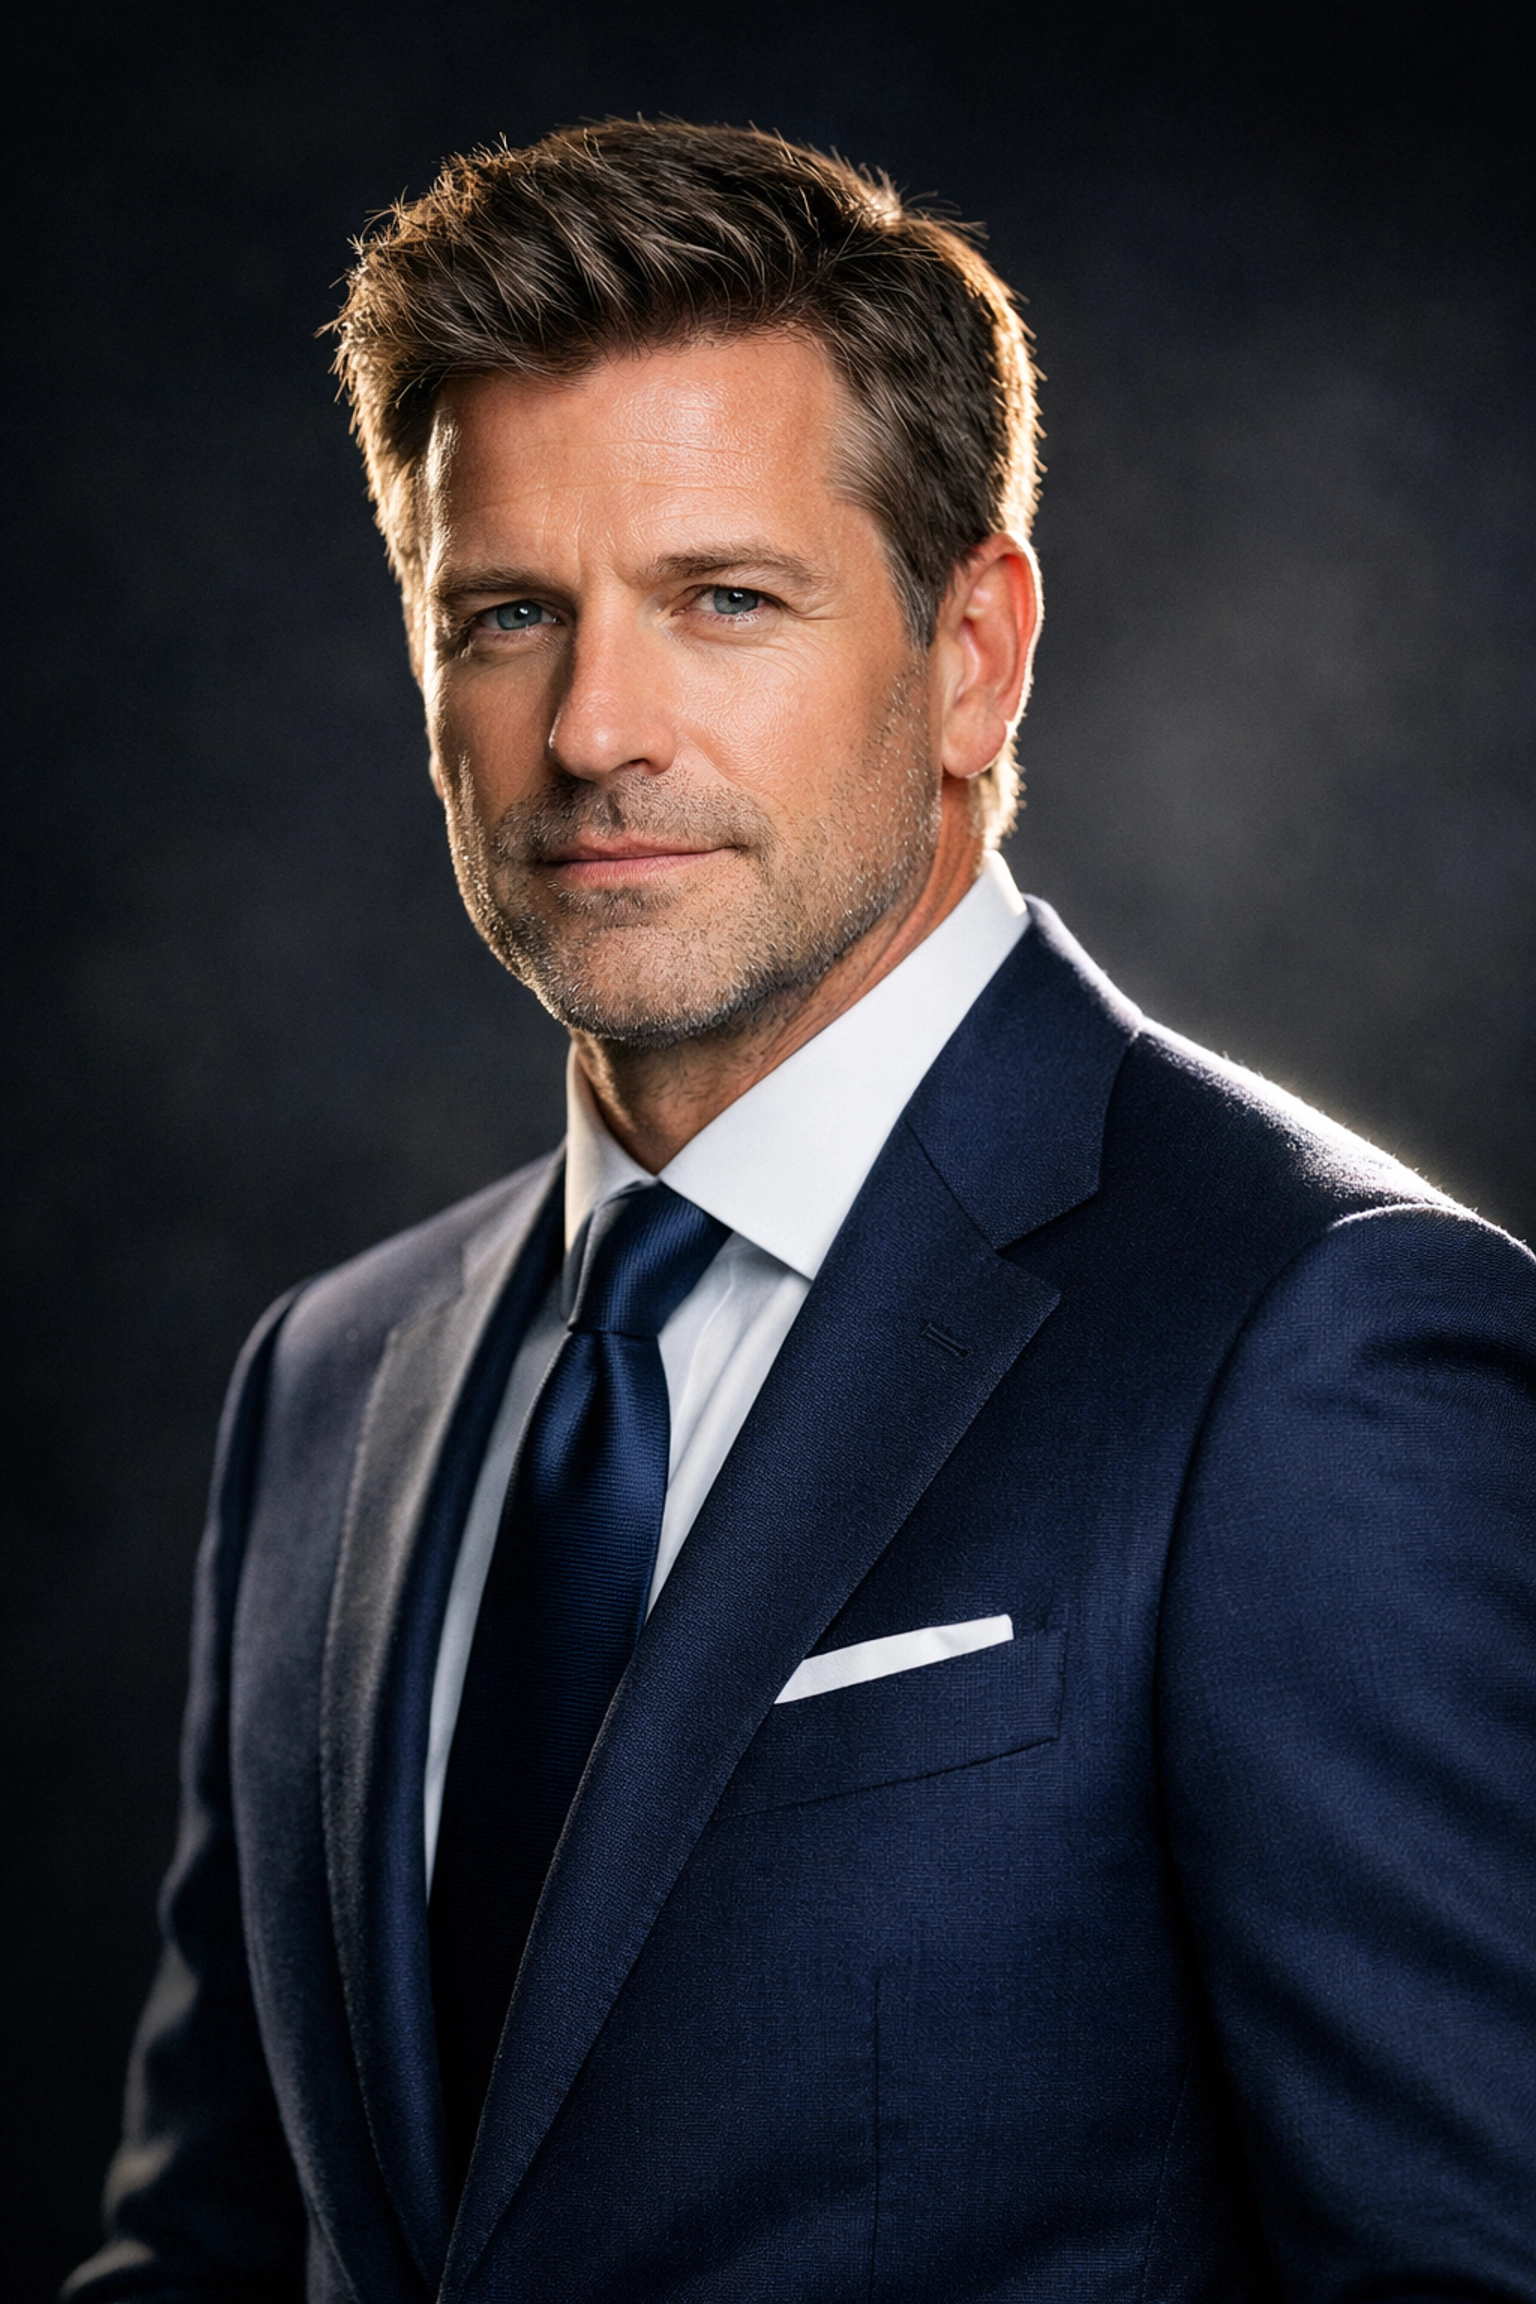
Alt text: Behind the scenes of a two-light executive portrait setup showing the key light and the rim light for background separation.
Clamshell Lighting: The Secret to Looking Younger
Let’s say you’re photographing an executive who is particularly worried about wrinkles or "tired eyes." Clamshell lighting is your secret weapon.
In this setup, you place one light (the key) directly in front of the subject, slightly above eye level. Then, you place a second light (or a large reflector) directly below their face, pointing up. When viewed from the side, the lights look like an open clamshell: hence the name.
This fills in the shadows under the eyes and chin, effectively "filling in" the lines on the face with light. It’s incredibly flattering and creates a very clean, modern look. It’s a staple for high-end corporate work where the goal is a polished, "retouched" look straight out of the camera.
If you really want to perfect the skin after the shoot, using Luminar for AI-driven skin enhancement can save you hours of manual cloning and healing.

Alt text: A model illuminated by clamshell lighting, showing bright, even skin tones and distinct catchlights in the eyes.
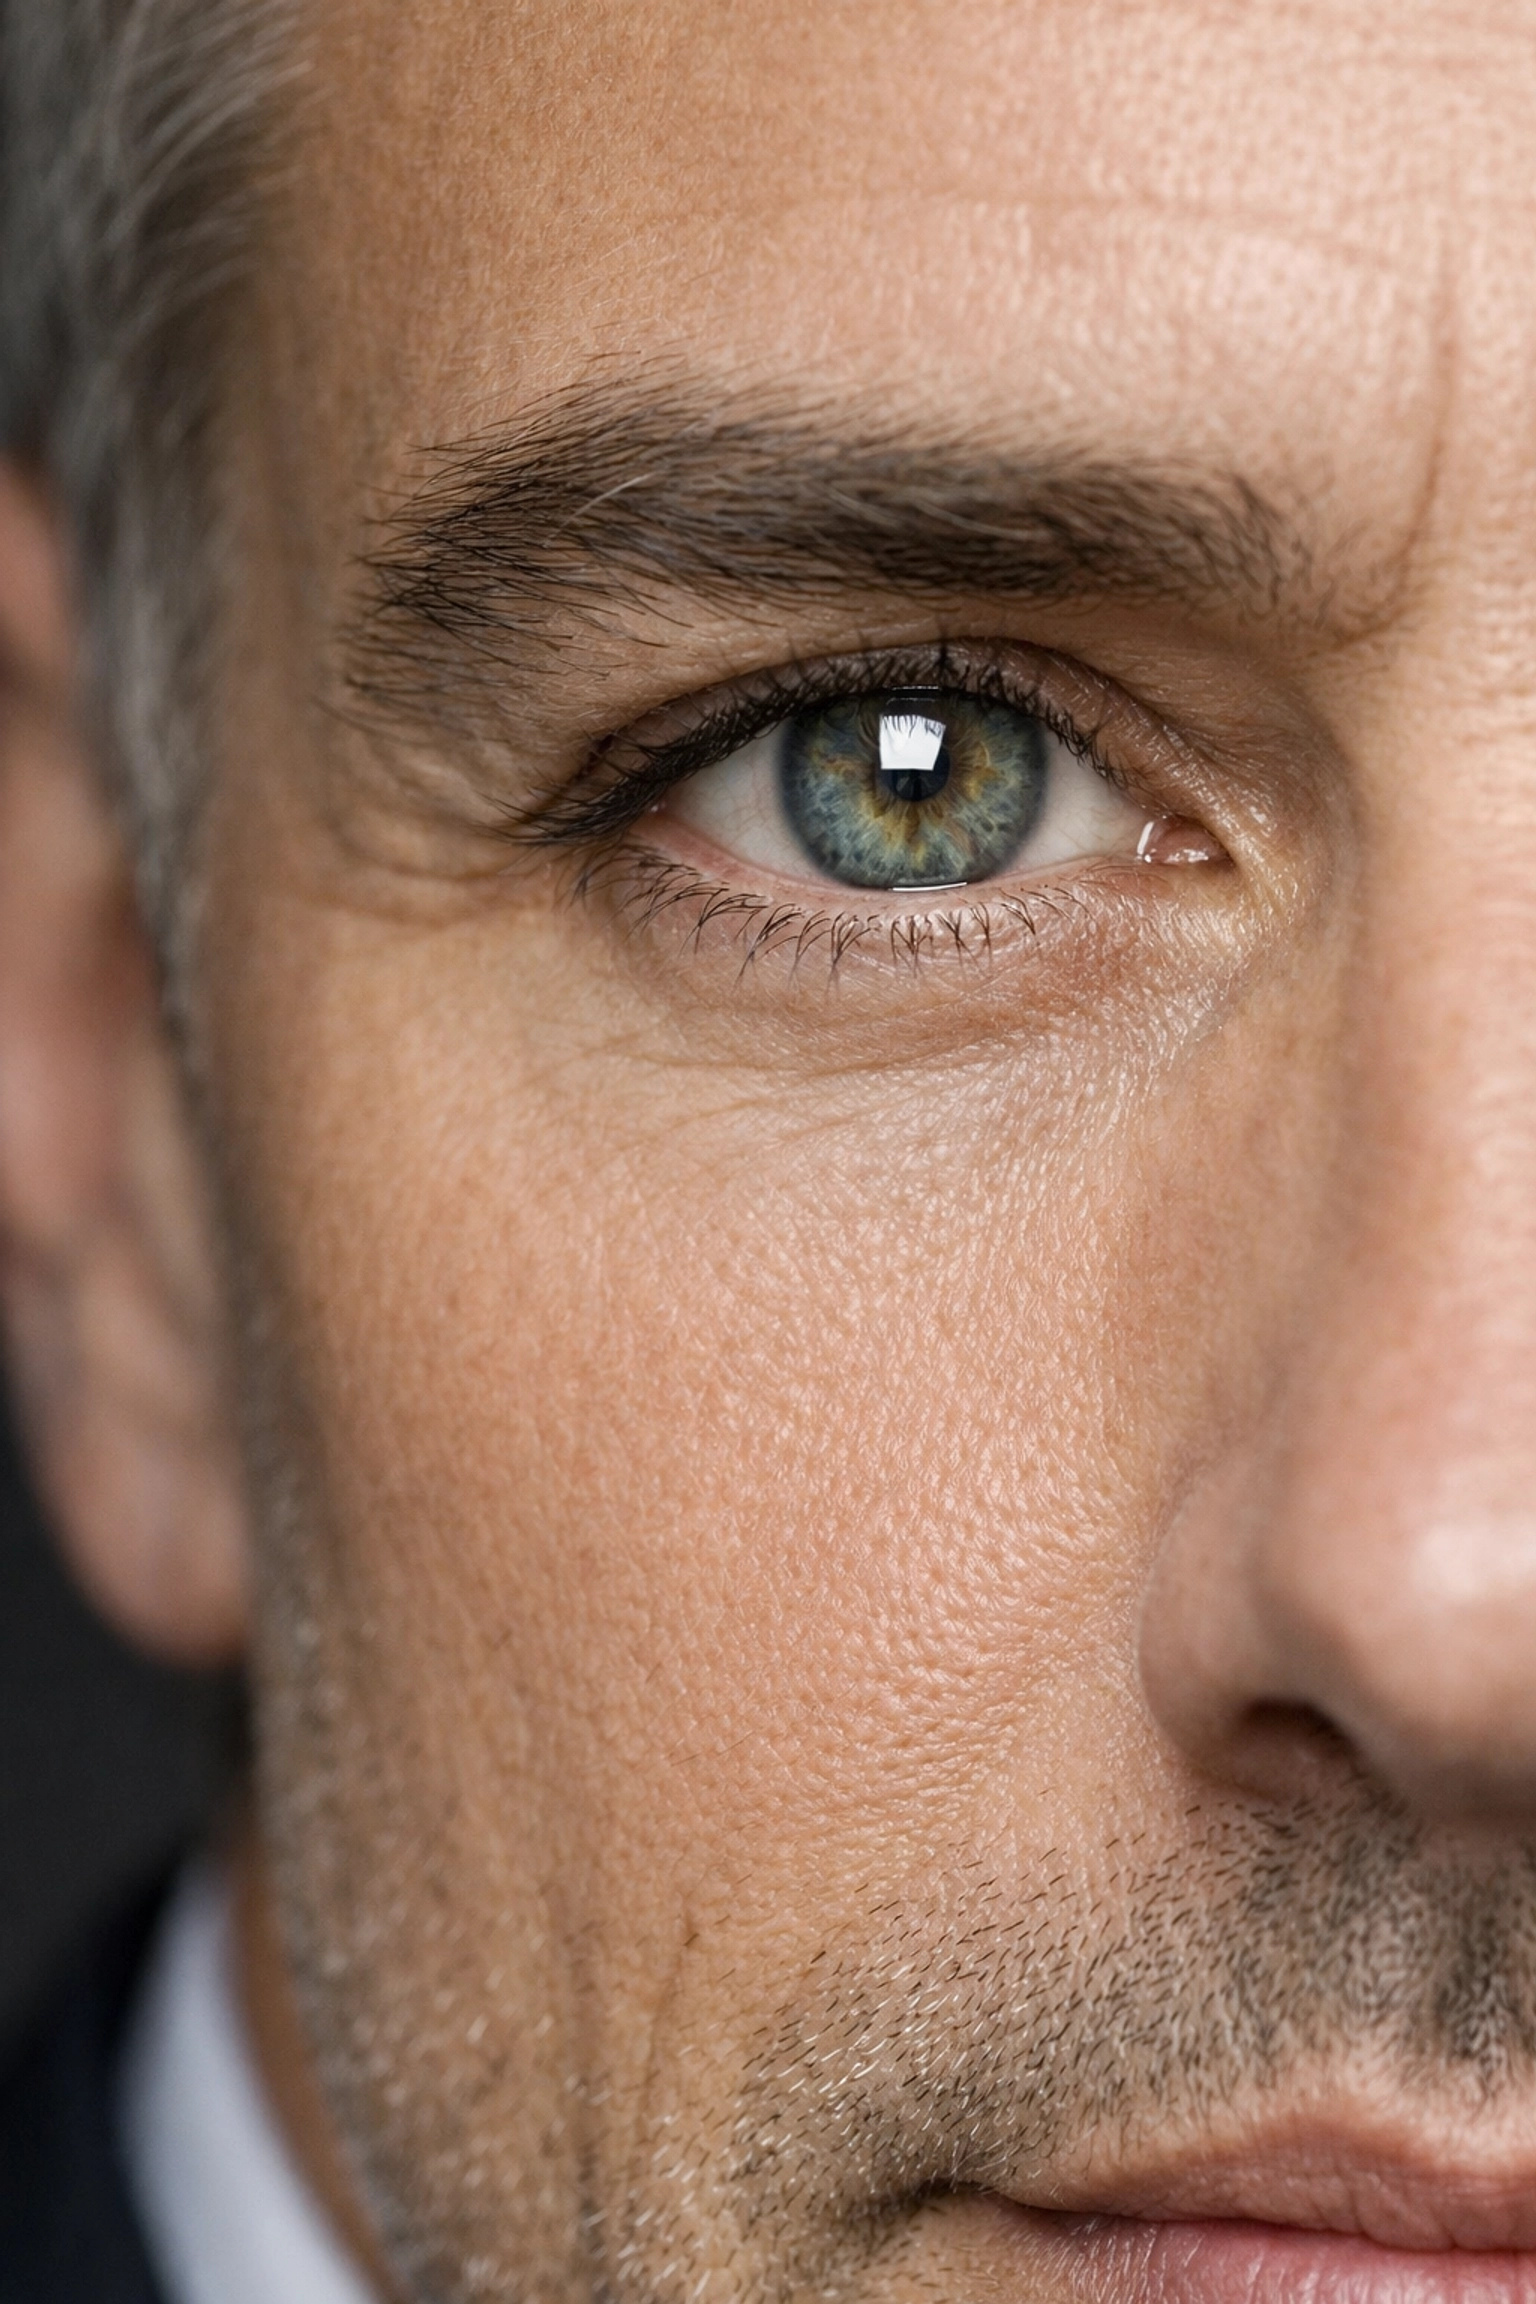
Professional Corporate Headshot Tips: It’s About the Eyes
You can have the most expensive lights in the world, but if the eyes look "dead," the photo is a failure.
In photography, we talk about catchlights. These are the small reflections of the light source in the subject’s pupils. Without them, the eyes look flat and lifeless. To get great catchlights, your light source needs to be large enough and positioned so that the subject is "seeing" it.
If you’re struggling to get that "spark" in the eyes, try lowering your light slightly or moving it closer. The eyes are where the connection happens. If you want to see examples of perfectly lit eyes in a professional context, take a look at the portfolio at Perfect Corporate Headshots.
How to Prepare for a Headshot Session
As the photographer, your job is 50% lighting and 50% coaching. You can’t expect an executive to walk into a room and automatically know how to pose. Part of the best lighting for executive portraits is knowing how the subject’s face interacts with that light.
Advice for the Subject:
- The "Turtle" Technique: Have them push their forehead out and slightly down. This defines the jawline and prevents the "double chin" effect that happens when people pull back in front of a camera.
- Wardrobe Matters: Tell them to avoid busy patterns. Solid, mid-tone colors work best with studio lighting.
- The Angle: Most people look better at a slight angle rather than straight-on. This makes the shoulders look narrower and adds a dynamic feel to the composition.
Understanding how to prepare for a headshot session isn't just about the client's clothes; it's about the mental prep. If they feel comfortable, they look better. Simple as that. You can find more business-side tips at proshoot.io.
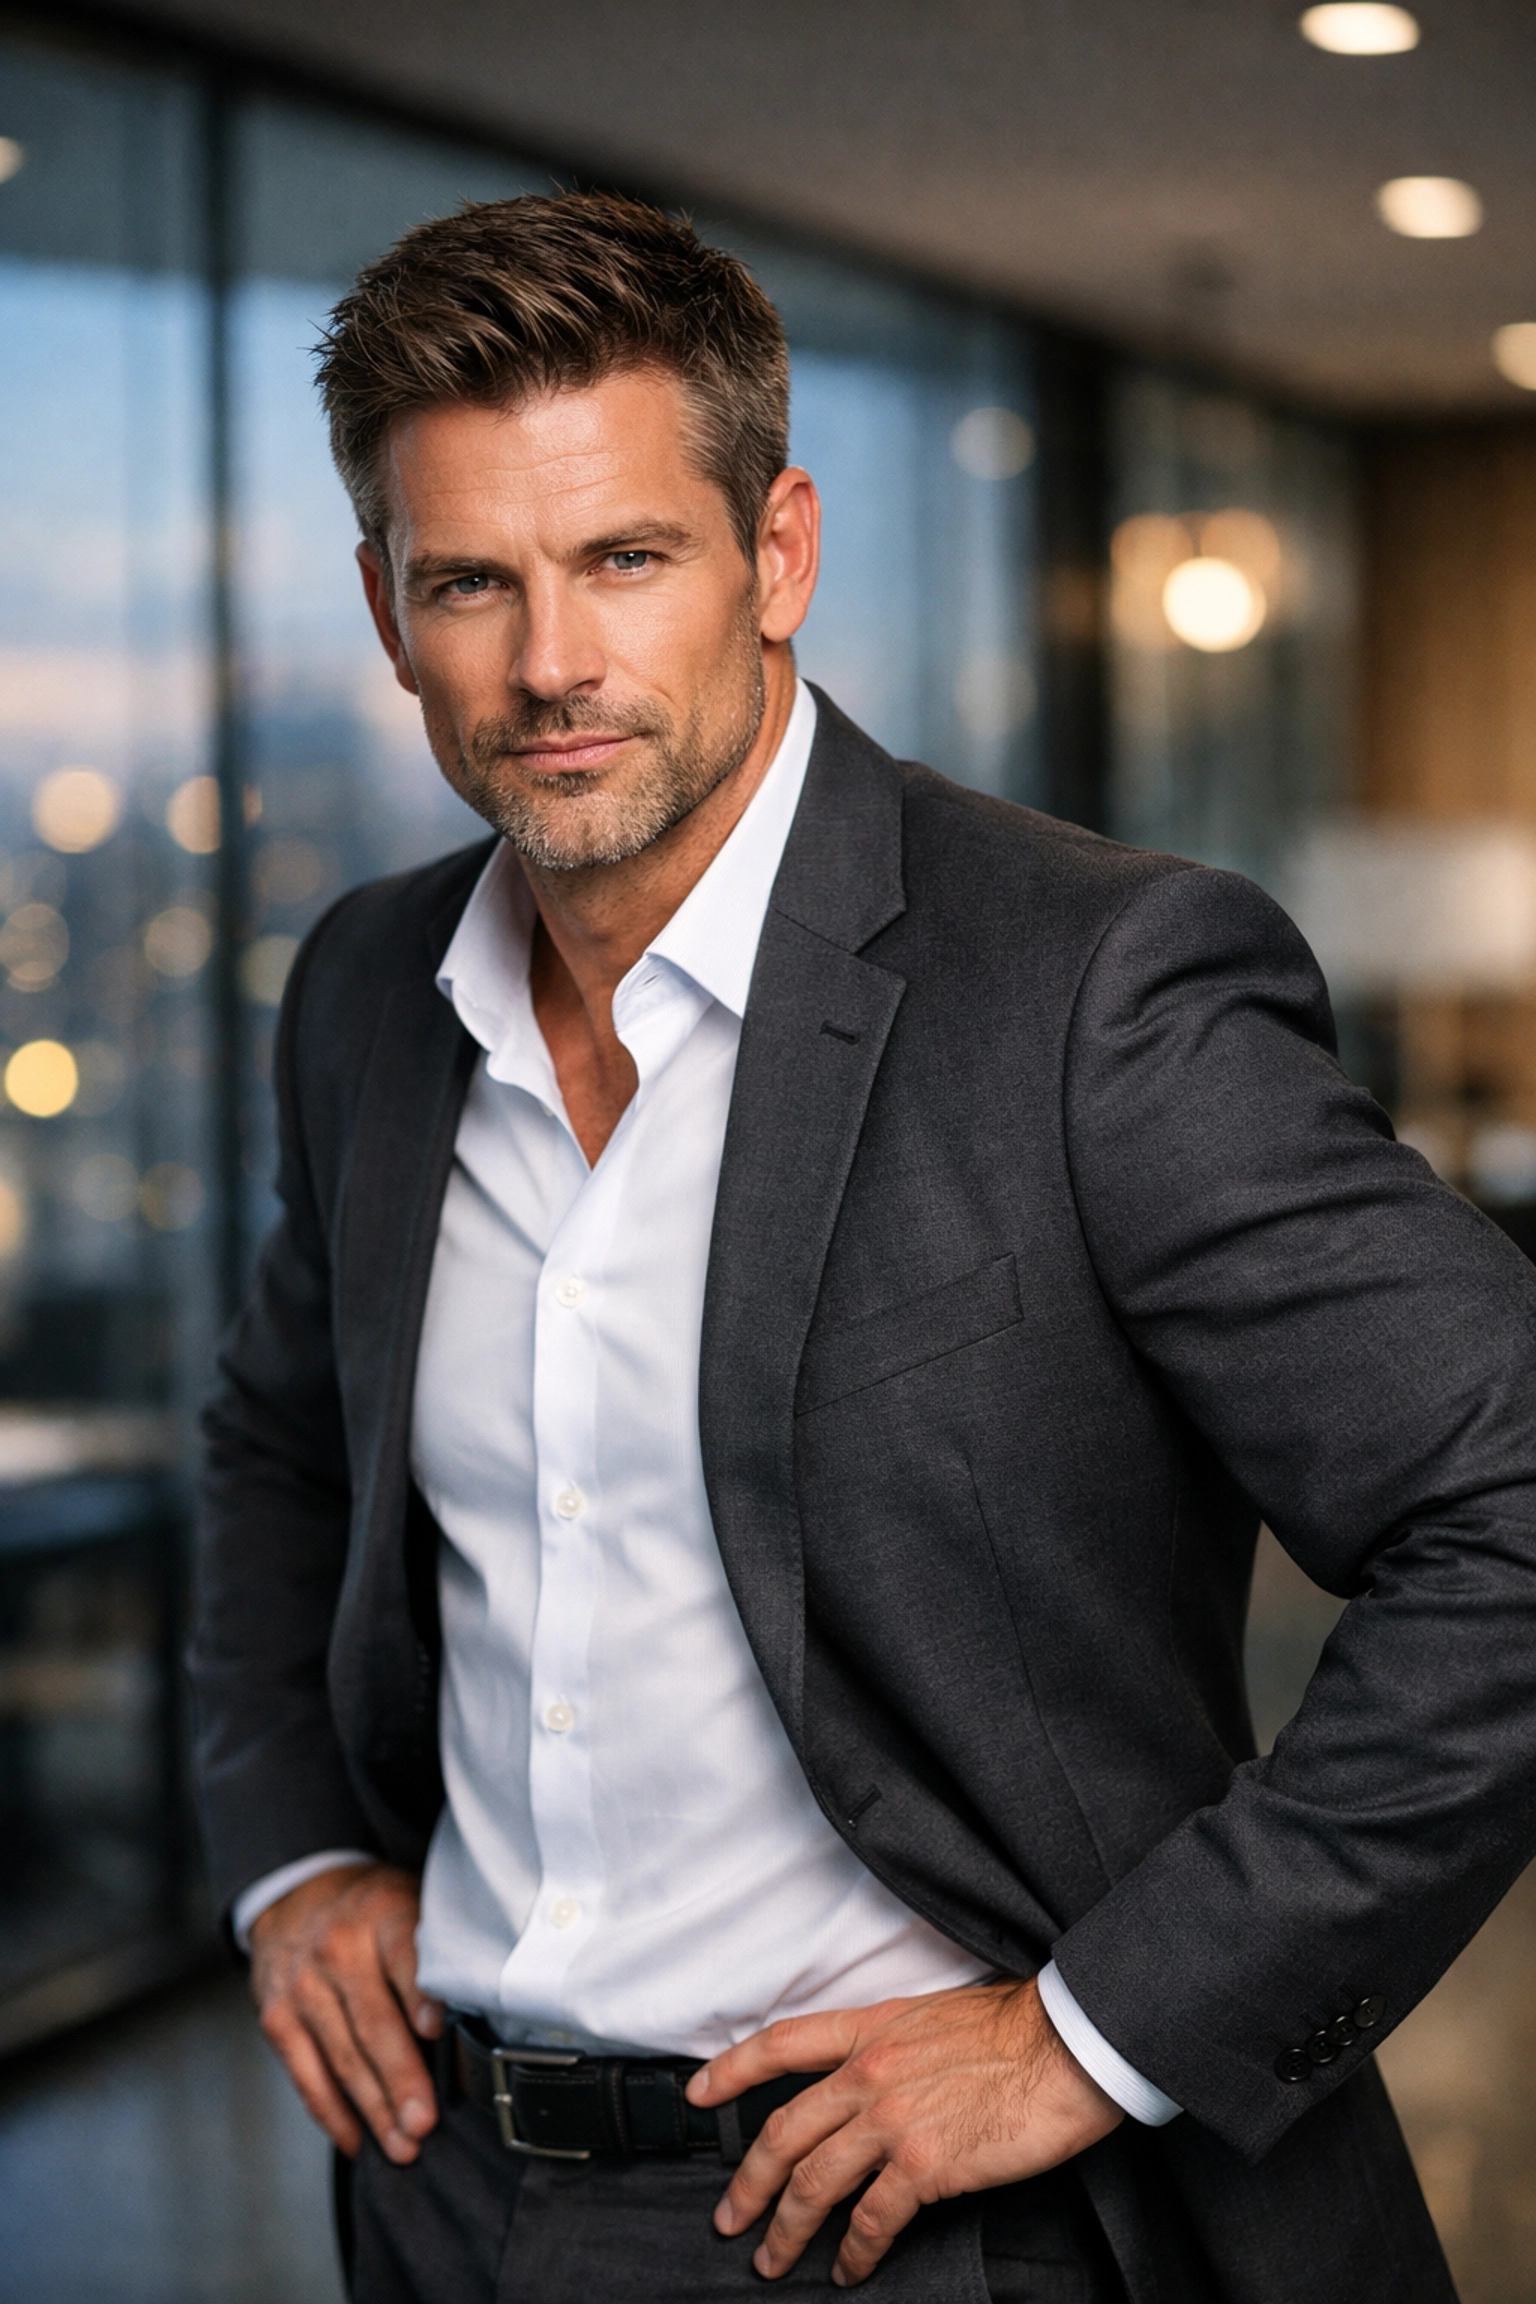
Alt text: An executive posing with the "turtle" technique to define the jawline under professional studio lighting.
The Distance Factor: The Inverse Square Law (Simplified)
Here’s a "secret" that pros use to control the mood of the photo: the distance of the light.
There’s a bit of physics called the Inverse Square Law, but don’t let the name scare you. In simple terms: the closer the light is to the subject, the faster it "falls off" into shadow.
If you want a very dramatic, moody portrait where the background goes black, put the light very close to the subject. If you want the lighting to be even and the background to be visible, move the light further away and turn up the power.
Pros often position the subject approximately the same distance from the light as the width of the light itself. If you’re using a 3-foot octabox, start with it 3 feet away from the face. It’s a magic ratio that rarely fails.
Why Background Light Changes Everything
Most beginners forget the background. They focus so much on the face that the background becomes an afterthought. But if you want that "pro" look, you need to light the background separately.
By placing a small light (often with a "grid" to keep the light from spilling everywhere) directly behind the subject and pointing it at the backdrop, you create a "halo" or a gradient. This adds depth and makes the image look like it was shot in a high-end studio rather than a spare office.
If you’re looking for inspiration on how to style these backgrounds, Edin Chavez’s blog has some great examples of high-end environmental portraits.
Post-Processing: The Final 10%
Even with perfect lighting, a pro never delivers a raw file. Modern executive portraits require a bit of polish. This doesn't mean making someone look like a plastic doll; it means removing temporary distractions.
A stray hair, a blemish, or a slight yellowing of the teeth can distract the viewer from the executive’s expression. This is where tools like Luminar become essential. Their AI tools allow you to enhance the eyes and skin naturally without the "over-edited" look that kills credibility.
For high-end fine art approaches to portraiture, you can also explore the styles over at Edin Fine Art.
Alt text: A split-screen comparison showing a raw executive portrait vs. a subtly retouched version using Luminar.
Lighting for Different Skin Tones
One of the "unspoken" secrets is that you cannot light everyone the same way.
- Fair Skin: Be careful with highlights. It’s easy to "blow out" the forehead or cheeks. Use larger modifiers for softer transitions.
- Deep Skin Tones: You need more "specular" light. Use reflectors with a silver surface rather than white. This creates beautiful highlights that define the structure of the face without making the skin look ashy.
Professional photography is about adaptation. If you treat every face like a math equation, you’ll end up with boring photos. Treat every face like a landscape that needs the right "sun" to look its best.
The Bottom Line
Executive portraiture is a high-stakes game. These images end up on LinkedIn, company websites, and press releases. They are the face of a brand.
By mastering the one-light setup, understanding the power of the rim light, and using tools like Luminar to polish the final result, you’re providing more than just a photo: you’re providing a professional identity.
Remember:
- Keep it soft.
- Create separation.
- Focus on the eyes.
- Coach your subject.
If you're looking to book a session that uses these exact techniques to elevate your personal brand, head over to Perfect Corporate Headshots. We’ve built our reputation on these "secrets," and we’re here to help you shut your aperture and capture something incredible.
For more photography insights and to see our full range of services, visit Shut Your Aperture or check out our studio work at Edin Studios. Lighting isn't just about gear; it's about seeing the world: and your subject( in the best possible way.)


