
So, you finally did it. You went out and bought one of the best mirrorless cameras on the market, or maybe you dusted off an old DSLR that’s been sitting in the closet since 2019. You’re excited. You’re ready to take those crisp, blurry-background photos you see on Instagram. But then you look at the top of the camera and see that little dial.
You’ve been staying on "Auto" (the green "A" or the "iA" mode) because, let's be honest, the "M" stands for "Maybe I’ll break it" or "Mystery," right?
Wrong. "M" stands for Manual, and it is the key to your creative freedom.
Sticking to Auto mode is like buying a Ferrari and never taking it out of first gear. It’ll get you to the grocery store, but you’re missing out on the soul of the machine. In this guide, I’m going to break down how to use manual mode camera settings without making your brain explode. We’re talking simple language, no gatekeeping, and just enough photography for beginners knowledge to get you shooting like a pro by sunset.
Why Even Bother with Manual Mode?
The most common question I get in my photography tutorials is: "If the camera is so smart, why do I need to do the work?"
Here’s the deal: Your camera is a computer, but it’s a computer that doesn't have an artistic eye. It sees the world in middle gray. It wants every photo to be perfectly "safe", not too bright, not too dark. But "safe" is usually boring.
If you want to capture a moody, dark silhouette or a bright, airy landscape photography shot, the camera’s Auto mode will fight you. It will try to make the dark parts brighter and the bright parts darker. By learning manual mode, you take the steering wheel. You decide what's important in the frame.
The Holy Trinity: The Exposure Triangle
Every photo you take is just a result of light hitting a sensor. Manual mode is simply the act of controlling how much light gets in and what it does when it arrives. This is controlled by three things, often called the Exposure Triangle:
- Aperture
- Shutter Speed
- ISO
Think of it like baking a cake. If you turn the heat up (Aperture), you might need to leave it in the oven for less time (Shutter Speed). If your ingredients are low quality, you might need some extra additives (ISO) to make it work, but the cake might come out a bit grainy.
Let’s dive into each one.
1. Aperture: The "Eye" of the Lens
Aperture is the opening in your lens. It’s measured in "f-stops" (like f/1.8, f/5.6, or f/22).
This is the setting that most people are obsessed with because it controls Depth of Field. If you want that creamy, blurred-out background in your portrait photography techniques, you need to understand aperture.
- Low f-number (e.g., f/1.8, f/2.8): The "hole" is wide open. Lots of light comes in. The background gets very blurry. This is great for portraits or low-light situations.
- High f-number (e.g., f/11, f/16): The "hole" is tiny. Less light comes in. Everything from the flower in front of you to the mountain in the back is in focus. This is essential for landscape photography tips.
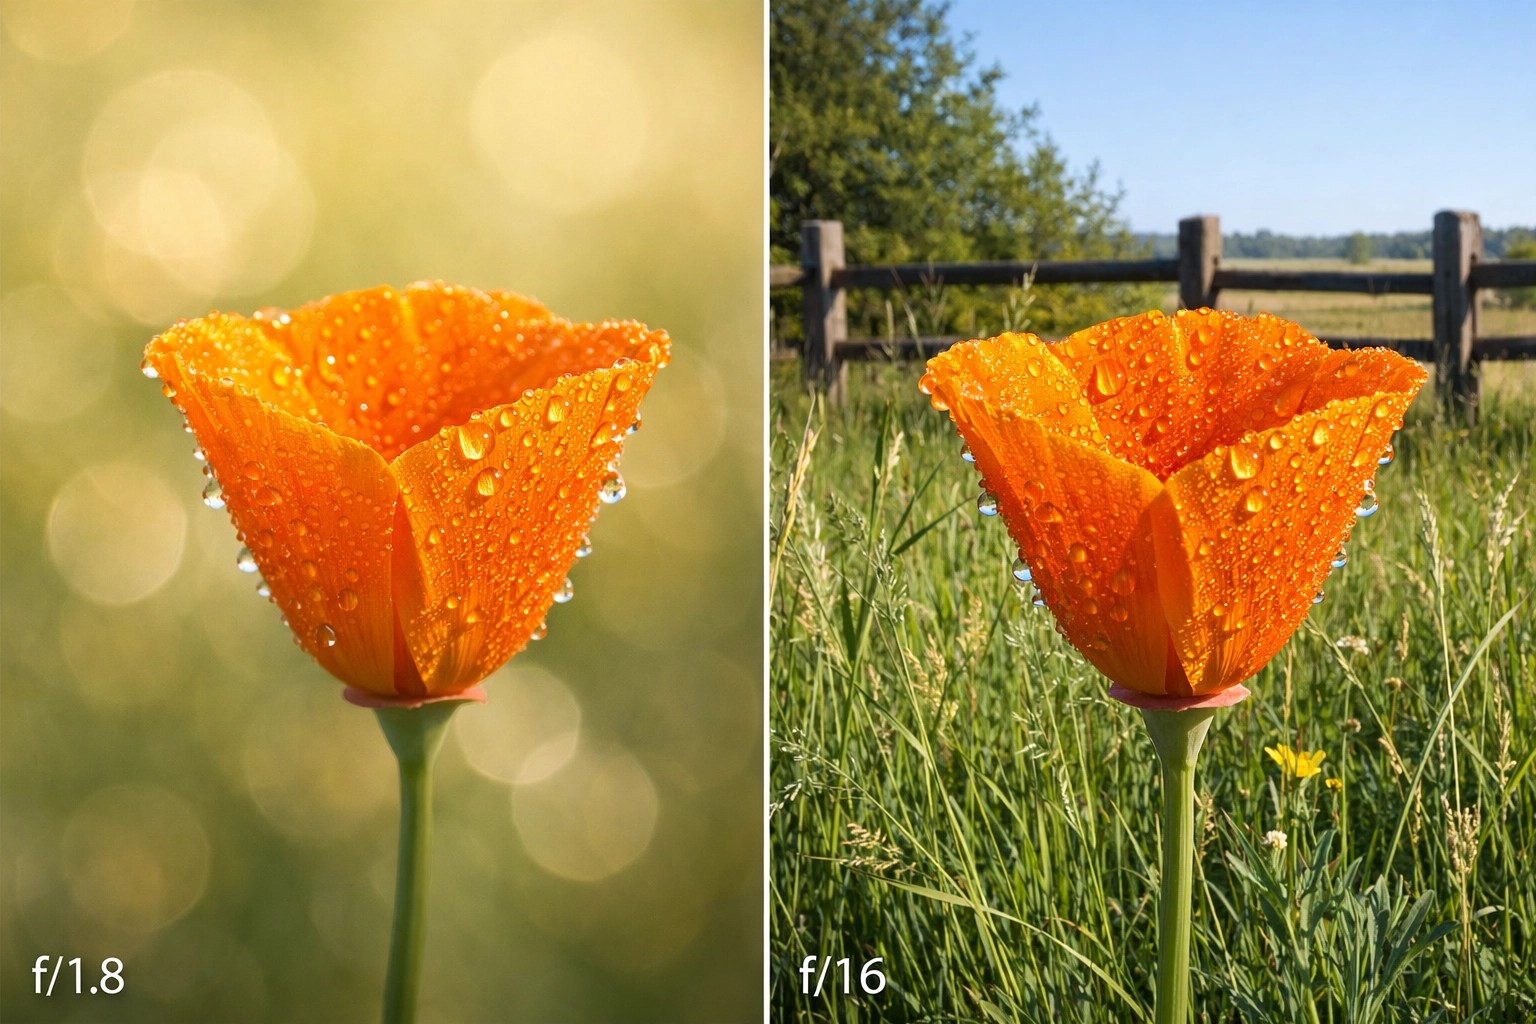
SEO Alt Text: A side-by-side comparison of two photos; one with a wide aperture (f/1.8) showing a sharp flower with a blurred background, and one with a narrow aperture (f/16) showing the entire garden in focus.
When you're starting out, remember: Small number = Big hole = Blurry background.
2. Shutter Speed: The "Time" Keeper
Shutter speed is how long the camera’s "curtain" stays open to let light hit the sensor. It’s measured in fractions of a second (like 1/1000 or 1/30).
- Fast Shutter Speed (e.g., 1/1000 or 1/4000): The shutter blinks incredibly fast. This freezes motion. If you’re looking for street photography ideas and want to capture a person jumping over a puddle without any blur, you need a fast shutter speed.
- Slow Shutter Speed (e.g., 1/10 or 5 seconds): The shutter stays open longer. This allows light to "pool" onto the sensor. Anything moving during this time will look like a blur. This is how you get those silky-smooth waterfalls in nature shots.

SEO Alt Text: A fast shutter speed photo of a splashing water droplet frozen in mid-air versus a slow shutter speed photo showing a motion-blurred city street at night with light trails.
A quick tip for beginners: If you are holding the camera in your hands, try not to go slower than 1/60th of a second. Anything slower and the natural shake of your hands will make the whole image blurry. If you're going slow, use a tripod, especially if you're trying to elevate your real estate with aerial photography or long exposures.
3. ISO: The Light Booster
ISO is your camera’s sensitivity to light. Back in the day, you’d buy "100 speed" film or "800 speed" film. Today, it’s just a button.
- Low ISO (100–400): Use this when you have plenty of light (like outdoors during the day). Your images will be clean, sharp, and "noise-free."
- High ISO (1600–6400+): Use this when it’s dark. It digitally boosts the signal to make the image brighter. The downside? It adds "noise" or "grain."
In the world of photography news, modern sensors are getting insanely good at handling high ISO, but as a rule of thumb, you always want to keep your ISO as low as possible to maintain the highest image quality. If you're shooting for luxury dining or high-end interiors, keeping the ISO low is non-negotiable for that crisp, professional look.
How to Balance the Triangle (The Manual Workflow)
Now that you know what the three pillars are, how do you actually use them together? When you switch to Manual mode, you’ll see a little scale in your viewfinder or on your screen that looks like this:
-2 . . . -1 . . . 0 . . . +1 . . . +2
This is your Exposure Meter. Your goal is usually to get that little tick mark to sit right at the 0.
If it’s in the minus, your photo will be too dark (underexposed). If it’s in the plus, it’ll be too bright (overexposed).
Here is a step-by-step workflow for your first Manual shot:
- Set your ISO first. If it’s sunny, set it to 100. If it’s cloudy or you’re indoors, try 800.
- Decide your Aperture. Do you want a blurry background (f/2.8) or everything in focus (f/8)? Set it and leave it.
- Adjust your Shutter Speed. Look through the viewfinder and start turning the shutter speed dial until that little meter hits the 0.
- Take the shot. Look at the screen. Is it too dark? Slow down the shutter. Too bright? Speed it up.
It really is that simple. You aren't "doing math"; you're just balancing three sliders to get the meter to zero.
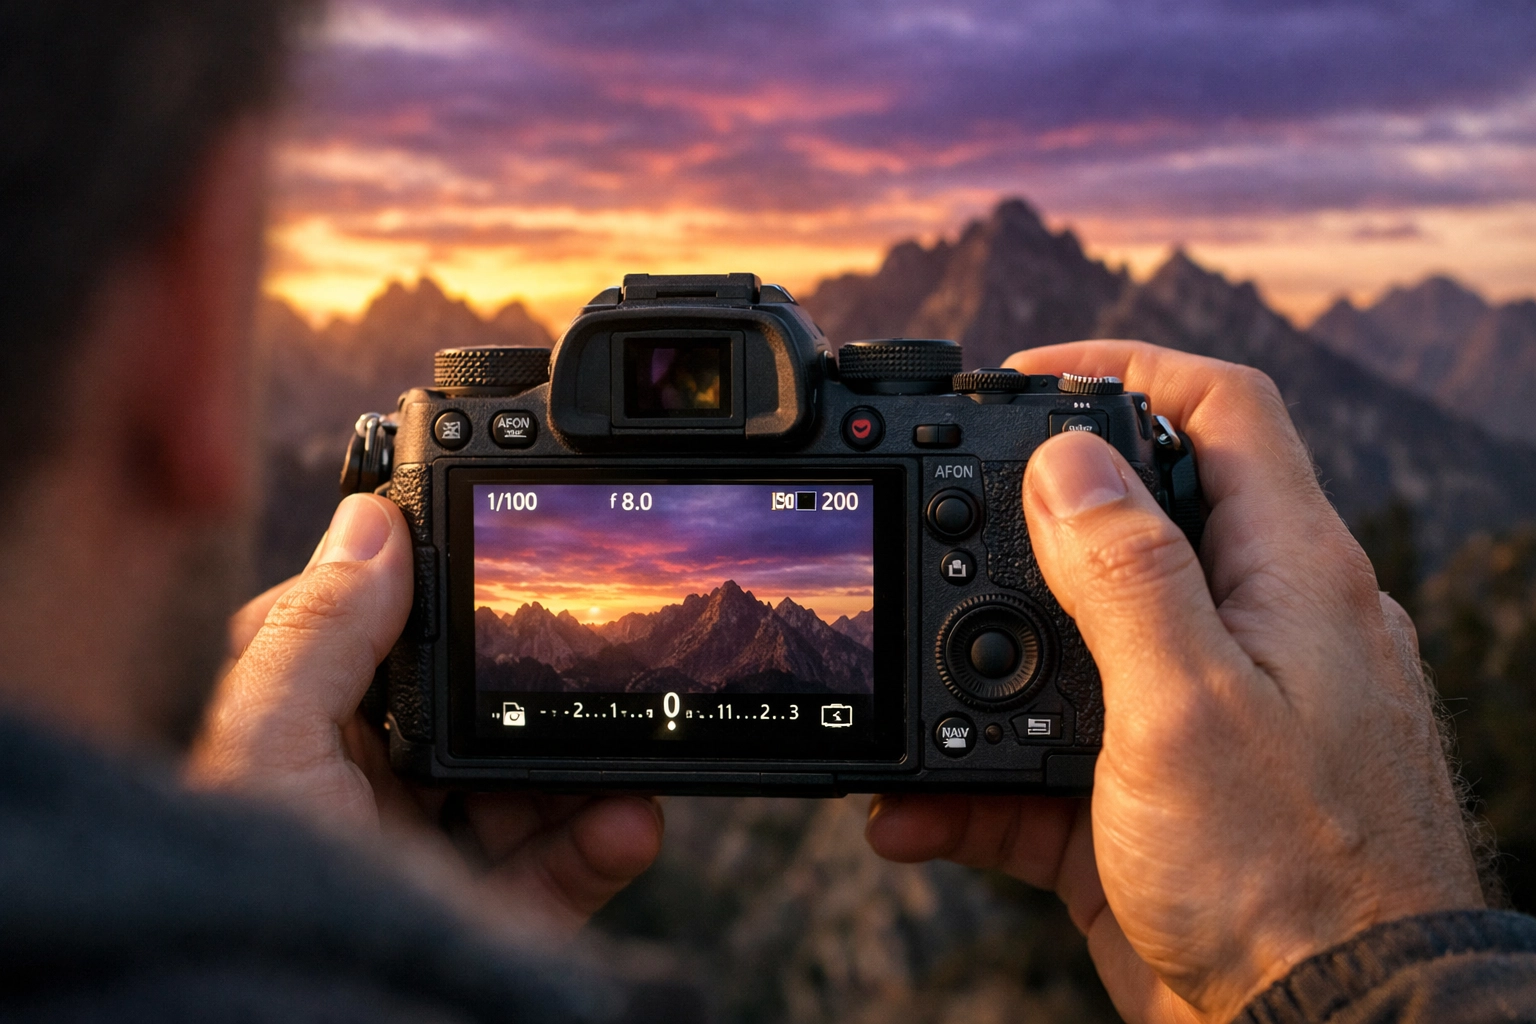
SEO Alt Text: An over-the-shoulder shot of a photographer looking at the back of a mirrorless camera screen, showing the exposure meter at zero while pointing at a sunset landscape.
Applying This to Different Styles
Once you’ve mastered the basics, you can start using manual mode to achieve specific looks. Here’s how you might set your camera for different scenarios:
Street Photography
When you're hunting for street photography ideas, things move fast. You don't have time to fiddle with dials for ten minutes.
- Aperture: f/5.6 or f/8 (so you have a bit of a "safety net" for focus).
- Shutter Speed: 1/250 or faster (to catch people walking).
- ISO: Auto ISO (Yes, you can use "Auto ISO" in Manual mode! It's a great "cheat code" for beginners).
Landscape Photography
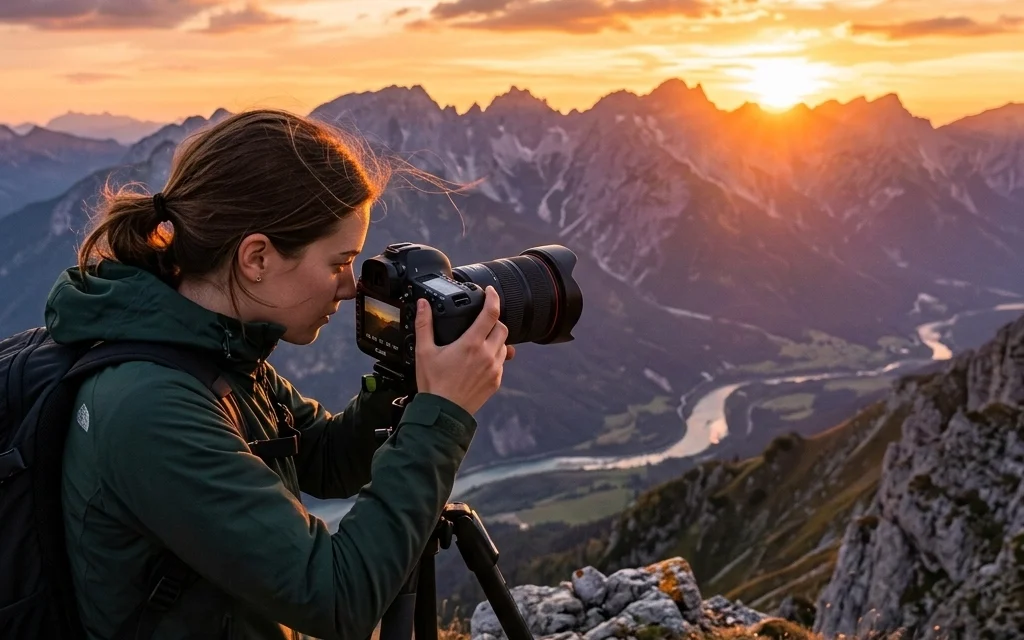
When you're out capturing the vistas and perspectives of the great outdoors, you usually have time.
- ISO: 100 (for maximum quality).
- Aperture: f/11 (to keep the whole mountain range sharp).
- Shutter Speed: Whatever it takes to get to "0" on the meter (often requires a tripod if the sun is low).
Portrait Photography
For those portrait photography techniques that make people look like movie stars:
- Aperture: The lowest your lens will go (f/1.4, f/1.8, or f/2.8).
- ISO: Low as possible.
- Shutter Speed: Fast enough to avoid blur (at least 1/200).
Gear Matters (But Not the Way You Think)
People often ask me for camera gear reviews because they think a better camera will make manual mode easier.
While it’s true that the best mirrorless cameras have better dials and electronic viewfinders that show you the exposure in real-time, you can learn manual mode on a 15-year-old DSLR. The physics of light haven't changed.
However, if you are looking to upgrade, look for a camera with "dual command dials." This means you have one wheel for your index finger (usually Shutter Speed) and one for your thumb (usually Aperture). Having separate wheels makes the manual workflow much more intuitive.
The Secret Sauce: Post-Processing
Here is a secret that many pros won't tell you: A "perfect" manual exposure is often just the starting point.
Even if you nail the exposure in-camera, you’ll want to fine-tune the colors, shadows, and highlights later. This is where photo editing tutorials come in handy. I personally recommend using Luminar for beginners. It uses AI to help you enhance the light you captured in manual mode without needing a degree in computer science.
Editing is where you take a "good" manual shot and turn it into a "wow" shot. Whether you’re working on corporate event photography or fine art, the edit is half the battle.
Common Manual Mode Mistakes to Avoid
- Forgetting to check your ISO: You might be shooting at ISO 3200 from the night before and then walk out into bright sunlight. Your photos will be "blown out" (pure white) and you'll wonder why. Always reset your settings before you start a new session.
- Chasing the "0" too strictly: Sometimes, the camera’s meter is wrong. If you’re shooting a black cat in a coal mine, the camera will try to make it gray. If you’re shooting a snowman, the camera will try to make it gray. Use your eyes. If the photo looks good at -1 or +1, leave it there!
- Ignoring the Histogram: Most cameras have a little graph you can turn on called a histogram. If the graph is touching the far right, you’re losing detail in the highlights. If it’s touching the far left, your shadows are "crushed." Aim for a mountain in the middle.
Practice Makes Progress
You aren't going to master this in an hour. It’s a muscle.
The best way to learn is to commit. Go out this weekend and tell yourself: "I am not touching the Auto button today." You will mess up. You will take some photos that are way too dark and some that are way too bright. But by the 50th shot, you’ll start to "feel" the light. You’ll know that when the sun goes behind a cloud, you need to either slow down your shutter or open up your aperture.
If you’re looking for more inspiration, check out some of the iconic works through the years to see how masters of the craft use light to tell a story.
Manual mode isn't about being "pro." it's about being intentional. It’s about taking a photo because you saw something beautiful, not because a computer chip thought the light was okay.
For more in-depth guides, head over to PhotoGuides.org or browse my fine art collection to see what’s possible when you finally take control of that dial.
Now, grab your camera, get off the couch, and go shoot something in Manual!


