
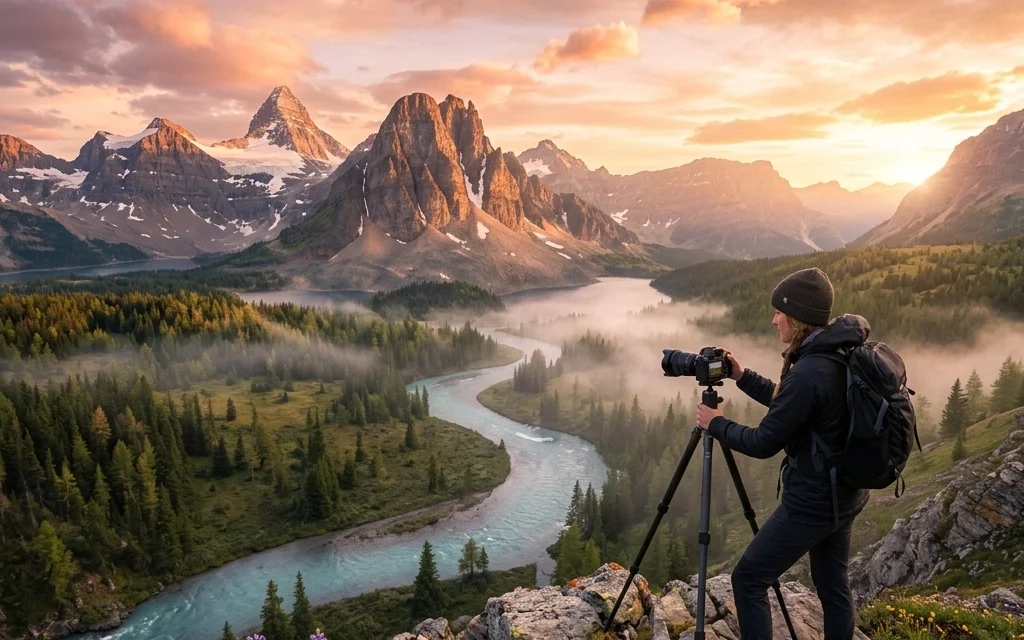
Landscape photography is more than just a hobby. It’s a pursuit of that perfect moment where light, land, and atmosphere collide. We’ve all seen those jaw-dropping shots on Instagram or in National Geographic and thought, "I want to do that." But then you get out into the field, and your photos look flat, dull, or just plain messy.
The truth is, capturing a stunning landscape isn't about luck. It’s about a combination of technical skill, creative composition, and a lot of preparation. At Shut Your Aperture, we believe anyone can master this craft if they have the right roadmap.
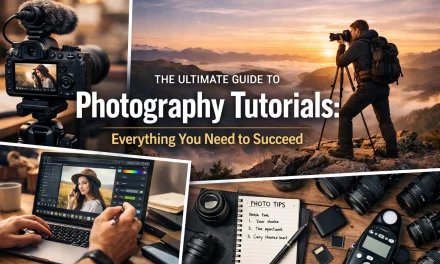
In this guide, we’re going to break down everything you need to know to level up your landscape game. From the gear you actually need to the "secret" settings the pros use, let’s dive in.
1. The Gear: It’s Not Just About the Camera
Before you start worrying about whether you have the latest 50-megapixel beast, let’s talk about the gear that actually matters for landscapes. You can take a world-class photo with an entry-level DSLR or mirrorless camera, provided you have the right accessories.
The Almighty Tripod
If there is one piece of gear you cannot compromise on, it’s a sturdy tripod. Why? Because landscape photography often happens when the light is low: think sunrise, sunset, or the blue hour. To get those sharp, detailed images at low ISO settings, you’ll need longer shutter speeds. Holding your camera by hand at a half-second exposure is a recipe for a blurry mess.
Filters: Your Secret Weapon
While you can do a lot in post-processing using tools like Luminar, some things are better handled in-camera.
- Circular Polarizers: These help cut down on reflections and make the blues in the sky pop.
- Neutral Density (ND) Filters: These act like sunglasses for your lens, allowing you to use very slow shutter speeds even in daylight to get that silky water effect.
Lens Selection
While a wide-angle lens is the classic choice for "sweeping" vistas, don't sleep on your telephoto lens. A longer focal length allows you to "compress" the scene, making distant mountains look massive and picking out details that a wide lens would lose. For more on choosing the right glass, check out some of the gear reviews at www.proshoot.io.

2. Master Your Camera Settings
If you’re still shooting in "Auto" mode, it’s time to stop. Landscape photography requires control. Here is the standard "recipe" for a sharp landscape shot:
Aperture: The Sweet Spot
To get everything from the blade of grass in front of you to the mountain peak miles away in focus, you need a deep depth of field. This means using a small aperture (a high f-number). Usually, f/8 to f/11 is the sweet spot for most lenses. Avoid going all the way to f/22, as "diffraction" can actually start making your image less sharp.
ISO: Keep it Clean
Keep your ISO as low as possible: ideally ISO 100. This ensures your images have the least amount of digital noise and the highest dynamic range. Since you’re using a tripod, you don’t need to worry about bumping the ISO to get a faster shutter speed.
Shutter Speed: The Creative Variable
Your shutter speed will depend on what you’re trying to achieve. Want to freeze a crashing wave? Use a fast speed (1/500s or faster). Want that ethereal, misty water look? Go for a long exposure (2 seconds or more).
If you're looking for top spots for stunning nature imagery to test these settings, planning is half the battle.
3. Composition: How to Tell a Story
Composition is what separates a snapshot from a photograph. It’s the arrangement of elements within your frame that guides the viewer's eye.
The Rule of Thirds
Imagine your frame is divided into a 3×3 grid. Instead of putting your horizon or your main subject dead center, try placing them along those grid lines or at the intersections. It creates a more balanced and natural feel.
Foreground Interest
This is perhaps the biggest "pro tip" for landscapes. A great landscape photo has a clear foreground, middle ground, and background. By placing an interesting rock, a flower, or a patch of ice in the immediate foreground, you create a sense of depth that pulls the viewer into the scene. Without foreground interest, your photo can feel two-dimensional.
Leading Lines
Use natural elements like paths, rivers, or even the shadows of trees to lead the viewer’s eye toward your main subject. This creates a visual journey through the image. If you’re hunting for unique environments to practice this, take a look at these lesser-known vistas for enigmatic photos.

4. The Importance of Light (and Patience)
You can have the best gear and the perfect composition, but if the light is bad, the photo will be mediocre.
The Golden Hour
The hour after sunrise and the hour before sunset are legendary for a reason. The sun is low, the shadows are long and soft, and the light has a warm, golden quality. This is when the magic happens.
The Blue Hour
Don’t pack up as soon as the sun dips below the horizon! The "blue hour" (the 20-30 minutes after sunset) provides a cool, moody light that is perfect for cityscapes or tranquil lake shots.
Weather is Your Friend
Don't be afraid of "bad" weather. Clear blue skies are actually quite boring for landscape photography. Storm clouds, mist, and even rain can add drama and mood to your shots. For inspiration on capturing mood, check out Edin’s Fine Art collection.
5. Planning and Research
The best landscape photographers don't just show up and hope for the best. They plan.
- Apps: Use apps like PhotoPills or The Photographer’s Ephemeris to see exactly where the sun and moon will rise and set.
- Scouting: Use Google Earth to look at the topography of a location before you go.
- Internal Link: If you're looking for inspiration on where to go next, check out our guide on finding hidden gems for stunning travel photography.

6. Post-Processing: Bringing the Vision to Life
Raw files out of the camera often look a bit flat. Post-processing is where you add the finishing touches to match the scene you saw with your eyes.
We highly recommend using Luminar for landscape editing. Its AI-powered tools like "Accent AI" and "Sky Replacement" (for those pesky birdless or cloudless days) are game changers. The goal isn't to fake the photo, but to enhance the textures and colors that were already there.
When editing, focus on:
- White Balance: Does the scene feel too cold or too warm?
- Contrast and Shadows: Bringing out the details in the dark areas without blowing out the highlights.
- Sharpness: Adding just enough to make the details pop without creating "halos."
For more advanced editing tutorials and photography insights, PhotoGuides.org is a fantastic resource to bookmark.
7. The "Human" Element
Sometimes, adding a person to a landscape can give the viewer a sense of scale. A massive waterfall looks impressive, but put a person standing at the base, and suddenly the viewer realizes just how gargantuan it really is.
If you’re interested in more "out of the box" techniques, you might enjoy our article on using rare textures for tangible aesthetic photography. It's all about pushing the boundaries of what a traditional landscape looks like.
8. Common Mistakes to Avoid
Even pros slip up. Here are a few things to keep an eye on:
- Crooked Horizons: Nothing ruins a photo faster than a tilted ocean. Use the leveling tool in your camera or fix it in post.
- Over-Processing: It’s easy to go overboard with the saturation slider. If it looks like a neon fever dream, dial it back.
- Ignoring the Back: Sometimes the best shot isn't the sunset in front of you, but the way the light is hitting the hills behind you. Always turn around!
For more professional advice and a peek into the business of photography, visit blog.edinchavez.com.

Putting it All Together
Landscape photography is a journey. It’s about getting up at 4:00 AM, hiking in the dark, and sometimes coming home with nothing because the clouds didn't play along. But when it all clicks: the light, the composition, the settings: there is no feeling like it.
Remember, the best camera is the one you have with you, and the best tip is to just keep shooting. Explore hidden gem locations for travel photography and find your own "ethereal landscapes" to capture.
If you want to see more of our work or learn about our studio sessions, head over to www.edinstudios.com.
Now, grab your gear, check the weather, and go shut your aperture! Happy shooting.


