So, you’ve got a camera, and you’ve probably taken some decent shots of your dog or a sunset. But now you’re looking at the pros and thinking, "How do I get there?"
Welcome to Shut Your Aperture. We aren’t just another blog; we’re the number one photography school online, designed to take you from "fumbling with buttons" to "charging for your talent." Whether you’re holding a $5,000 mirrorless beast or a humble GoPro, the principles of great photography don't change.
In this comprehensive guide, we’re going to dive deep into the world of professional photography. We’ll cover everything from the technical specs of your gear to the business moves that actually get you paid. If you’ve been looking for the ultimate photography tutorials, you’ve found them.
The Gear: It’s Not About the Price Tag
Before we talk about how to use manual mode camera settings, let’s talk about the box in your hand. Everyone thinks they need the latest Sony or Canon to be a "real" photographer. Truth is, your vision matters more than your sensor.
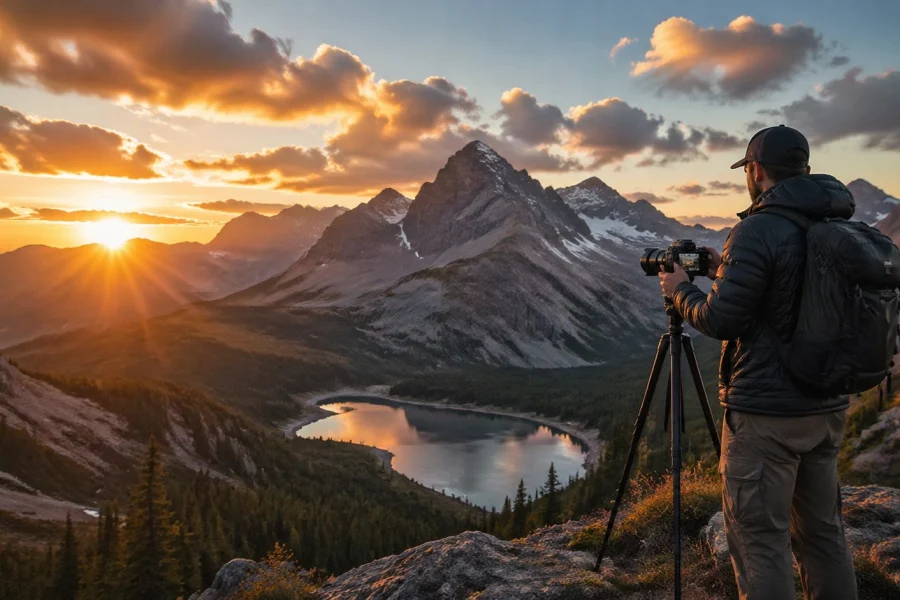
However, if you want to go pro, you need gear that doesn’t fight you. A solid DSLR or mirrorless camera with a full-frame sensor is the industry standard for a reason, better low-light performance and dynamic range. But don't sleep on your accessories. A sharp prime lens (like a 35mm or 50mm) will do more for your image quality than a dozen cheap zooms.
If you’re just starting, check out our photography news to see what gear is currently dominating the market.

SEO Alt Text: A professional photographer setting up a mirrorless camera on a tripod during a golden hour landscape session.
Mastering the Basics: How to Use Manual Mode Camera Settings
This is the hurdle where most hobbyists stop. They stay in "Auto" mode because it’s safe. But "Auto" is basically you letting a computer guess what you want. If you want to go pro, you have to take control.
The "Exposure Triangle" is your new best friend. It consists of Aperture, Shutter Speed, and ISO. Here is the breakdown:
1. Aperture (The F-Stop)
Think of this as the pupil of your eye. It controls how much light enters the lens.
- Low F-stop (f/1.8, f/2.8): Wide opening. Lots of light. This gives you that "bokeh" effect where the background is blurry and your subject pops.
- High F-stop (f/11, f/16): Narrow opening. Less light. This keeps everything from the foreground to the background in sharp focus, perfect for landscapes.
2. Shutter Speed
This is how long the "curtain" stays open.
- Fast (1/1000s or faster): Freezes motion. Perfect for sports or birds in flight.
- Slow (1/30s or slower): Blurs motion. Use this for those silky waterfall shots (but you’ll need a tripod).
3. ISO
This is your camera sensor's sensitivity to light.
- Low ISO (100-400): Clean, crisp images. Use this when there is plenty of light.
- High ISO (1600+): Allows you to shoot in the dark, but it adds "noise" or grain to your photos.
When you learn how to use manual mode camera settings, you’re finally speaking the camera's language. It takes practice, but once it clicks, you'll never go back to Auto. For more hands-on practice, you can find deeper dives over at PhotoGuides.org.
Light: The Soul of Your Image
You can have the best camera in the world, but if your light sucks, your photo sucks. Professional photography is, quite literally, the study of light.
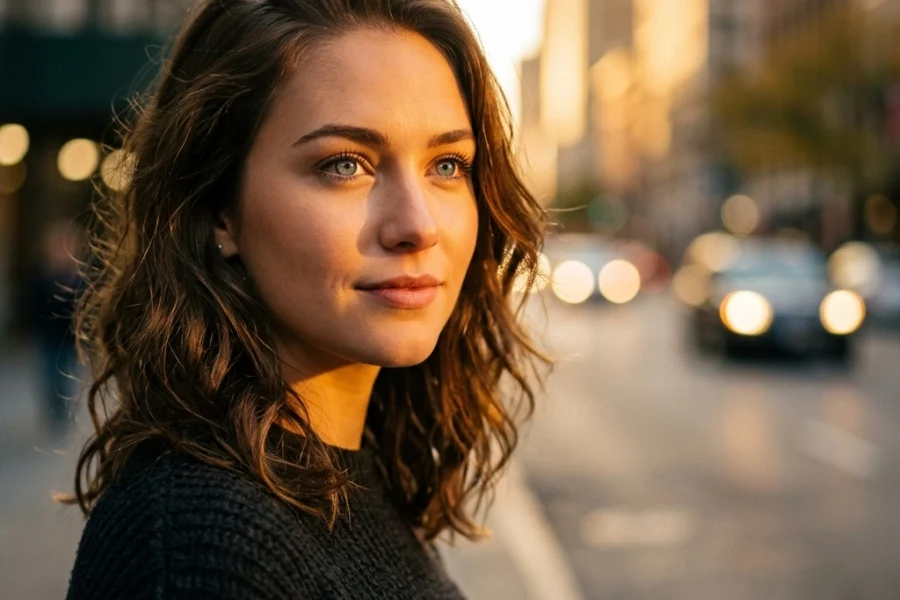
Natural Light: The "Golden Hour" (the hour after sunrise and the hour before sunset) is famous for a reason. The light is soft, warm, and flattering. Avoid shooting at high noon unless you love harsh shadows under people’s eyes.
Artificial Light: Pros don't just wait for the sun. They create their own. Learning how to use off-camera flash or continuous LED panels is what separates the weekend warriors from the people getting hired for commercial gigs.
If you’re looking for inspiration on how to capture light in its purest form, take a look at the gallery at www.edinfineart.com.

SEO Alt Text: Soft golden sunlight hitting a portrait subject, illustrating the importance of natural light in professional photography.
Composition: How to Tell a Story
Composition is how you arrange the elements in your frame. It’s what guides the viewer's eye.
- Rule of Thirds: Imagine a grid on your screen. Place your subject on the lines or intersections rather than dead center. It creates more tension and interest.
- Leading Lines: Use roads, fences, or even shadows to point directly toward your subject.
- Framing: Use natural elements like overhanging branches or doorways to "frame" your subject within the photo.
Remember, rules are meant to be broken, but you have to master them first before you can break them effectively. We offer tons of photography tutorials on specific composition styles for different genres.
Action Cameras and GoPros: Can They Go Pro?
Surprisingly, yes. While you won't use a GoPro for a wedding portrait, they are essential for adventure photography.
The trick to making GoPro footage look professional is all about the settings. Always shoot in RAW format. It gives you way more data to work with in post-processing. Use Continuous Shutter for action shots so you don't miss the peak moment. And if you're shooting video, stick to 24fps for that cinematic look, or 60fps if you plan on slowing it down.

SEO Alt Text: An action photographer using a GoPro mounted on a helmet to capture a high-speed mountain biking trail.
Post-Processing: Where the Magic Happens
Taking the photo is only 50% of the job. The other 50% happens at your computer. If you aren't editing your shots, you aren't delivering a finished product.
Professional editors almost always shoot in RAW and then use powerful software to bring the image to life. While Adobe is the old guard, many pros are moving toward more intuitive, AI-powered tools. If you want to speed up your workflow and get stunning results without spending hours masking, you need to try Luminar. Its AI tools for sky replacement and portrait enhancement are game-changers.
Editing isn't about "faking" a photo; it's about bringing it closer to what your eyes actually saw. Sensors don't have the same dynamic range as the human eye, so post-processing bridges that gap. For more tips on digital darkroom techniques, check out the latest entries at blog.edinchavez.com.
The Business of Photography: Going Pro
"Going Pro" means getting paid. To do that, you need more than just a good eye; you need a business mind.
- Find Your Niche: Don't try to be the "everything" photographer. Be the best wedding photographer in your city, or the go-to guy for real estate. Specialization allows you to charge more.
- Build a Portfolio: Nobody cares what school you went to. They care what your work looks like. Create a clean, professional website that showcases your best 15-20 images. Quality over quantity, every single time.
- Network: Most professional gigs come from word-of-mouth. Join communities, talk to other creatives, and get your name out there.
- Workflow Management: As you get busier, you'll need tools to manage your clients and shoots. Check out proshoot.io to help streamline your business and keep your projects organized.

SEO Alt Text: A clean, modern home office setup showing a photographer editing photos on a large monitor with a professional portfolio website open.
Why Shut Your Aperture?
There are a million places to learn photography, but most of them are boring or overly technical. At Shut Your Aperture, we believe in keeping it simple. Photography is supposed to be fun. It’s about capturing a moment in time that will never happen again.
Our photography tutorials are designed to cut through the noise. We don't want you to just memorize settings; we want you to understand why those settings matter. We want you to look at a scene and instinctively know how to capture it.
If you’re serious about making this your career, stay tuned to our updates. We’re constantly dropping new guides on everything from street photography to advanced studio lighting.
Practical Exercise: The "Manual Mode" Challenge
Ready to put this guide into action? Here is your homework:
Grab your camera and head outside. Set it to Manual Mode (M).
- Set your ISO to 100.
- Set your Aperture to the lowest number your lens allows (like f/2.8 or f/4).
- Now, adjust your Shutter Speed until the light meter in your viewfinder hits the middle (0).
- Take a photo of a flower or an object.
- Now, change your Aperture to f/11. Watch how the image gets dark.
- Slow down your Shutter Speed until the meter is back at 0.
- Take the shot again.
Compare the two. The first will have a blurry background; the second will be sharp throughout. Congratulations, you’ve just mastered the core of manual photography.

SEO Alt Text: Two side-by-side photos of the same subject showing the difference between a wide aperture (f/2.8) and a narrow aperture (f/11).
Photography is a journey, not a destination. Even the pros are still learning every day. The gear will change, the software (like Luminar) will get smarter, but your unique perspective is what people will pay for.
Keep shooting, keep failing, and keep shutting your aperture. We’ll be here to help you every step of the way. For more deep dives and gear reviews, don't forget to visit blog.edinchavez.com and explore the wealth of knowledge we’ve built for you.
Becoming a pro isn't an overnight thing, but with the right guidance, it’s a lot closer than you think. Let's get to work.