
Street photography is the closest thing a photographer has to being a hunter-gatherer. You aren't in a studio controlling the lights, and you aren't in a landscape waiting for the sun to hit a specific peak. You’re out in the wild: the concrete jungle: reacting to life as it happens. It’s exhilarating, frustrating, and deeply rewarding all at once.
If you’ve ever felt stuck or intimidated by the idea of pointing a camera at a stranger, you’re not alone. Street photography is a mental game as much as a technical one. But once you have a few solid ideas and a framework to work with, the city becomes your playground. At Shut Your Aperture, we believe in keeping things simple and getting you out there shooting.
In this guide, we’re going to dive into the best street photography ideas, technical setups, and compositional tricks to help you capture those "decisive moments."
Getting Your Technical Foundation Right
Before we talk about creative ideas, we have to talk about your gear and settings. If you’re fumbling with your dials when a guy in a bright red suit walks past a yellow wall, you’ve already lost the shot.
The Need for Speed
In the street, things move fast. To keep your images sharp, you want a shutter speed of at least 1/250s. If you’re in a high-energy environment: like a busy intersection in NYC: bump that up to 1/500s. You can always check out more essential photography tips to sharpen your foundational skills.
Auto-ISO is Your Best Friend
Lighting on the street changes constantly. You walk from a bright sidewalk into a dark alleyway in seconds. Set your camera to Auto-ISO with a cap at around 6400. This ensures your shutter speed stays fast enough to freeze motion while the camera handles the exposure. If the grain gets a bit much, you can always clean it up later using Luminar.
Master Zone Focusing
This is the secret sauce of street photography. Instead of relying on autofocus: which can hunt and miss: set your camera to manual focus. If you’re using a wide-angle lens (like a 35mm), set your focus distance to about 8-10 feet and your aperture to f/8 or f/11. This creates a deep depth of field where everything from 5 feet to 15 feet is in focus. Now, you just have to worry about the composition.
1. The Art of Juxtaposition
One of the most powerful street photography ideas is juxtaposition. This is just a fancy word for putting two things together that don't normally go together, or that create a funny or striking contrast.
Look for:
- An old person walking past a colorful piece of modern graffiti.
- A businessman eating a messy hot dog under a sign for a luxury watch.
- Someone wearing a shirt that matches the color of the building behind them.
The trick here is to find the background first. Find a billboard or an interesting wall and wait. This is what we call "fishing." You’ve set the hook; now you’re just waiting for the right person to swim into the frame. For more on how backgrounds influence perception, check out our piece on vistas and perspectives.
2. Play with Shadows and Chiaroscuro
You don't always need a clear view of your subject’s face to tell a story. In fact, sometimes the less you see, the better. Dramatic light and shadow can transform a mundane street into a film noir set.
Look for "pockets" of light between tall buildings. Set your exposure compensation to -1 or -2 to crush the shadows into pure black. When a person walks into that single beam of light, they’ll pop out of the darkness. It creates a sense of mystery and depth that flat lighting can never achieve.
If you're struggling to get the contrast right in-camera, using a tool like Luminar can help you accentuate those shadows and highlights in post-processing.
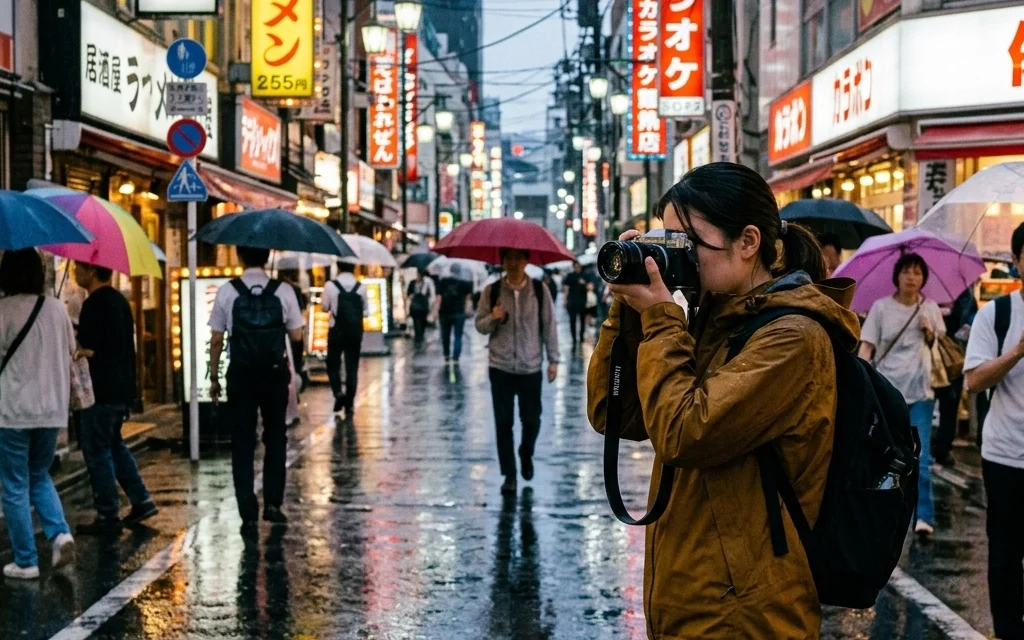
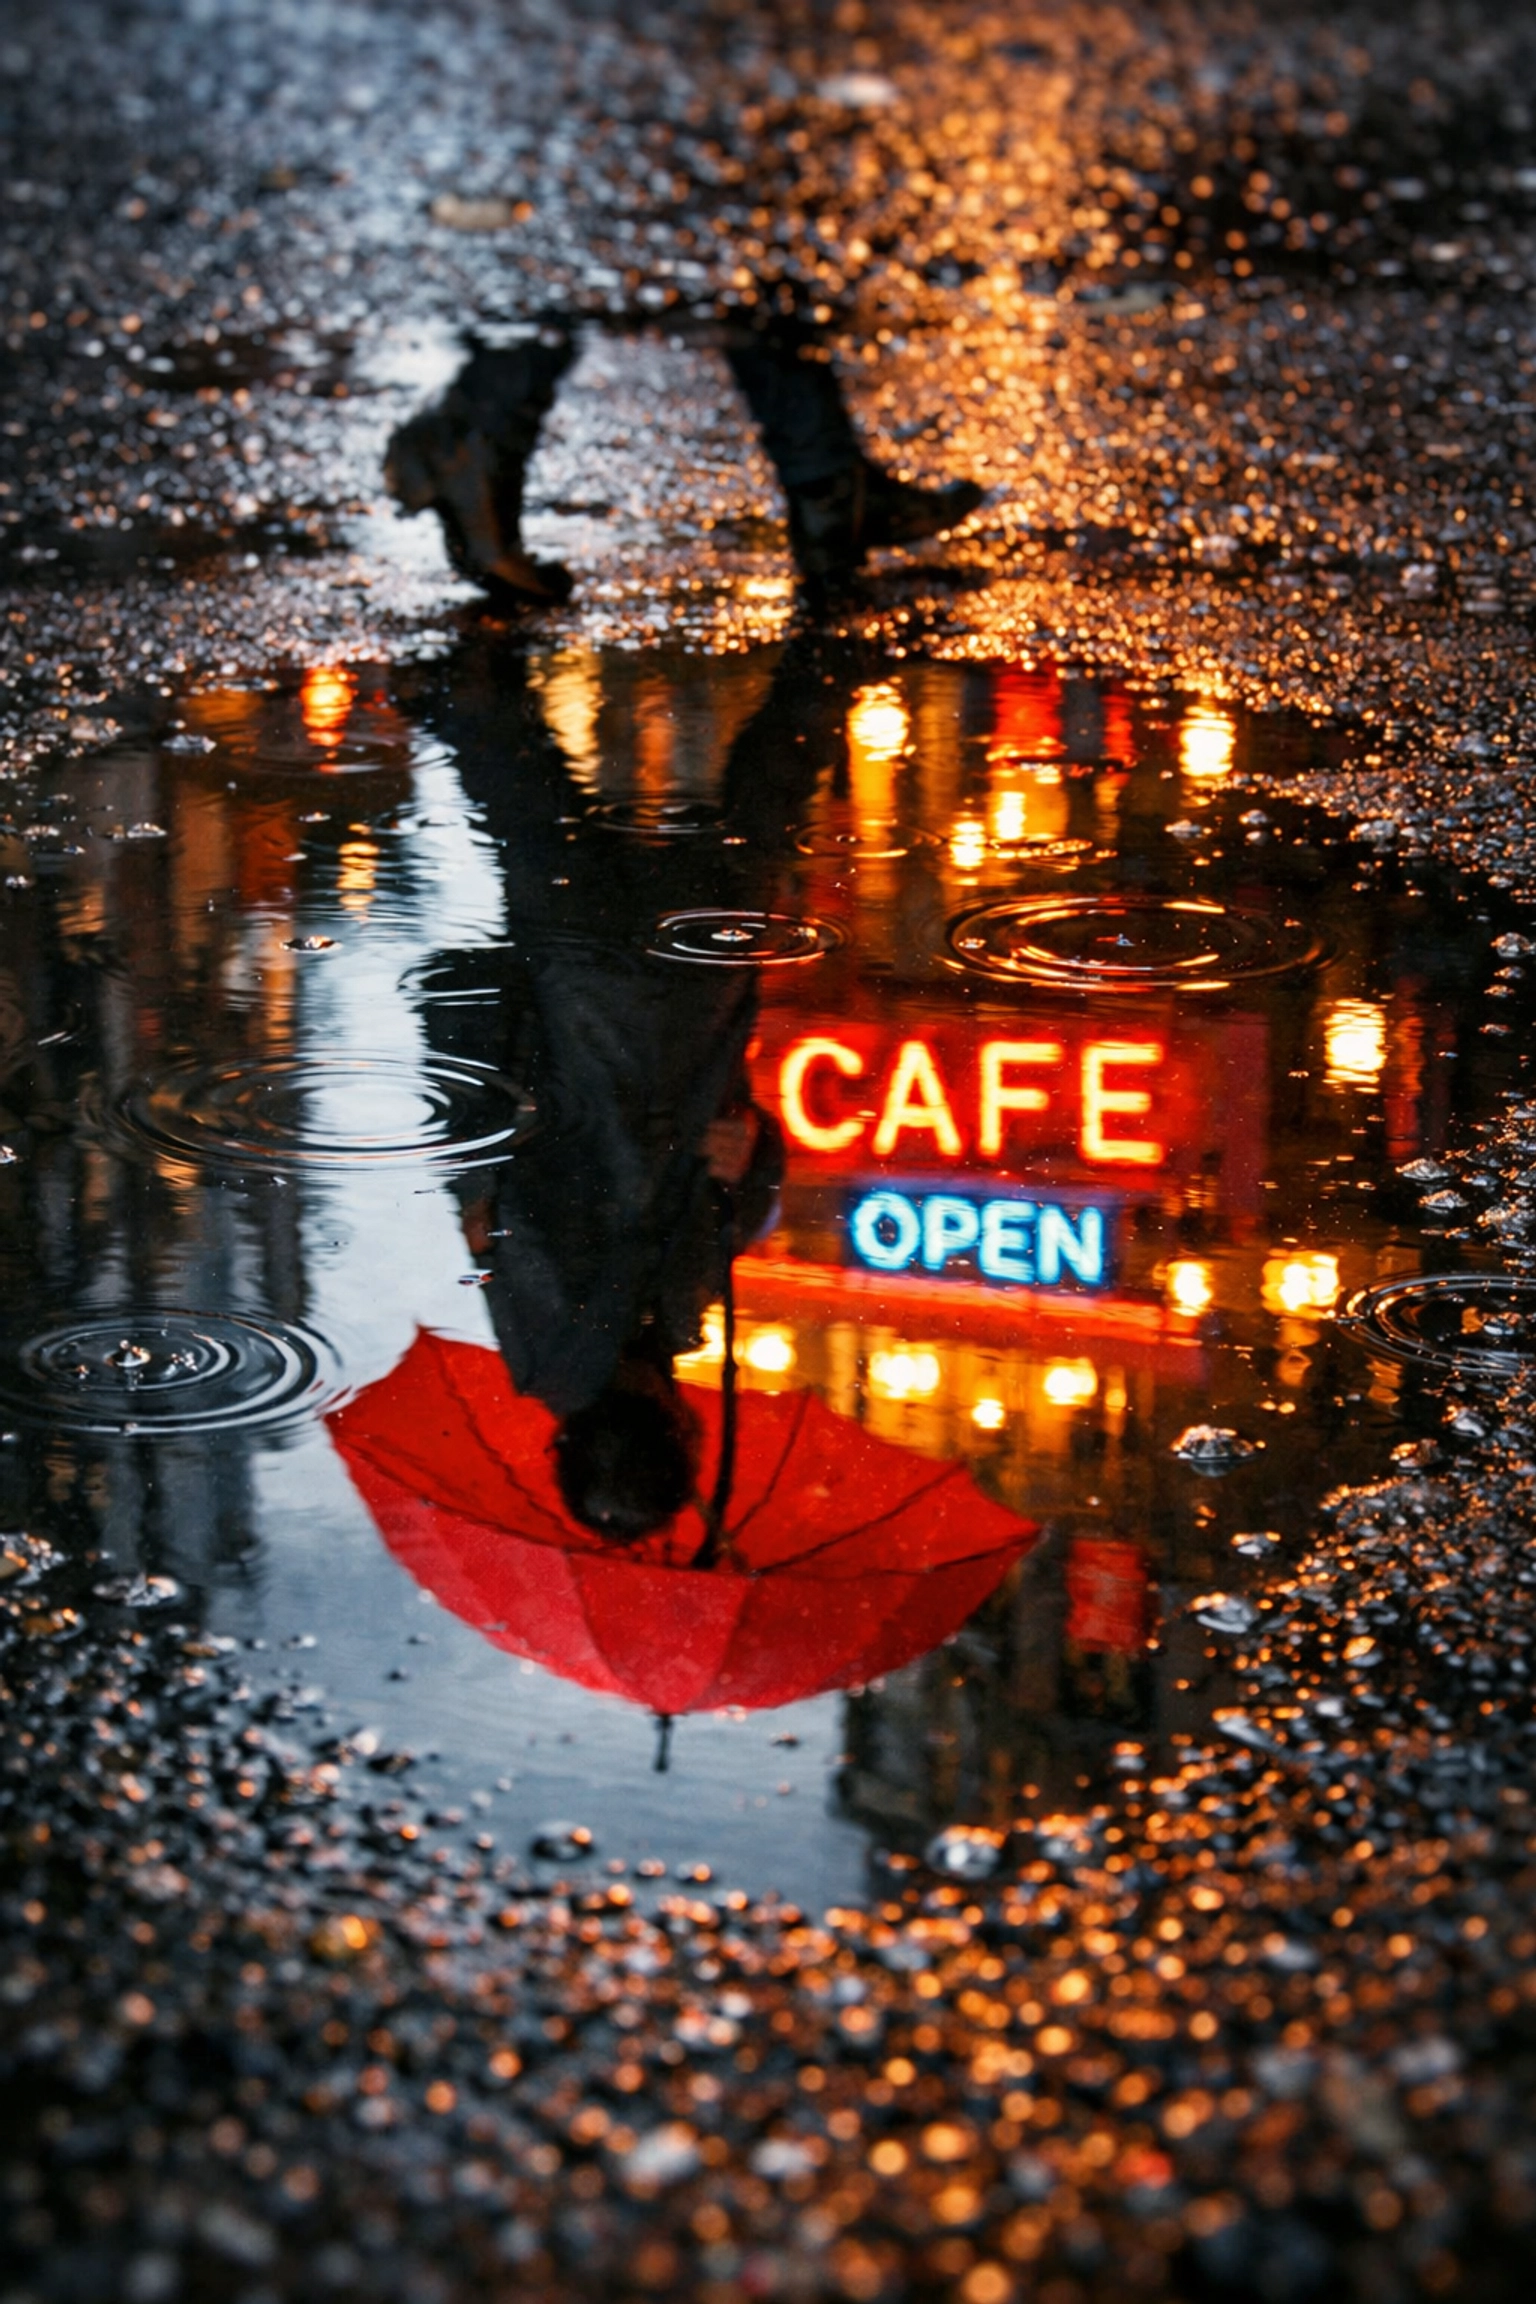
3. Reflections and Rainy Days
Don't let a rainy day keep you inside. Some of the best street photography happens when the ground is wet. Puddles become mirrors, and umbrellas add a geometric element to your shots.
Instead of shooting at eye level, get low. Aim your camera at a large puddle and capture the city upside down. If you catch a person walking through the reflection, you’ve got a shot that feels more like a painting than a photograph. If you need inspiration for capturing dramatic scenes, take some lessons in landscape photography from Peter Lik, as his use of light and reflection is world-class.
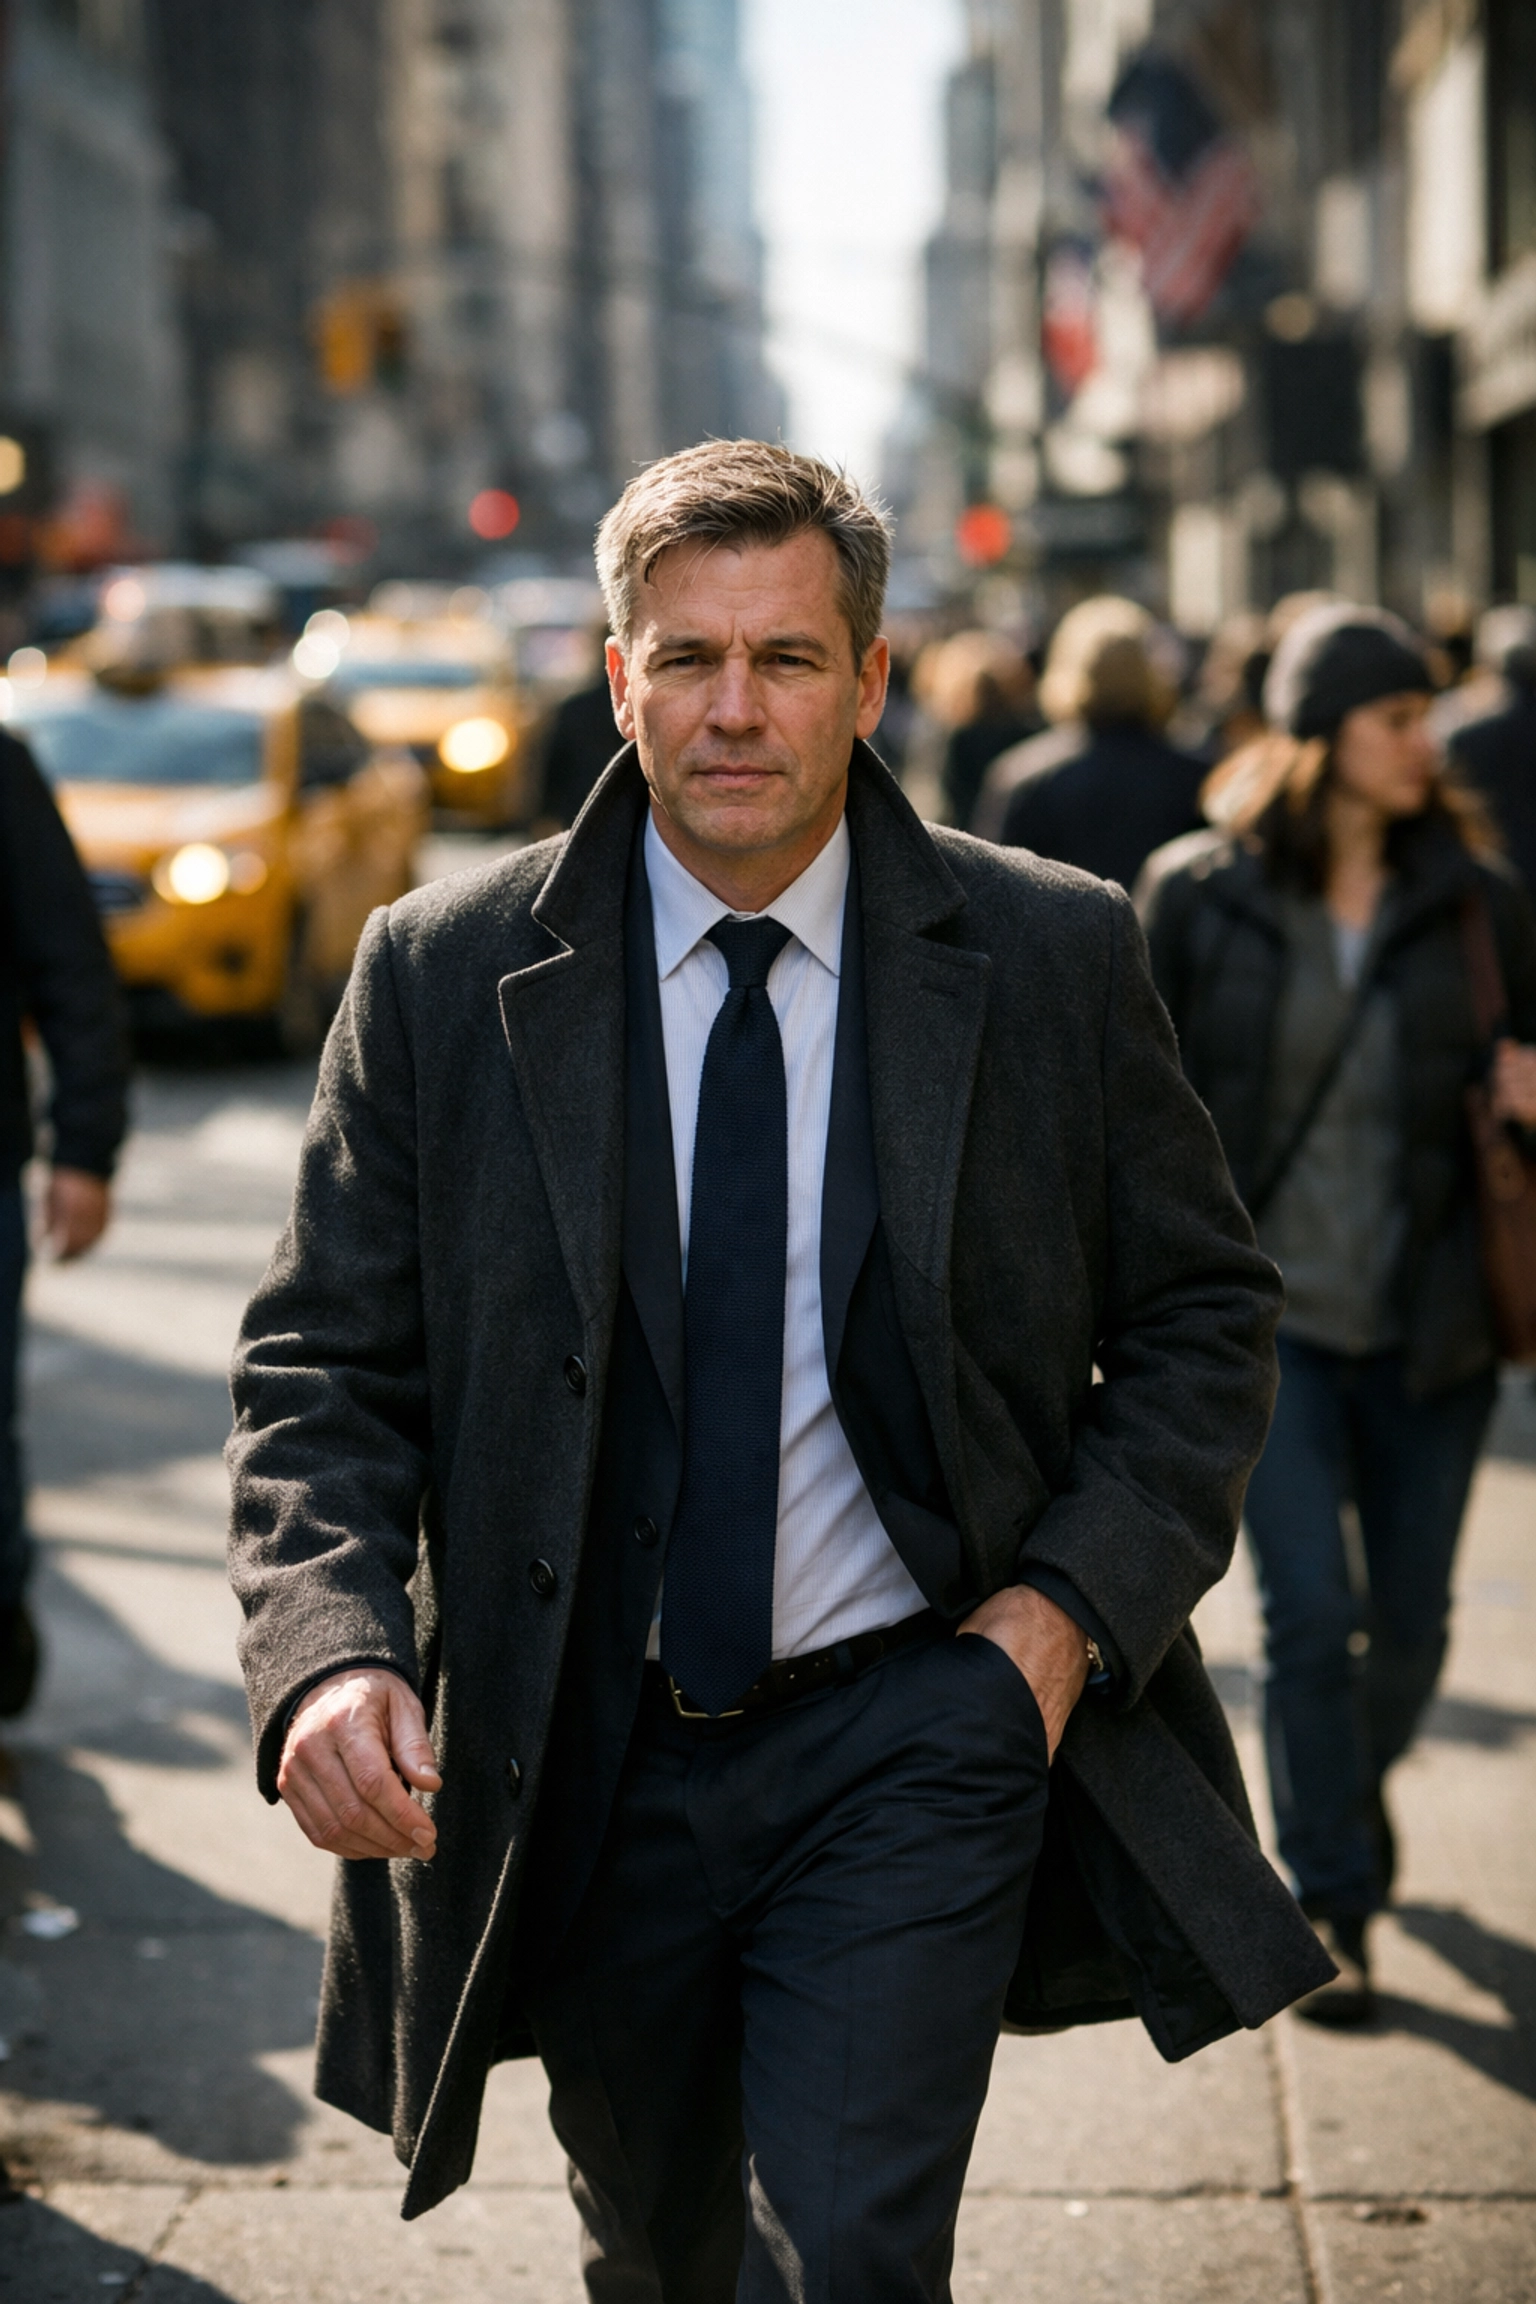
4. The "Back of the Head" Approach
A lot of beginners are terrified of "the look": that moment a subject realizes you're taking their photo and gives you a death stare. If you’re feeling nervous, try shooting people from behind.
This isn't just a "cheat" for shy photographers; it’s a legitimate style. Shooting someone from behind allows the viewer to step into the subject's shoes. It makes the person an "everyman" and focuses the attention on the environment and the direction they are headed. It’s a great way to practice your shot compositions without the pressure of social interaction.
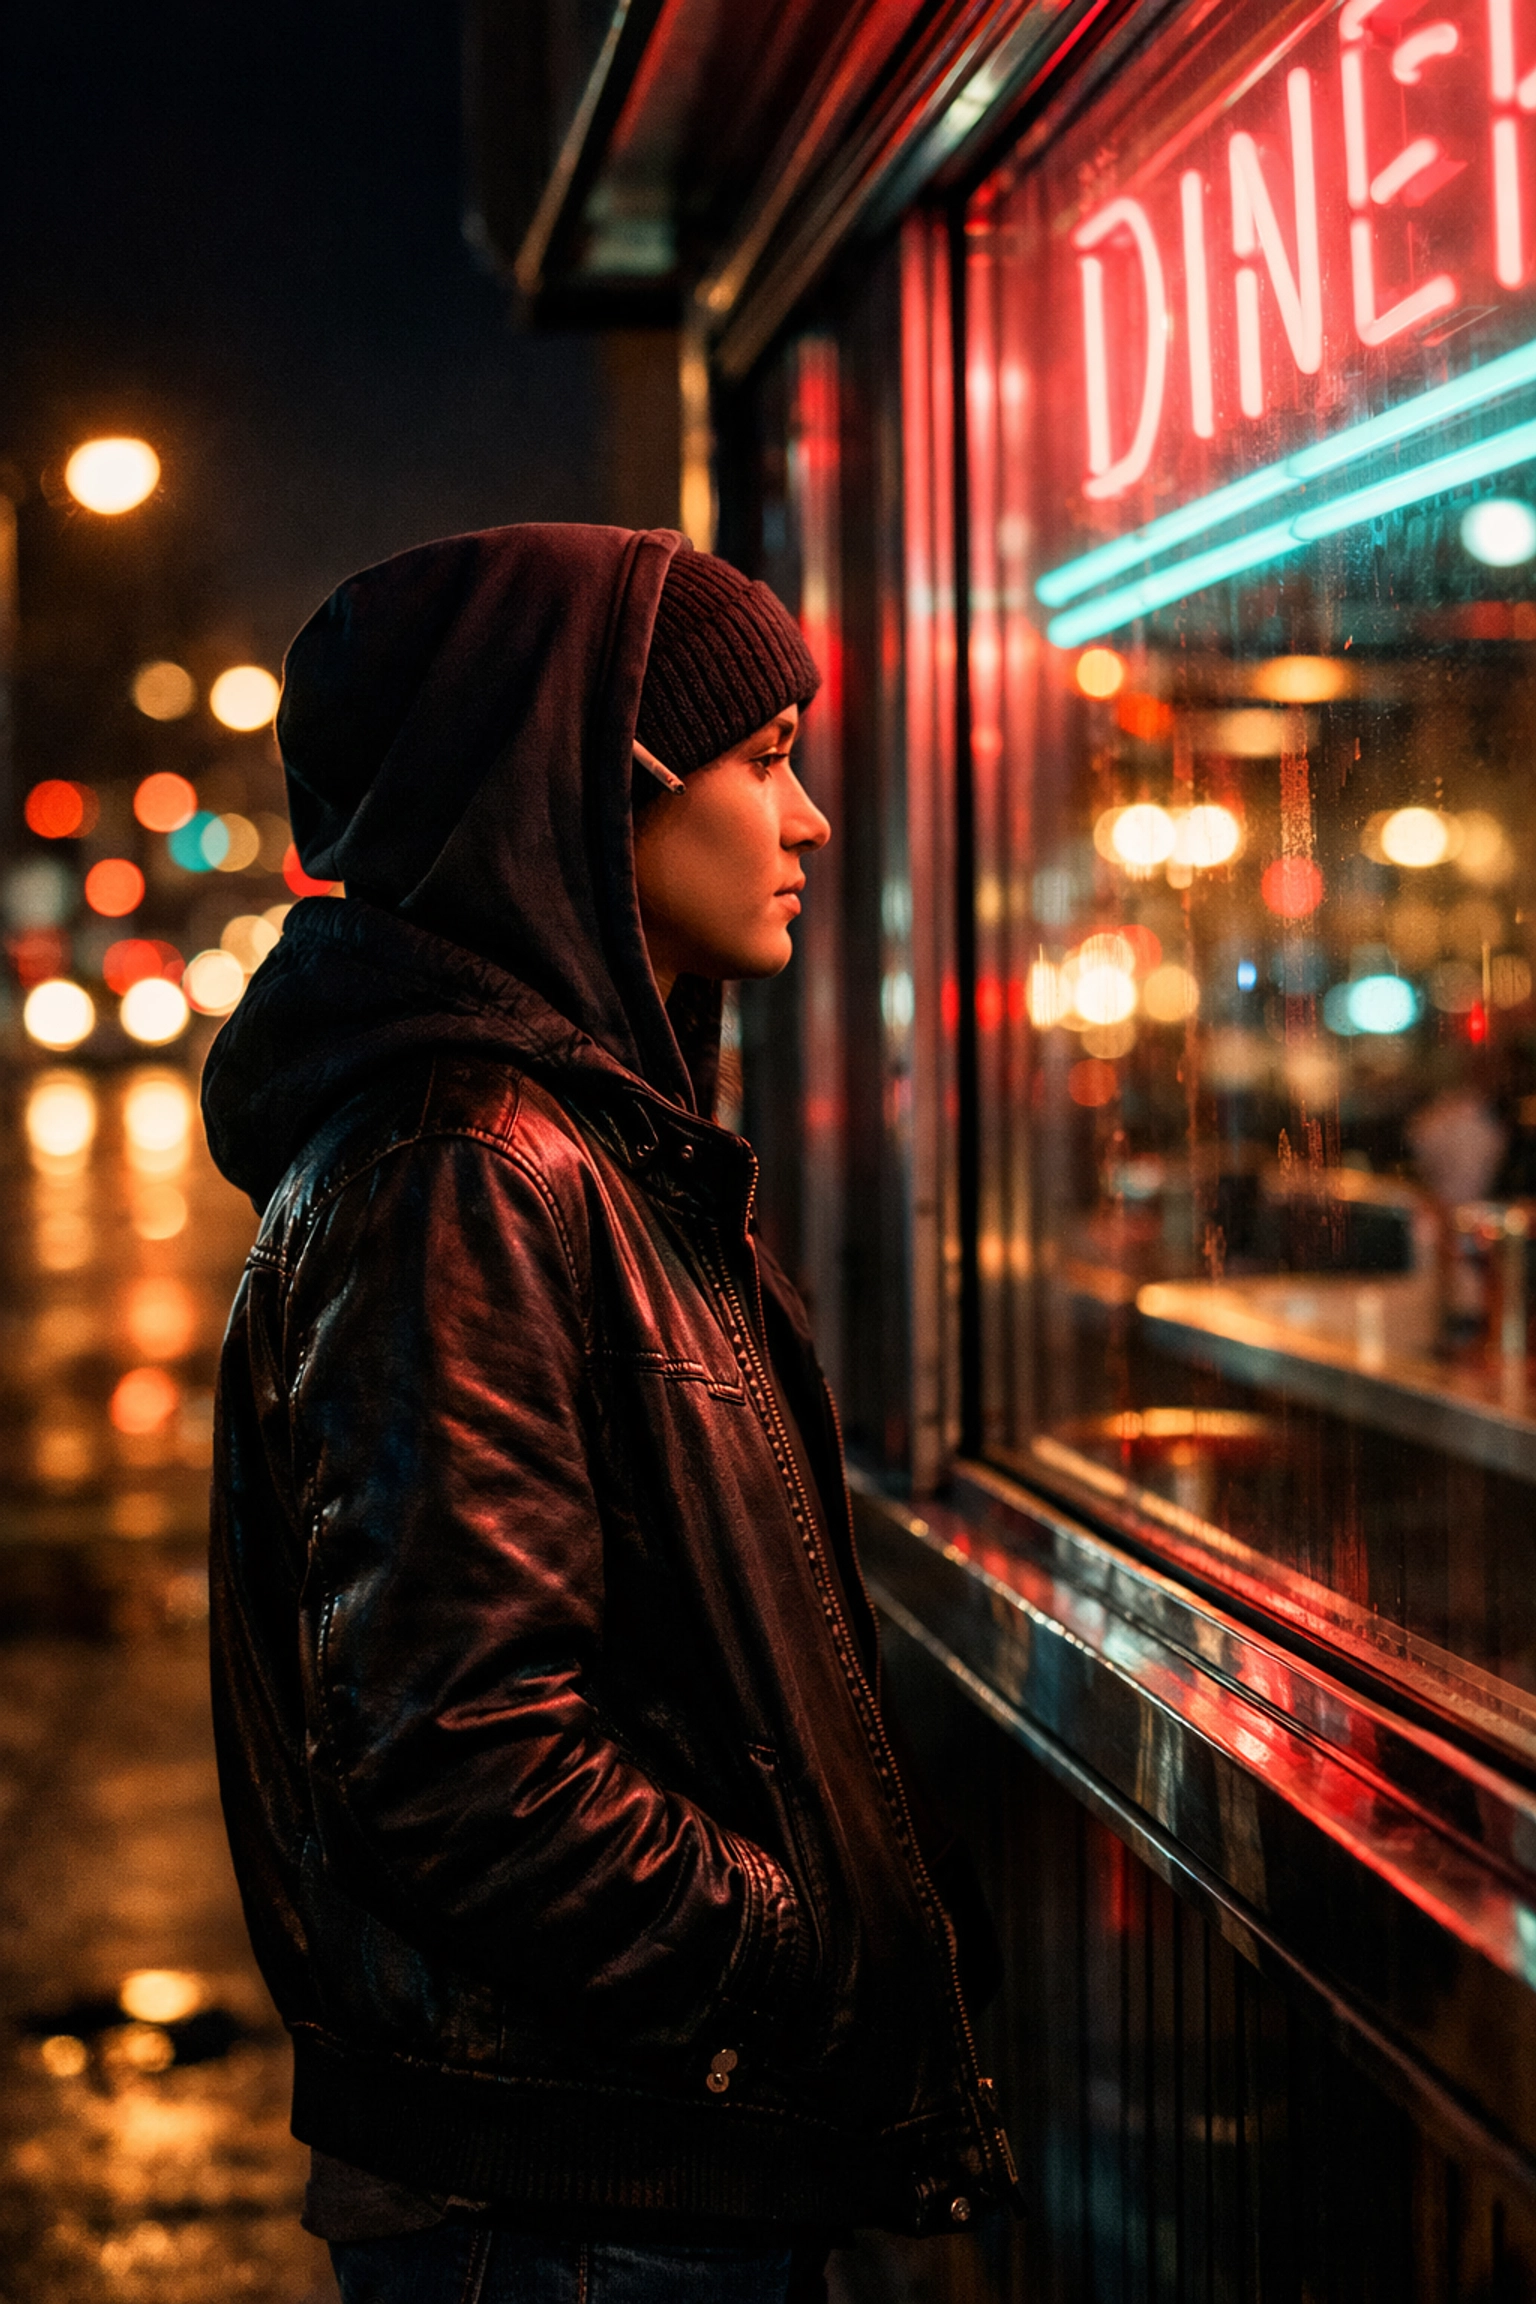
5. Night Street Photography and Neon
When the sun goes down, the city changes. Shopfronts, neon signs, and car headlights become your primary light sources. Night street photography is all about "finding the light."
Position yourself near a brightly lit storefront or a movie theater marquee. The light coming from these windows is often soft and flattering. It’s a great way to capture candid moments of people looking at displays or waiting for a bus. For more tips on working with light in various environments, you might find our article on the role of luminosity helpful, even if it's geared toward real estate.
6. Focus on the Details
You don't always need a full-body shot to tell a story. Sometimes, the story is in the details.
- A pair of worn-out boots on a subway floor.
- Hands holding a crumpled newspaper.
- A dog waiting patiently outside a grocery store.
By narrowing your focus, you strip away the clutter of the city and force the viewer to look at one specific thing. This is a great exercise for improving your observation skills. You can find more about this kind of focused artistic process in our look at Peter Lik’s creative process.
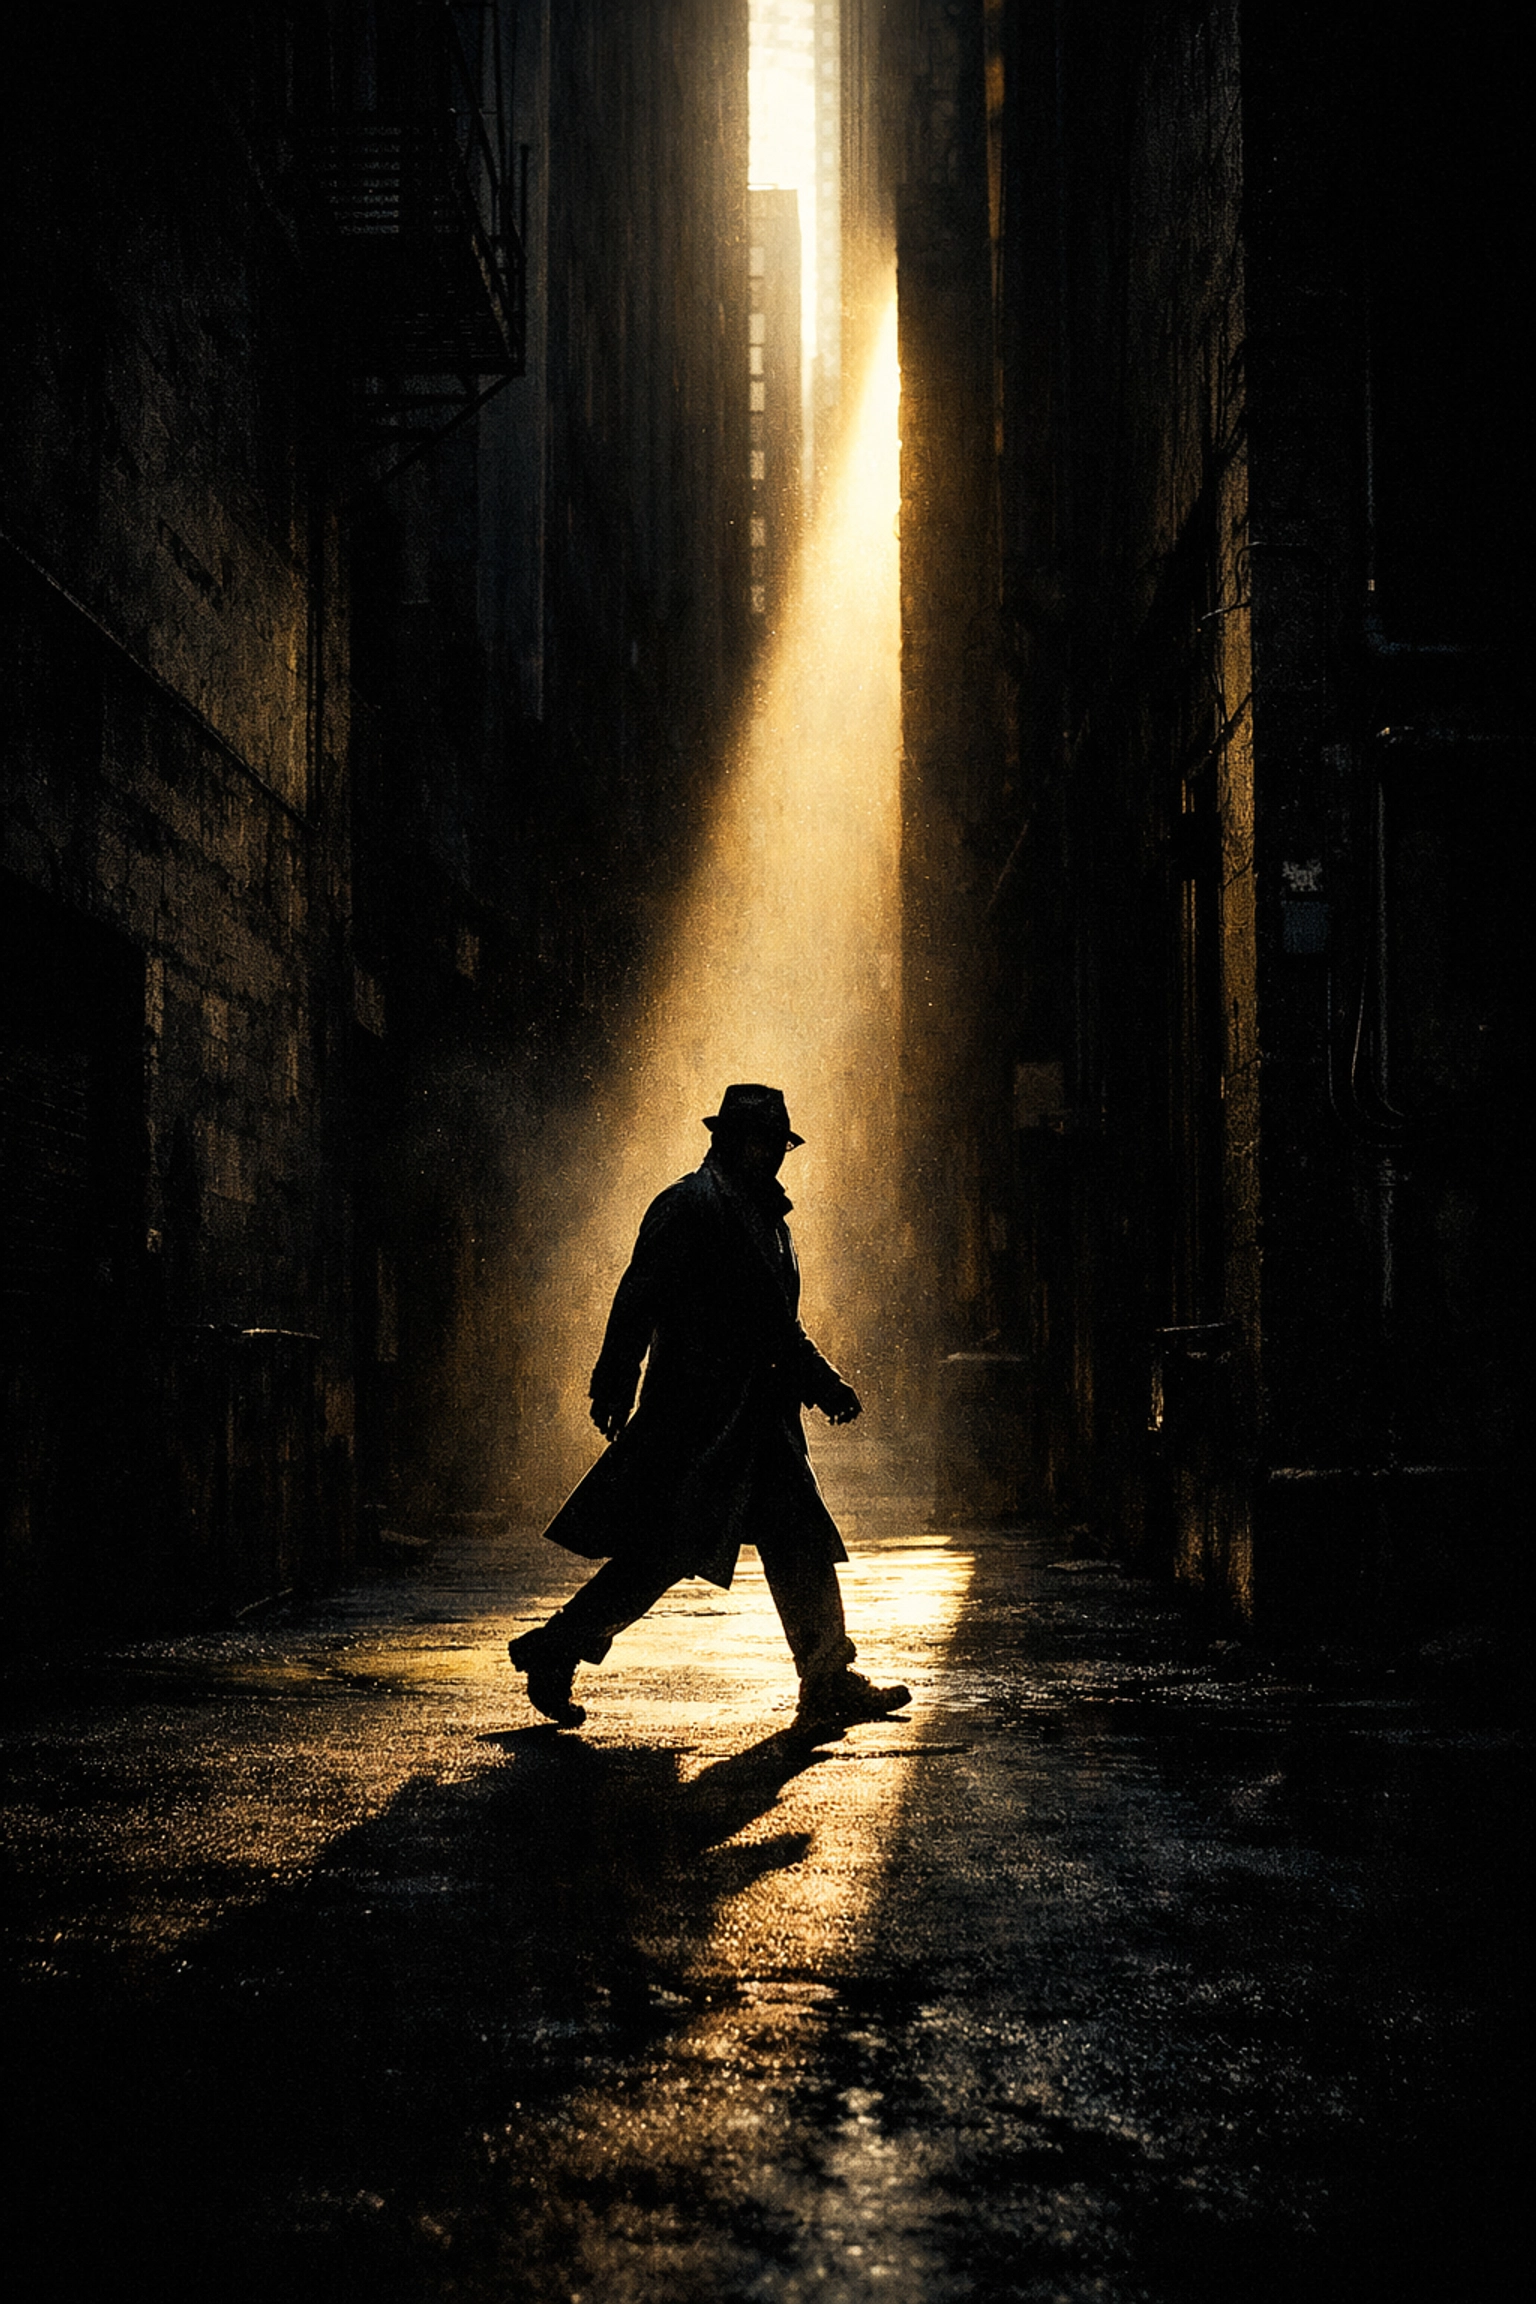
7. Silhouettes and Geometry
Cities are full of lines, squares, and triangles. Use the architecture to your advantage. Frame your subject within a doorway, under a bridge, or between two pillars.
If you find a very bright background: like the end of a tunnel or a sun-drenched street at the end of a dark alley: wait for someone to walk through. The result will be a stark silhouette. This strips away the identity of the person and turns them into a graphic element within the frame. It’s simple, clean, and always looks professional.
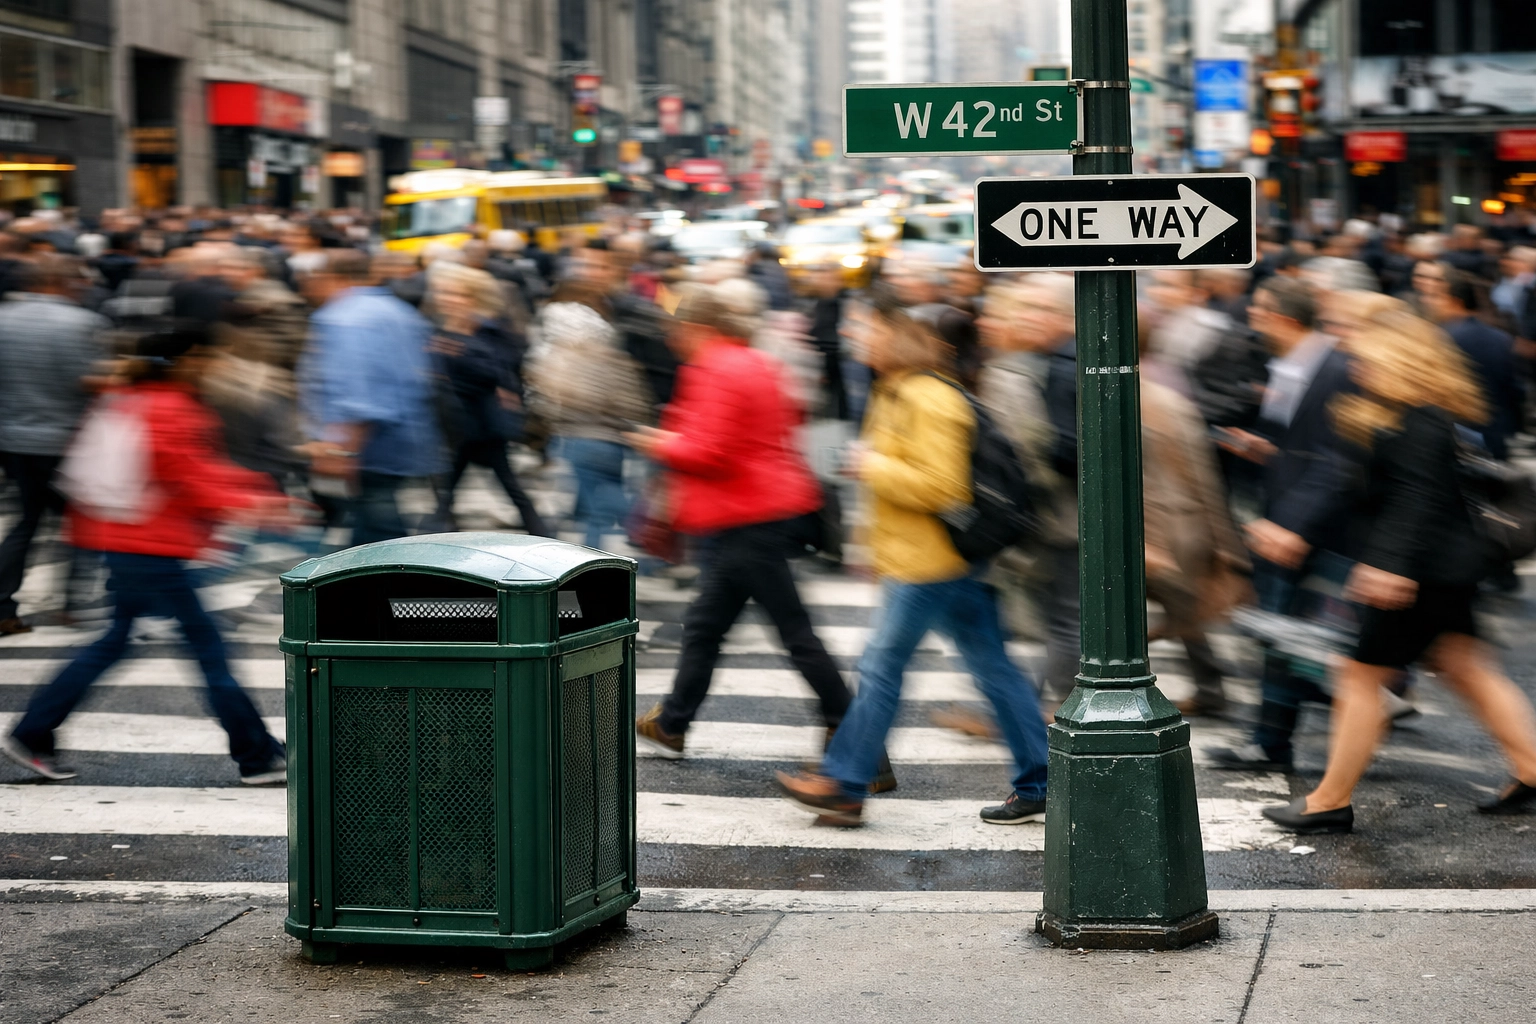
8. Motion Blur for Energy
Street photography doesn't always have to be tack-sharp. Sometimes, intentional motion blur can convey the "hustle and bustle" of city life better than a frozen frame.
Try slowing your shutter speed down to 1/15s or 1/30s. If you hold the camera very still (or lean against a lamp post) and take a photo of a busy sidewalk, the people will turn into ghostly streaks while the buildings stay sharp. It adds a sense of time and movement to your work. If you want to see how these techniques are applied in other fields, check out how cinematic techniques transform visual storytelling.
9. Color Blocking
Sometimes, the "idea" for a photo is just a color. Maybe you see a bright blue door and decide to wait for someone wearing something yellow to walk past. This creates a high-contrast, poppy image that grabs attention immediately.
Street photography is often messy, but color blocking is a way to bring order to the chaos. You can use post-processing software like Luminar to enhance specific color channels and make your "blocks" really stand out.
10. The Ethical Side of the Street
We can't talk about street photography without mentioning ethics. Generally, if you are in a public space in the USA, you have the legal right to take photos. However, "legal" and "kind" aren't always the same thing.
A good rule of thumb is to treat people with respect. If someone sees you take their photo and they look uncomfortable, give them a smile and a nod. If they ask you to delete it, just delete it. There are a billion other photos waiting to be taken; it’s not worth a confrontation. For more on the impact of photography on culture and trends, see the impact of Peter Lik on photography trends.
Putting It All Together
Street photography is a marathon, not a sprint. You might go out for four hours and come back with nothing but blurry shots of pigeons. That’s okay. The goal is to train your eyes to see the world differently.
Start by choosing one of these ideas: like "Reflections" or "Juxtaposition": and spend an entire afternoon focusing only on that. By limiting your choices, you actually become more creative.
Don't forget to check out PhotoGuides.org for more technical breakdowns, or visit blog.edinchavez.com for some personal inspiration from the field. If you’re looking to get your work printed or see what professional street and landscape work looks like, head over to www.edinfineart.com.
Quick Checklist for Your Next Street Session:
- Check your settings: 1/250s, Auto-ISO, f/8.
- Pick a theme: Shadows, colors, or reflections.
- Be patient: If you find a great spot, stay there for 20 minutes.
- Blend in: Wear dark, comfortable clothes and use a small camera if possible.
- Edit with purpose: Use Luminar to bring out the soul of the shot.
The streets are always changing, which means you'll never run out of subjects. Whether you're in a small town or a massive metropolis, there’s a story happening right in front of you. Go find it. For more professional photography services and insights, you can always visit www.proshoot.io or www.edinstudios.com.
If you’re planning to travel for your photography, you might want to time your trip perfectly by checking out the best time for USA road trips. Street photography in a new city is one of the best ways to truly experience a new culture. Now, shut your aperture (metaphorically, keep it at f/8) and go shoot!


