

Let’s be honest: taking a photo of a person should be easy. You point the camera, they smile, and you click the button. Right? If only it were that simple. If you’ve ever looked at your SD card after a shoot and wondered why your subject looks like a ghost, a cardboard cutout, or someone caught in the middle of a sneeze, you’re not alone.
Portrait photography is a delicate dance between technical precision and human connection. It’s about more than just having a fancy lens; it’s about how you manipulate light, how you position your subject, and how you handle the "boring" stuff like shutter speeds and crops. Even the pros at Edin Studios will tell you that the difference between a snapshot and a masterpiece is often just a few small adjustments.
Today, we’re diving into the seven most common mistakes people make with portrait photography and, more importantly, how you can fix them right now to start taking photos that actually look professional.
1. The "Ghost in a Cave" Problem: Lighting and Separation
One of the biggest mistakes beginners make is failing to understand the relationship between their subject and the background. This usually manifests in two ways: under-lighting the face or letting the subject blend into the shadows.
The Mistake
Under-lighting often happens when your fill light (the light meant to soften shadows) is actually stronger than your key light (your main light source). This creates a flat, muddy look. Even worse is when you place your subject far away from a dark background and use a single light source. The result? The shadow side of your subject’s face disappears into the abyss, making them look like a floating head.
The Fix
First, you need to master the balance between your lights. If you’re struggling with the technical side of things, check out our guide on how to master your camera’s manual mode in 5 minutes.
To fix separation, try moving your subject closer to the background so some of the light "spills" onto it. This creates a natural halo effect that defines the subject’s silhouette. If you’re in a studio, use a dedicated background light to create that depth. Think of it like real estate photography; as we discuss in the role of luminosity in real estate photography, light is what gives an object its shape and form. The same rules apply to a human face.
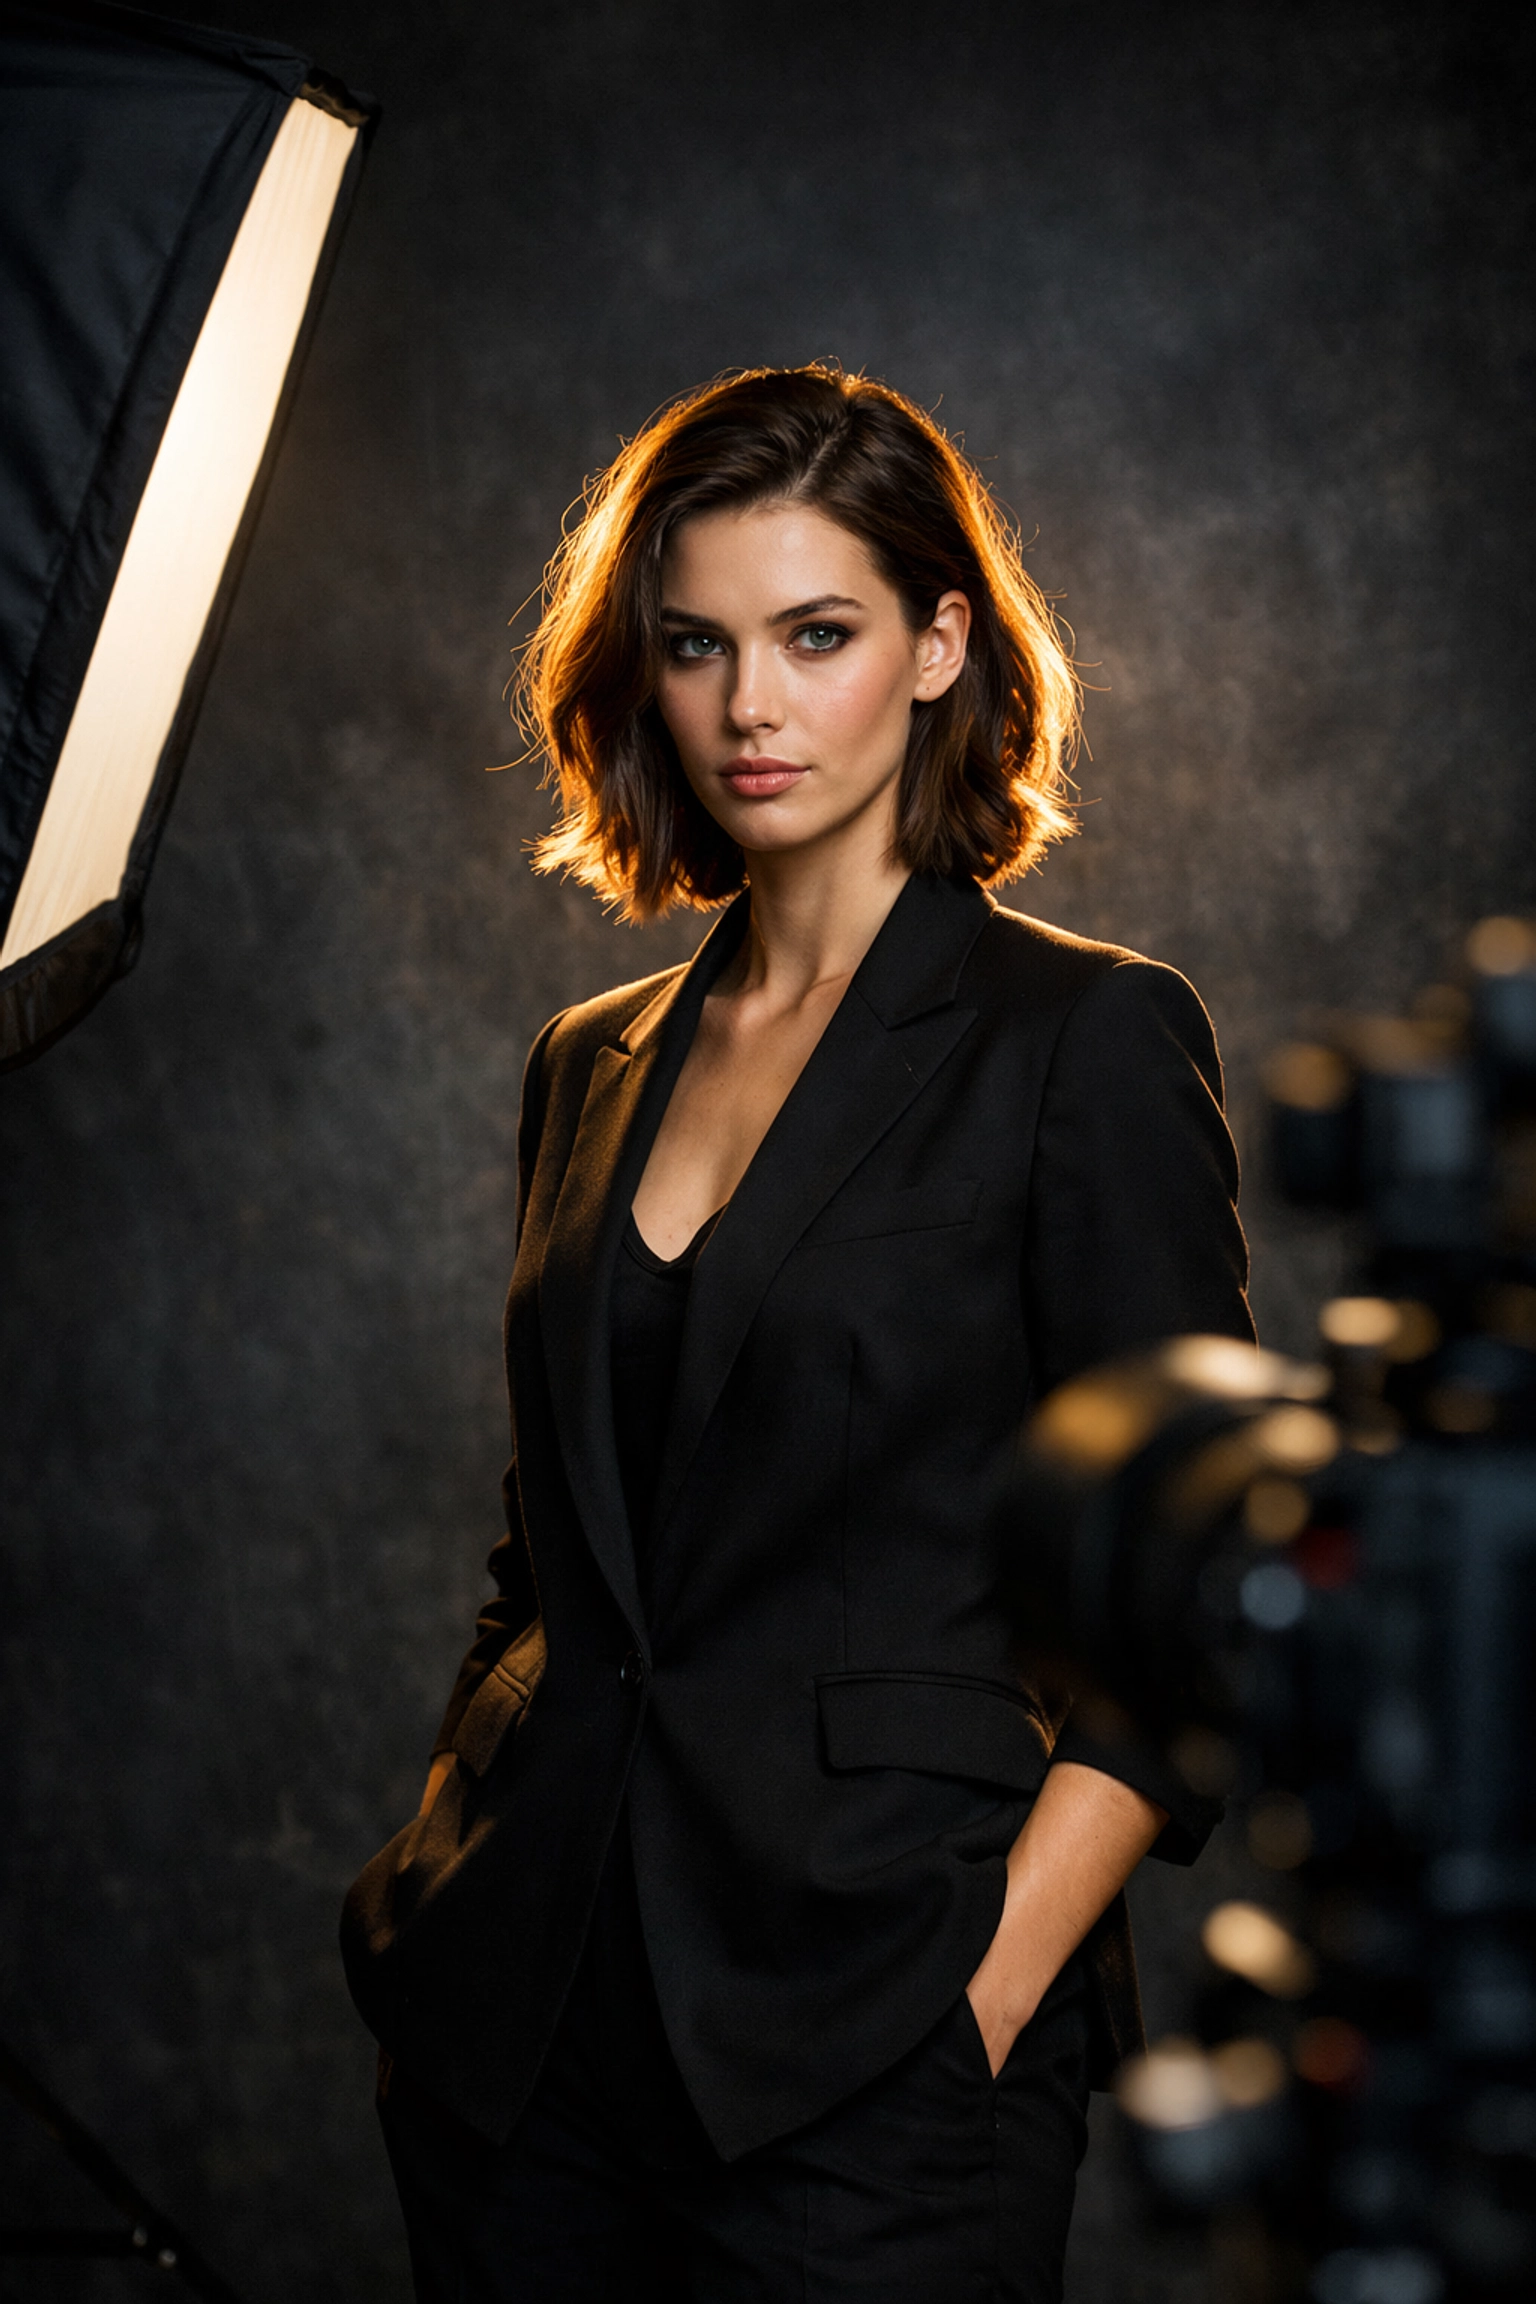
2. The "Alien Glow" (Distracting Hair Lights)
We all love a good hair light. It adds that "expensive" look by highlighting the texture of the hair and separating the subject from the backdrop. But there is a very fine line between a professional rim light and something that looks like a UFO is hovering just off-camera.
The Mistake
The most common error is positioning the hair light too far forward. When this happens, the light spills over the hair and hits the side of the subject’s face, nose, or lips. This creates weird, bright hot spots that distract the viewer’s eye away from the subject's expression.
The Fix
Keep your hair lights behind the subject. The goal is to catch the strands of hair, not the skin. If you see light hitting the cheekbone or the tip of the nose from behind, move the light further back or use a "snoot" or "grid" to narrow the beam. Small adjustments here make a world of difference in the "cleanliness" of your final image.
3. The "Deer in the Headlights" Posing
Most people aren’t professional models. When you put a camera in front of them, they freeze. They stand square-to-camera, shoulders wide, looking like they’re posing for a mugshot.
The Mistake
Shooting someone "square-on" makes them look as wide as possible, which is rarely flattering. Then there are the hands. If you don’t tell a subject what to do with their hands, they usually end up looking like "claws", clenched tight or hanging awkwardly.
The Fix
Direction is your job. Don't expect the subject to know what to do.
- The Angle: Ask your subject to turn their body 45 degrees away from the camera. This slims the profile and creates more interesting lines.
- The Hands: Give them something to do. If they’re sitting, have them rest their hands lightly. Use the "staircase" technique for fingers, instead of a fist, have the fingers staggered at different lengths to create an elegant, natural look.
- The Chin: To avoid the dreaded double chin (even on thin people), have them push their forehead toward the camera and down slightly. It feels weird for them, but it looks incredible on lens.
Great posing is a lot like shot composition’s impact on buyer attraction. It’s all about leading the eye to the right places.
4. Staying Stuck at Eye Level
If every photo you take is from the exact height of your own eyes, your portfolio is going to look boring. We see the world from eye level every single day. As a photographer, your job is to show the world something different.
The Mistake
Shooting everything from your own standing height creates a monotonous perspective. It can also be unflattering; shooting slightly from below can make a subject look intimidating or bulky, while shooting from too far above can make them look diminished.
The Fix
Move! Squat down, get on a ladder, or tilt the camera. A slightly higher angle can emphasize the eyes and slim the face, while a lower angle can give the subject a sense of power and presence. This is a lesson we can take from landscape photography lessons from Peter Lik, changing your physical perspective is the easiest way to transform a "standard" shot into something artistic. Experiment with different focal lengths too, but keep in mind that wide angles up close will distort facial features in a way that usually isn't very nice.
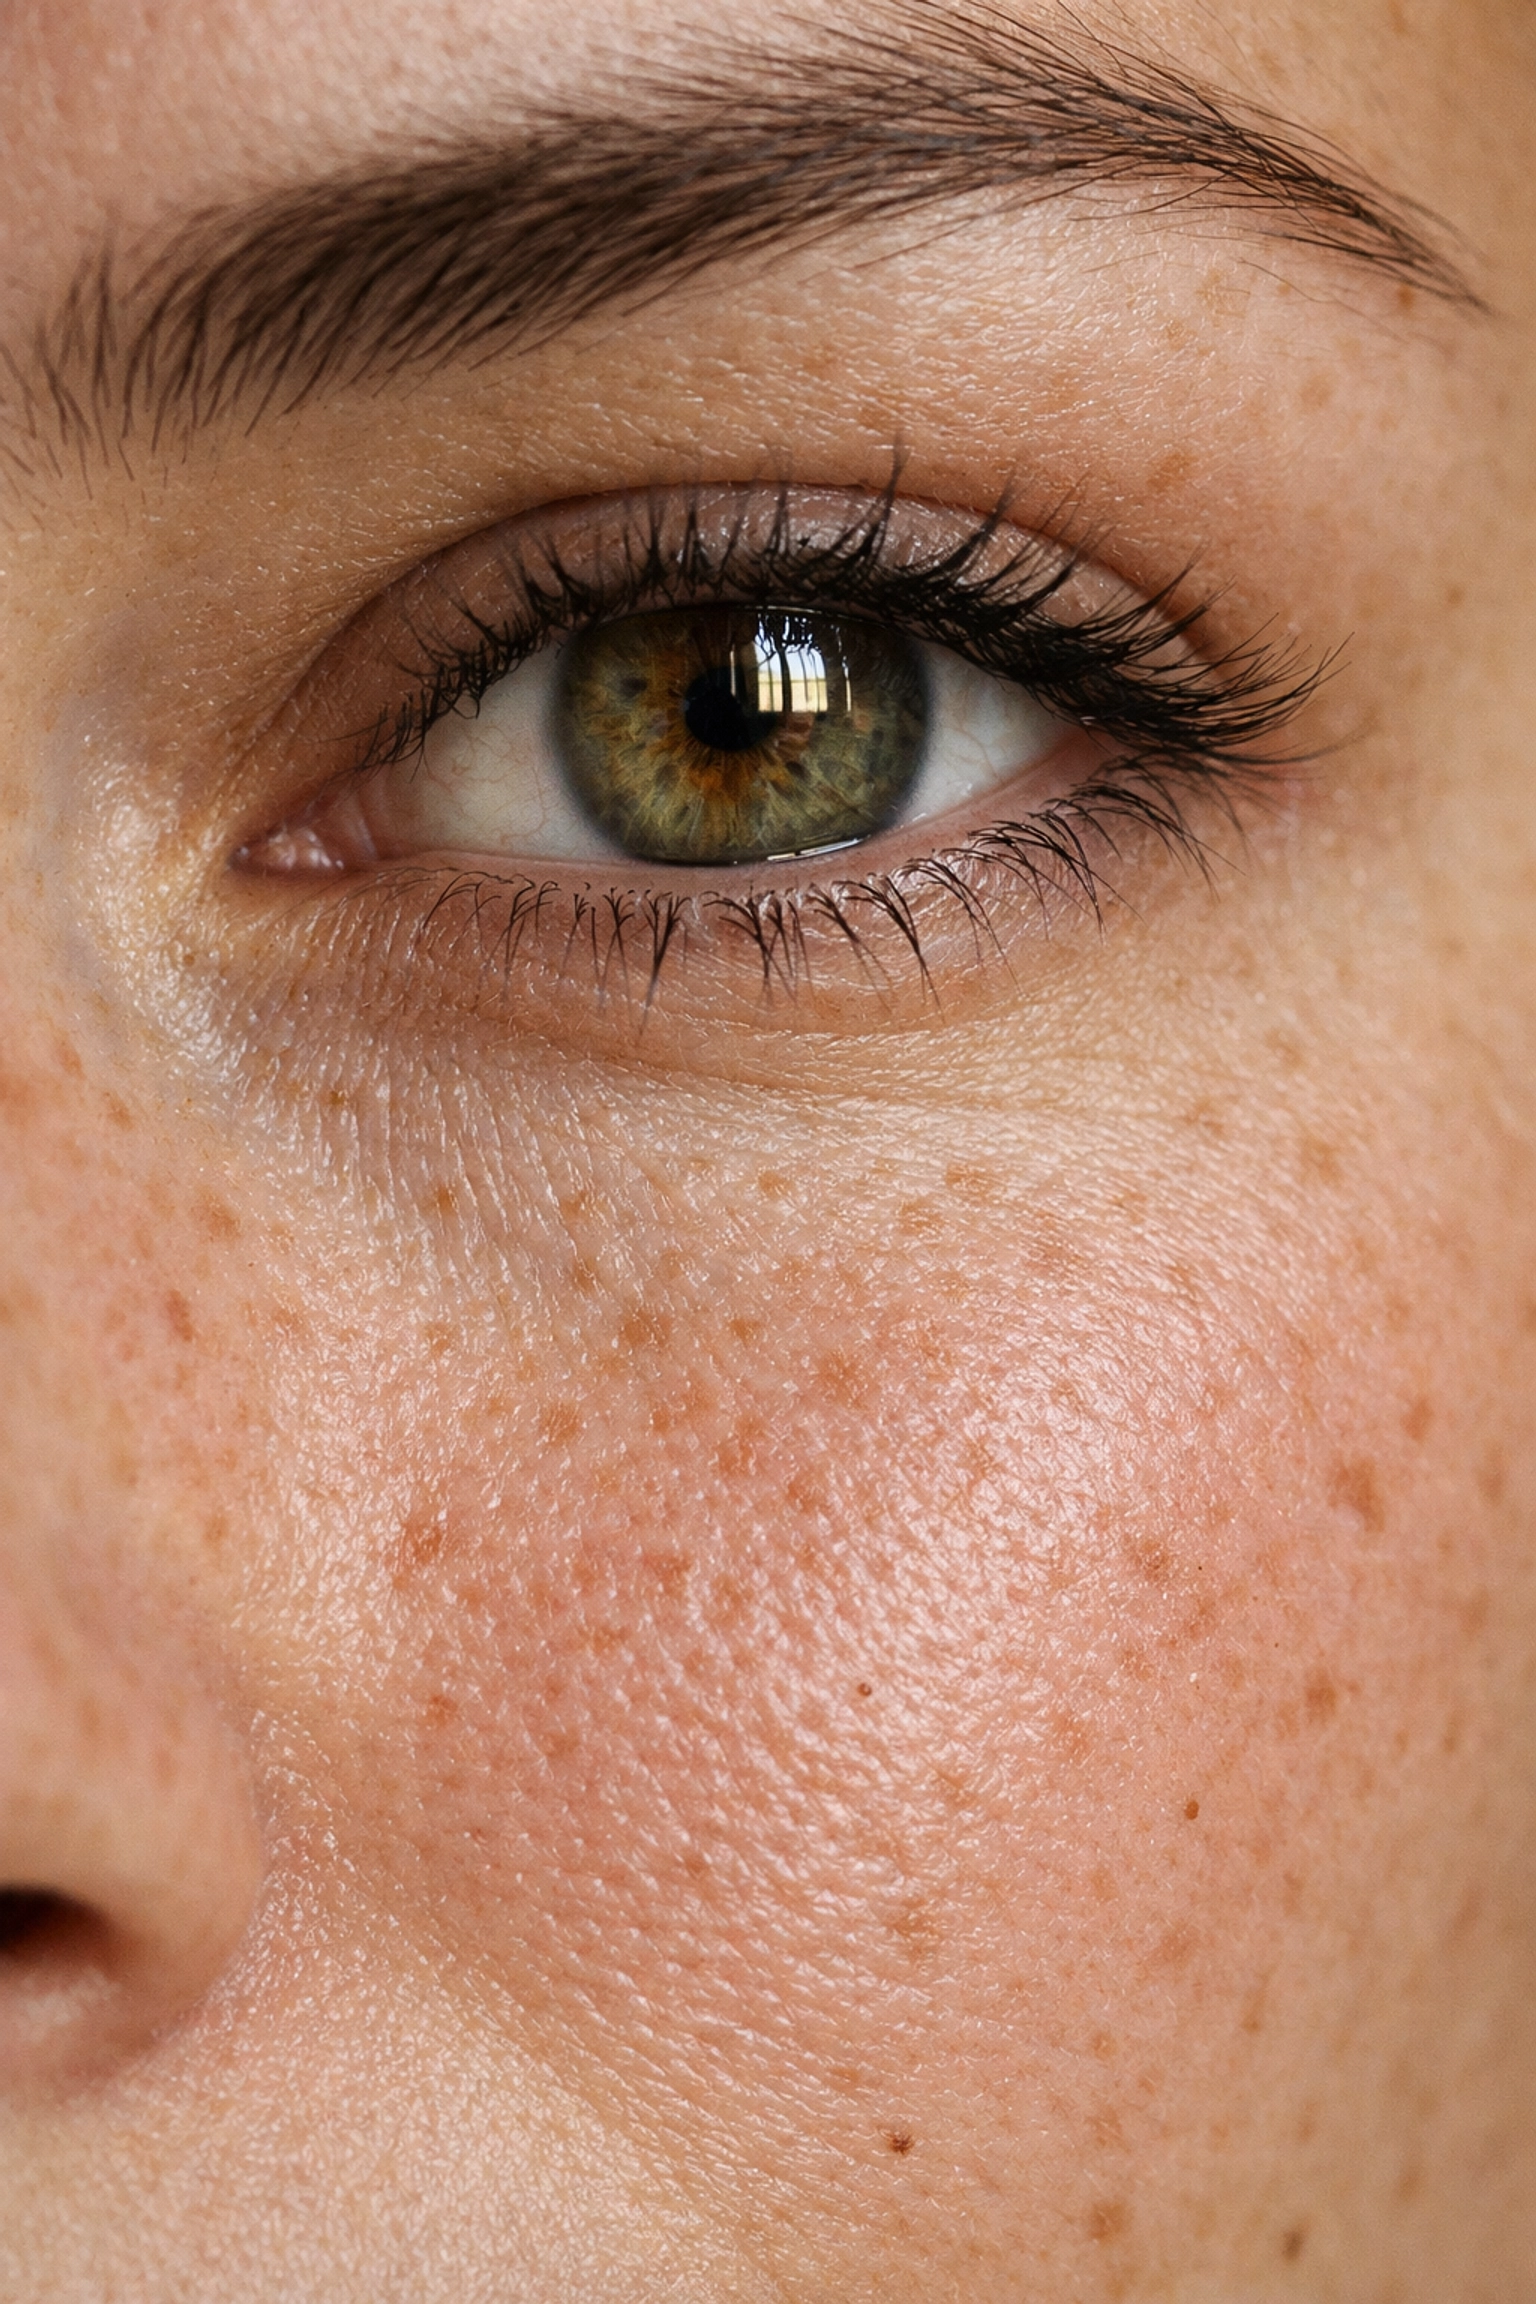
5. Over-Retouching: The Uncanny Valley
We live in an age of filters, but in professional portraiture, less is almost always more.
The Mistake
Flash photography is honest, sometimes too honest. It shows every pore and blemish. The temptation is to jump into Photoshop and smooth the skin until it looks like plastic. We’ve all seen those portraits where the subject has no nose pores and their eyes glow like LED bulbs. It looks artificial and, frankly, a bit creepy.
The Fix
Instead of removing texture, aim to reduce distractions. Use the "healing brush" for temporary blemishes but leave the natural character of the skin. When it comes to eyes, don't just brighten the whole eyeball. To keep them looking natural, keep the edges of the "whites" slightly darker than the center.
For a more natural and efficient workflow, many pros are switching to AI-assisted tools. I highly recommend trying out Luminar. It allows you to enhance features subtly without losing the "human" element of the photo. If you want to dive deeper into professional editing standards, check out the resources at PhotoGuides.org.
6. Terrible Cropping and Composition
Where you cut off the frame is just as important as what you put in it.
The Mistake
There are two common cropping sins. The first is leaving way too much "dead air" above the head, making the subject look like they’re sinking to the bottom of the photo. The second is "amputating" limbs at the joints. Cutting someone off exactly at the wrist, elbow, or knee looks jarring and anatomical.
The Fix
Follow the "Rule of Thirds" but don't be afraid to break it intentionally. If you're doing a tight portrait, feel free to crop into the top of the hair to bring the focus entirely onto the eyes. However, never crop at the joints. Always crop mid-thigh, mid-waist, or mid-bicep. This maintains a sense of flow.
If you’re looking for inspiration on how to fill a frame effectively, look at how vistas and perspectives manipulate perception in other fields of photography. It’s all about balance and intentionality.

7. Using a Slow Shutter Speed
You might think that because your subject is "standing still," you can get away with a slower shutter speed to let in more light. You would be wrong.
The Mistake
Humans are never perfectly still. They breathe, they sway, and their eyes micro-blink. If your shutter speed is too slow, say, 1/60th of a second: you’re going to get "soft" images. There is nothing more frustrating than nailing the perfect expression only to find out the eyes are slightly blurry because of motion blur.
The Fix
Keep your shutter speed fast. A good rule of thumb for handheld portraits is to keep it at least double your focal length (e.g., if you're using an 85mm lens, shoot at 1/200s or faster). This ensures that even if the subject moves a fraction of an inch, the image remains tack-sharp. Sharpness is one of the 10 essential tips for mastering photography that we always preach here at Shut Your Aperture.
Putting It All Together
Mastering portrait photography isn't about avoiding mistakes entirely: it's about learning how to spot them and correct them on the fly. Whether you're shooting a high-end corporate headshot or a casual photo of a friend, these "fixes" will immediately elevate your work.
Remember, the tech is just a tool. Whether you're using the latest mirrorless setup or a compact point-and-shoot, the principles of light, posing, and composition remain the same.
If you want to see how these techniques look in a different context, take a look at our piece on why everyone is talking about today's photography news or head over to Edin Chavez’s personal blog for more behind-the-scenes insights into the creative process.
Portrait photography is an obsession for many of us because every face tells a different story. Your job is just to make sure that story isn't "I don't know how to use my flash." Keep practicing, stay curious, and stop cropping people at the knees!
For more advanced gear reviews and technical deep-dives, don't forget to visit ProShoot.io and Edin Fine Art to see how these techniques translate into gallery-quality prints. Now get out there and start shooting!


