

Let’s be real for a second: portrait photography looks easy until you actually try to do it. You see a beautiful face, you have a fancy camera, and you think, “How hard can this be?” Then you get home, load the photos onto your computer, and realize your subject looks like they’re in a police lineup, or worse, their nose looks three times its actual size.
We’ve all been there. Even the pros at Shut Your Aperture started somewhere. Taking a great portrait isn't just about having a subject who knows how to smile; it’s about mastering the technical bits that usually go unnoticed until they’re wrong.
If you feel like your portraits are lacking that "wow" factor, you’re likely making one (or all) of these common mistakes. The good news? They are incredibly easy to fix. Let’s dive into the seven most common portrait photography blunders and how you can turn them around today.
1. The "Lost in Space" Look (Poor Cropping and Framing)
One of the most immediate signs of an amateur portrait is poor framing. Usually, this manifests in two ways: leaving way too much empty space above the subject’s head or cutting off limbs at the joints.
When you leave massive amounts of "dead air" above someone's head, you make them look small and insignificant in the frame. It draws the viewer's eye away from the face and toward whatever is happening in the top third of the photo. On the flip side, "clipping" is just as bad. A golden rule in portraiture is never to crop at a joint. Don’t cut off fingers, wrists, elbows, knees, or ankles. It makes the subject look like an amputee and creates a jarring visual break.
The Fix:
Try to fill the frame. If you’re doing a headshot, let the top of the head get close to the top of the frame (or even slightly crop the hair: it’s a vibe). If you’re doing a full-body shot, use the Rule of Thirds to place your subject intentionally. Offset them to one side to create a more dynamic composition. Also, if you need to crop a limb, do it in the "meaty" parts: the mid-thigh or the forearm: rather than the joint.
For more on how to frame different types of shots, check out The Ultimate Guide to Landscape Photography Tips. While it’s focused on landscapes, the rules of composition and "negative space" apply heavily to environmental portraits too.
2. The "Ghost Eyes" (Out-of-Focus Eyes)
In portraiture, the eyes aren't just the window to the soul; they are the most important part of your technical execution. If the eyes aren't sharp, the photo is almost always a "reject."
A common mistake is letting the camera’s autofocus choose the closest object to the lens, which is often the tip of the nose. By the time you get to the eyes, the depth of field has already blurred them out. This is especially true if you’re shooting with a fast prime lens at f/1.8 or f/1.4.
The Fix:
If your camera has "Eye Autofocus" (Eye-AF), turn it on and never turn it off. It’s a literal cheat code. If you’re shooting manually or with an older camera, always toggle your focus point specifically onto the eye closest to the camera.
If you find your eyes are just a little bit soft after the fact, you can use AI-powered tools like Luminar to enhance the sharpness and "pop" of the iris. It can’t save a totally blurry shot, but it can definitely bring back that sparkle. For high-end retouching tips, ProShoot.io has some great resources on getting that commercial-grade sharpness.
3. The "Micro-Blur" (Shutter Speed Too Slow)
Have you ever looked at a photo that seems sharp on your camera’s small LCD screen, but when you zoom in on your monitor, everything looks just a tiny bit mushy? That’s camera shake or subject movement, caused by a shutter speed that’s too slow.
People move. Even when they think they’re standing still, they are swaying, breathing, and blinking. If your shutter speed is hovering around 1/60th of a second, you’re playing a dangerous game.
The Fix:
For handheld portraits, try to keep your shutter speed at 1/250th of a second or faster. This is fast enough to freeze the subtle movements of your subject and compensate for the slight shake of your hands. If you’re using a long telephoto lens (like a 200mm), you might need to go even faster to ensure total crispness.
Don't be afraid to bump up your ISO to achieve this faster shutter speed. Modern cameras handle "noise" incredibly well, and a slightly grainy photo is always better than a blurry one.
4. The "Tree-Head" Syndrome (Distracting Backgrounds)
We’ve all seen it: a beautiful portrait of a woman, but there’s a telephone pole or a tree branch growing directly out of the top of her head. This happens when the photographer is so focused on the subject's expression that they completely forget to look at what’s happening behind them.
A busy, cluttered background competes for the viewer's attention. If there’s a bright red trash can or a neon sign behind your subject, that’s where the eye will go first.
The Fix:
Before you press the shutter, do a quick "perimeter check" of the frame. Is there anything distracting? If so, move yourself or your subject. Often, just taking one step to the left or right will completely hide a background distraction.
Another trick is to create physical distance between your subject and the background. The further they are from the wall or the trees behind them, the more "bokeh" (background blur) you’ll get. If you’re looking for unique textures to use as backgrounds, check out our post on using rare textures for tangible aesthetic photography. Sometimes a simple textured wall is all you need for a masterpiece.
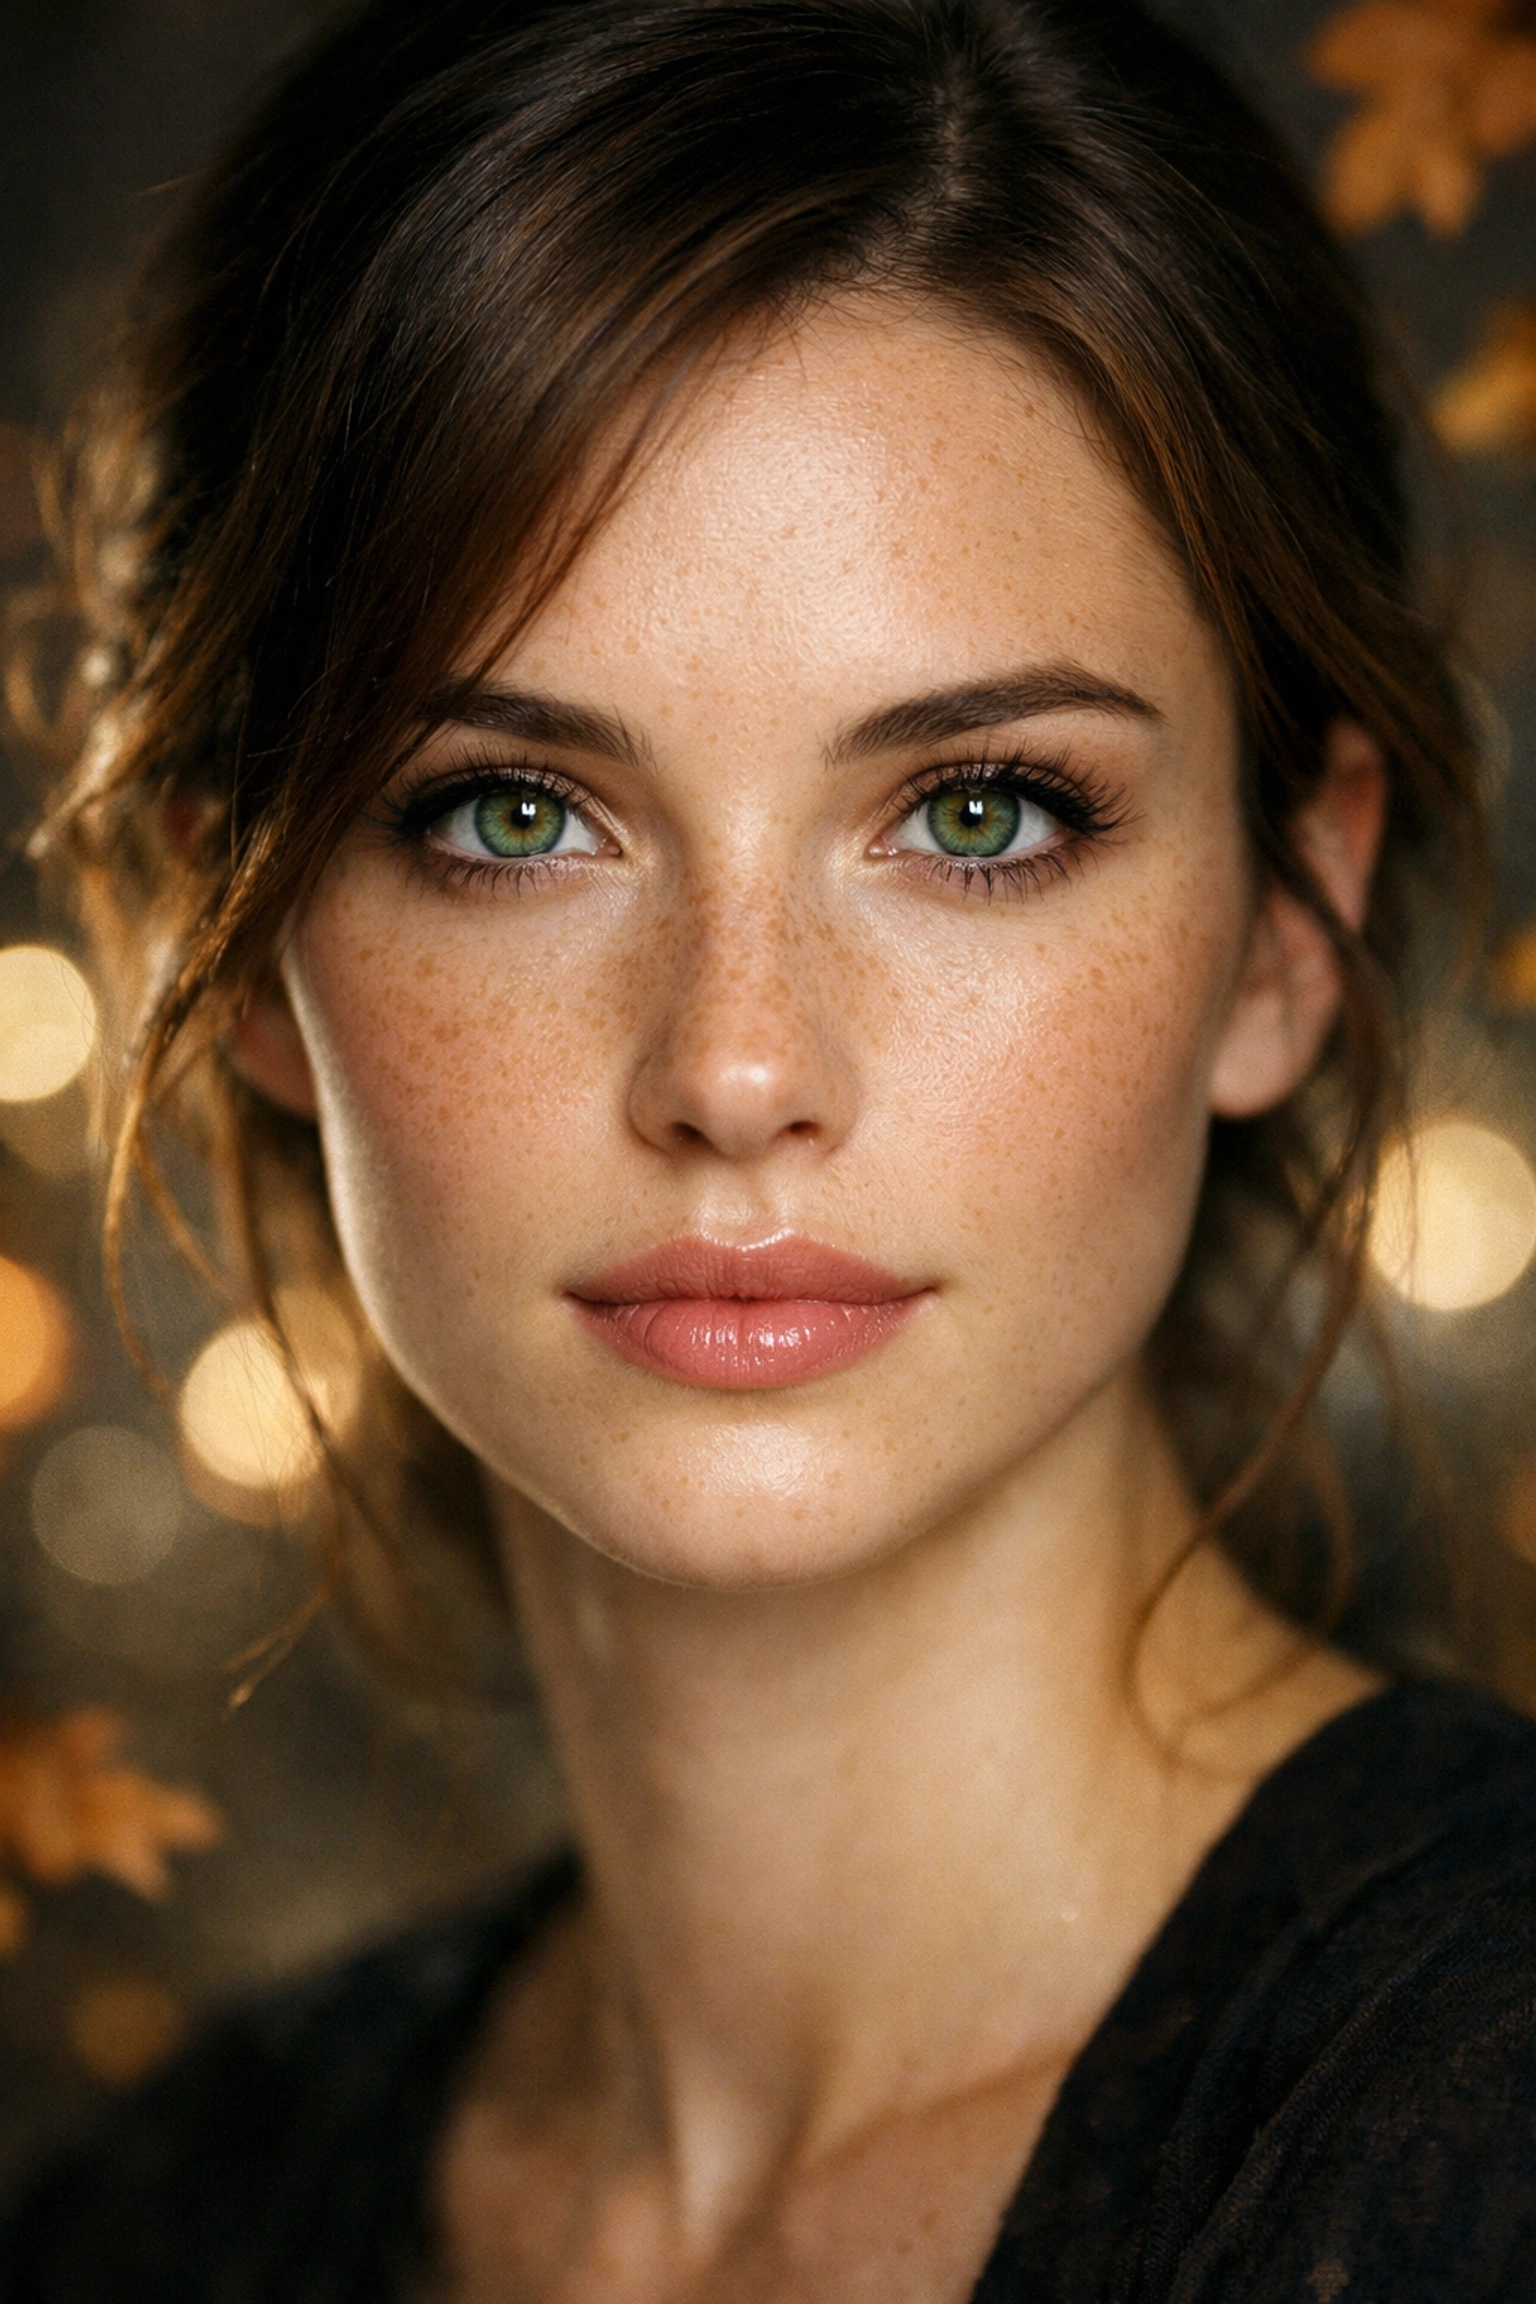
5. The "Big Nose" Distortion (Using Wide-Angle Lenses)
If you’re using your phone’s standard lens or a 24mm/35mm lens for close-up portraits, you might notice that people’s faces look… off. Wide-angle lenses have a tendency to distort things that are close to the glass. In a portrait, this usually means the nose looks larger and the ears look like they’re being pulled back. It’s not a flattering look for anyone.
While 35mm is great for "environmental" portraits where you want to see the location, it’s a disaster for tight headshots.
The Fix:
The "sweet spot" for portraits is usually between 85mm and 135mm (on a full-frame camera). These focal lengths "compress" the features, making the face look more natural and flattering. If you’re stuck with a 50mm lens, just don’t get too close. Take a few steps back and crop the image later if you have to.
For a deeper dive into lens choices and gear, PhotoGuides.org is an excellent resource for choosing the right tool for the job.
6. The "Aperture Addiction" (Incorrect Depth of Field)
We get it. You bought a lens that goes to f/1.2 or f/1.8 because you want that creamy, buttery background. But shooting "wide open" all the time is a mistake.
If you’re shooting a close-up at f/1.4, your depth of field might be so thin that the subject's eyelashes are in focus, but their actual eyeball is blurry. Or, if you’re shooting a couple, one person might be sharp while the other is a soft blob. Just because your lens can go to f/1.8 doesn't mean it should for every shot.
The Fix:
Stop down a little. Shooting at f/2.8 or f/4 still gives you plenty of background blur while ensuring that the entire face (or both people in a group) remains sharp.
If you’re shooting in a stunning location: maybe one of those hidden gem locations for travel photography: you actually want to see some of the background. In those cases, try f/5.6 or f/8. This is called an "environmental portrait," and it tells a much bigger story than just a blurry background. If you need inspiration for these types of shots, see what Edin is doing over at blog.edinchavez.com.
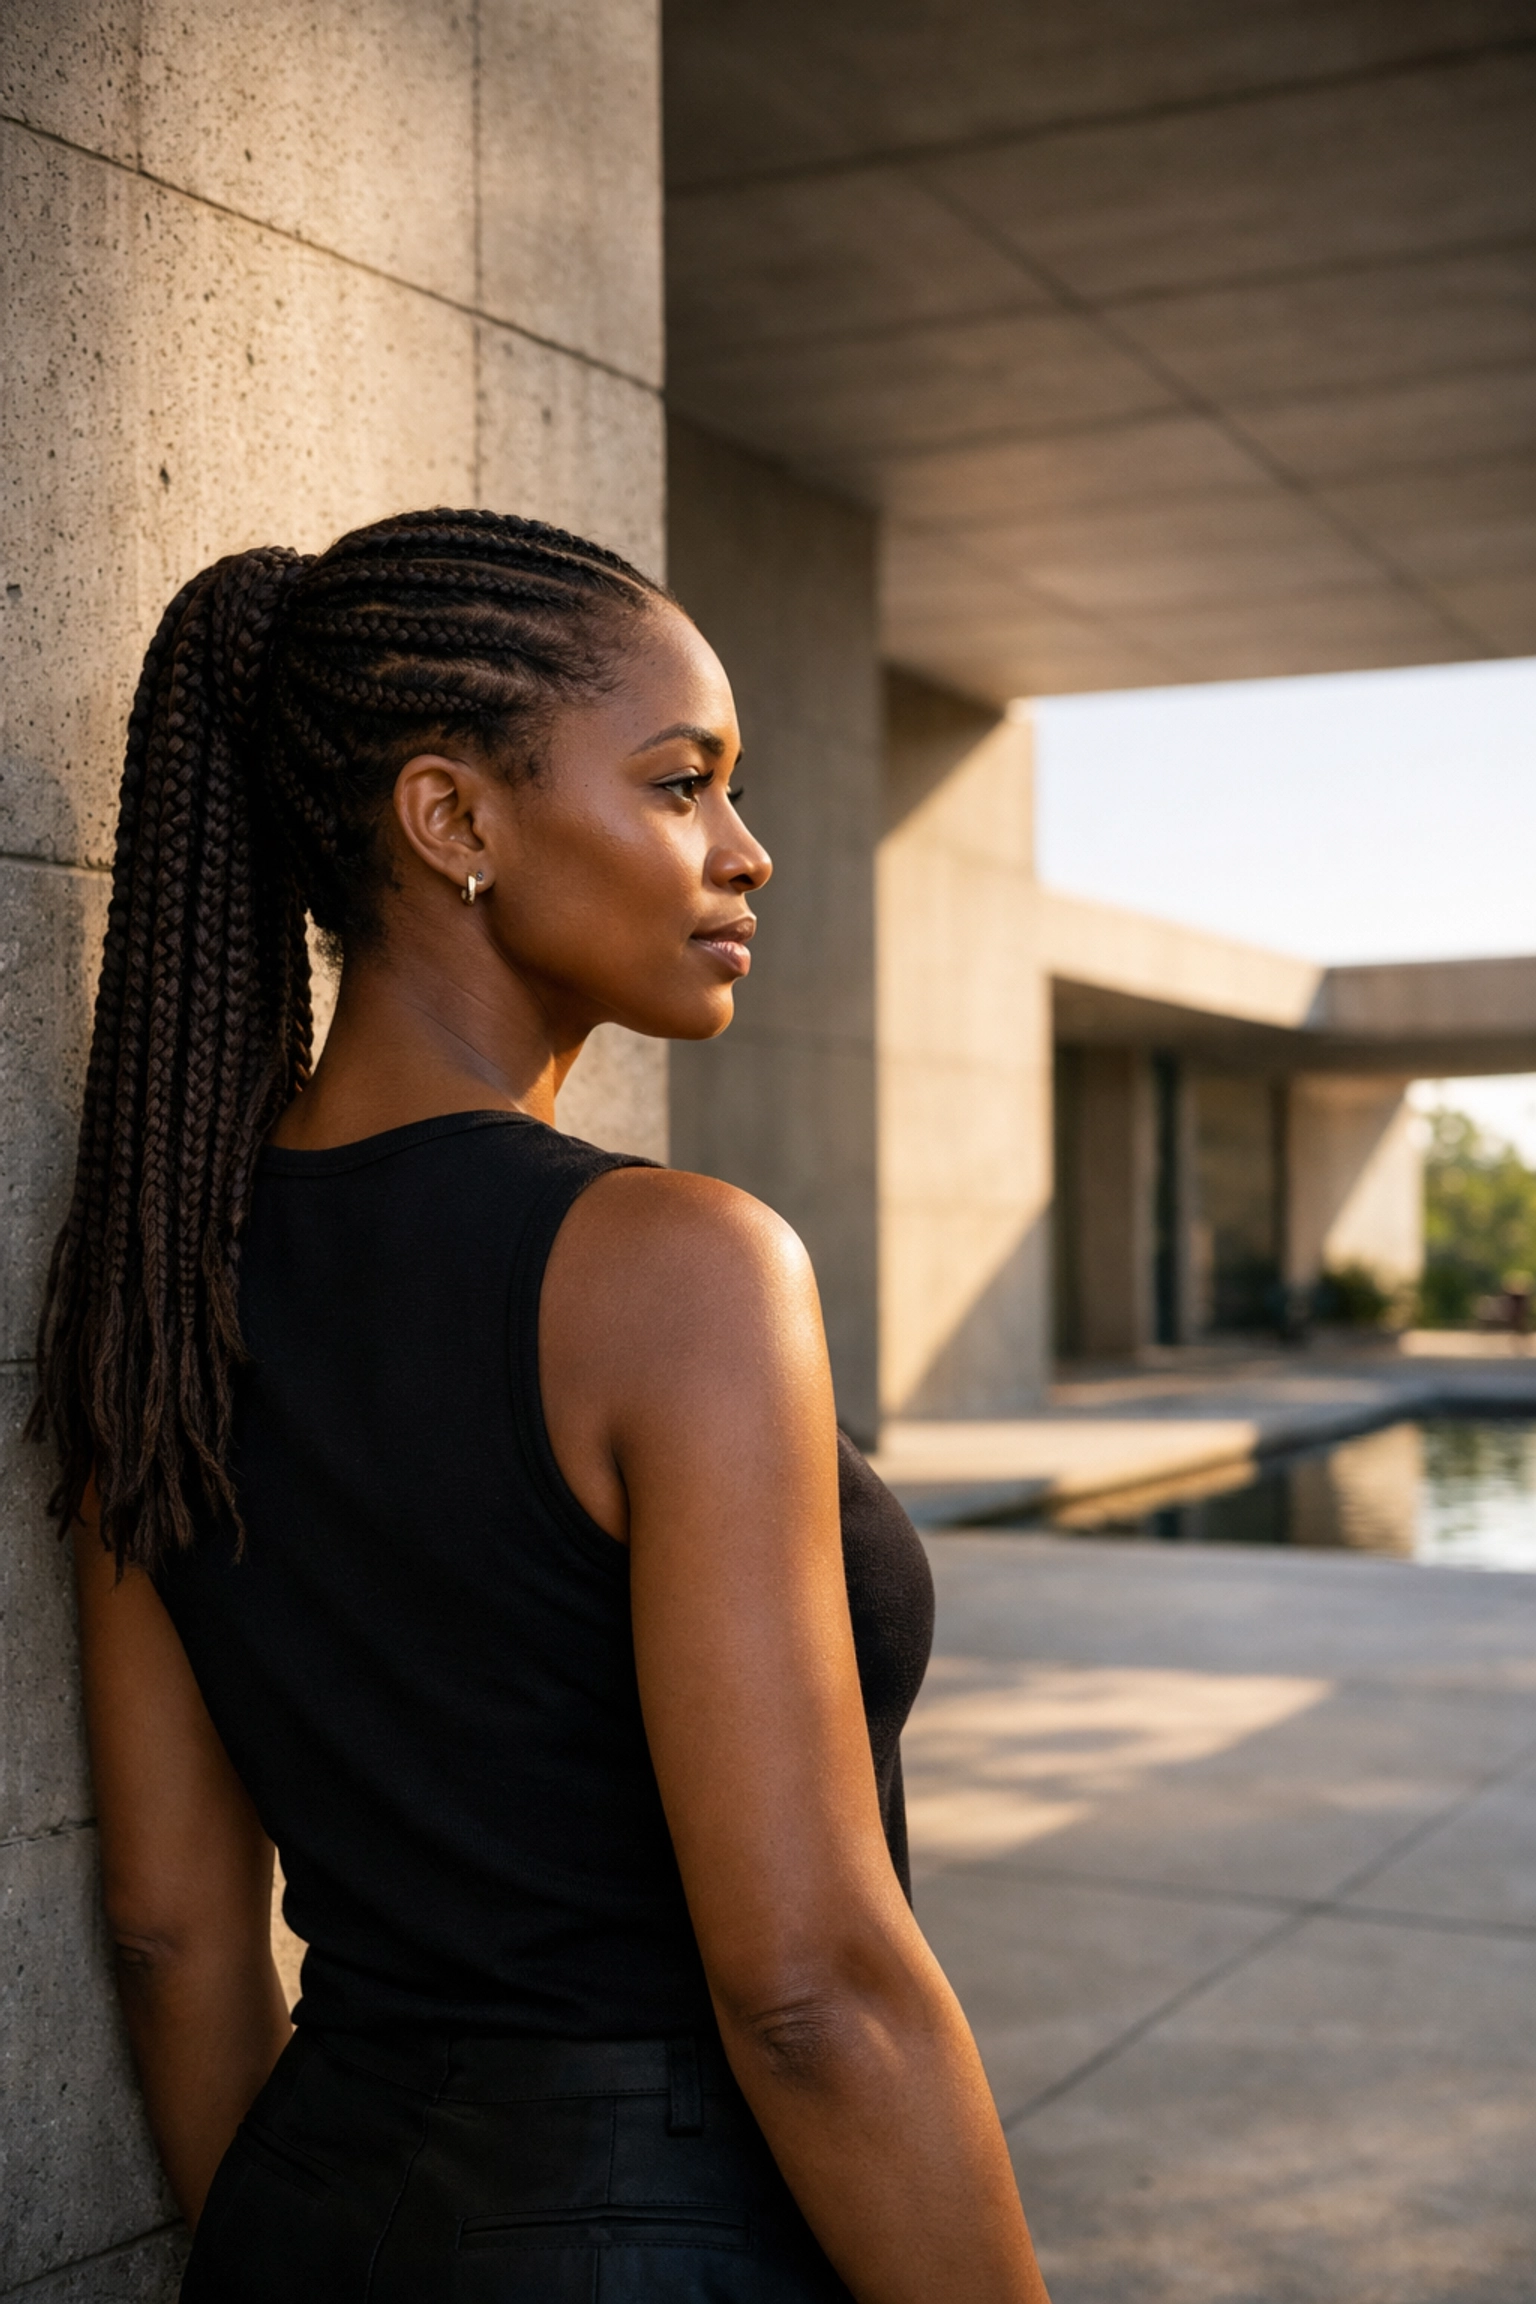
7. The "Deer in Headlights" (Square-On Positioning)
When you tell someone to stand for a photo, their natural instinct is to stand square-on to the camera, shoulders wide, feet planted. This is the least flattering way to photograph a human. It makes them look as wide as possible and often creates a stiff, "mugshot" vibe.
The Fix:
Have your subject turn their shoulders about 45 degrees away from the camera. This creates a slimmer profile and adds a sense of depth to the image. Ask them to put their weight on their back foot: this naturally creates a more relaxed posture.
Another tip is to look for "triangles." Have them put a hand on a hip or lean against a wall. Triangles in posing create visual interest and lead the eye around the frame. You can find more professional posing and studio setup tips at edinstudios.com.
Taking It Further: The Power of Post-Processing
Even if you nail all seven of these fixes, your raw photos might still look a bit "flat." That’s where the magic of editing comes in. You don't need to spend four hours in Photoshop to make a portrait look good.
Software like Luminar uses AI to handle things like skin smoothing, eye enhancement, and face lighting in a matter of seconds. It’s perfect for when you want that professional look without the steep learning curve of traditional editing.
If you’re looking to turn your portraits into actual pieces of art, check out edinfineart.com to see how professional-grade editing can transform a simple photo into something gallery-worthy.
Wrapping It Up
Portrait photography is a dance between technical precision and human connection. By fixing these seven mistakes: tightening your crops, nailing the eye focus, speeding up your shutter, cleaning up your backgrounds, choosing the right lens, being smart with aperture, and angling your subject: you’ll see an immediate jump in the quality of your work.
Don't be afraid to experiment. Go find some lesser-known vistas for enigmatic photos and practice these techniques. The more you shoot, the more these "fixes" will become second nature.
Photography is about capturing a moment, but it’s the technique that makes that moment worth looking at. Now, grab your camera, find a patient friend, and go make some magic happen!


