You have the power to transform your photography by mastering the art of lighting. Understanding how to manipulate light can enhance your images, highlight your subjects, and create stunning effects. In this post, you’ll discover vital lighting techniques that can elevate your photography from ordinary to extraordinary. From the importance of natural light to clever use of shadows, these secrets will help you capture breathtaking photographs consistently. Get ready to unlock your potential as you research into the vital principles of lighting that every photographer should know!

Key Takeaways:
- Lighting is the foundation of photography; mastering different lighting scenarios can enhance image quality.
- Understand the three main types of lighting: natural light, artificial light, and ambient light, and how they affect your subject.
- Experiment with different light sources and modifiers, such as diffusers and reflectors, to achieve desired effects.
- Pay attention to the direction of light; it can dramatically change the mood and depth of a photograph.
- Practice shooting at various times of day to observe how natural light changes, and learn to adapt your techniques accordingly.
The Power of Light: Understanding Its Role in Photography
Light serves as the backbone of photography, shaping composition and mood in every image you capture. Mastering light allows you to create more dynamic photographs, drawing viewers into your visual narratives. Whether it’s the soft glow of dawn or the stark contrast of neon lights at night, understanding how light interacts with your subject will elevate your photography skills to new heights.
The Physics of Light: Unpacking Its Properties
Understanding the fundamentals of light involves delving into its unique properties, such as wavelength, which affects color, and intensity, which determines how bright or dim an image will appear. Light can travel in waves, reflecting, refracting, or diffusing depending on the surfaces it encounters. Knowledge of these properties can enhance your ability to manipulate light creatively, leading to more compelling images.
Natural vs. Artificial Light: When to Use Each
Choosing between natural and artificial light depends on your subject and desired outcome. Natural light, available during the golden hour or through windows, offers a warm, soft quality that enhances portraits and landscapes. In contrast, artificial light provides control and consistency, making it ideal for studio settings or low-light scenarios. Understanding when to utilize each type allows you to tailor your lighting approach for optimal results.
When to choose natural light can sometimes be dictated by the time of day; for example, shooting during the golden hour—shortly after sunrise or before sunset—yields rich colors and softer shadows. This makes it perfect for landscape photography or capturing candid shots of subjects in natural settings. However, should you find yourself in low-light environments or needing specific ambient effects, artificial light becomes invaluable. Utilizing strobes or LED panels, you can achieve consistent isos, eliminate unwanted shadows, and manipulate your subject’s appearance effectively. Striking a balance between both lighting forms enables you to maximize your creative vision.

Mastering Light Sources: The Core Types
Understanding the core types of light sources is important for any photographer. Your skillful manipulation of natural and artificial lighting directly impacts the emotion and composition of your images. Here’s a breakdown of the main types of light sources to consider:
| Natural Light | Sunlight, moonlight, and ambient light |
| Continuous Lighting | LEDs and fluorescent lamps |
| Flash Lighting | Speedlights and studio strobes |
| Reflectors | Bounce light to enhance shadows |
| Diffusers | Soften and spread light |
Any understanding of these sources will enhance your ability to create visually striking photographs.
The Sun as Your Ultimate Light Source
The sun serves as the most versatile and easily accessible light source available, offering a range of opportunities throughout the day. During the golden hour—just after sunrise and before sunset—you’ll find soft, warm light that beautifully enhances skin tones and landscapes. Shadows cast by the sun can create dramatic effects, adding depth and dimension to your images. Learning to position your subjects in relation to the sun will elevate your photography significantly.
Exploring Continuous and Flash Lighting
Both continuous lighting and flash lighting offer unique advantages in controlled environments. Continuous lighting allows you to see how shadows and highlights interact in real-time, making it excellent for video and still photography alike. On the other hand, flash lighting delivers powerful bursts of illumination, freezing fast motion and enabling great depth of field at a wider range of apertures. Explore how each lighting type can transform your photography.
Continuous lighting, like LED and fluorescent options, provides a steady source for your setup, allowing you to adjust and position your subjects effectively. These bulbs generate less heat and have a longer lifespan than traditional options, making them a desirable choice for many photographers. Flash lighting systems, including speedlights and studio strobes, produce short bursts of light at high intensity, giving you creative control over exposure and the ability to capture fleeting moments with clarity. Understanding the nuances between these techniques will give you the capacity to adapt to various shooting conditions with confidence.
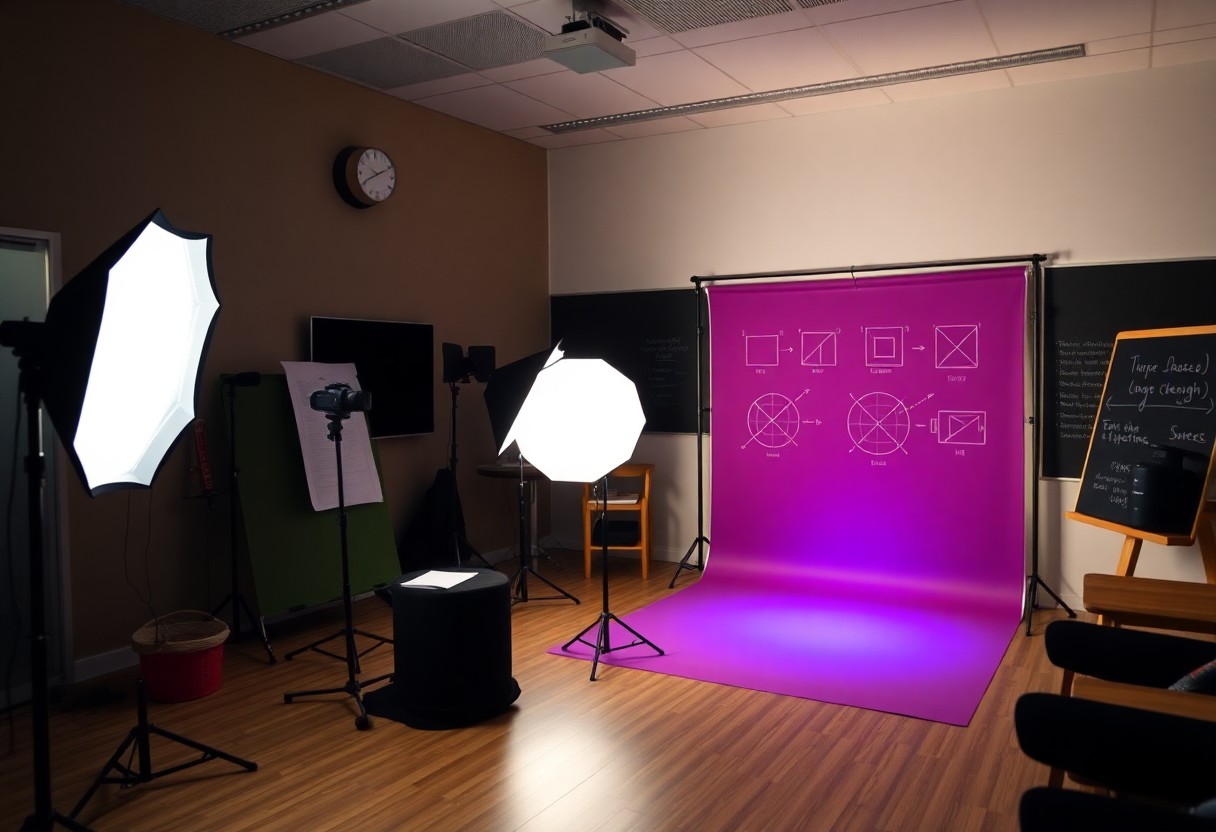
Manipulating Light: Tools of the Trade
Every photographer has a toolbox filled with various tools to manipulate light effectively. Mastering these tools allows you to shape the mood, texture, and overall quality of your images. From reflectors that bounce natural light to diffusers that soften harsh shadows, knowing which tool to use in each situation can significantly elevate your photography. With the right gear, you can transform an ordinary scene into something extraordinary, harnessing the full potential of available light.
Essential Gear: Reflectors, Diffusers, and More
Reflectors and diffusers are crucial tools that can dramatically alter how light interacts with your subject. A reflector redirects sunlight or artificial light to illuminate shadows, while a diffuser softens direct light, reducing contrast and creating a gentle glow. Additionally, portable options like collapsible reflectors make it easy to carry and set up anywhere. By integrating these accessories into your shots, you’ll enhance the quality of your images, giving you more creative latitude.
Creative Control: Filters and Gels
Filters and gels provide endless opportunities for creative expression in photography. They can adjust color temperatures, achieve different moods, and control exposure levels, making your images pop. For instance, a polarizing filter can reduce reflections and enhance color saturation, while gels can alter the color of your artificial lights, allowing you to mimic various times of day or create unique effects. The versatility of these tools, when applied with intention, transforms any scene into a captivating visual story.
By exploring the creative possibilities of filters and gels, you can take your photography to the next level. For example, using a warm gel on an LED light source can replicate the golden hour’s enchanting glow, adding a romantic touch to portraits. On the other hand, employing a cooling gel can create a dramatic, moody atmosphere for still life compositions. The right filter or gel can also allow you to correct color casts introduced by artificial lighting, ensuring your images maintain accurate, vivid colors that resonate with viewers.

The Art of Lighting: Composition and Mood
Your understanding of lighting can greatly enhance composition and elevate the mood of your photographs. Use lighting to create depth, enhance textures, and establish atmosphere. The interplay between shadows and highlights can evoke emotions ranging from serenity to tension. Experimenting with different lighting techniques can transform an ordinary scene into a powerful storytelling medium. Let the light guide your composition, and watch as it breathes life into your subject matter.
Direction and Quality of Light: Crafting Emotion
Manipulating the direction and quality of light is necessary for crafting emotion in your images. Side lighting can add drama and dimension, while diffused light can create a soft, dreamy atmosphere. Think about the emotional response you want to evoke, and adjust your light source accordingly—whether it be natural or artificial. For instance, shooting during the golden hour bathes your scene in warm tones that can evoke nostalgia.
Color Temperature: Setting the Scene
Understanding color temperature helps you set the scene and influence the mood of your photographs. Warmer light (around 2000K-4000K) creates feelings of warmth and intimacy, while cooler light (5000K-7000K) can evoke a sense of calmness or sterility. You can adjust your camera’s white balance settings to enhance these effects, making your images speak a visual language that resonates with the viewer.
Color Temperature Breakdown
| Color Temperature (K) | Emotional Impact |
|---|---|
| 2000K – 3000K | Warmth, Comfort |
| 4000K – 5000K | Neutral, Balanced |
| 6000K – 7000K | Cool, Calm |
Adjusting the color temperature in your photographs can significantly shift the viewer’s perception. For example, capturing a sunset at 3000K will imbue your image with warmth and intimacy, while shooting a snowy landscape at 6000K will reinforce a cool, crisp atmosphere. Each adjustment allows you to communicate specific feelings, enhancing the connection between your audience and your imagery.
Color Temperature Influence
| Type of Scene | Recommended Color Temperature |
|---|---|
| Beach Sunset | 2000K – 3000K |
| Indoor Portraits | 4000K – 5000K |
| Winter Landscape | 6000K – 7000K |
Practical Tips: Achieving Professional Results
- Utilize natural light to enhance your subject
- Experiment with different times of day for diverse effects
- Use reflectors to bounce light onto your subject
- Employ diffusers to soften harsh shadows
- Practice with artificial lights to gain control over your environment
Achieving professional results requires attention to light quality and manipulation. Utilizing techniques like light diffusion and bounce will enhance the look of your shots. Any willingness to experiment and adapt to different lighting situations will elevate your photography skills significantly.
Real-World Lighting Strategies for Beginners
As a beginner, utilize simple lighting techniques such as shooting during the golden hours—shortly after sunrise and before sunset—to capture warm, flattering light. Incorporate basic reflectors to fill in shadows and soften your subjects. Experiment with your camera settings to discover how aperture, ISO, and shutter speed affect your photos. Engaging with these strategies builds your confidence and understanding, paving the way to more creative experimentation.
Common Pitfalls and How to Avoid Them
Many new photographers fall into common traps like shooting in direct sunlight, creating harsh shadows, or failing to adjust their settings. Neglecting the quality of light can diminish the overall appeal of your images. Keeping in mind the positioning of your subject relative to light sources can help you avoid these mistakes. Understanding your environment and adapting accordingly can dramatically improve your photography.
To sidestep the pitfalls, assess your surroundings before snapping away. For example, observe how light interacts with your subject, and move to a shaded area to reduce harsh sunlight effects. Always check your camera settings—exposing your image properly can make the difference between a professional look and a snapshot. By taking the time to plan your shots and make thoughtful adjustments, you’ll develop better instincts over time.
Conclusion
So, by grasping these important photography lighting secrets, you elevate your skills and gain more control over your images. Understanding the interplay of natural and artificial light, as well as how to manipulate shadows, will significantly enhance your creativity and effectiveness as a photographer. You can take your photography to the next level by experimenting with different lighting techniques and settings. Embrace your journey, and let light become your loyal companion in capturing breathtaking visuals.
FAQ
Q: What are the basic types of lighting in photography?
A: In photography, the basic types of lighting include natural light, artificial light, and flash. Natural light refers to sunlight or ambient light from the environment, which can vary in quality and color throughout the day. Artificial light is any man-made light source, such as lamps or studio lights, which can be adjusted for intensity and direction. Flash is a specific type of artificial light that provides a quick burst of light to illuminate a scene, often used in low-light conditions or to freeze motion.
Q: How can I determine the best lighting for my photographs?
A: To determine the best lighting for your photographs, consider the subject and the atmosphere you wish to achieve. Experiment with different light sources and angles to see how they affect the scene. The time of day can also influence your shoot; for example, the golden hour (shortly after sunrise or before sunset) often provides soft, warm light that enhances colors and textures. Additionally, using reflectors or diffusers can help to manipulate and soften harsh lighting conditions.
Q: What is the significance of the ‘golden hour’ in photography?
A: The ‘golden hour’ refers to the period shortly after sunrise and before sunset when the sun is low on the horizon, creating soft, diffused lighting. This quality of light is highly sought after because it casts warm tones, reduces harsh shadows, and provides a natural glow that enhances images. Photographers often schedule shoots during this time to take advantage of the beautiful lighting conditions that can transform a scene.
Q: How do shadows impact the mood of a photograph?
A: Shadows play a significant role in shaping the mood and depth of a photograph. They can add drama and contrast, highlight shapes, and create a sense of three-dimensionality. Depending on their size, angle, and intensity, shadows can evoke different emotions. For a softer, more tranquil feel, using diffused light can minimize shadows, while harsh lighting creates stark contrasts that can feel intense or ominous, depending on the composition.
Q: What techniques can I use to control lighting in indoor photography?
A: To control lighting in indoor photography, you can use various techniques such as adjusting the position of available light sources, utilizing artificial lights like softboxes or LED panels, and incorporating accessories like reflectors and diffusers. Positioning your subject near windows can harness natural light while managing shadows. Additionally, adjusting camera settings, such as ISO, aperture, and shutter speed, can help you achieve the desired exposure in varying indoor lighting conditions.