

There is an intrinsic magic in the way the morning light kisses a mountain peak, a moment where the earth seems to hold its breath. For us, the photographers, the environment is our canvas and the sun is our paintbrush. We venture into the wild with a sense of reverence, hoping to capture even a fraction of that ephemeral beauty. But somewhere between the shutter click and the final export, things can go sideways.
Landscape photography tips are everywhere, yet many of us fall into the same traps that strip the soul right out of a scene. We want our photos to pop, but we end up with something that looks more like a high-octane video game than a slice of nature. If you’ve ever looked at your final edit and felt like something was "off," you’re not alone. I have tried every trick in the book, and I’ve learned that the secret to a breathtaking landscape isn’t in how much you can add, but in how much you can preserve.
Let’s dive into the seven most common mistakes you’re making and how to keep your shots looking as stoic and grand as the nature they represent.
1. The Neon Nightmare: Excessive Saturation
We’ve all been there. You get home, look at your raw files, and the sunset looks a bit… grey. The temptation to grab that saturation slider and crank it to 100 is real. But listen, fellow enthusiasts: nature doesn't glow in neon. When you over-saturate, you lose the subtle tonal shifts that make a landscape feel deep and three-dimensional.
Instead of hitting the global saturation button, venture forth into the HSL (Hue, Saturation, and Luminance) panel. This is where the real work happens. If the sky is a bit dull, maybe just a slight nudge to the blues will do. If the grass looks flat, a tiny boost to the yellows (yes, grass has more yellow than you think!) can breathe life back into it.
I always say that nothing compares to the natural palette provided by the "Golden Hour." If you find yourself pushing saturation past +10 or +15, stop and ask yourself if you’re trying to fix a composition or lighting issue with color. You can see some examples of balanced, vibrant-yet-natural work over at Edin Fine Art.
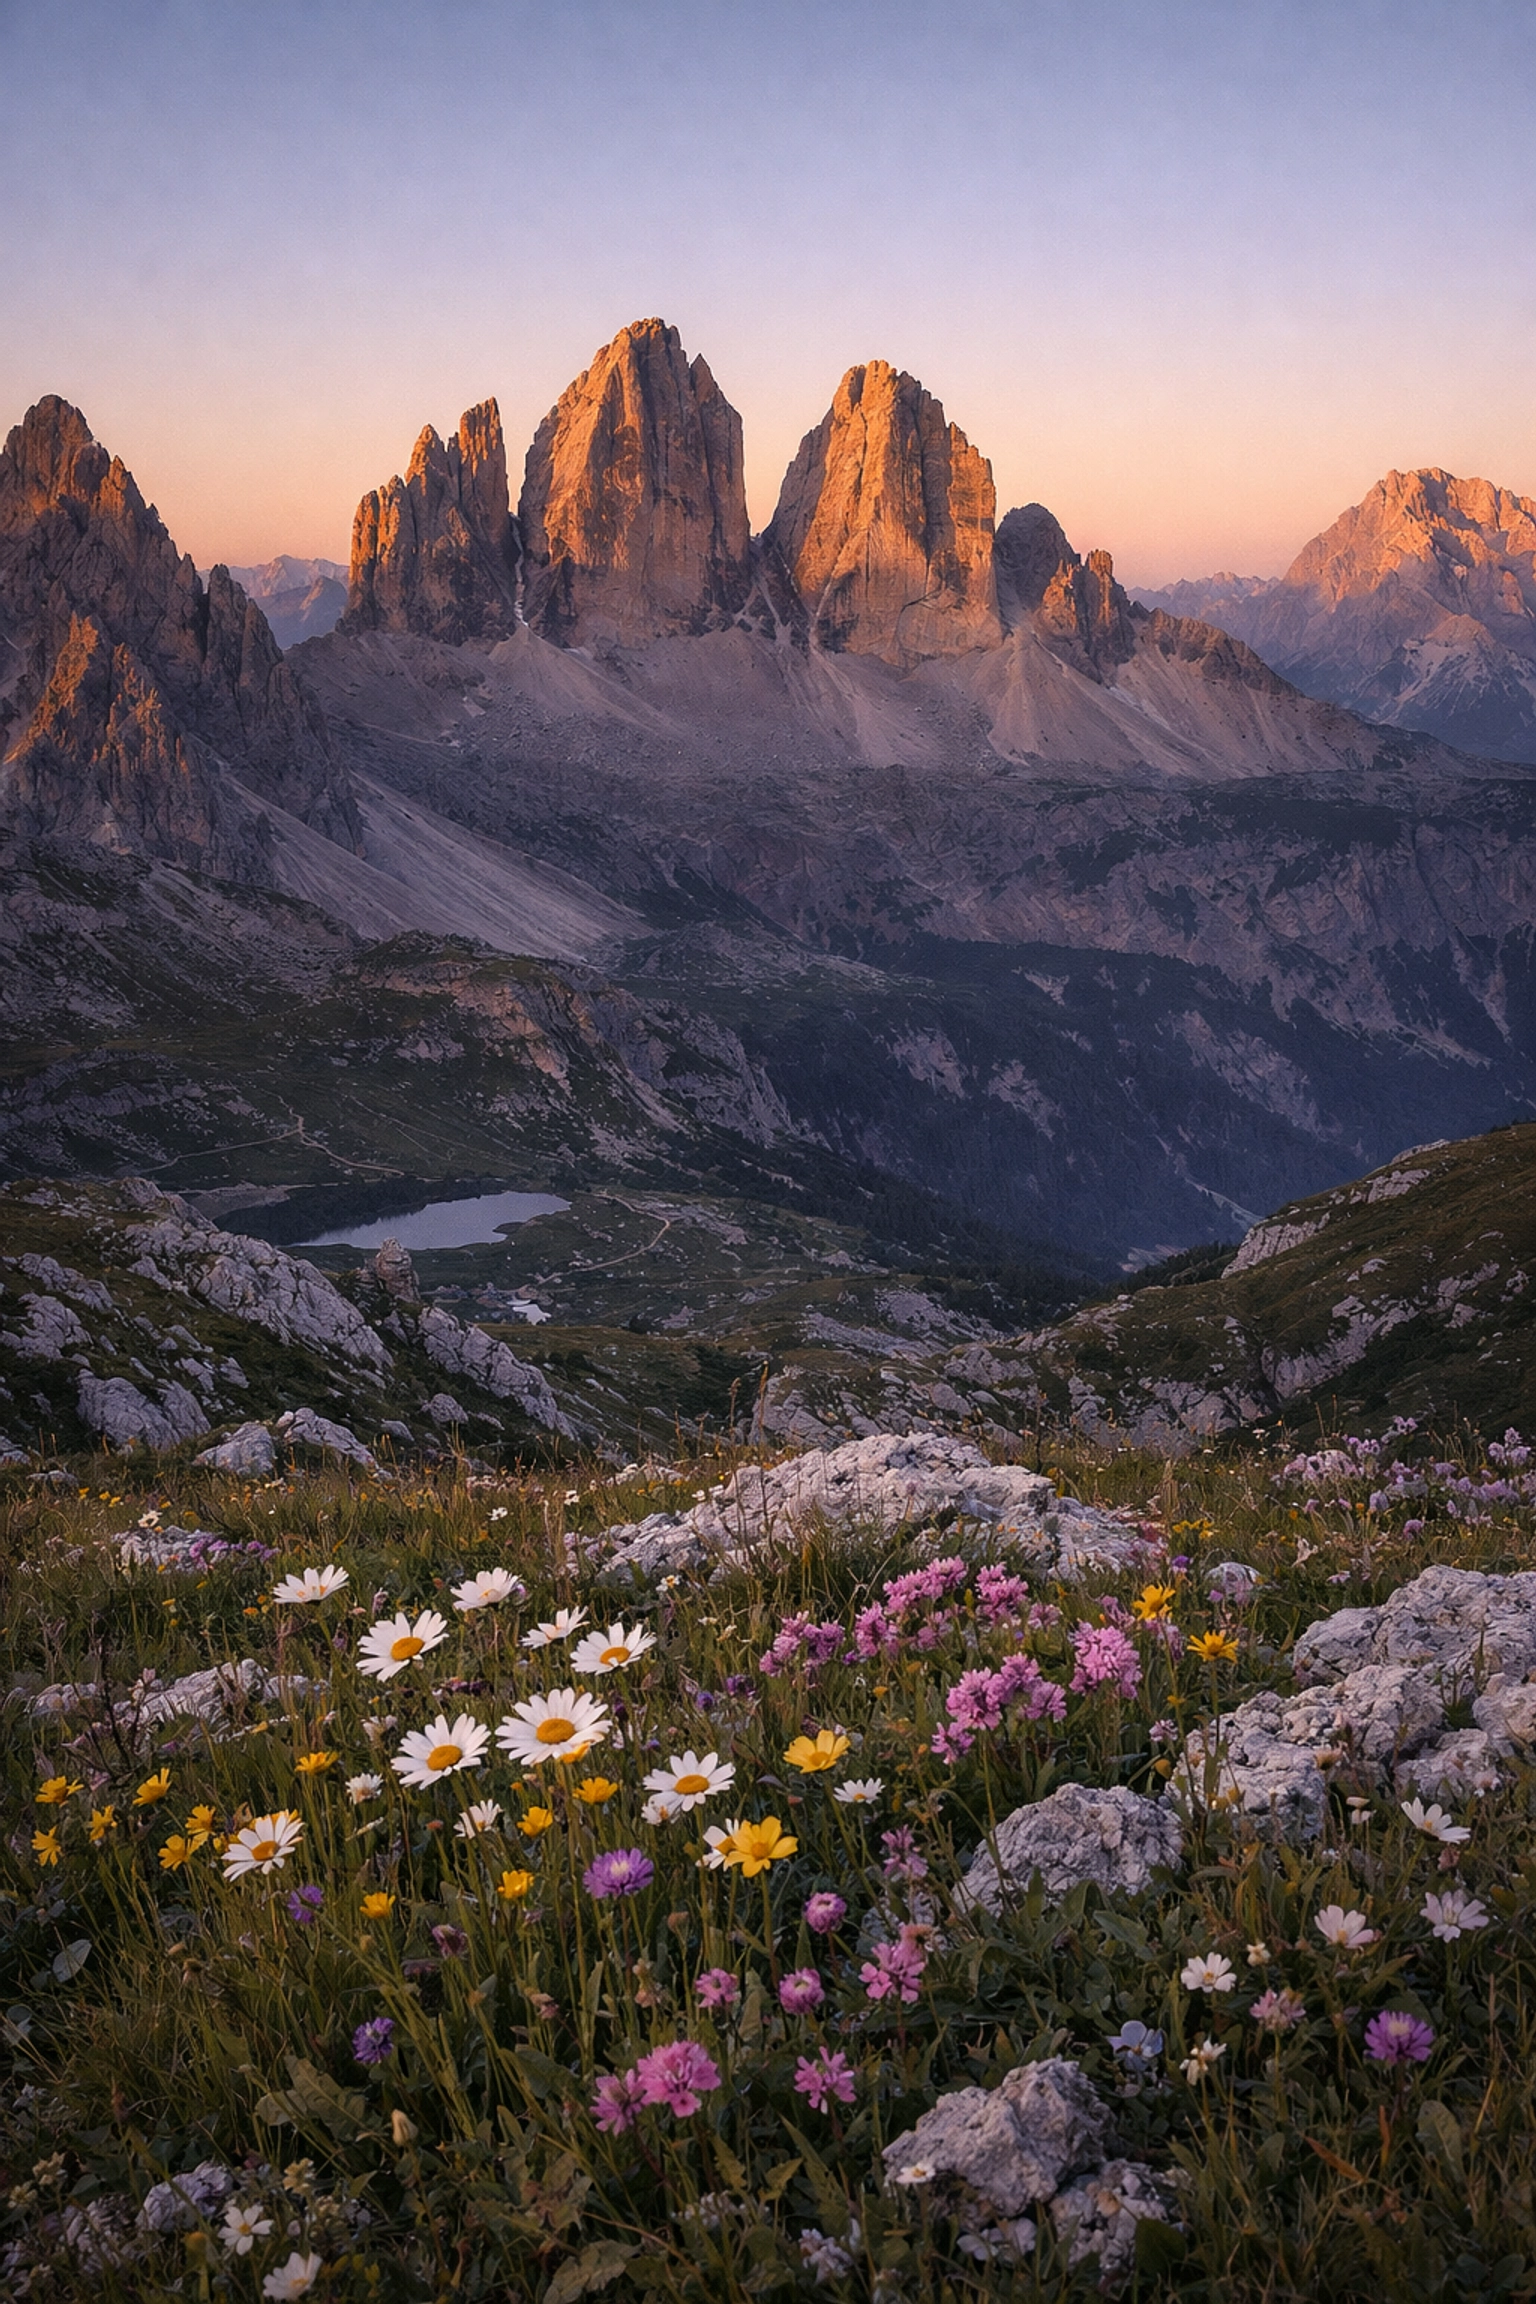
SEO Alt Text: A breathtaking mountain landscape during sunset with natural, balanced colors and soft lighting.
2. The Gritty Ghost: Overusing the Clarity Slider
Clarity is like a powerful spice; a little bit enhances the flavor, but too much makes the dish inedible. In the digital darkroom, clarity adds mid-tone contrast, making textures jump out. While it can make a rocky cliff look epic, it often creates a "dirty" or "gritty" look when applied to clouds or water.
When the sky begins to look like it’s made of charcoal, you’ve gone too far. For those chasing an ethereal vibe in their work, try using a "negative" clarity or a bit of "Dehaze" sparingly to soften the scene instead of hardening it. If you want to dive deeper into how to balance these settings, check out our mastering nature photography guide.
Remember, the goal is to guide the viewer’s eye, not to scream at it. Keep your clarity adjustments subtle: usually under +20: to maintain that professional, clean aesthetic.
3. Haloing Heavens: Poor Masking and Selections
Nothing ruins the reverence of a beautiful horizon faster than a glowing white line between the mountains and the sky. This is the "halo effect," and it’s a direct result of sloppy masking. When we use the adjustment brush or the graduated filter to darken a sky, we often accidentally overlap onto the land.
Dear hobbyists, take your time with your selections. Use the "Range Mask" tool or the "Intersect" feature in modern Lightroom versions to ensure your edits stay where they belong. If you’re struggling with the technical side of selections, ProShoot.io offers some incredible insights into high-end retouching workflows that avoid these digital artifacts.
A natural transition is seamless. The viewer should never be able to tell where your "paintbrush" started and the original "canvas" ended.
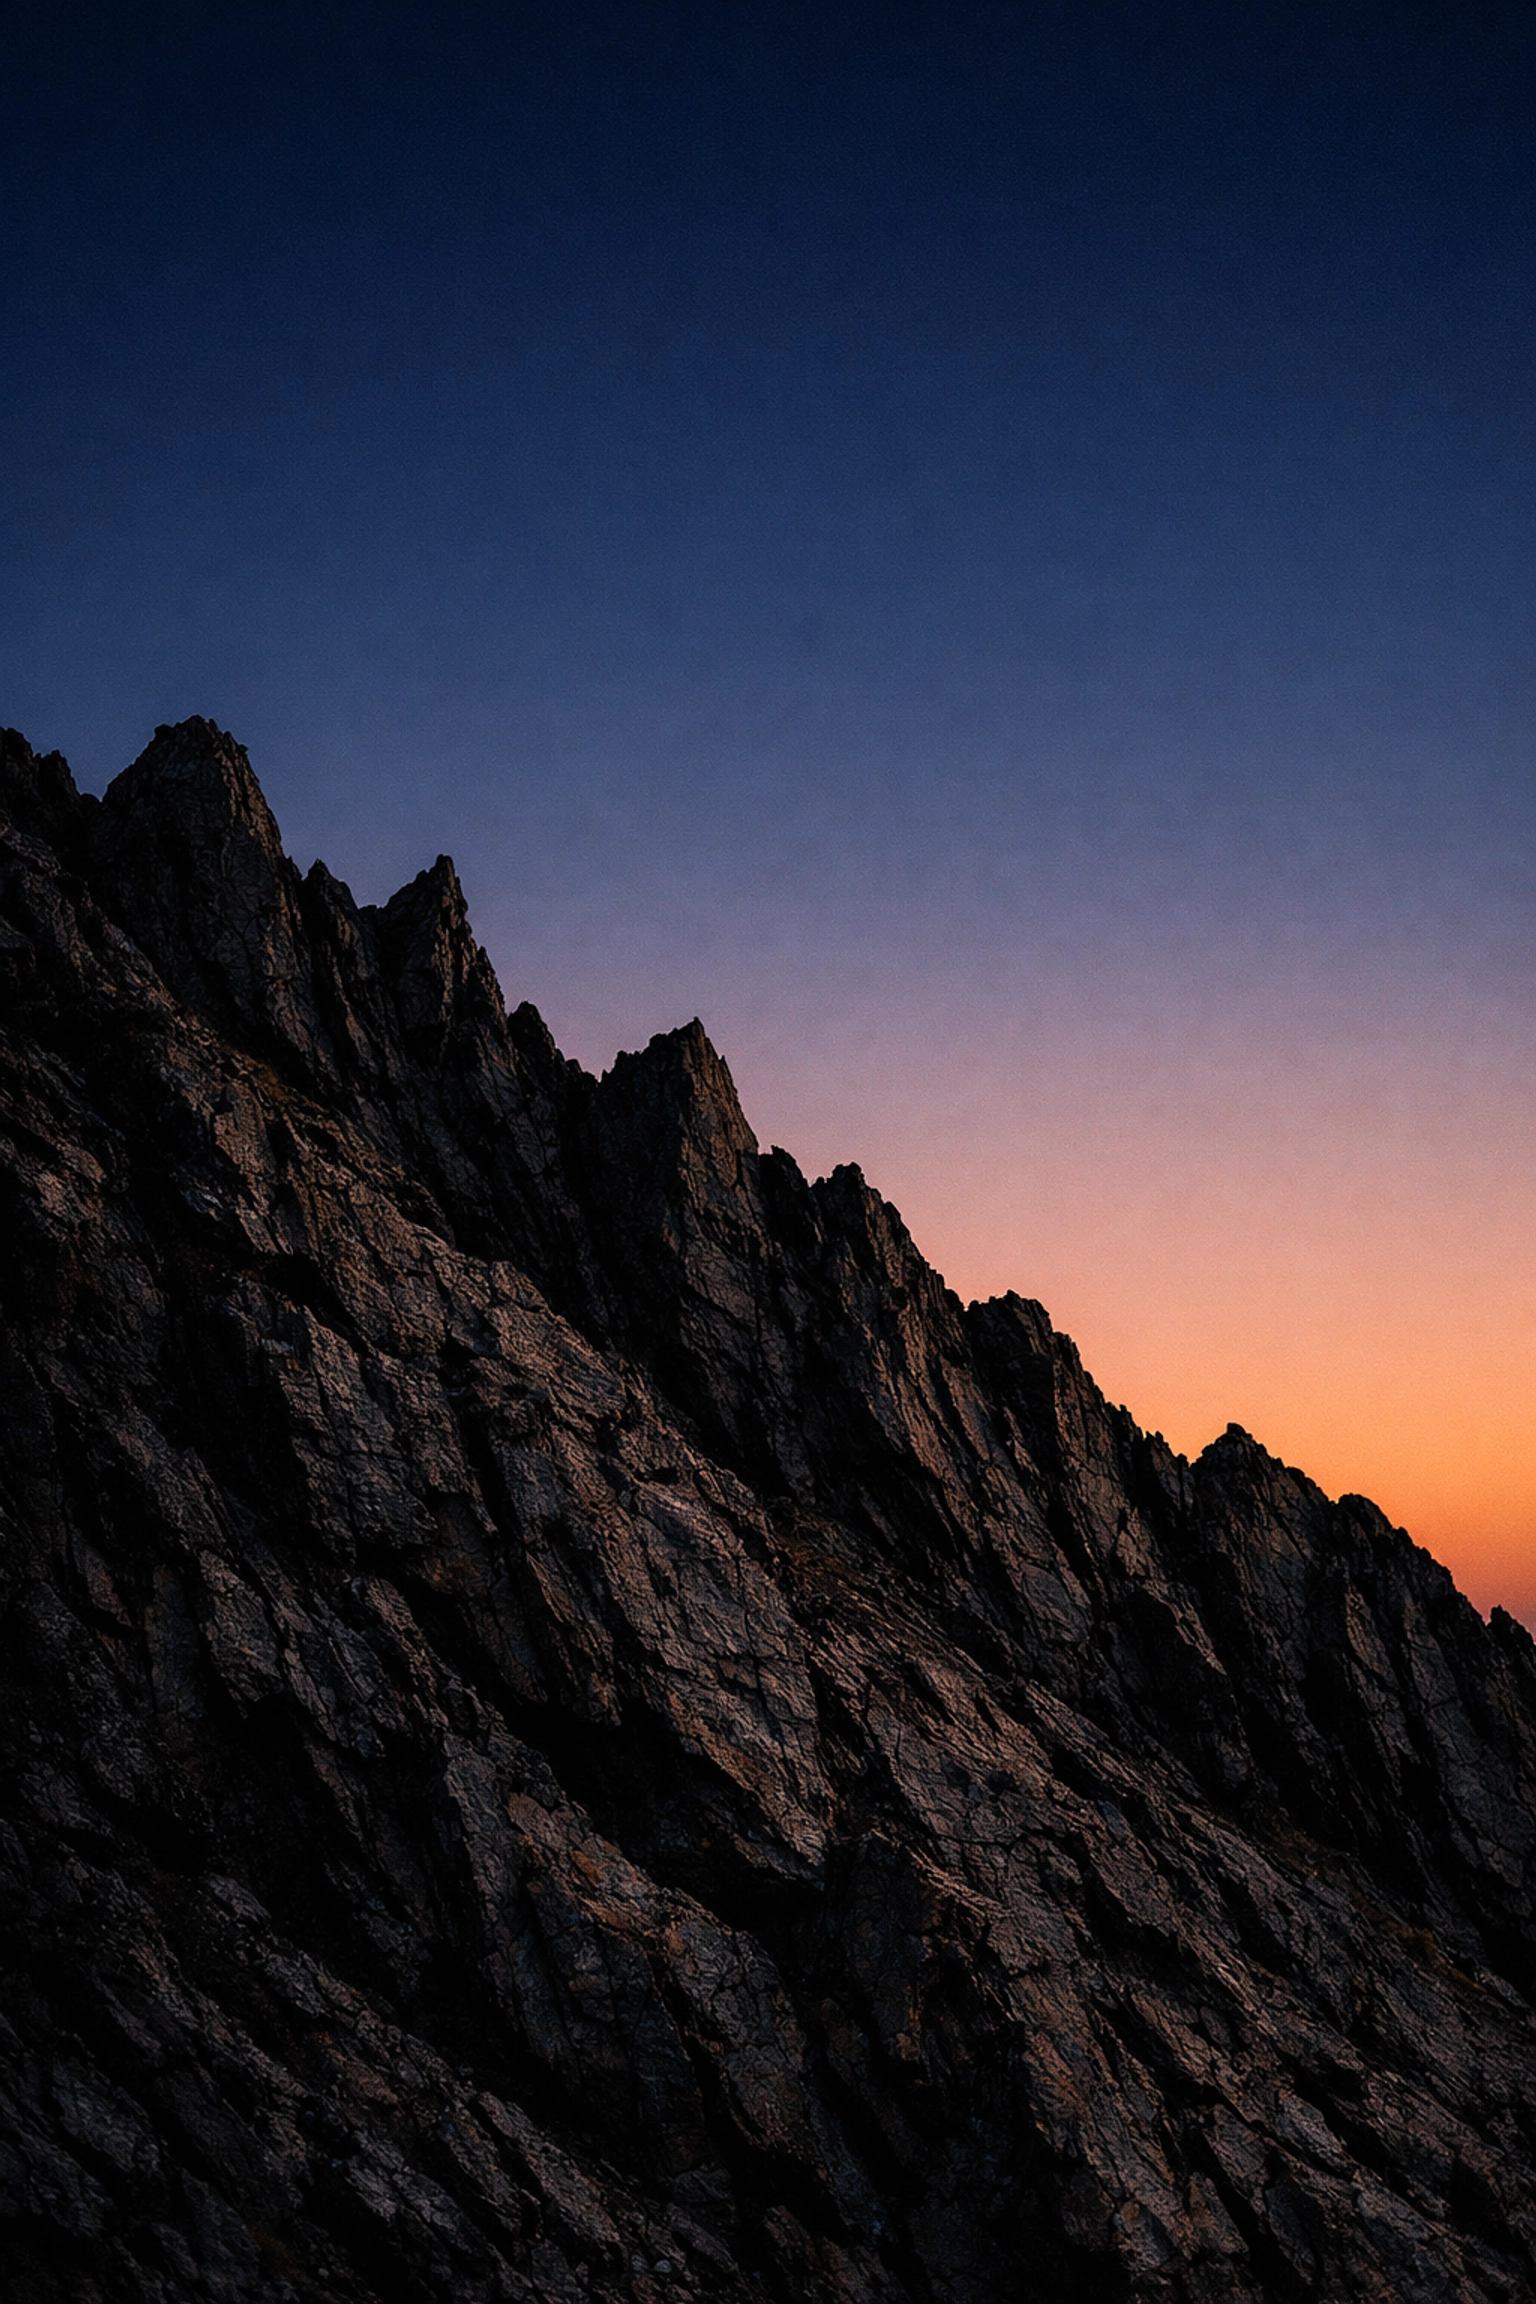
SEO Alt Text: Close up of a mountain ridge showing clean editing transitions without any digital halos or artifacts.
4. The Digital Edge: Over or Under Sharpening
Sharpening is the final touch, the "unsung hero" of the export process. However, it’s a double-edged sword. Over-sharpening introduces "worms" and digital noise, making the image look brittle and fake. On the other hand, under-sharpening leaves your $3,000 lens looking like a plastic toy.
The secret to natural sharpening is masking. Hold down the 'Alt' or 'Option' key while moving the "Masking" slider in Lightroom. You only want to sharpen the edges: the silhouettes of trees, the crags of rocks: not the flat surfaces like the sky or smooth water.
I’ve found that every camera sensor reacts differently. For instance, the way I sharpen files from my Nikon D850 is vastly different from how I’d handle a smaller sensor. You can find more specific gear-related landscape photography tips over at Edin Chavez’s Blog.
5. Shadow and Highlight Havoc: The Dynamic Range Trap
Modern cameras have incredible dynamic range, but just because you can see into the darkest shadows doesn't mean you should. A mistake I see constantly is "crushing" the shadows or pulling the highlights back so far that the sun looks like a grey blob.
If you’re shooting a high-contrast scene, consider using an HDR tutorial approach: but do it carefully. You want to preserve the "dance" of light and shadow. Shadows provide the "bass" to your visual melody; they give the image weight and mystery. If you lift the shadows to 100, you lose the depth and create a flat, muddy mess.
Let the sun be bright. Let the deep crevices of the canyon be dark. That contrast is what creates the drama we all crave. For more on capturing that perfect light, browse through these beautiful mountains photos for inspiration.
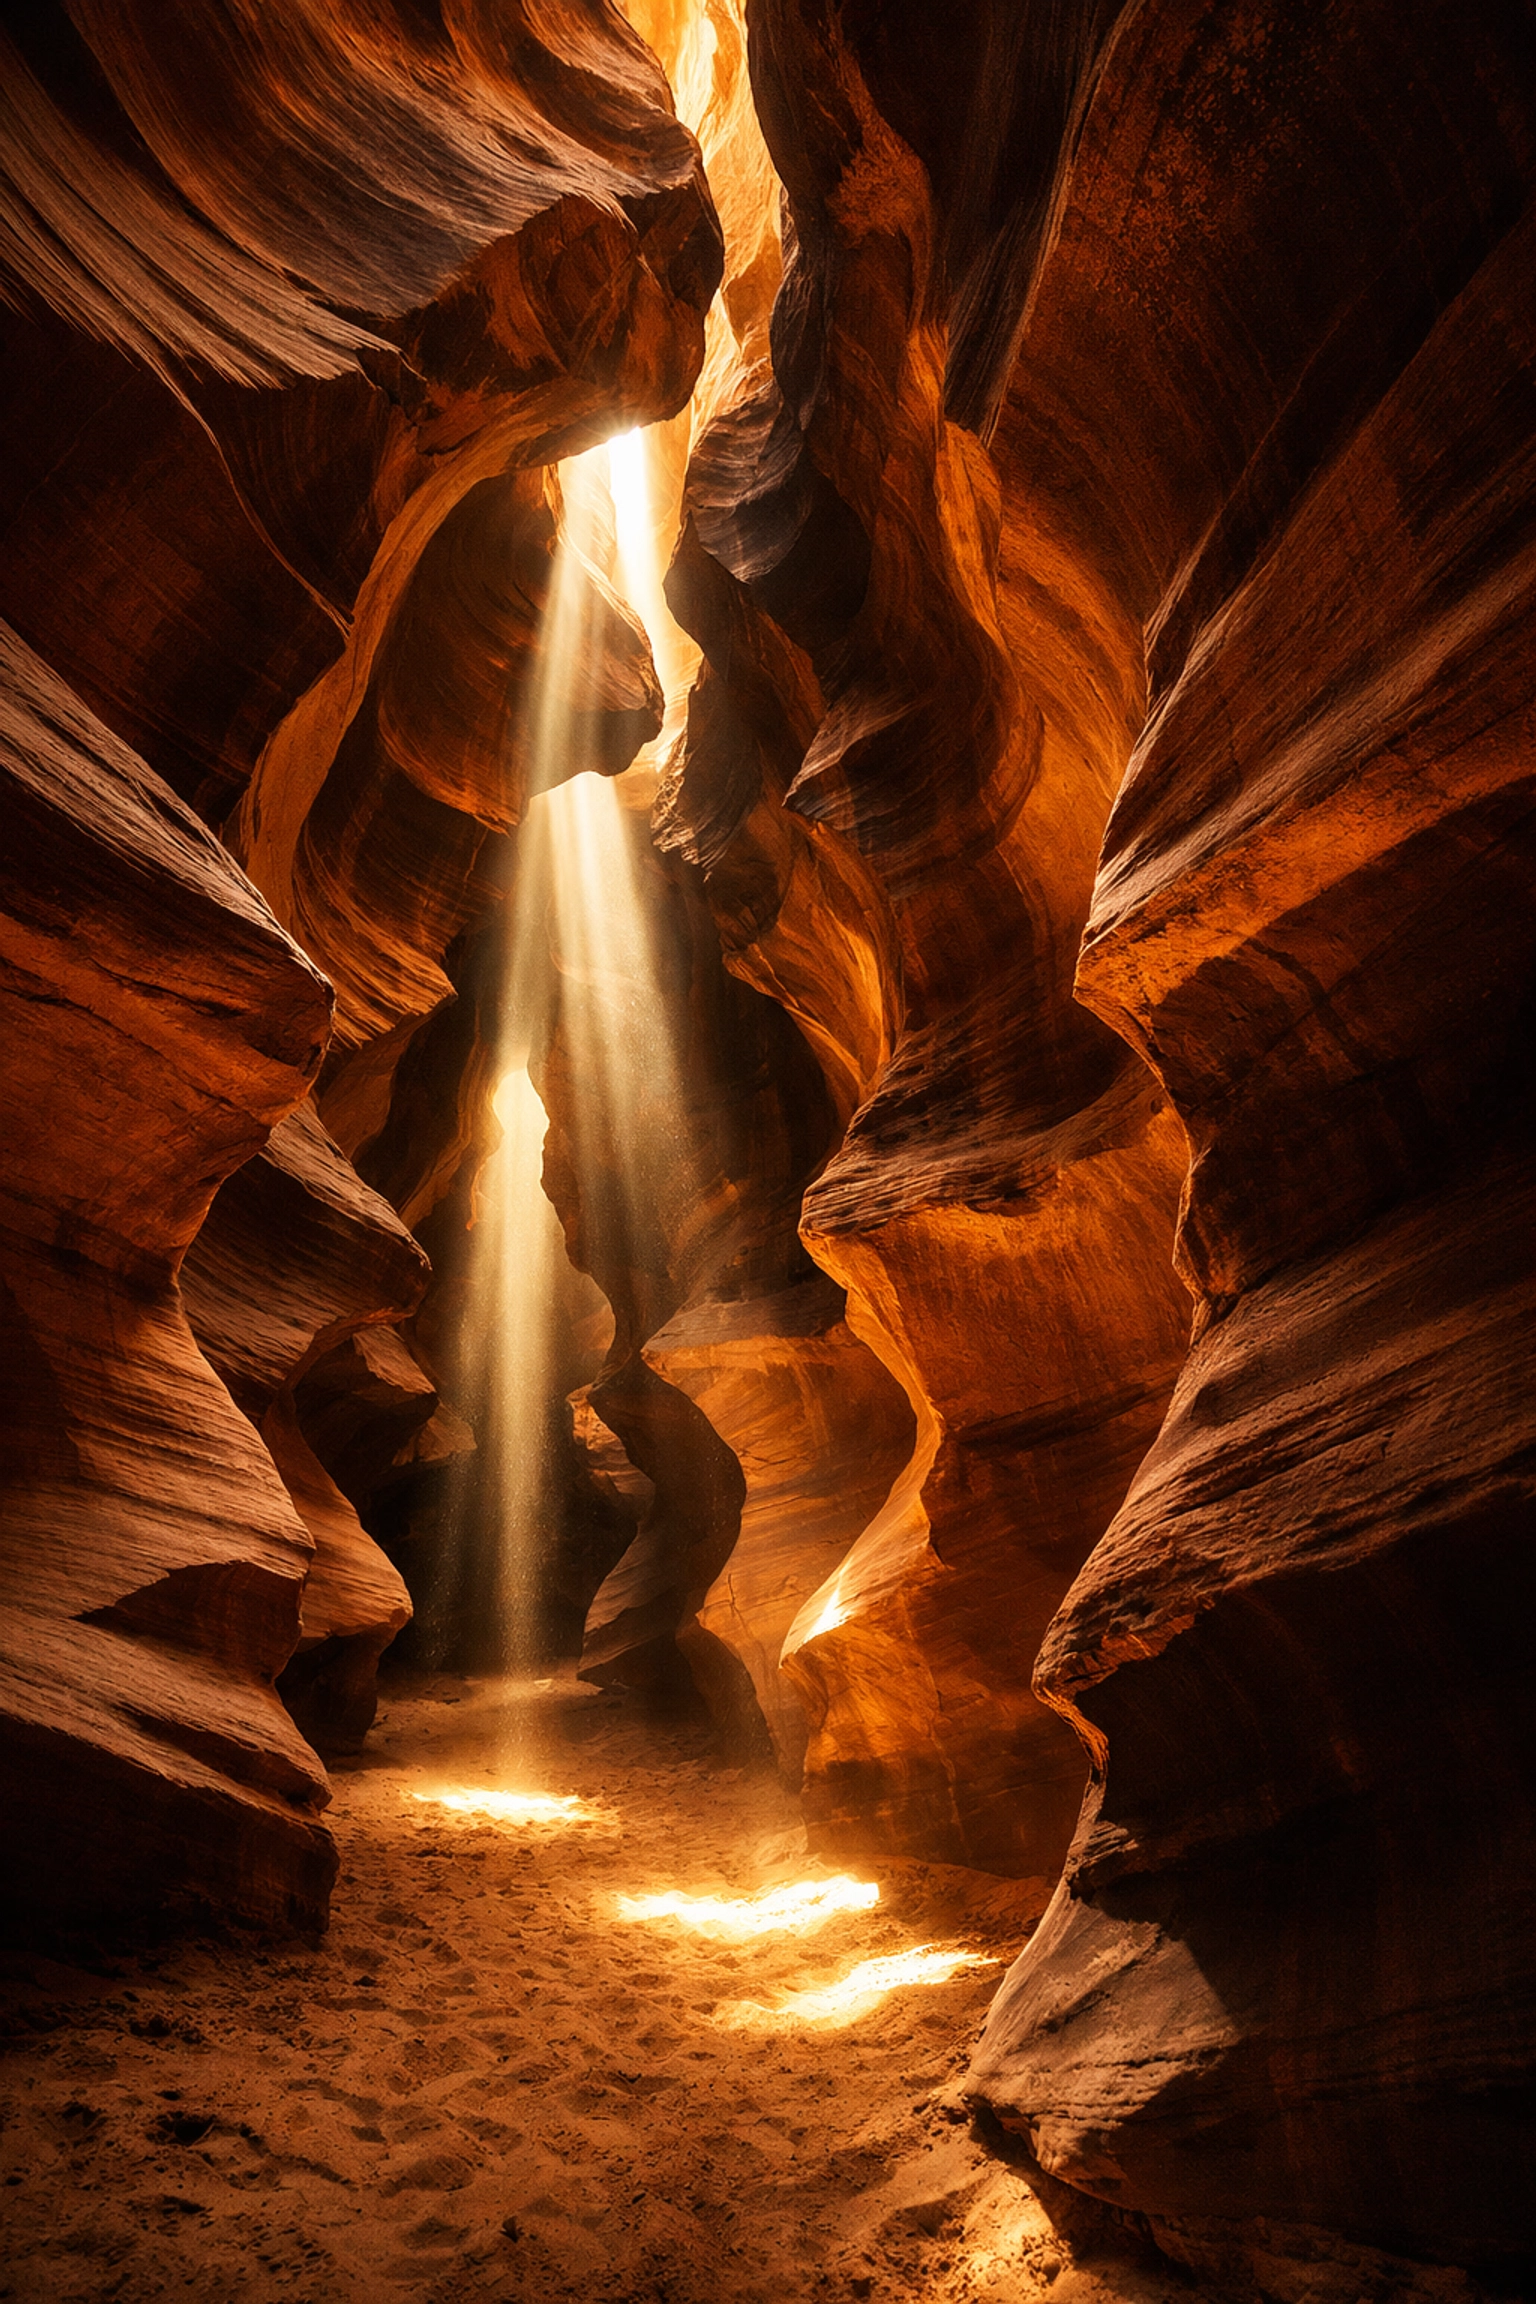
SEO Alt Text: A high-contrast landscape photo of a canyon with deep shadows and bright, natural highlights.
6. Waxy World: Too Much Noise Reduction
We all fear noise. We see a little grain in the sky and we panic, sliding the "Luminance Noise Reduction" to 50. Suddenly, the trees look like they’re made of melted wax and the rocks look like plastic.
Noise is often an intrinsic part of a high-ISO shot, and in many cases, it actually adds a film-like texture that feels more "real" than a perfectly smooth, artificial surface. If you must reduce noise, do it in stages or use AI-powered tools like those discussed at Edin Studios. These tools are game-changers because they recognize the difference between "noise" and "detail," allowing you to keep the texture of the earth while cleaning up the grain in the sky.
Don't be afraid of a little grit. It gives the image a sense of place and time.
7. Edge Enigmas: Ignoring the Frame’s Borders
Now that we’ve delved into the technical side of processing, it’s time to get down to the "brass tacks" of composition. A common mistake is falling so deeply in love with the mountain in the center that you forget about the trash can, the stray branch, or the half-cutoff rock at the very edge of your frame.
These elements are distractions that pull the viewer’s eye away from your subject. Before you click the shutter, run your eye along all four edges of the viewfinder. Is there a "leading line" that goes nowhere? Is there a distracting bright spot on the border?
A clean composition shows that the photographer was in control of the scene. For a comprehensive look at how to frame your shots perfectly, I highly recommend checking out PhotoGuides.com. They have some of the best breakdowns on compositional theory available today.
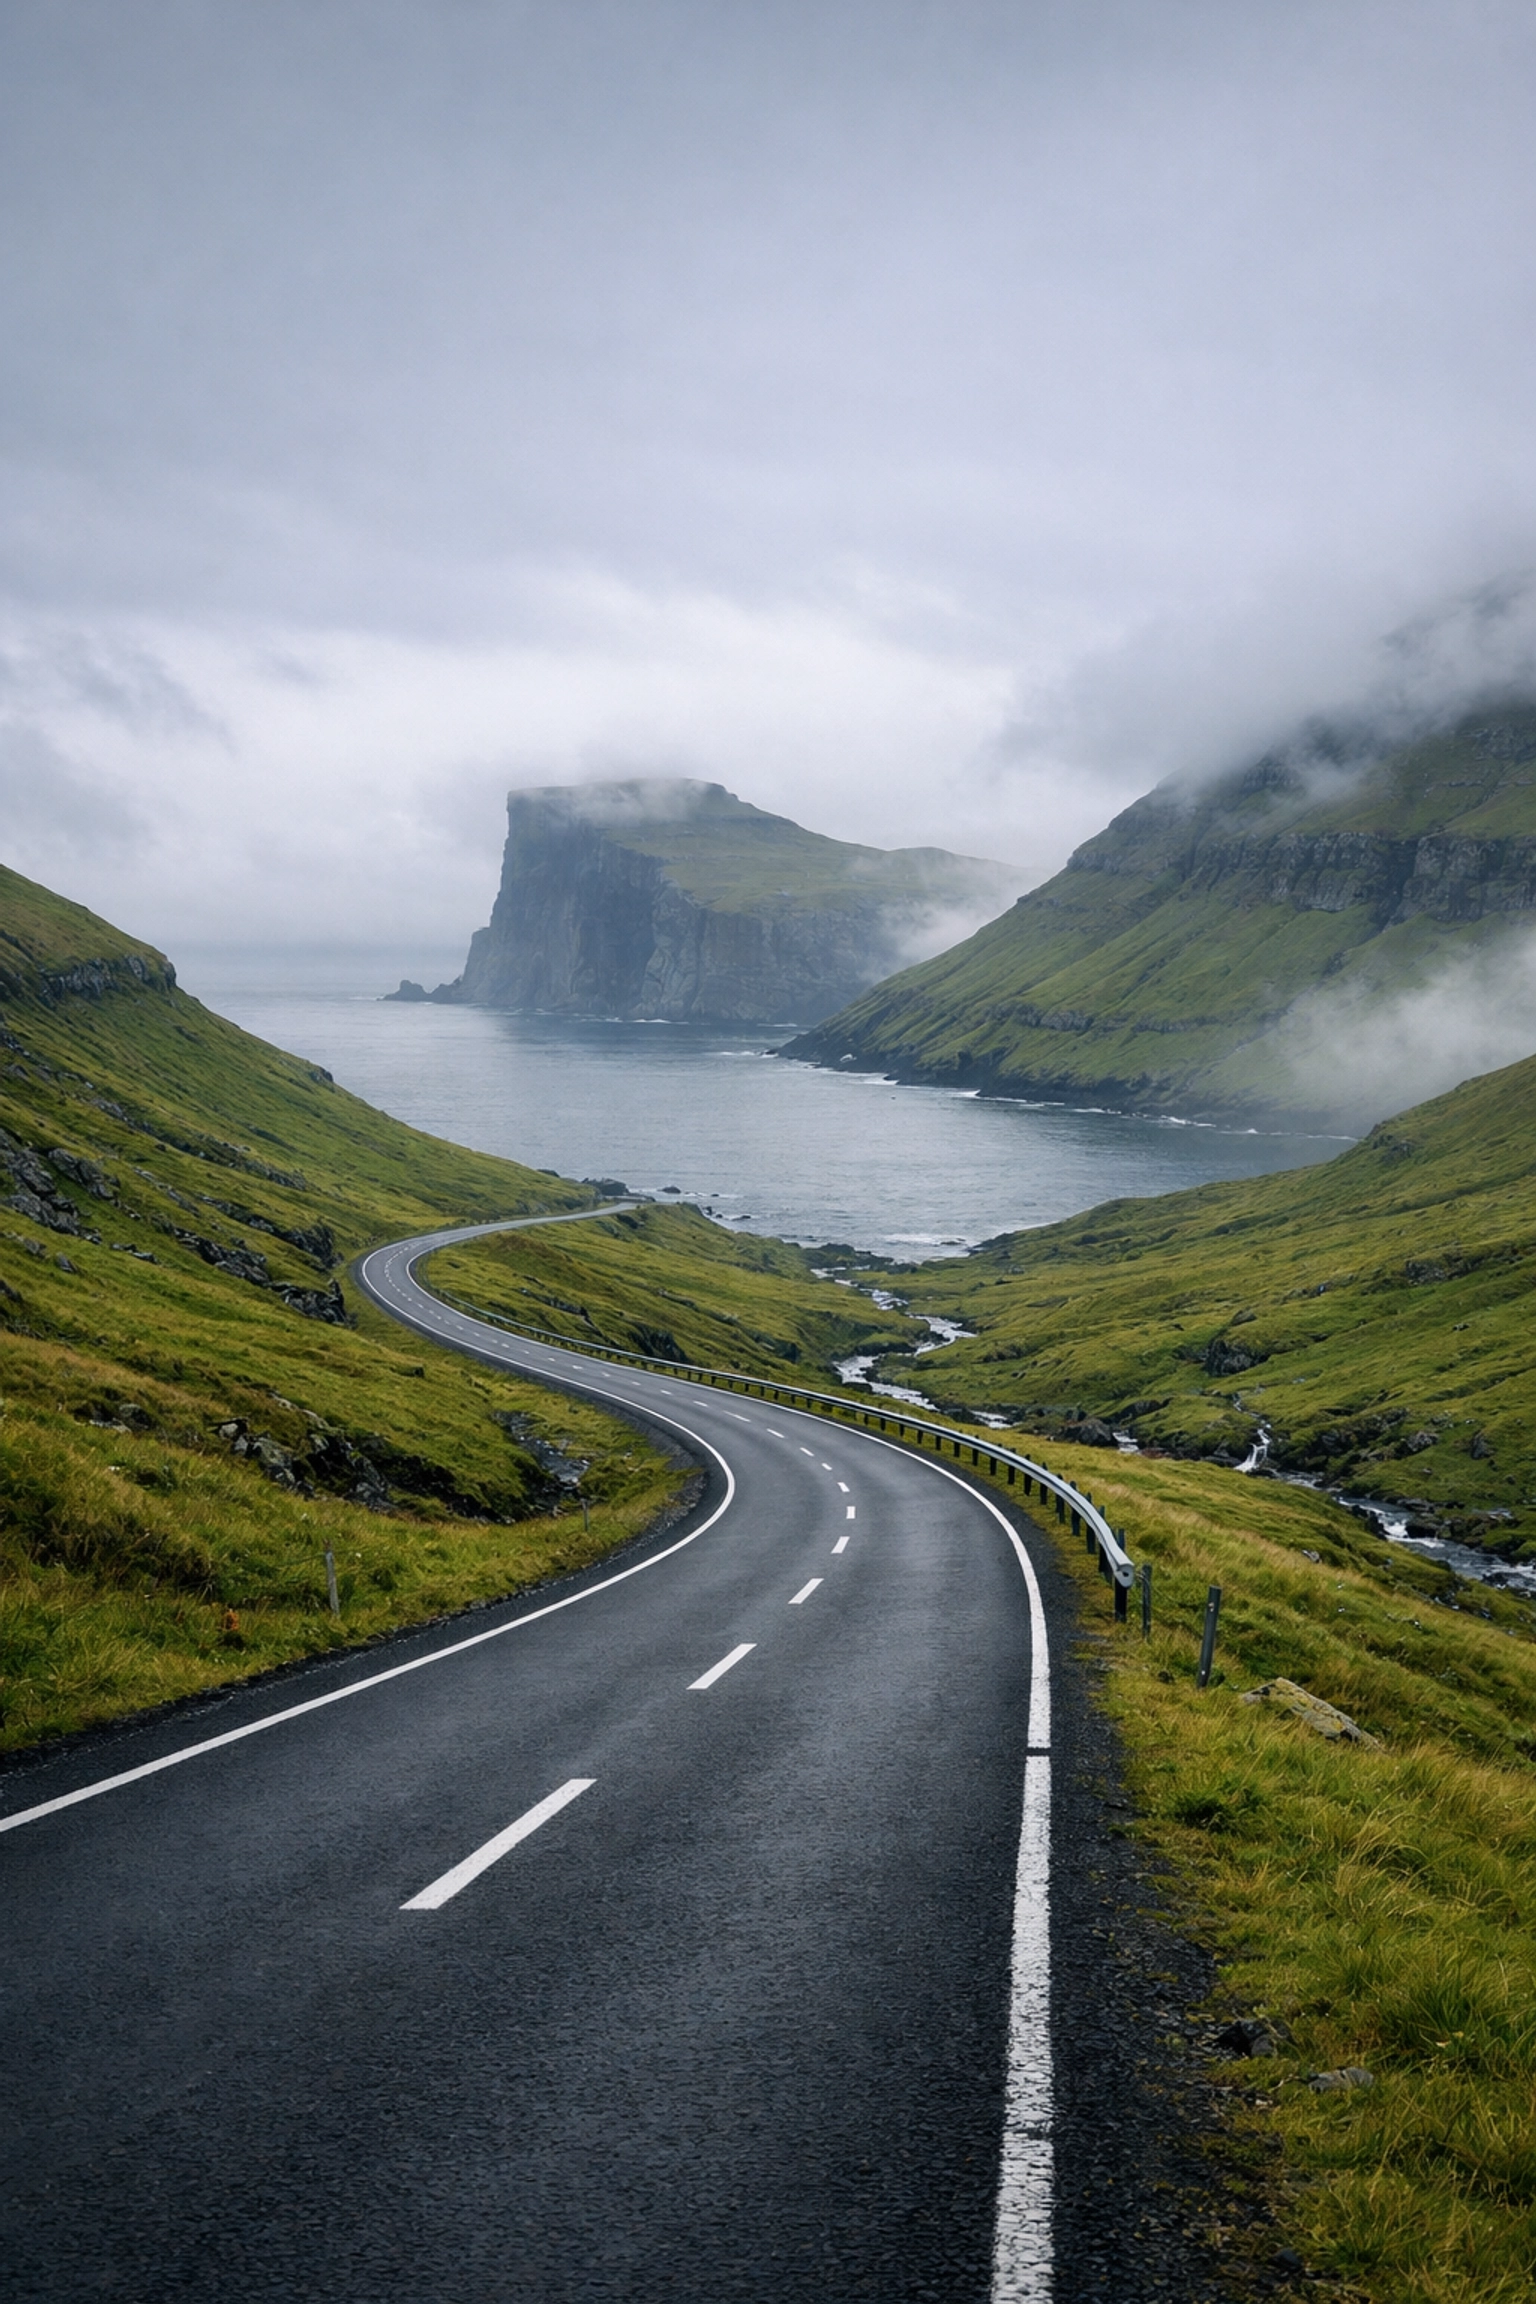
SEO Alt Text: A perfectly composed landscape photo with leading lines and no distracting elements at the edges of the frame.
The Spiritual Reward of the Craft
Landscape photography is more than just a hobby; it’s a shared journey into the heart of the world. Every time we set up our tripods, we are engaging in a silent dialogue with the earth. The sun whispers through the trees, the weather dances across the plains, and we sit there, stoic, waiting for that one ephemeral moment where it all aligns.
It is easy to get caught up in the sliders and the software, but never forget why you started. You didn't start so you could make "perfect" digital files; you started because you felt a sense of wonder. By avoiding these seven common mistakes, you aren't just making "better" photos: you’re clearing the digital clutter so that the true spirit of the landscape can shine through.
Seize these moments! Venture forth with your camera and a renewed respect for the natural world. If you find yourself capturing something truly special, don't forget that we are always looking for new talent: check out our submissions page to share your journey with us.
If you have any questions about these landscape photography tips or want to share your own "favorite mistakes," drop me a line below! I’m always happy to chat with fellow enthusiasts who are as obsessed with the light as I am.
Now, go out there and shut your aperture!
Looking for more ways to level up? Explore our category of tutorials or grab some of our high-quality downloads to help streamline your workflow.


