Landscape photography looks easy on paper. You find a pretty mountain, you point the camera, and you click the shutter. Boom, masterpiece, right?
If only.
Most of us have come home from a breathtaking trip, uploaded our files, and felt that sinking feeling in our gut. The mountains look small, the colors look muddy, and the whole vibe is just… off. At Shut Your Aperture, we see it all the time. Whether you’re shooting on a brand-new Nikon Z6 III or a Sony A7 IV, the gear can only take you so far. The rest is about avoiding the traps that turn a "wow" moment into a "meh" photo.
Here are the 7 most common mistakes people make with landscape photography and exactly how to fix them.
1. The "Drunken" Horizon
There is nothing that ruins a professional-looking landscape faster than a crooked horizon. It’s the visual equivalent of a painting hanging slightly tilted on a wall: it just feels wrong. If your ocean looks like it’s draining out of the left side of the frame, you’ve got a problem.
This usually happens because we get so excited about the light or the subject that we forget to check the level. We’re human; it happens. But in the world of PhotoGuides.org, a straight horizon is Landscape 101.
The Fix:
Most modern mirrorless cameras have a built-in electronic level (often called a "Virtual Horizon"). Turn it on. If your camera doesn’t have one, turn on the 3×3 grid lines in your viewfinder and align the horizon with one of the horizontal lines.
If you still mess it up in the field, don’t panic. You can easily fix this in post-processing using the crop tool in Luminar. Just be careful: straightening a photo requires a slight crop, so leave a little "breathing room" around the edges of your frame when you’re shooting just in case.

2. Ignoring the Foreground
A common mistake beginners make is standing at the edge of a scenic overlook and shooting straight at the horizon. While the view might be epic, the photo often feels "flat." Without a foreground, the viewer has no way to judge the scale or depth of the scene.
You want to lead the viewer’s eye into the photo. Think of your image as a story: the foreground is the introduction, the middle ground is the plot, and the background is the grand finale. If you skip the intro, nobody knows how to get into the story.
The Fix:
Get low and get close. Look for an interesting rock, a patch of wildflowers, or some rare textures to place in the bottom third of your frame. This creates a 3D effect that pulls the viewer in. Using a wide-angle lens helps exaggerate this depth, making that foreground element feel prominent and powerful.
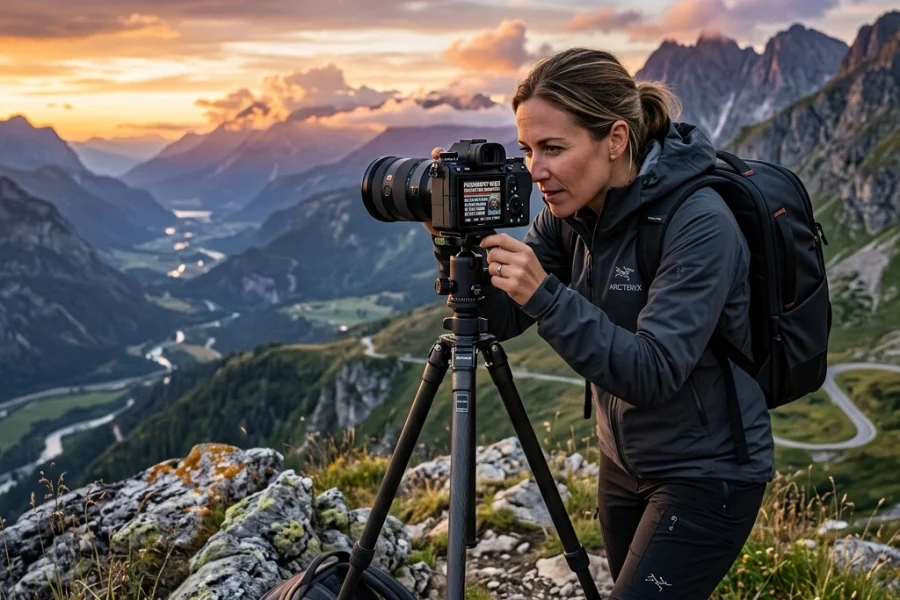
3. Shooting in "Boring" Light
I hate to be the bearer of bad news, but that 1:00 PM sun is doing you no favors. Midday light is harsh, creates ugly shadows, and washes out the natural colors of the earth. If you’re wondering why your photos look "cheap" compared to the pros, it’s probably because you’re shooting when the sun is directly overhead.
Landscape photography is 10% about the location and 90% about the light. You could be at the most secluded paradise, but if the light is flat, the photo will be flat.
The Fix:
Chase the "Golden Hour": the hour after sunrise and the hour before sunset. The light is softer, warmer, and hits the landscape at an angle, creating shadows that define the shape of the terrain. If you want to take it a step further, stay for the "Blue Hour" (just after sunset) to capture those majestic sunset photography vibes. Check out blog.edinchavez.com for some deep dives into how light changes the mood of a scene.

4. Being Afraid of the "Long" Lens
There’s a myth that you must use a wide-angle lens for landscapes. While wide-angle lenses are great for capturing a big sense of scale, they can also make everything look very far away and insignificant. Sometimes, the most interesting parts of a landscape are the small details tucked away in the distance.
If you only shoot wide, you’re missing out on lens compression: a phenomenon where a telephoto lens makes the background look much larger and closer to the foreground.
The Fix:
Pack a 70-200mm or even a 100-400mm lens in your bag. Use it to "crop" the landscape in-camera. Look for patterns in the trees, the way light hits a specific mountain peak, or the layers of a distant ridgeline. Telephoto landscapes often feel more intimate and artistic than standard wide shots. For more on gear selection, head over to www.proshoot.io.
5. The "No Subject" Trap
A beautiful sunset isn’t a subject; it’s a condition. A forest isn’t a subject; it’s a setting. One of the biggest mistakes in landscape photography is having a frame full of "stuff" but no clear place for the eye to land. If the viewer’s eye is wandering around the frame saying "Where am I supposed to look?", you’ve lost them.
The Fix:
Find a focal point. It could be a lone tree, a hiker in a red jacket, a specific rock formation, or a captivating waterfall. Once you find your subject, use the rules of composition: like the Rule of Thirds or Leading Lines: to point toward it. Remember, simple is almost always better. If an element doesn't add to the story of your subject, find a way to frame it out.

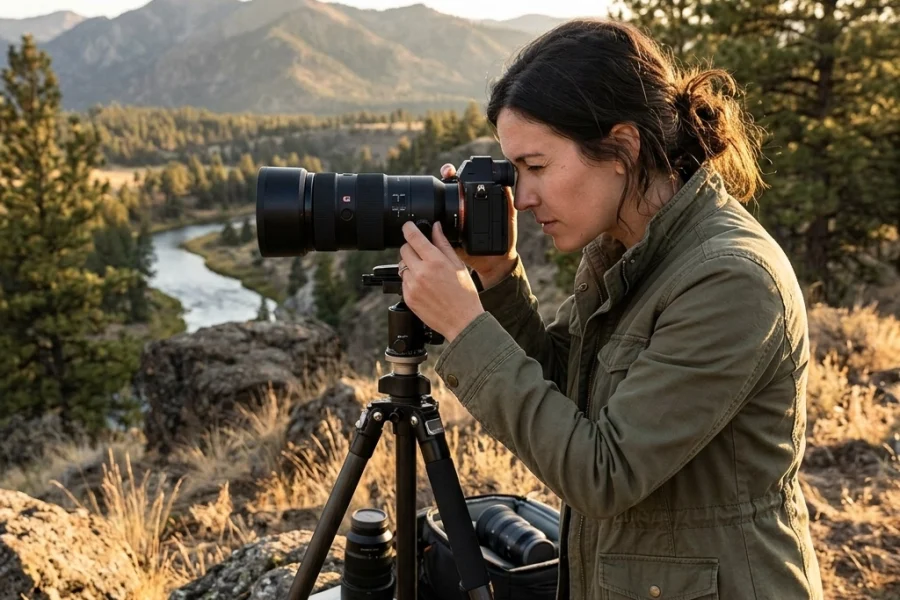
6. Neglecting Stability (The Blurry Mess)
Even the best sensors in the world struggle when the camera shakes. In landscape photography, we often use narrow apertures (like f/11 or f/16) to keep everything in focus. This means less light is hitting the sensor, which requires a slower shutter speed. If you’re hand-holding your camera at 1/10th of a second, your photo is going to be a blurry disaster.
This is especially true if you’re trying to master water photography. That silky, smooth water look requires long exposures that are impossible without a rock-solid foundation.
The Fix:
Use a tripod. I know, they’re heavy and annoying to carry, but they are the single most important piece of essential water photography gear. If you’re hiking and absolutely can’t bring a tripod, look for a rock or a fence post to stabilize your camera. Also, use a remote shutter or the 2-second timer on your camera to avoid the "shake" that happens when you physically press the button. For more techniques, check out our long exposure techniques guide.
7. Over-Processing (The "Nuclear" Look)
We’ve all seen them: the photos where the grass is neon green, the sky is a bruised purple, and every shadow has been boosted so much that the image looks like a cartoon. This usually happens when photographers try to "fix" a bad photo with too much editing.
Editing should enhance the reality of what you saw, not create a fake world that hurts the eyes. When you over-saturate and over-sharpen, you lose the subtle textures that make a landscape feel real.
The Fix:
Less is more. Use the "Vibrance" slider instead of "Saturation": it’s much more subtle and protects skin tones and already-saturated colors. If you use Luminar, take advantage of the AI tools like "Accent AI," but pull the slider back to about 30-50%. You want people to compliment your photography, not your software.
Pro tip: Step away from your computer for 10 minutes after you finish an edit. When you come back with fresh eyes, you’ll usually realize you went a little too heavy on the sliders. For more on refining your look, visit www.edinfineart.com to see how professional prints are balanced.

Bonus Tip: Watch Your Edges
Before you press that shutter button, do a "border patrol." Run your eyes around the very edges of your frame. Is there a random tree branch poking in from the side? Is there a piece of trash on the ground in the corner? Is a person’s elbow cut off?
These tiny distractions can pull a viewer’s attention away from your beautiful subject. It’s much easier to move your camera an inch to the left while you’re in the field than it is to try and clone out a complex distraction later in www.edinstudios.com.
Landscape photography is a marathon, not a sprint. You’re going to make these mistakes: we all do. The key is to recognize them, learn the "why" behind the fix, and keep shooting. Whether you’re exploring hidden gem locations or just shooting in your local park, these small adjustments will elevate your work from hobbyist snapshots to professional-grade imagery.
Now, grab your gear, check your horizon, and go find some light. The world is waiting.