
Let’s be honest: your fancy new camera doesn't know a sunset from a sandwich. It’s a tool: a highly sophisticated, expensive piece of glass and silicon: but it’s only as good as the person pressing the shutter. If you’ve been stuck on "Auto" mode, you’re basically driving a Ferrari in a school zone. It’s time to shift gears.
At Shut Your Aperture, our mission is to become the number one photography school online. We aren't just here to give you a few tips; we’re here to transform how you see the world. This guide is a roadmap through the best photography tutorials and concepts you need to master to go from "lucky amateur" to "consistent pro."
Why You Need a Structured Learning Path
The internet is overflowing with photography tutorials. You can find a million videos on YouTube, but jumping from a "how to edit a portrait" video to a "best lenses for birds" article is a recipe for confusion. To truly succeed, you need to build your skills like a house: foundation first, then the walls, then the fancy roof.
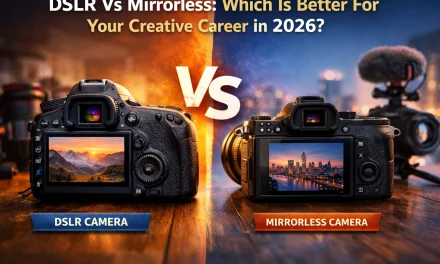
If you are just starting out, you might be wondering: does new camera gear really matter in 2026? The short answer is: only if you know how to use it.
We break photography down into four major stages:
- Technical Basics (Manual Mode)
- Composition and Storytelling
- The Science of Light
- Post-Processing and Workflow
Stage 1: How to Use Manual Mode Camera Like a Pro
If there is one thing that separates the pros from the hobbyists, it’s the ability to control the camera manually. Understanding how to use manual mode camera settings gives you the creative freedom to capture what you see, not what the camera thinks it sees.
The Exposure Triangle
This is the holy trinity of photography tutorials. You cannot master your craft without understanding these three elements:
- Aperture: This controls the opening of your lens. A wide aperture (small f-number like f/1.8) lets in a lot of light and gives you that blurry background (bokeh) everyone loves. A narrow aperture (large f-number like f/11) keeps everything from the foreground to the background in focus.
- Shutter Speed: This is how long your sensor is exposed to light. Fast shutter speeds (1/1000s) freeze motion. Slow shutter speeds (1/2s or more) create motion blur, which is great for silky waterfalls.
- ISO: This is your sensor's sensitivity to light. Low ISO (100) is best for bright days. High ISO (3200+) helps in the dark but introduces "noise" or graininess.
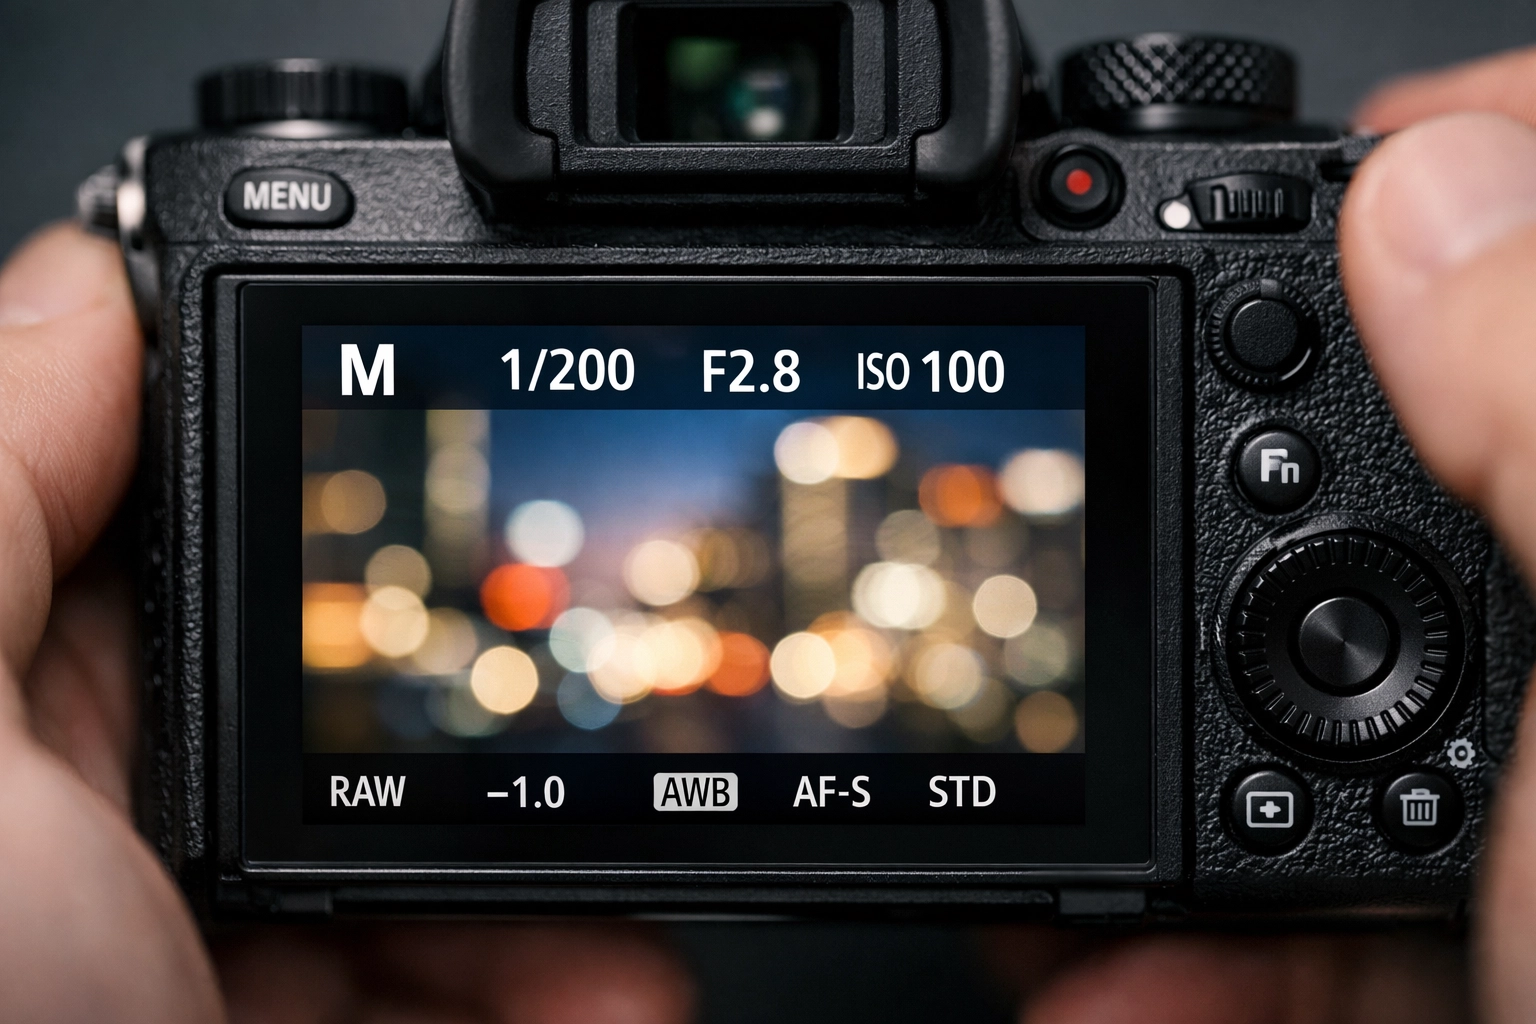
SEO Alt Text: A close-up of a digital camera screen showing manual mode settings including aperture, shutter speed, and ISO for a photography tutorial.
When you master these, you’re no longer guessing. You’re creating. For a deeper dive into these basics, check out these 10 essential tips for mastering photography.
Focus and Metering
Manual mode isn't just about exposure; it’s about focus. Understanding back-button focus and different metering modes (spot, center-weighted, or matrix) allows you to nail the shot even in tricky lighting. If you’re still struggling with blurry shots, it might be time to look at your technique rather than your gear.
Stage 2: Beyond the Basics – Composition and Storytelling
Once you’ve figured out how to get a clean exposure, the next step in our photography tutorials is composition. This is the difference between a "snap" and a "photograph."
The Rules (and When to Break Them)
We all know the Rule of Thirds. It’s the bread and butter of beginner photography. But if you want to elevate your work, you need to explore:
- The Fibonacci Spiral (Golden Ratio): A more natural-looking way to lead the eye through an image.
- Leading Lines: Using roads, fences, or shadows to pull the viewer into the frame.
- Frame within a Frame: Using a window or a tree branch to isolate your subject.
Composition is the key to storytelling in photography. You want your viewer to feel something. Whether you’re shooting a busy street in NYC or a quiet landscape, your composition should tell the story of that moment.
Developing Your Eye
I always tell students at Shut Your Aperture that the best lens you own is your eyes. Before you even lift the camera, look for the light and the angles. If you’re interested in seeing how the greats do it, look into the techniques behind Peter Lik’s landscape photography. He has a unique way of manipulating perspectives that has inspired art lovers worldwide.
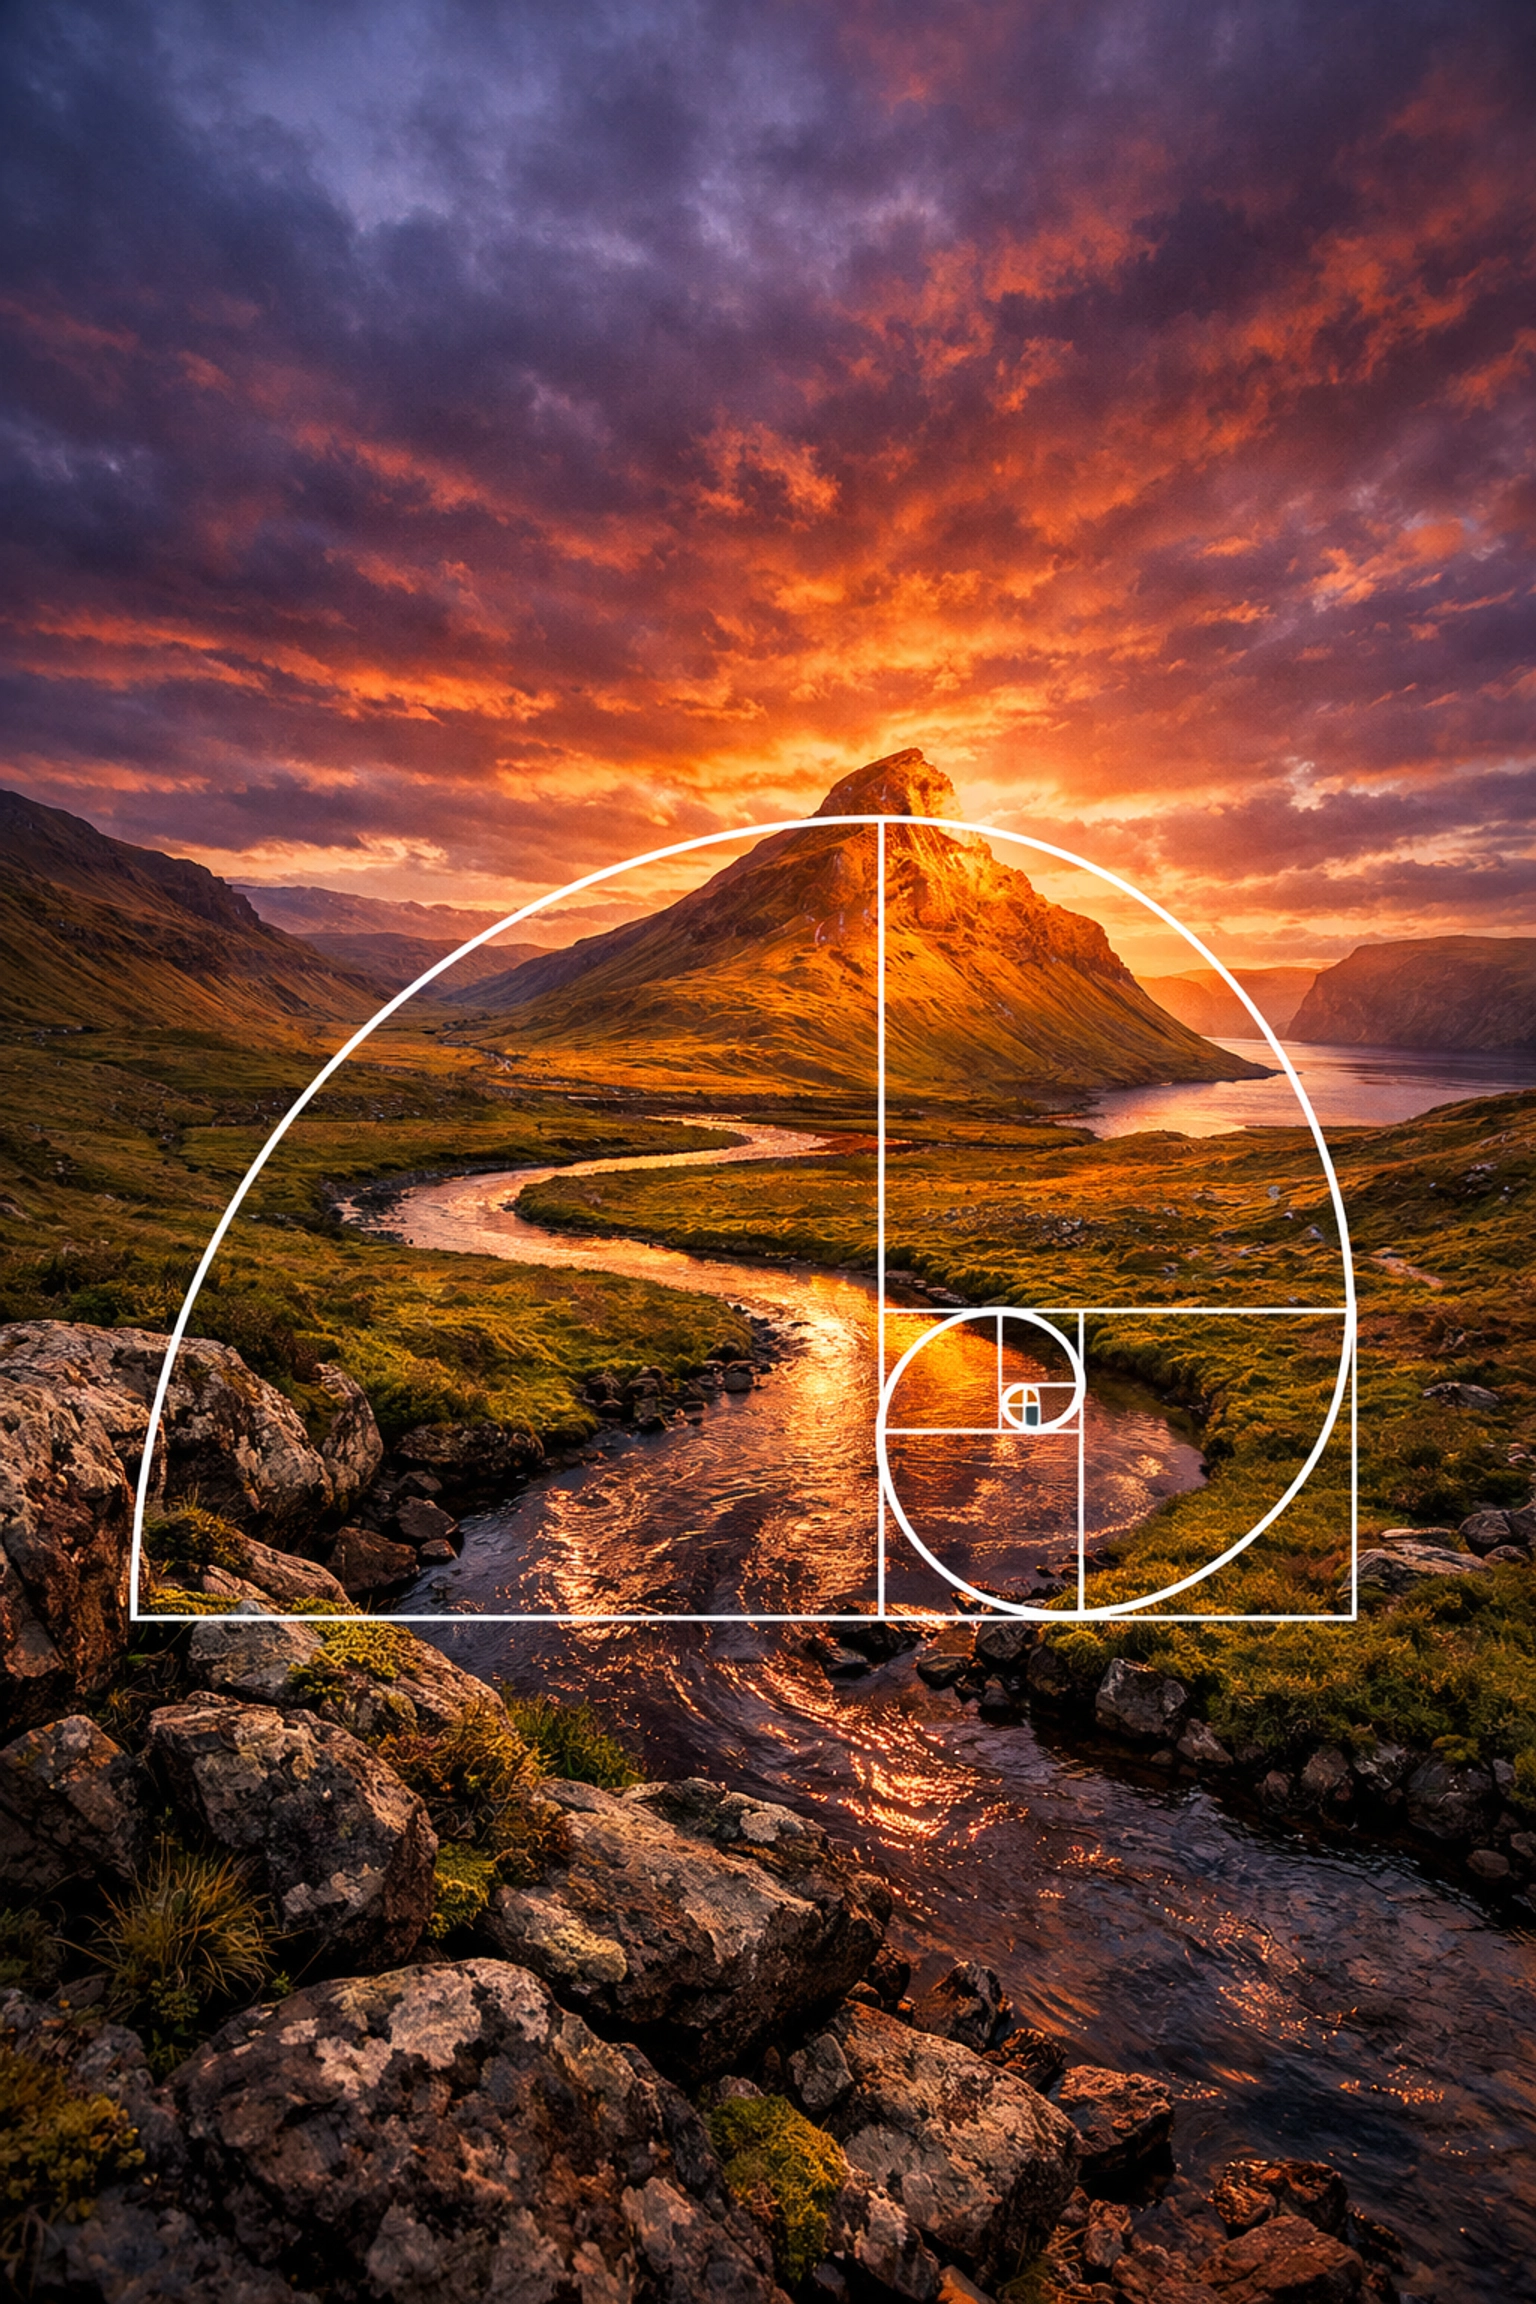
SEO Alt Text: A breathtaking landscape photo demonstrating the Fibonacci spiral composition in a sunset mountain scene.
Stage 3: The Mastery of Light
Light is everything. In fact, the word "photography" literally means "drawing with light." You can have the best composition and the most expensive mirrorless camera for 2026, but if the light is flat and boring, the photo will be too.
Natural vs. Artificial Light
Most beginners start with natural light because it’s free and everywhere. But understanding "Golden Hour" (the hour after sunrise and before sunset) and "Blue Hour" is crucial.
In more advanced photography tutorials, we cover:
- The Inverse Square Law: Understanding how light falls off over distance.
- Subtractive Lighting: Using flags to create shadows and depth.
- Luminosity: This is particularly important in niches like real estate. In fact, the role of luminosity in real estate photography is the difference between a house looking like a dungeon or a dream home.
If you’re ready to take your lighting to a professional level, you might want to see how cinematic techniques can transform property showcases.
Stage 4: Post-Processing and the Digital Darkroom
Taking the photo is only 50% of the job. The other 50% happens in front of the computer. If you aren't shooting in RAW and editing your files, you’re leaving a massive amount of "data" on the table.
The Power of Editing
Editing isn't about "faking" a photo; it’s about bringing out the vision you had when you clicked the shutter. I highly recommend using Luminar for a streamlined, AI-powered workflow. It’s perfect for those who want professional results without spending five hours on a single image.
A typical pro workflow looks like this:
- Culling: Picking the best shots (don't show people your bad ones!).
- Global Adjustments: Fixing white balance and exposure.
- Local Adjustments: Dodging and burning to lead the eye.
- Color Grading: Giving the image a specific "mood" or "vibe."
For more advanced critiques and professional growth, I always point my students toward proshoot.io, where you can get your work seen and evaluated by people who know their stuff.
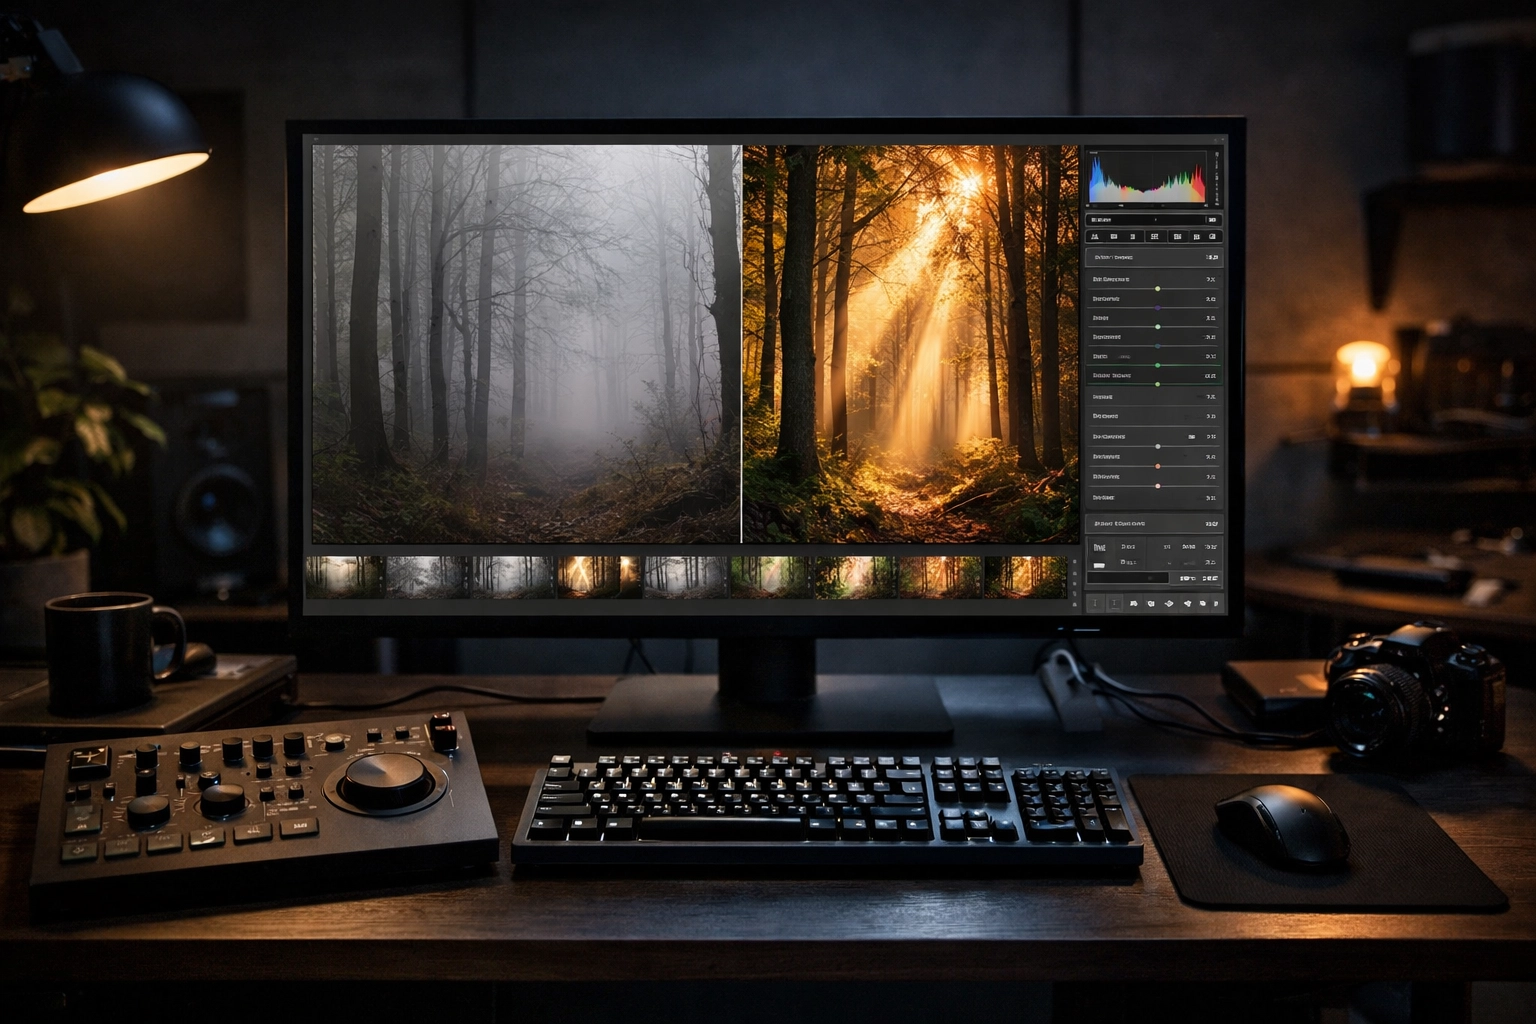
SEO Alt Text: A side-by-side comparison of a raw landscape photo and a fully edited version using Luminar software.
Specialized Photography Tutorials: Finding Your Niche
Once you have the basics down, it’s time to specialize. Whether you want to sell fine art prints or become a high-end real estate photographer, each niche has its own set of rules.
Landscape Photography
Landscape photography is about patience and gear. It’s about waking up at 4 AM to hike to a spot before the sun comes up. However, even the pros make mistakes. Avoid these 7 mistakes you’re making with landscape photography to start seeing immediate improvements.
If you want to see what's possible at the highest levels, check out Edin Fine Art for inspiration on how landscapes can be turned into luxury gallery pieces.
Real Estate and Architectural Photography
This is a fantastic way to make a living as a photographer. It’s highly technical and requires a great eye for detail. From aerial photography to understanding how shot composition impacts buyer attraction, the stakes are high.
Real estate isn't just about showing a room; it’s about creating an "ethereal imagery" that makes a buyer fall in love. You can learn more about elevating real estate listings here.
Continuous Learning: The Path to the Top
Photography is a journey that never truly ends. Even after years of shooting professionally at Edin Studios, I’m still learning. The technology changes, the trends shift: look at the impact of Peter Lik on photography trends: and you have to stay sharp.
Here is a quick checklist for your ongoing education:
- Daily Practice: Shoot something every day, even if it’s just on your phone.
- Study the Masters: Look at the iconic works of Peter Lik or visit PhotoGuides.org for more technical breakdowns.
- Get Critiqued: Don't just post to Instagram for "likes." Get real feedback on proshoot.io.
- Read the News: Stay updated with our morning breakdowns at blog.edinchavez.com.
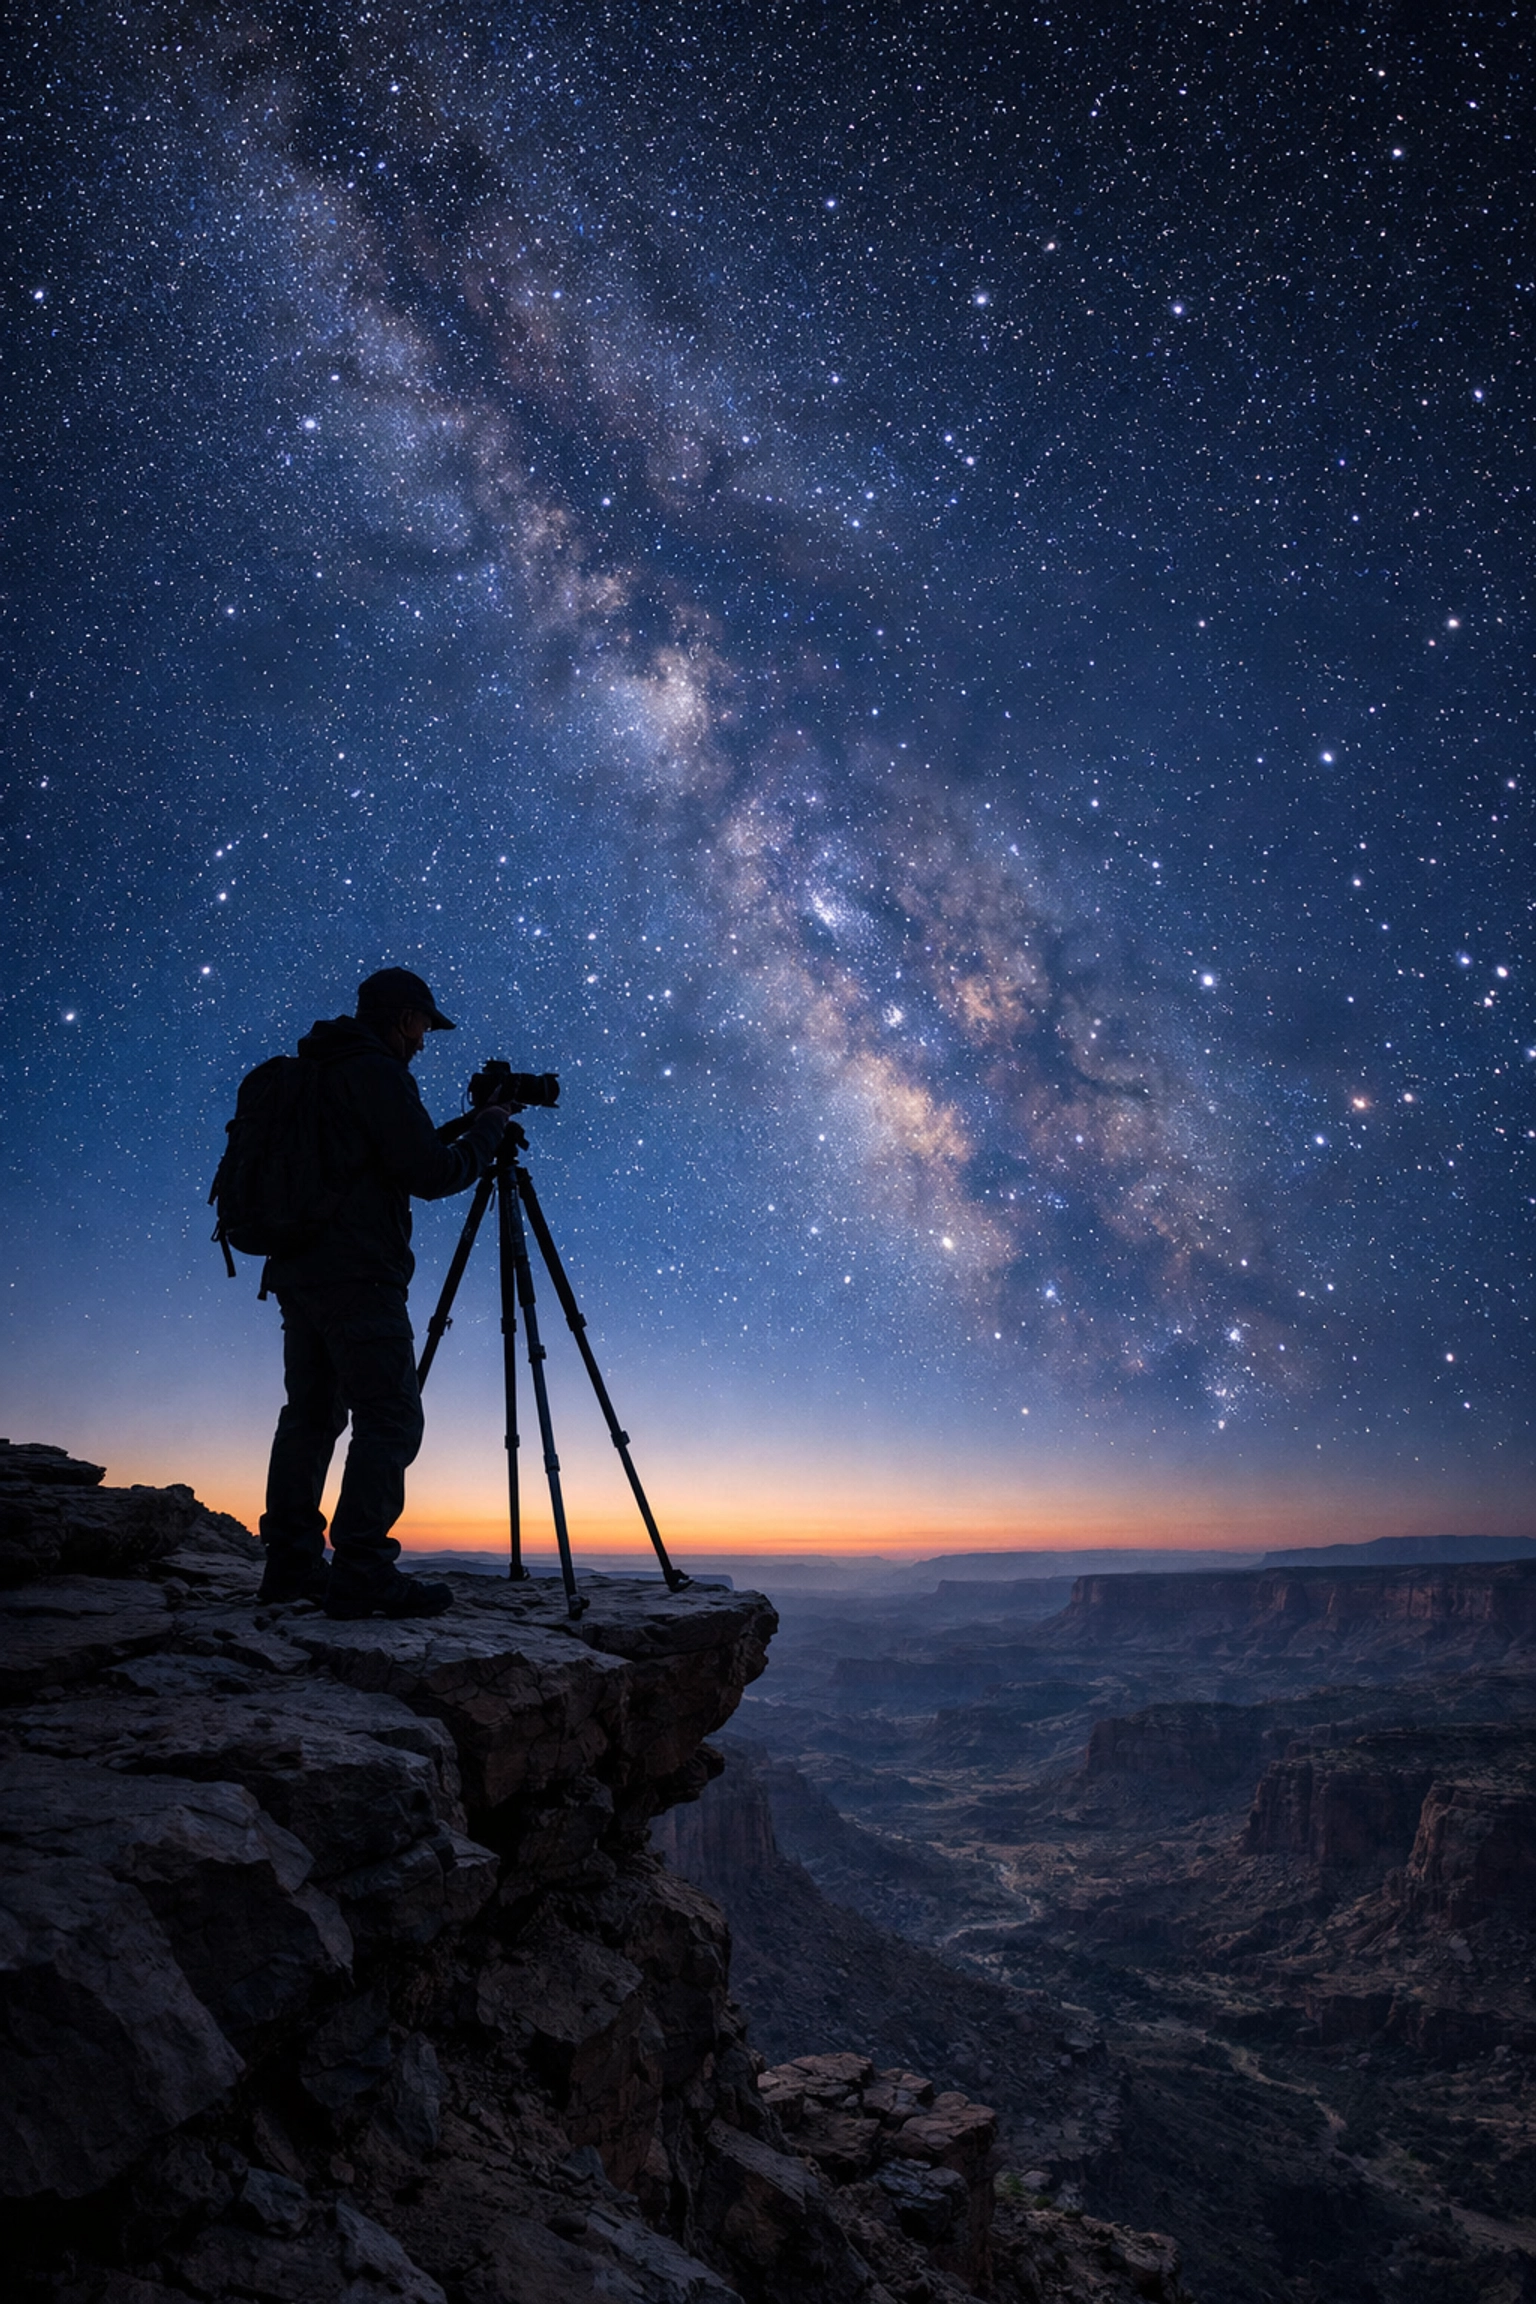
SEO Alt Text: A photographer standing on a cliffside during sunset, holding a mirrorless camera on a tripod, symbolizing the journey of photography mastery.
Final Thoughts
Mastering photography doesn't happen overnight. It takes a lot of bad photos to get to the good ones. But with the right photography tutorials and a commitment to learning how to use manual mode camera settings, you’re already ahead of 90% of the people out there.
Shut Your Aperture is here to be your home base. Whether you’re learning about vistas and perspectives or just trying to figure out why your photos are blurry, we’ve got your back.
Now, stop reading and go take some photos. The light is waiting.


