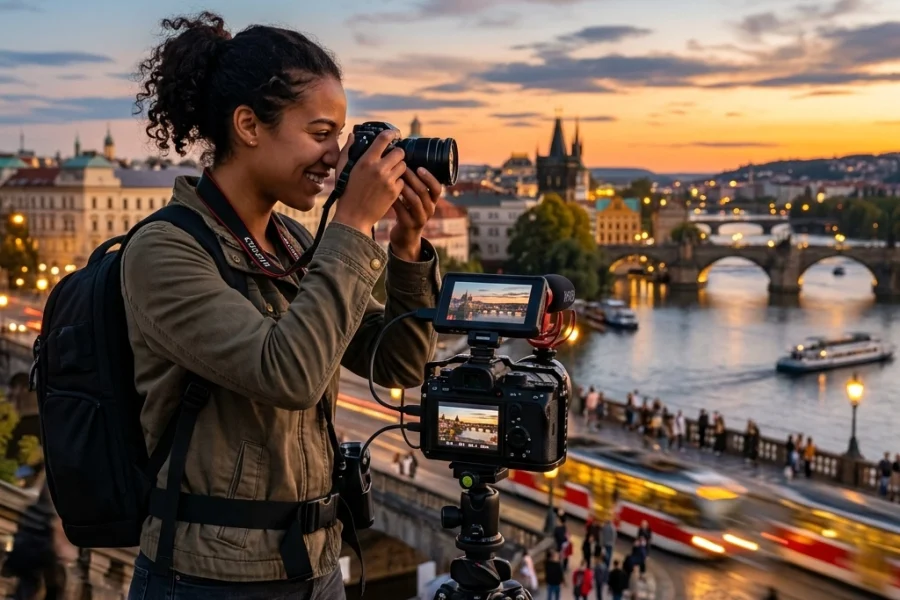
Let’s be real for a second. We’ve all been there. You have a beautiful subject, a decent camera, and what looks like a great location. You click the shutter, look at the back of the screen, and… meh. It’s fine, but it’s not "wow." It’s a portrait, but it doesn’t feel like a piece of art.
Portrait photography is one of the most accessible genres of photography, but it’s also one of the hardest to master. It’s not just about having a sharp lens; it’s about light, psychology, geometry, and a whole lot of tiny details that most people ignore. At Shut Your Aperture, we see these mistakes all the time. The good news? They are incredibly easy to fix once you know what to look for.
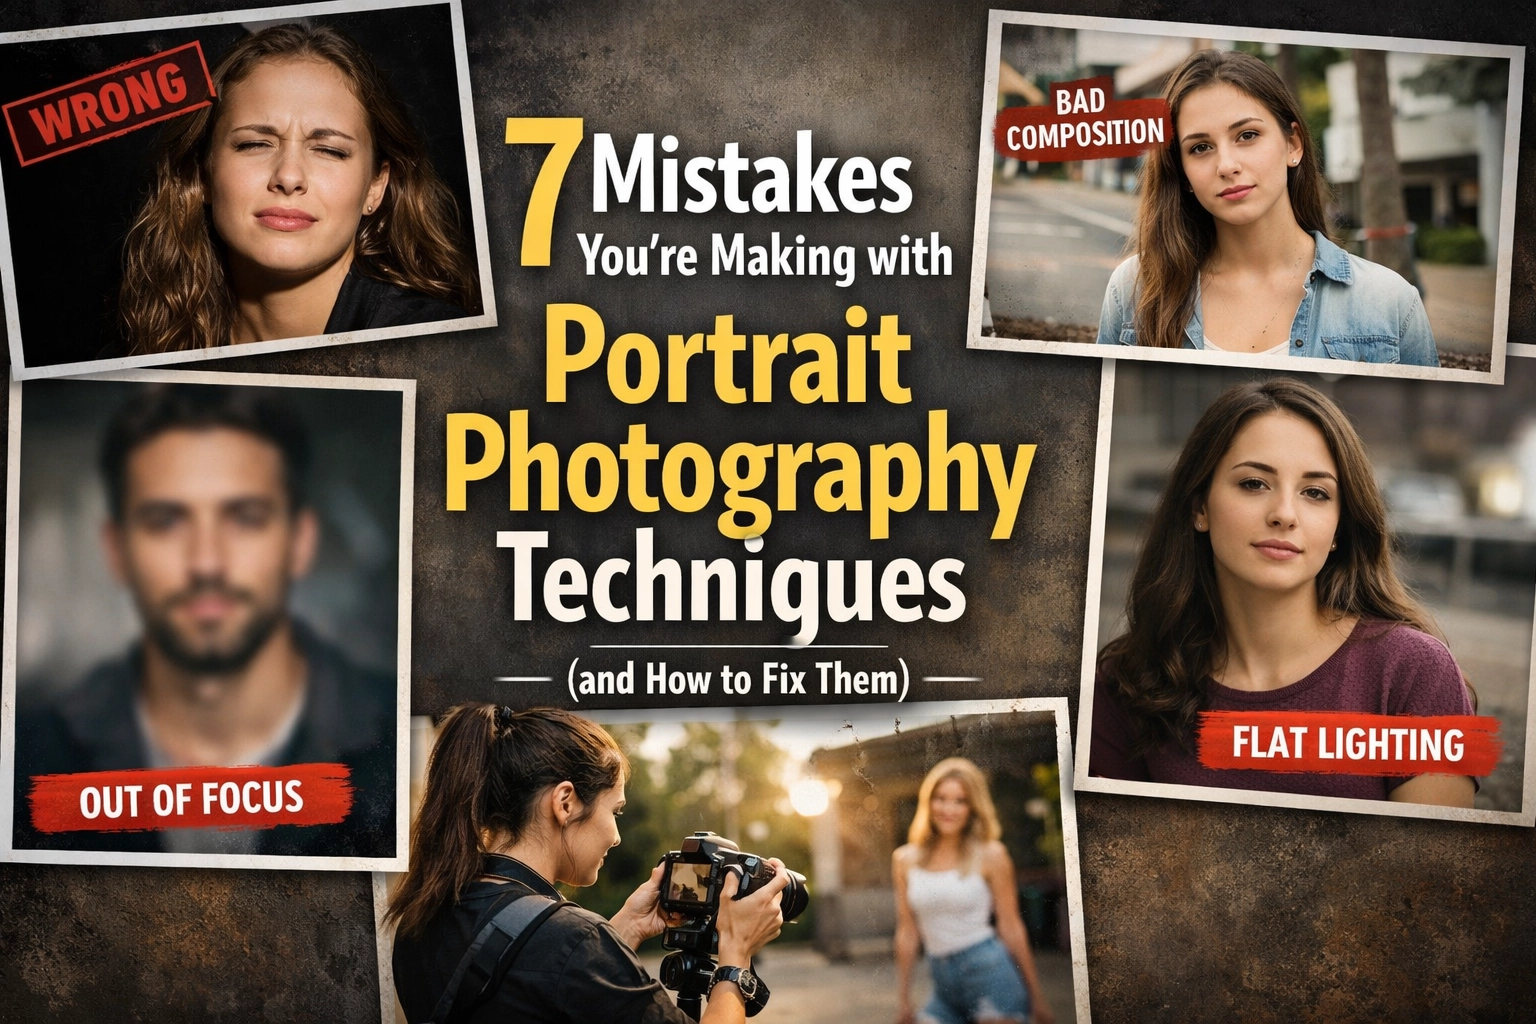
Here are the seven most common mistakes people make with portrait photography techniques and how you can stop making them today.
1. Under-lighting Your Subject (The Flat Face Syndrome)
Lighting is the "make or break" element of any photo. One of the biggest mistakes beginners make is failing to understand the relationship between the key light and the fill light. Often, the fill light (the light meant to soften shadows) ends up being just as bright: or brighter: than the key light (your main light source).
When your fill light overpowers your key light, you lose the natural contours of the face. The subject looks flat, 2D, and honestly, a little boring. This often happens when you're shooting indoors and rely too heavily on ambient light without controlling it.
How to Fix It: Always ensure your key light is the primary source of illumination. If you’re using a two-light setup, your key light should be about one to two stops brighter than your fill. This creates a gentle shadow that defines the jawline and cheekbones.
If you’re photographing people of different heights, don't just set your lights and forget them. If you just shot a 6'5" guy and now a 5'3" woman is stepping in, you must move your lights. If you don't, the shorter subject will likely be too close to the fill light and too far from the key light, ruining the balance. For more on the technical side of things, check out our guide on how to master your camera’s manual mode in 5 minutes.

2. Poor Subject-to-Background Separation
Have you ever taken a photo where the subject’s dark hair just disappears into a dark background? It looks like a floating face in a void. This is a classic case of poor separation. When the subject blends into the background, the viewer’s eye struggles to find the focal point. It lacks depth and looks amateur.
This happens most often in single-light setups or when you’re shooting in tight spaces. You want your subject to pop, not to be absorbed by the wallpaper.
How to Fix It: There are a few ways to tackle this. First, use a "rim light" or "hair light" (more on that in a second). Second, let some of your key light spill onto the background to create a slight gradient. This creates a visual barrier between the subject and the wall.
Another trick is to move your subject further away from the background. The further they are from the wall, the more out of focus that wall becomes, creating a natural separation through bokeh. If you’re into the art of depth and perspective, you might find some inspiration in how landscape pros like Peter Lik handle vistas and perspectives. Even though that’s real estate focused, the principles of "foreground vs. background" remain the same.
3. Improper Hair Light Placement
A hair light is a fantastic tool to create that "glow" and separation we just talked about. But if you place it incorrectly, you’ll end up with light "bleeding" onto the subject’s nose or cheeks. This creates distracting, bright hot spots on the face that look like mistakes rather than intentional lighting choices.
How to Fix It: The hair light should be positioned slightly behind the subject and angled down toward the top or back of the head. The goal is to catch the edges of the hair, not the skin of the face. If you see light hitting the tip of the nose or the lips, you’ve moved it too far forward. Pull it back. You want it to define the silhouette, not add a third light source to the face.
If you find your lighting is still a bit harsh, using software like Luminar can help you subtly mask and pull down those highlights during post-processing to save the shot.
4. Square-On Posing (The "Mugshot" Look)
If you tell your subject to stand straight and look directly at the camera, you’re probably going to get a boring photo. Shooting someone "square-on" (shoulders parallel to the lens) makes them look as wide as possible. Unless you are shooting a passport photo or a driver’s license, this is rarely flattering.
And don't even get me started on "claw hands." When subjects don't know what to do with their hands, they often tense up, making their fingers look like rigid talons or hiding them altogether.
How to Fix It: Angle the subject. Ask them to turn their shoulders about 30 to 45 degrees away from the camera while keeping their face toward you. This creates a slimmer, more dynamic silhouette.
For the hands, give them something to do. If they are resting their hands near their face, make sure they aren't pushing against the skin (which creates lumps). Ask them to "staircase" their fingers: meaning, keep the fingers slightly separated and at different heights for a more elegant, relaxed look. Remember, the eye is drawn to the brightest part of the image, so if their hands are closer to the light than their face, their hands will be the star of the show. Keep the face as the primary focal point. Understanding shot composition and its impact is just as important in portraits as it is in marketing.

5. Inappropriate Cropping (Losing the Subject)
Composition is key, but cropping is where a lot of people fail. A common mistake is leaving way too much "dead space" above the subject’s head. This makes the person look small and lost in the frame. Conversely, some people crop at the joints: never crop a person at the wrists, elbows, or knees. It makes them look like they’ve had an unfortunate accident.
How to Fix It: Tighten up. If you aren't showing the environment for a specific reason, get closer. The eyes should generally be in the upper third of the frame. If you want to get creative with off-center compositions, make sure it looks intentional. A centered subject can be powerful, but an off-center subject can feel more candid and alive.
If you find yourself struggling with where to cut the frame, head over to Shut Your Aperture for some excellent visual breakdowns of the "rules of thirds" and "golden ratio" applied specifically to human subjects.
6. The Eye-Level Trap
Most people take photos from their own eye level. Why? Because it’s easy. But it’s also how we see the world every single day. If you want your portraits to stand out, you need to show the world from a perspective people don't usually see. Shooting everything from 5.5 feet off the ground is a recipe for mediocrity.
How to Fix It: Get high or get low. Shooting from a slightly higher angle can make the eyes look larger and the jawline sharper. Shooting from a lower angle can make the subject look powerful and heroic (though be careful with the chin: no one wants a "double chin" shot).
Experiment with different focal lengths too. A 35mm lens from a low angle gives a very different "vibe" than an 85mm lens from eye level. If you want to see how perspective can completely change the mood of a scene, look at Peter Lik’s landscape techniques; he is a master of using unique angles to make the ordinary look extraordinary.

7. Shutter Speed That’s Too Slow
This is a technical mistake that ruins thousands of portraits every day. You think you’re being steady, and your subject thinks they’re being still, but at a shutter speed like 1/50th or 1/80th of a second, even the slightest micro-movement can cause "softness." There’s nothing worse than a portrait where the eyes are just a little bit blurry.
How to Fix It: Keep your shutter speed fast. As a rule of thumb, if you’re shooting handheld, try to keep your shutter speed at at least 1/200th of a second. This freezes the subtle movements of your hands and the subject’s breathing. If you’re using a long lens (like a 200mm), you might need to go even faster to avoid camera shake.
If you’re struggling with gear settings in different lighting conditions, our 10 essential photography tips cover the basics of balancing your exposure triangle to ensure sharpness every time.
Bonus: Don't Forget the Post-Processing
Even if you nail all of the above, a raw photo usually needs a little bit of love to truly shine. We’re not talking about making people look like plastic dolls, but rather enhancing the natural beauty of the shot.
Using tools like Luminar allows you to use AI-driven tools to enhance eyes, smooth out skin textures naturally, and adjust the lighting (Relight AI) if you didn't quite get the key/fill ratio perfect on set. It’s a lifesaver for professional-looking results without spending hours in a dark room.
Putting It All Together
Portrait photography is a conversation between you, the light, and the subject. If you can fix these seven common mistakes, you’ll find that your "hit rate" goes up significantly. You won't just be taking pictures of people; you’ll be creating portraits that tell a story.
Ready to take it to the next level? Start by checking out our other resources on why photography news matters and keep your gear updated. Whether you're shooting for a client or just for your own Instagram, these techniques will set you apart from the crowd.
Now, grab your camera, find a friend, and go practice that hair light placement. Your next masterpiece is only a few adjustments away.
Skylum’s Aperty is purpose-built for portrait retouching with AI skin, eye and detail enhancement. Luminar Neo’s Portrait AI complements it for full-body and editorial work. Tagged as affiliate per FTC.