Ask any professional landscape photographer about their "secret sauce," and they won’t tell you it’s a specific lens or a fancy filter. They’ll tell you it’s the light. Specifically, that fleeting, glowy, "I-can’t-believe-this-is-real" window of time we call the Golden Hour.
If you’ve ever looked at a stunning vista and felt like your photo just didn’t capture the feeling of being there, you probably missed the light. At Shut Your Aperture, we believe great photography shouldn't be complicated, but it does require showing up at the right time. Whether you’re planning the best time for USA road trips or just hitting your local park, mastering the golden hour is the single fastest way to level up your portfolio.
What Exactly Is the Golden Hour?
In simple terms, the golden hour is the first hour after sunrise and the last hour before sunset. During these times, the sun is low on the horizon, which means the light has to travel through more of the Earth's atmosphere. This scatters the harsh blue light and leaves us with those warm, soft tones of red, orange, and gold.
But it’s not just about the color. It’s about the quality of the light. Unlike the harsh, overhead sun at noon that creates "raccoon eyes" on people and ugly, flat shadows on mountains, golden hour light is directional. It rakes across the land, highlighting textures and creating a sense of depth that makes a two-dimensional photo feel like a three-dimensional world.
Why Golden Hour Changes the Game
If you want to understand why top-tier pros like Peter Lik spend decades chasing specific light, you have to look at how light interacts with the landscape. There are four main reasons why this time of day is the holy grail:
- Enhanced Textures: Because the light is hitting your subject from the side (lateral lighting), it picks up every ripple in the sand, every crack in a rock, and every leaf on a tree. This is essential for creating ethereal imagery that can elevate listings or landscapes alike.
- Vibrant Color Palettes: You get a natural warm filter that no digital slider can perfectly replicate. The sky turns into a painter’s palette of pinks and golds.
- Soft Contrast: The "dynamic range" (the difference between the brightest and darkest parts of your shot) is much more manageable. You won't end up with a blown-out sky and pitch-black ground.
- Natural Depth: Long shadows provide a sense of scale and distance. They lead the eye through the frame.
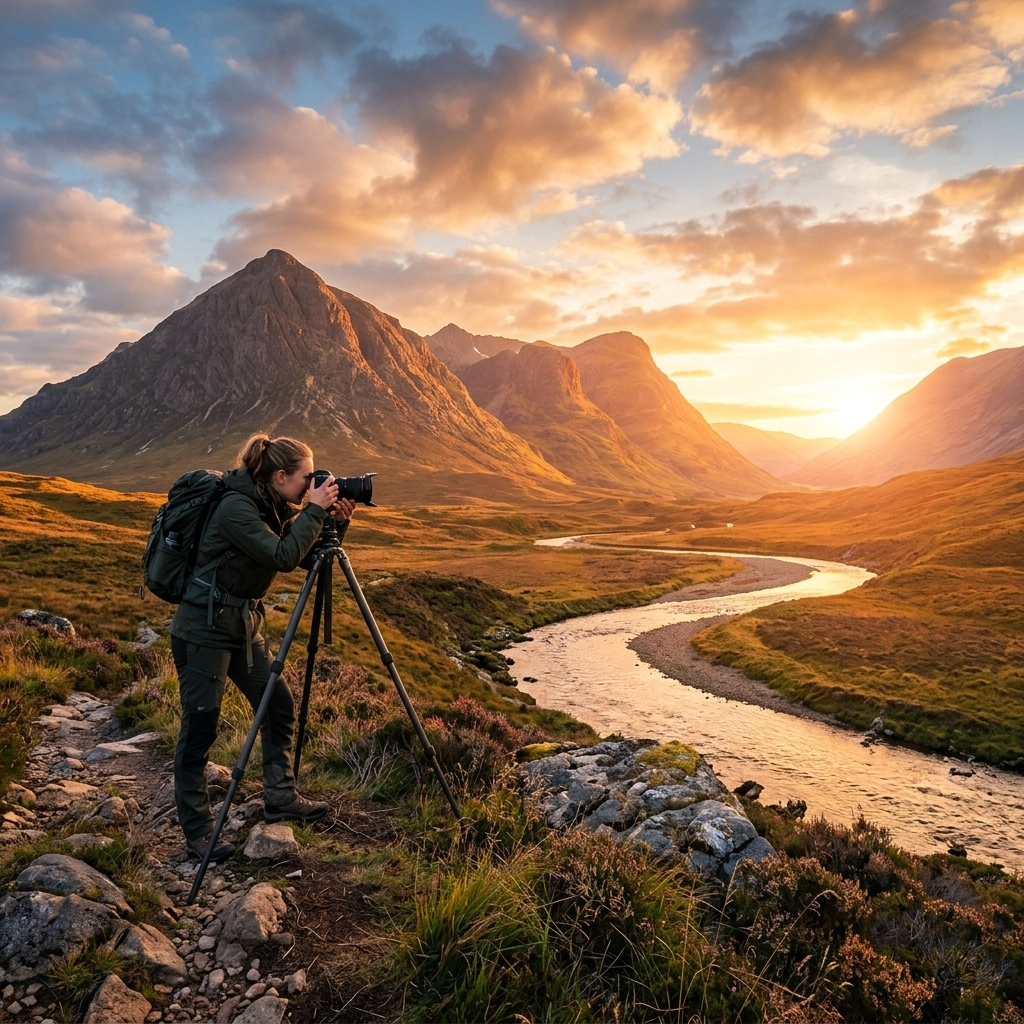
Preparation: Don't Just "Show Up"
One of the biggest mistakes beginners make is arriving at a location exactly when the sun starts to set. By then, you’ve already lost. Success in landscape photography happens in the planning phase.
Know Your Timing
Golden hour isn't always sixty minutes long. Depending on your latitude and the season, it might last twenty minutes or two hours. Use apps like PhotoPills or The Photographer’s Ephemeris to track exactly where the sun will be. If you're looking for more gear and planning advice, Shut Your Aperture is a fantastic resource for deeper technical dives.
Watch the Clouds
A perfectly clear sky is actually kind of boring for landscape photographers. You want some clouds, ideally between 30% and 70% coverage. Clouds act as a canvas for the sun to paint on. If you have high-altitude cirrus clouds, they’ll catch the light long before the sun actually hits the horizon. For more on how weather and timing impact your shots, check out mastering photography with these 10 essential tips.
Scouting the Location
Don't wait until the light is perfect to look for a composition. Arrive at least an hour early. Walk around. Look for leading lines, interesting foreground elements, and how the sun's trajectory will hit the landscape. This is a technique often discussed when looking at the techniques behind Peter Lik’s landscape photography.
Composition Hacks for Stunning Results
Once the light starts to turn, you need to work fast. Here are three compositional strategies to keep in your back pocket.
1. Master Backlighting
Position the sun behind your subject. This creates a "rim light" effect, where the edges of your subject seem to glow. This is especially effective with tall grass, trees, or mist. It adds a sense of mystery and drama that is hard to beat. For a deeper look at how this impacts the viewer, read about vistas and perspectives in photography.
2. Side Lighting for Drama
If backlighting is too "dreamy" for you, try side lighting. By keeping the sun to your left or right, you emphasize the three-dimensional form of the landscape. This is how you get those iconic shots of mountain ranges where one side of the peak is glowing and the other is in a soft, deep shadow.
3. The Sun Star Technique
Want to add a "wow" factor? Use a narrow aperture (like f/16 or f/22) and position the sun so it’s just peeking out from behind an object, like a tree trunk or a mountain ridge. This will turn the sun into a beautiful starburst. It’s a classic move that never goes out of style.
Technical Considerations: Camera Settings
While we like to keep things simple at Shut Your Aperture, you do need to know your way around your manual settings to really nail the golden hour.
- Aperture: For landscapes, you usually want everything in focus. Start around f/8 to f/11. If you want that sun star, bump it up to f/16.
- ISO: Keep it as low as possible (ISO 100) to avoid "noise" or grain. Since you’re shooting in lower light, this means you’ll likely need a tripod.
- Shutter Speed: This will vary. If you’re shooting moving water at sunset, a slower shutter speed will give you that silky, blurred look. For more on these types of "master" moves, you might find inspiration in Peter Lik’s creative process revealed.
- White Balance: Don't leave your camera on "Auto White Balance." It will try to "correct" the beautiful orange light by adding blue. Set it to "Cloudy" or "Shade" to preserve those warm tones.
Post-Processing: Bringing the Vision to Life
Even the best RAW file needs a little love. When you get back to your computer, your goal isn't to fake the scene, but to enhance what was already there.
One of the most powerful tools for landscape photographers right now is Luminar. Its AI-driven tools, like "Golden Hour" and "Sunrays," are specifically designed to enhance the natural glow without making the photo look like a cheap HDR mess. I often use Luminar to lift the shadows just enough to see detail while keeping the rich, saturated colors of the sky.
If you’re looking for more professional editing tips, check out ProShoot.io for workflows that focus on high-end results.
Why You Shouldn't Pack Up When the Sun Drops
The biggest rookie mistake in landscape photography is packing up the tripod as soon as the sun disappears below the horizon. The party is just starting!
This is the transition into the Blue Hour. For about 20 to 30 minutes after sunset, the sky takes on a deep, electric blue hue. The light is incredibly soft and even. This is the perfect time for long exposures, cityscapes, or capturing the ethereal glow of luxury dining locations.
Also, keep an eye out for "Afterglow." Sometimes, 15 minutes after you think the light is dead, the sky will suddenly explode with vivid purples and reds as the sun hits the underside of the clouds from below the horizon.
Subject Matter: What to Shoot?
While "everything" is a tempting answer, some subjects just sing during the golden hour.
- Reflections: Calm lakes or even puddles reflect the colors of the sky, doubling the impact of your shot.
- Wildlife: Animals are often most active during the "crepuscular" hours (dawn and dusk). The low light adds a majestic feel to wildlife portraits.
- Coastal Scenes: The interaction of wet sand, crashing waves, and golden light is a staple for a reason. Check out Peter Lik's iconic works for some of the best coastal landscape inspiration ever captured.
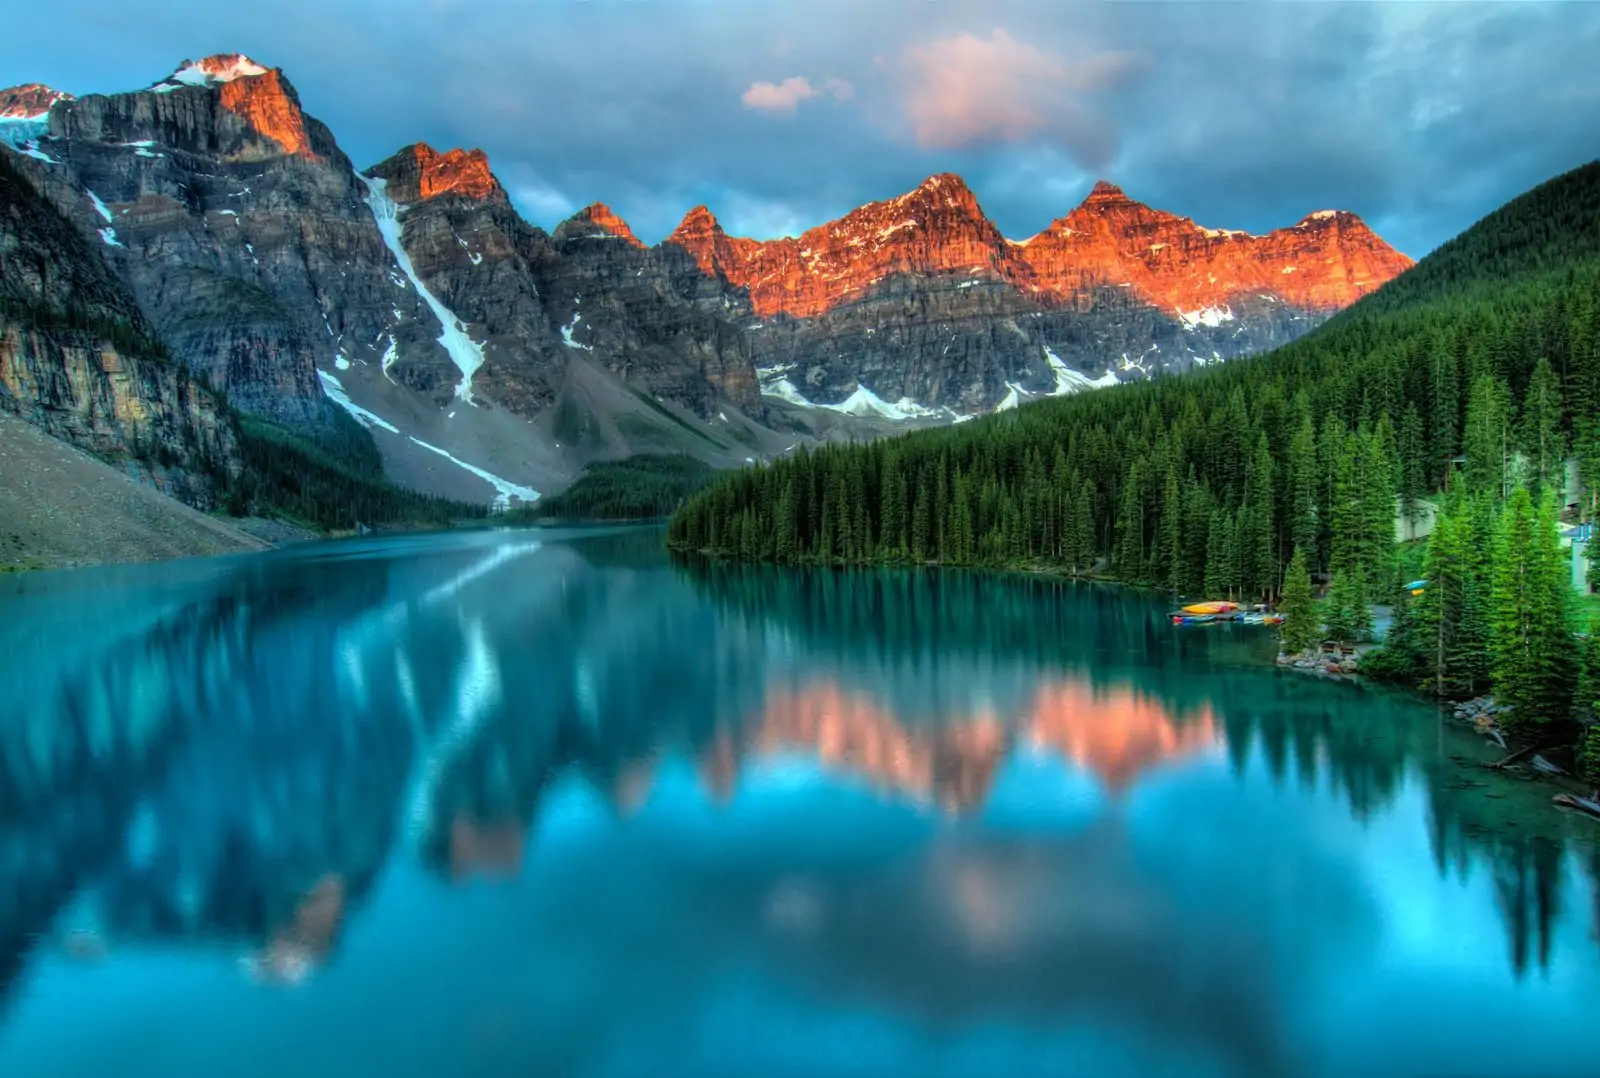
- Mountains: As the sun sets, the light "climbs" up the mountains, eventually hitting only the very peaks. This is known as alpenglow.
The Role of Gear
You don't need a $10,000 setup to take a great photo, but a few key items make golden hour much easier to handle.
- A Sturdy Tripod: Essential. As the light fades, your shutter speed will slow down. You can't hand-hold a 1-second exposure.
- Circular Polarizer: This helps cut glare on water and can actually make the colors in the sky pop a bit more.
- Graduated Neutral Density (GND) Filters: These are dark on the top and clear on the bottom. They help balance a bright sky with a dark foreground. However, with modern sensors and software like Luminar, you can often achieve this effect digitally by bracketed exposures.
- A Remote Shutter Release: Even the act of pressing the button can cause camera shake. Use a remote or your camera's built-in timer.
For more gear reviews and recommendations, I always suggest checking out EdinStudios.com or blog.edinchavez.com where I dive into the specific tools I use on my professional shoots.
Final Thoughts on the Magic Hour
Landscape photography is a patient man's game. You will have days where the clouds are too thick, or the horizon is too hazy. But when it all lines up: the right location, a killer composition, and that perfect golden light: there is no better feeling in the world.
It’s about not really just a "pretty picture." It’s about capturing a moment of stillness in a world that’s usually moving too fast. Whether you're trying to inspire art lovers worldwide or just want a better shot for your living room wall, the golden hour is your best friend.
So, set your alarm, pack your tripod, and get out there. The light is waiting.
Quick Checklist for Your Next Golden Hour Shoot:
- Checked the sunset/sunrise time?
- Arrived 60 minutes early to scout?
- Battery charged and SD card empty?
- Tripod packed?
- Luminar ready for the post-game?
- Stayed for the blue hour?
If you want to see how these techniques translate into other fields, like how photography is essential for real estate marketing, keep exploring the blog. We’re here to help you shut your aperture and open your eyes to the beauty around you. For high-end prints of some of the world's most beautiful golden hour locations, don't forget to visit EdinFineArt.com.
Luminar Neo’s Sky AI, atmosphere AI and SuperSharp are designed for landscape work — replace flat skies, add depth, and recover detail in seconds. Tagged as affiliate per FTC.


