Let’s be real for a second. You’ve probably seen those "perfect" portraits on Instagram or in high-end magazines and thought, “Man, I’ll never be able to do that.” You think they have some secret sauce, a $50,000 camera, or maybe a team of twenty people holding lights.
Well, I’m here to tell you that’s mostly a load of crap.
The "secrets" of the pros aren't actually secrets, they’re just rules they’ve learned to break at the right time. Most experts won't tell you this because it makes the job sound easier than it is, or because they want to keep the "magic" alive. But at Shut Your Aperture, we’re all about keeping things simple and getting you the results you want without the fluff.
Today, we’re pulling back the curtain. We’re going to talk about why your gear doesn’t matter as much as you think, why "perfect" lighting is boring, and how you can start taking professional-grade portraits with the gear you already have.
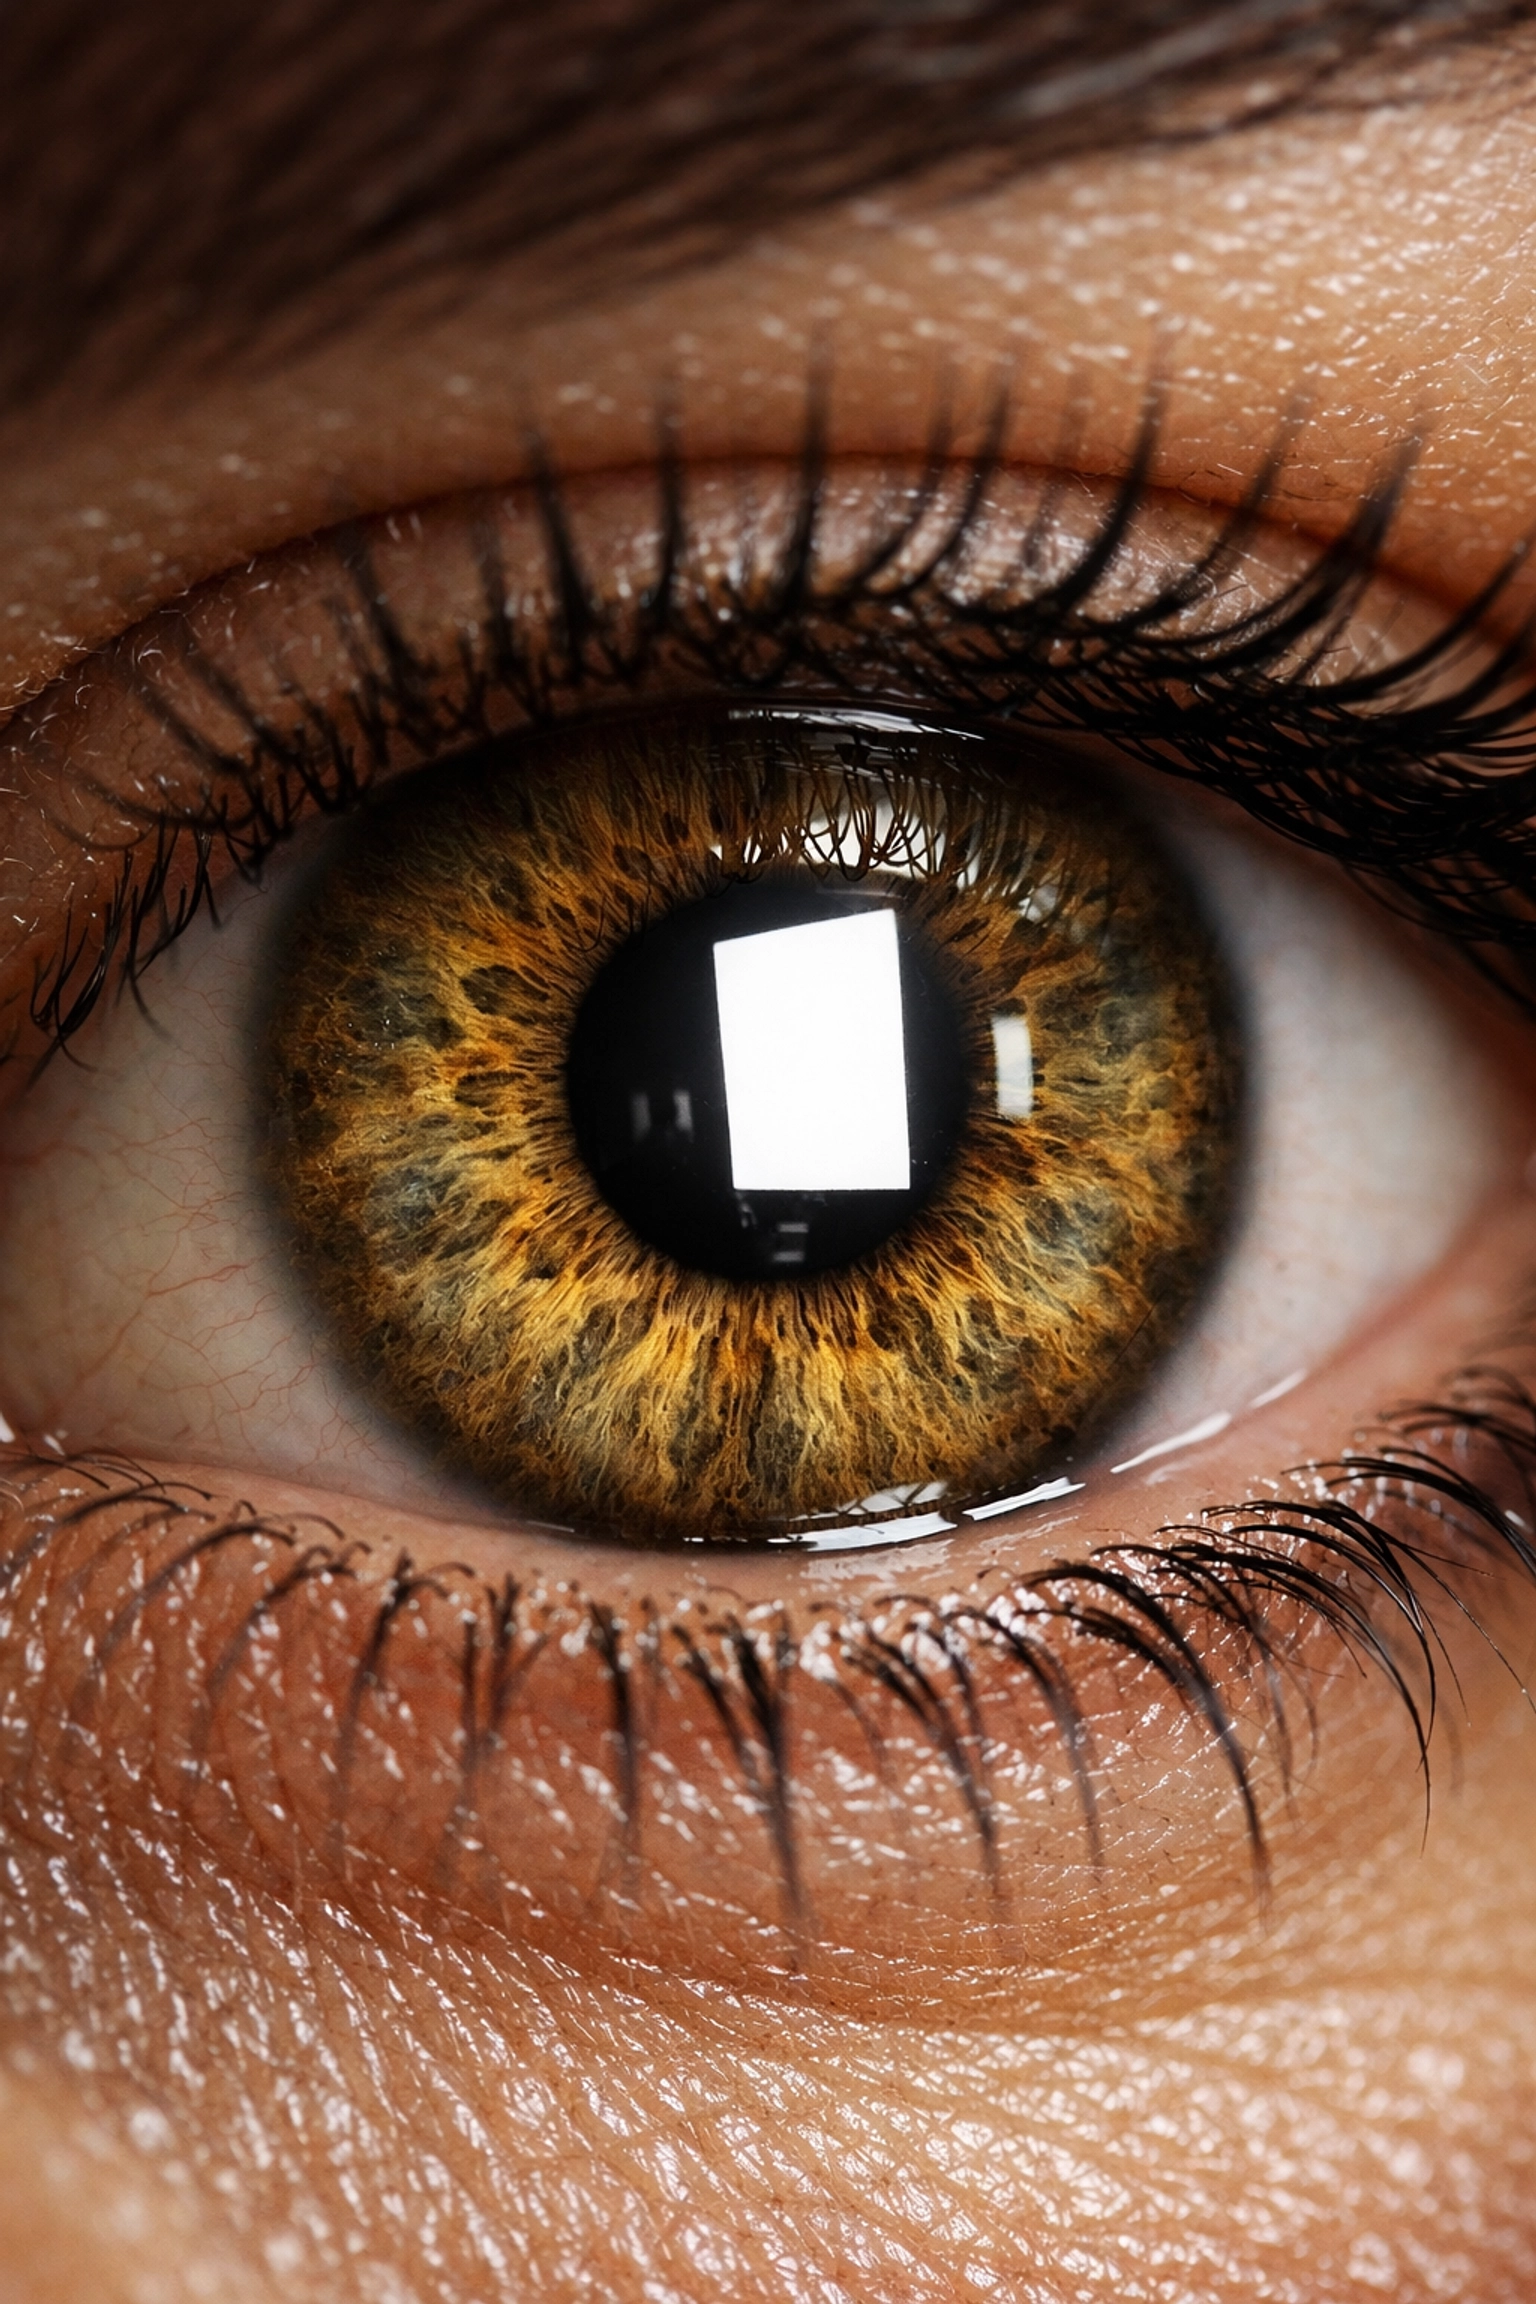
1. The "Golden Rule" of Catchlights is a Lie
If you’ve ever taken a basic photography class, you’ve heard about catchlights. Those are the little glints of light in a subject’s eyes that make them look alive. The standard advice? "Keep them small, round, and at the 10 o'clock or 2 o'clock position."
Here’s the secret: Catchlights don’t have to be small or round.
In fact, some of the most stunning fashion portraits use huge, rectangular softboxes that create massive catchlights. Sometimes, they use ring lights that create a circular "halo" in the eye. While the "natural sun" look is fine, departing from it can give your portraits a high-end, editorial feel. Don't stress about the shape; stress about whether the eyes look "alive." If there’s light in them, you’re winning.
2. You Don’t Need an f/1.2 Lens
There is a massive obsession in the portrait world with "bokeh", that blurry background everyone loves. Because of this, people think they have to buy an f/1.2 or f/1.4 prime lens that costs more than a used car.
The truth? Most pros actually stop their lenses down.
When you shoot at f/1.2, the depth of field is so thin that if your subject breathes, their eyes are out of focus. Nothing ruins a portrait faster than blurry eyes. Most lenses are actually at their sharpest about two stops down from their maximum aperture. If you have an f/1.8 lens, try shooting at f/2.8 or f/4. You’ll get a sharper image, and the background will still look plenty creamy.
If you're looking for the right tool to get started without breaking the bank, check out our guide on the best cameras for beginners. You'll find that you can get incredible results with modest gear if you know how to use it.
3. Stop Fearfully Following the Rule of Thirds
The Rule of Thirds is great for beginners. It helps you stop putting everything dead-center. But if you want your portraits to have a "soul," you need to know when to ignore it.
Centering a subject can create a powerful, confrontational, and symmetrical look that pulls the viewer straight into the eyes. This is especially true for tight headshots. Speaking of headshots, here’s a secret that drives some traditionalists crazy: It is perfectly okay to crop the top of someone’s head.
In high-end fashion and beauty photography, we do this all the time. It brings more focus to the eyes and the mouth. As long as you aren’t cutting off the chin (which usually looks awkward), a tight crop on the forehead is a professional move that adds intimacy to the shot.
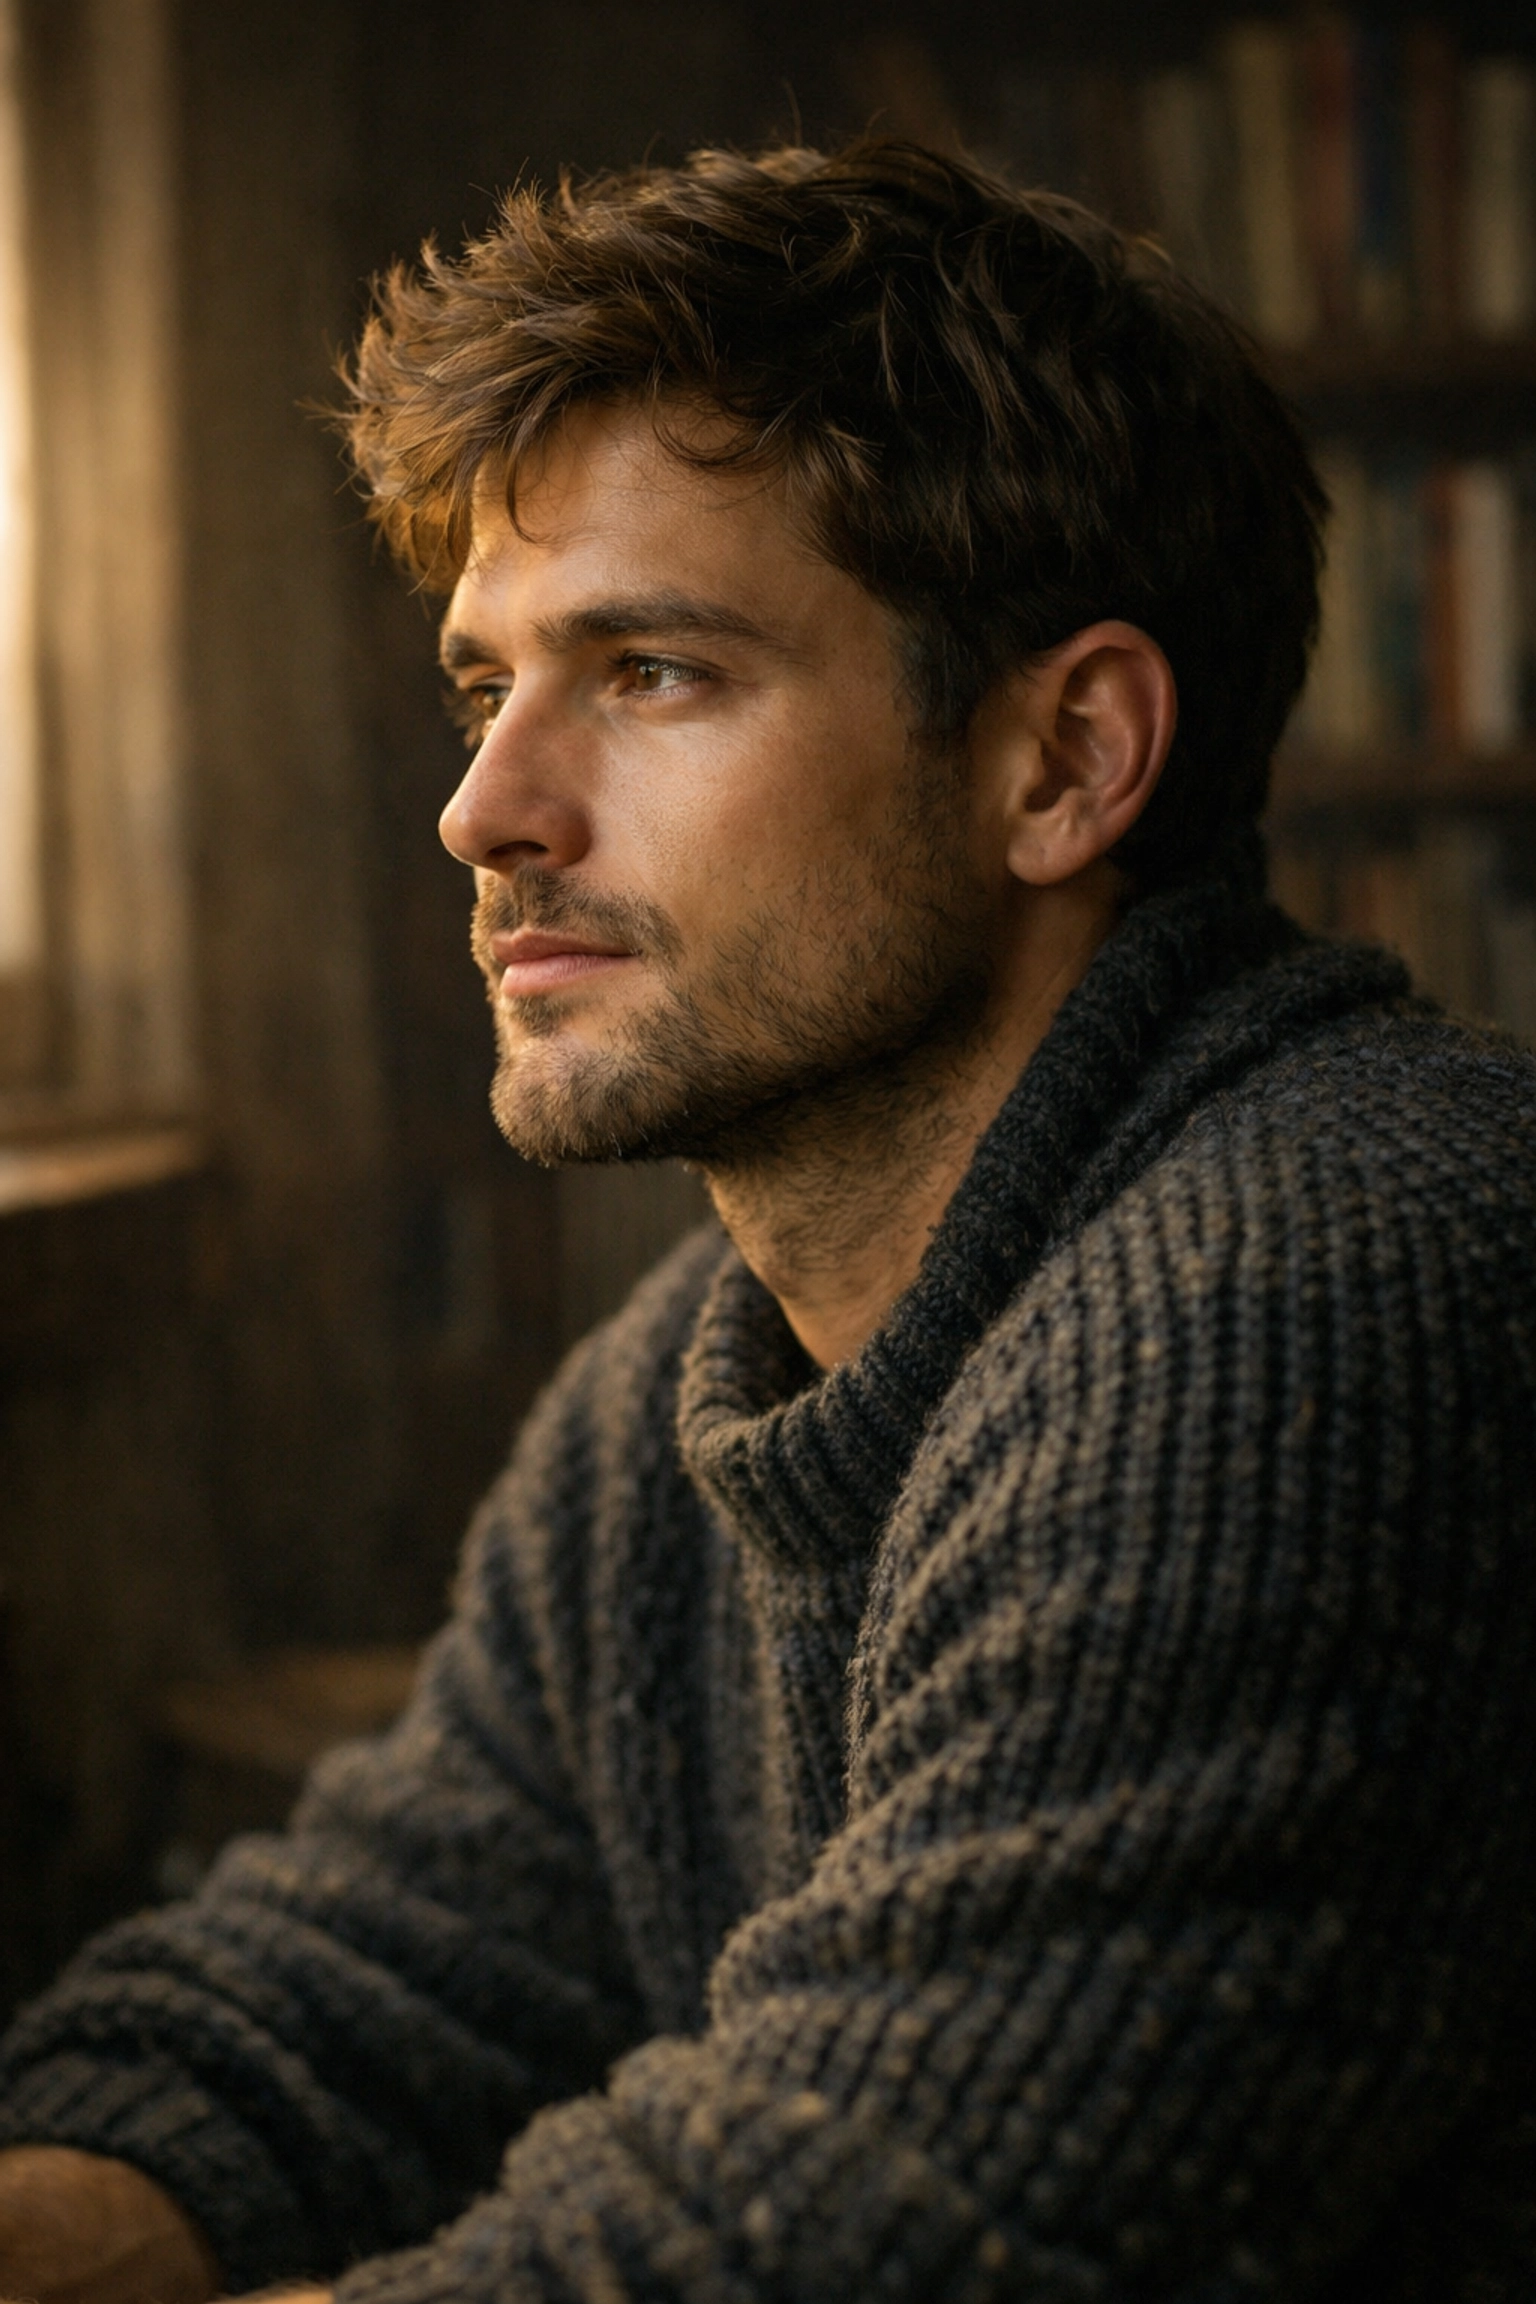
4. The "Eyes on Camera" Myth
We’re told from birth to "look at the camera and smile." For a portrait, that's often the most boring thing a subject can do.
The best portraits tell a story, and sometimes that story involves the subject looking away. They could be looking at something just off-camera, looking down in reflection, or even having their eyes closed. Closed eyes are a staple in beauty photography to show off makeup or create a sense of peace.
The key isn't having them look at the lens; it's having them look at something with intention. If they’re looking off-camera, give them a specific spot to focus on. It keeps the eyes from looking "dead" or wandering.
5. Expose for the Face, Forget the Background
Your camera is smart, but it’s also easily fooled. When you use auto-exposure, the camera tries to balance the whole scene. If your subject has light skin and the background is dark, the camera might overexpose the face to try and see the background.
Experts know that the background doesn't matter if the face is ruined. Always expose for the skin tones. If the background goes a bit too dark or blows out a little, that’s fine, it’s a portrait, not a landscape. If you're struggling with this, I highly recommend looking into top photography tips to master your manual settings.
6. The Psychological Secret: The 90/10 Rule
I was talking to Sonny, our social media manager, about this the other day. He sees thousands of photos a week, and he can always tell which photographers were comfortable with their subjects.
Portrait photography is 90% psychology and 10% pressing a button.
If your subject is stiff, the photo will suck. Period. I don't care if you're using professional photography cameras or an iPhone. Your job is to make them forget there is a big glass lens pointed at their face.
- Talk to them: Don't just hide behind the viewfinder.
- Give specific direction: Instead of saying "be natural," say "shift your weight to your back foot" or "think about your favorite meal."
- Show them the back of the camera: When you get a great shot, show them. It builds their confidence instantly.
7. Skin Shine Isn't Always the Enemy
We’ve been taught that "specular highlights" (shiny spots) on the skin are a mistake. While you don't want your subject looking like they just ran a marathon, a little bit of shine on the cheekbones or the bridge of the nose adds dimension. It makes the skin look like skin, not flat, matte plastic.
The trick is controlling it. Use a reflector to bounce some soft light back into the shadows. This helps the skin look "dewy" and healthy rather than oily. If you need help managing these details in post-production, Luminar has some incredible AI tools that can enhance skin texture without making it look fake.
8. Shoot Above Eye Level (Mostly)
If you want to make someone look better instantly, raise your camera slightly above their eye level. This forces them to look up a bit, which pulls the skin tighter around the jawline and minimizes any "double chin" action. It also makes the eyes look slightly larger, which is generally considered more "appealing" in traditional portraiture.
However, if you want your subject to look powerful or intimidating, shoot from slightly below eye level. This is the "hero" angle. Knowing which one to use is the difference between a snapshot and a portrait.
9. Use the "Boring" Light
Everyone wants to shoot during "Golden Hour," that hour before sunset when everything is orange and soft. It’s great, sure. But experts know how to use the "boring" light.
Overcast days are actually a portrait photographer’s best friend. The clouds act as a giant, world-sized softbox. The light is even, there are no harsh shadows under the eyes, and your subject won't be squinting. If you're stuck in bright midday sun, find "open shade", the area just inside the shadow of a building or a tree. You get the brightness of the day without the harshness of the direct sun.
For more gear to help you in different lighting situations, take a look at these essential camera accessories for 2024.
10. The Editing Secret: Less is More
One of the biggest giveaways of a "beginner" portrait is over-editing. We've all seen them: the eyes that glow like lasers and the skin that looks like a porcelain doll.
The secret experts won't tell you? They spend more time removing distractions than "adding" effects. Clean up a stray hair, remove a temporary blemish, and maybe soften the under-eye circles just a touch. If the viewer can tell the photo was edited, you went too far.
Using a tool like Luminar is a game-changer here because it uses AI to identify facial features, allowing you to make subtle, realistic adjustments in seconds rather than hours. It’s the closest thing to a "cheat code" in the industry right now.
11. Movement is Better Than Posing
Static poses often look… well, static. Instead of telling your subject to "stand there and look pretty," give them an action.
- "Walk toward me."
- "Spin around and laugh."
- "Run your hand through your hair."
When people move, their facial expressions become genuine. You’ll get those "in-between" moments that feel much more authentic than a forced smile. Set your camera to burst mode and fire away. You might take 50 shots to get the one perfect frame, but that one frame will be worth it.
12. Don't Ignore the Background
Wait, didn't I just say expose for the face and forget the background? Yes, for exposure. But for composition, the background is vital.
A common mistake is having a tree branch looking like it's growing out of your subject's head. Or having a bright red trash can in the corner that pulls the viewer's eye away from the subject. Before you click the shutter, do a quick "perimeter check" of your frame. If something doesn't belong, move yourself or your subject.
For those who love traveling and taking portraits in epic locations, you might find our guide on mastering canyon and gorge travel photography helpful for balancing subjects with complex backgrounds.
Wrapping It Up
At the end of the day, portrait photography isn't about following a checklist of rules. It’s about connection. It’s about you and the person on the other side of the lens.
The "secrets" are really just about being observant. Watch how light hits a face. Notice how a slight head tilt changes the mood. Don't be afraid to try something "wrong," like cropping off the top of a head or shooting in "bad" light.
If you're ready to dive deeper and want to see what kind of work is possible when you stop following the rules, check out some of the galleries at Edin Fine Art or read through more tips at Shut Your Aperture.
Photography should be fun, not a math equation. So grab your camera, find a willing subject (or a mirror), and start breaking some rules. You might be surprised at how "expert" your photos start to look.
And remember, if you need more technical breakdowns or gear reviews to help you make your choice, we’ve got everything from camera comparison insights to reviews of the latest mirrorless cameras right here on the site.
Go out there and shut your aperture! (But, you know, maybe open it up a bit for that bokeh).
Skylum’s Aperty is purpose-built for portrait retouching with AI skin, eye and detail enhancement. Luminar Neo’s Portrait AI complements it for full-body and editorial work. Tagged as affiliate per FTC.