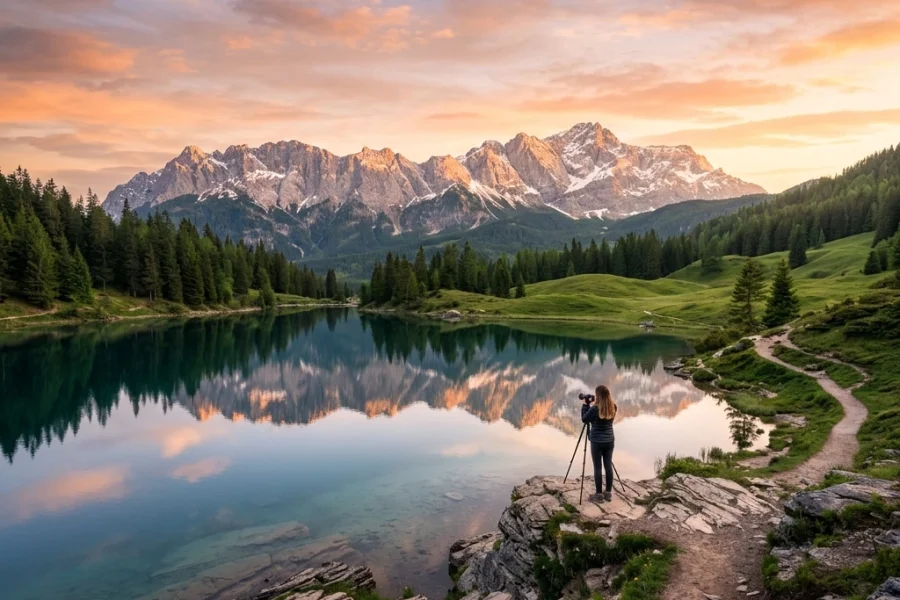
You just got home from an incredible shoot. The light was perfect, the composition was spot on, and you’re feeling like a total pro. You pop the SD card into your computer, open up the files, and… they look a little flat. Maybe the colors aren't as vibrant as you remember, or the shadows are a bit too dark.
Don't panic. This is where the real magic happens.
Post-processing isn't about "fixing" bad photos: though it can certainly help with that. It’s about fulfilling the vision you had when you pressed the shutter. Think of your camera as the tool that captures the ingredients, and photo editing as the chef who turns those ingredients into a five-star meal.
Whether you’re shooting luxury real estate or epic mountain ranges, editing is half the battle. In this guide, we’re going to break down everything you need to know to master the digital darkroom.
The Foundation: Why We Edit
There’s a common misconception that "real" photographers don't edit their photos. That’s total nonsense. Even in the film days, photographers like Ansel Adams spent hours in the darkroom dodging and burning to get the perfect print.
Today, we have software that would make the old masters weep with joy. Editing allows you to:
- Correct Technical Issues: Fix exposure, white balance, and lens distortion.
- Direct the Viewer’s Eye: Use light and color to show the viewer exactly where to look.
- Establish a Style: Whether you like moody, dark tones or bright, airy vibes, editing is where that happens.
- Maximize Detail: Cameras often hide details in the highlights and shadows that only appear after a little tweaking.
If you’re still wondering if the effort is worth it, just look at how distinctive elements of real estate photography rely almost entirely on clean, crisp post-processing to sell a lifestyle.
The RAW Truth: Stop Shooting JPEGs
If you take one thing away from this guide, let it be this: Shoot in RAW.
When you shoot in JPEG, your camera makes permanent decisions about color, contrast, and sharpening, and then throws away the rest of the data to save space. It’s like a microwave dinner: it’s done, but you can’t really change the recipe.
A RAW file is the "raw" ingredients. It contains all the data captured by your sensor. This gives you massive amounts of "dynamic range," which is just a fancy way of saying you can recover details from a bright sky or a dark corner without the image falling apart.

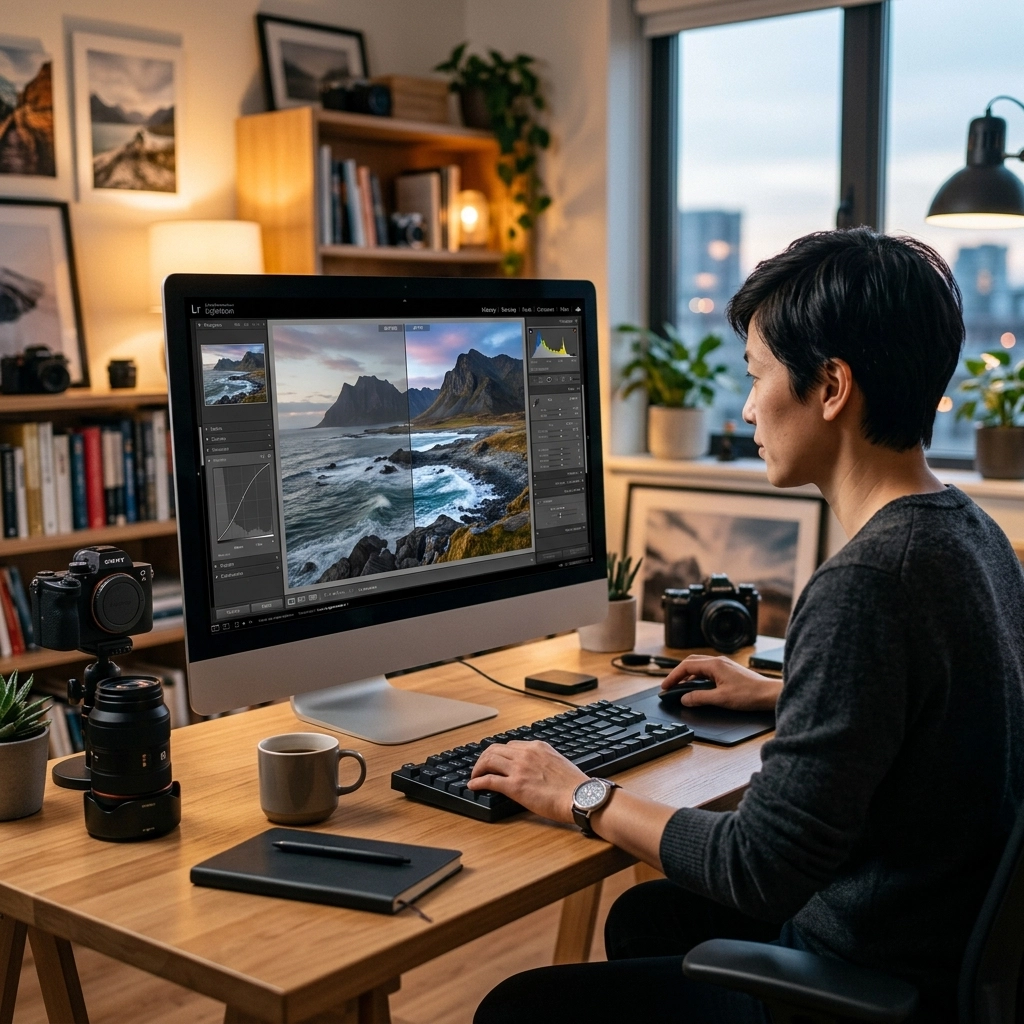
Choosing Your Weapon: Software Options
You don't need a thousand-dollar setup to get started, but you do need the right tools. Here’s the breakdown of the industry heavyweights:
Adobe Lightroom
This is the gold standard for a reason. Lightroom is a "non-destructive" editor, meaning it doesn't change your original file; it just saves a list of instructions on top of it. It’s perfect for managing thousands of photos and performing 90% of your editing needs. If you’re just starting, this is where you should live.
Adobe Photoshop
While Lightroom is for "developing" photos, Photoshop is for "manipulating" them. If you need to remove a distracting power line, swap a sky, or do complex frequency separation for portraits, Photoshop is your best friend. For more advanced tips, you can always check out PhotoGuides.org to see how the pros layer their edits.
Luminar
If you want results fast without learning a million sliders, Luminar is a game-changer. It uses AI to handle things like sky replacement, skin retouching, and even adding sunbeams with a single click. It’s powerful, intuitive, and great for those who want to spend more time shooting and less time clicking.
Capture One
Often preferred by studio and fashion photographers, Capture One is known for its superior color handling and "tethered" shooting capabilities (where your camera is plugged directly into the computer).
The Professional Workflow: Step-by-Step
Don't just start sliding bars randomly. You need a plan. A consistent workflow prevents you from over-editing and keeps your portfolio looking cohesive.
Step 1: Culling
Before you edit, you have to choose. This is "culling." Go through your shoot and be ruthless. Flag the winners, bury the losers. You don't need five shots of the same thing. Pick the best one and move on. As we’ve seen in corporate event photography tips, delivery speed matters, so don't waste time editing "okay" shots.
Step 2: Global Adjustments
Start with the big stuff that affects the whole image:
- White Balance: Does the photo look too blue? Too orange? Fix the "temperature" first.
- Exposure: Get the overall brightness right.
- Contrast: Add some punch, but don't go overboard.
- Highlights and Shadows: Pull back the highlights to see the clouds; boost the shadows to see the details in the trees.

Step 3: The Histogram is Your Best Friend
That weird little mountain graph in the corner of your editing software? That’s the histogram. It tells you exactly where the light is. If the graph is touching the right side, your highlights are "clipped" (pure white with no detail). If it’s touching the left, your shadows are "crushed" (pure black). Aim for a nice balance in the middle unless you’re going for a specific high-key or low-key look.
Step 4: Local Adjustments
This is where the pros separate themselves from the amateurs. A global edit affects everything. A local edit lets you "paint" adjustments onto specific areas.
- The Adjustment Brush: Use this to brighten just the subject's face or darken a distracting background.
- Radial and Linear Gradients: Perfect for darkening a sky or drawing attention to a specific path in a landscape.
In landscape photography inspired by Peter Lik, local adjustments are used to create that "glow" that makes the viewer feel like they’re standing in the scene.
Advanced Techniques: Dodging and Burning
Dodging and burning is a fancy way of saying "lightening and darkening."
- Dodging lightens an area.
- Burning darkens an area.
By selectively lightening highlights and darkening shadows, you create "dimension." It makes a flat 2D image feel 3D. This is essential when trying to manipulate real estate perception. You can lead a buyer’s eye straight to the fireplace or the expensive marble countertops just by playing with light.

Color Grading: Setting the Vibe
Once your exposure and contrast are dialed in, it’s time for color grading. This is purely artistic.
- HSL Slider (Hue, Saturation, Luminance): This allows you to change specific colors. Want the greens in your forest to look more yellow and "autumn-like"? Change the Hue. Want the sky to be a deeper blue? Lower the Luminance of the blues.
- Color Grading Wheels: These allow you to add a specific tint to the shadows (like a cool teal) and a different tint to the highlights (like a warm orange). This "orange and teal" look is a classic cinematic technique.
Speaking of cinema, cinematic techniques can transform property showcases, making a standard home look like a movie set through careful color grading.
Finishing Touches: Sharpening and Noise Reduction
Before you export, you need to clean things up.
- Sharpening: Every digital photo needs a little sharpening. Just don't overdo it, or you’ll get "halos" around your edges.
- Noise Reduction: If you shot at a high ISO (like in a dark church or at night), your photo might have "grain" or "noise." Modern software is incredible at removing this while keeping the details sharp.
If you’re struggling with grainy shots, head over to proshoot.io for some tips on getting cleaner files straight out of the camera.

The Export: Don't Trip at the Finish Line
You’ve spent an hour editing the perfect shot. Don't ruin it now with bad export settings.
- For the Web/Instagram: Export as a JPEG, sRGB color space, and set the long edge to about 2048 pixels.
- For Print: Export as a TIFF or high-quality JPEG, Adobe RGB or ProPhoto RGB color space, and keep the resolution at 300 DPI.
If you’re planning on turning your work into high-end art, take a look at Edin Fine Art to see how professional-grade files translate into physical prints.
Common Editing Mistakes to Avoid
We’ve all been there: you get excited, you start sliding things to the right, and suddenly your photo looks like a radioactive disaster. Watch out for these:
- Too Much Saturation: If your grass looks like neon slime, dial it back. Use "Vibrance" instead: it’s smarter and protects skin tones.
- Over-Sharpening: If everyone in your photo looks like they’re made of sandpaper, you’ve gone too far.
- Heavy Vignettes: A subtle vignette can help focus the eye, but a thick black circle around your photo looks like you’re looking through a telescope.
- Ignoring the Crop: Sometimes the best edit is just cutting out the trash on the edges. Don't be afraid to crop for better shot composition.
The Importance of "Fresh Eyes"
Here’s a pro tip: when you think you’re finished, walk away. Close the laptop, go get a coffee, and come back 20 minutes later. You’ll almost always notice that you went a little too heavy on the contrast or missed a spot of dust in the sky.
Editing is a marathon, not a sprint. For a deeper dive into the creative mindset, Edin Chavez’s personal blog often explores the philosophy behind the lens and the screen.
Wrapping Up the Darkroom
Mastering photo editing takes time. It’s a skill that you develop alongside your shooting. At first, it’ll feel clunky. You’ll wonder why your photos don't look like Peter Lik’s iconic works. But keep at it.
Start with the basics: shoot RAW, get your exposure right, and experiment with local adjustments. Over time, you’ll develop a "look" that is uniquely yours.
If you want to keep leveling up your game, check out our 10 essential photography tips to make sure you’re giving yourself the best possible files to work with in the first place.
Now, stop reading and go open up those folders. There’s a masterpiece hiding in your RAW files: you just have to go find it. For more professional services and studio insights, you can always visit Edin Studios.
Happy editing!