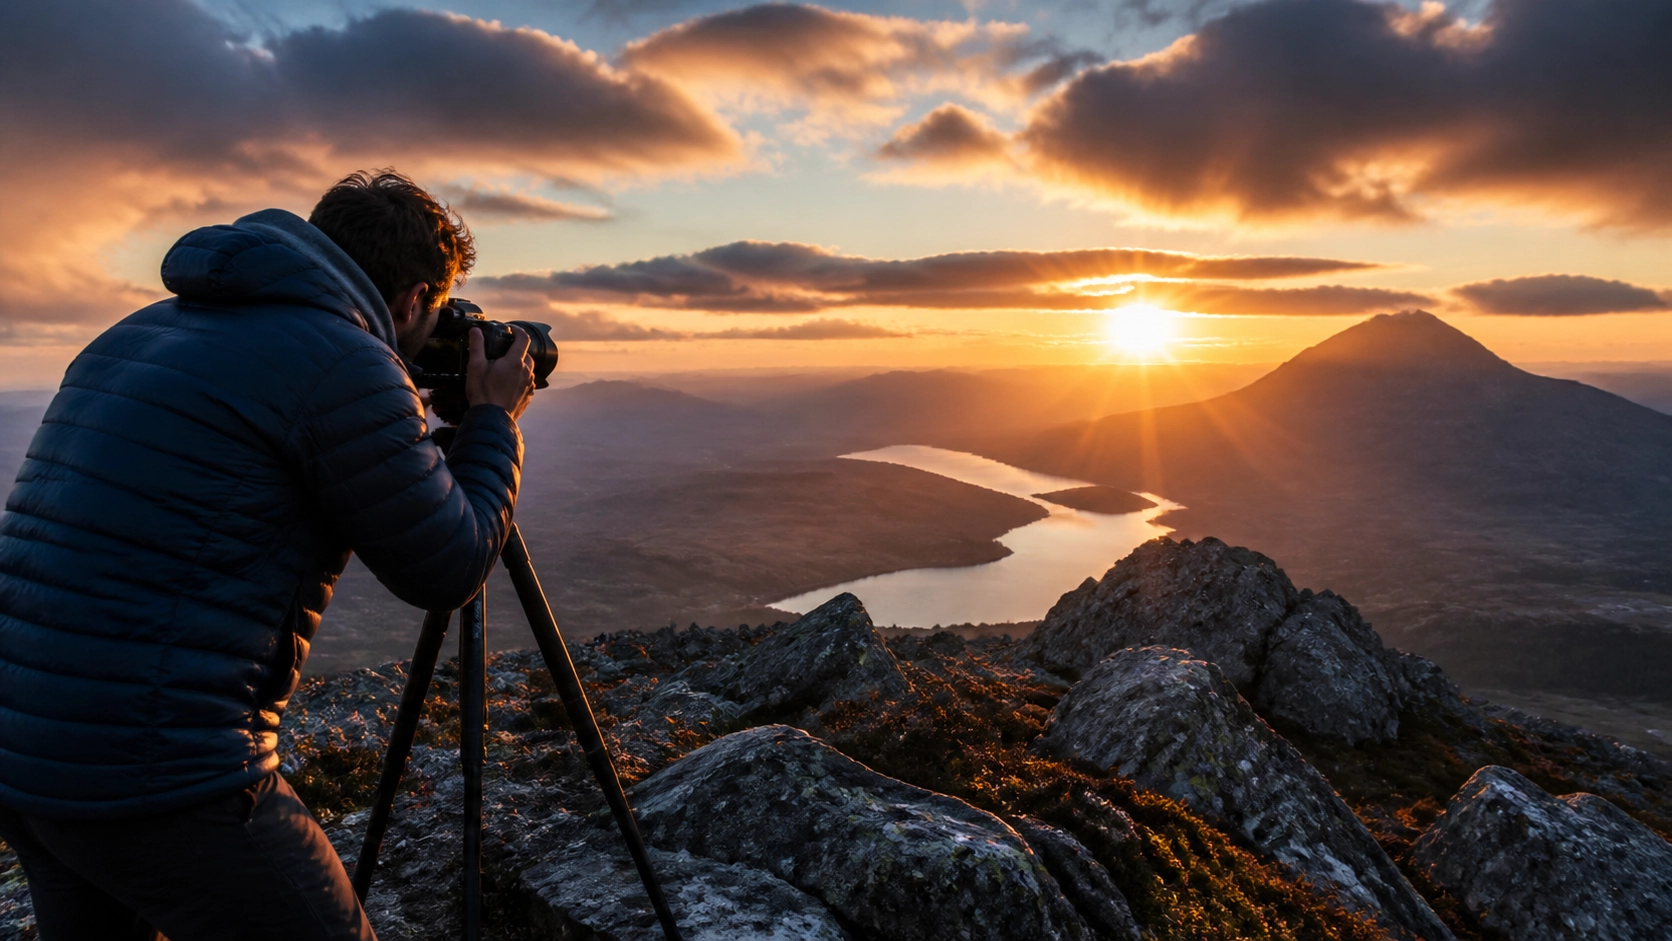
Look, we’ve all been there. You’re standing on the edge of a cliff, the air is crisp, the sun is doing something magical behind the clouds, and you think, "This is it. This is the shot that’s going on the wall." You click the shutter, look at the back of your screen, and… meh. It’s fine, but it’s not it.
Landscape photography seems like it should be the easiest thing in the world. The scenery does the work, right? Wrong. It’s actually one of the most frustrating genres to master because Mother Nature is a moody coworker who doesn't follow your schedule. But more often than not, the reason your shots aren't "popping" isn't the mountain's fault: it's a few common pitfalls that even the pros stumble into when they aren't paying attention.
If you’re tired of coming home with flat, boring, or just plain "okay" photos, let's break down the seven biggest landscape photography pitfalls and, more importantly, how you can fix them. If you're just starting out, you might want to check out our Photography 101 guide to get the basics down first.
1. The "Sunset Runner" Syndrome: Packing Up Too Early
This is probably the #1 mistake I see people make. The sun dips below the horizon, the "main event" is over, and suddenly there’s a mass exodus of photographers heading back to their cars to find the nearest burger joint.
Stop. Put the tripod back down.
The period immediately after the sun disappears is called the Blue Hour, and it is arguably the most underrated time for landscape photography. During this time, the sky takes on deep blues and purples, and the light becomes incredibly soft and directional. This is when you get those dreamy, ethereal vibes that look like they belong in a high-end gallery.
When the sun goes down, the light doesn't just vanish; it changes. It bounces off the atmosphere and fills the shadows with cool tones. If you’ve got a body of water in your frame, the reflections during the blue hour are usually much more intense and colorful than during the actual sunset.
The Fix: Stick around for at least 30 to 45 minutes after sunset. Use a long exposure to capture the fading light. If you’re worried about noise or camera shake, make sure you’re comfortable with your gear: I’ve talked about AI-powered mirrorless tech before and how it helps in low light, but at the end of the day, a sturdy tripod is your best friend here.
2. The "Everything But The Kitchen Sink" Frame
Beginner landscape photographers often try to fit the entire world into a single frame. They see a beautiful valley and think, "I need all of it!" So they zoom out to 14mm and fire away.
The result? A photo that is busy, cluttered, and has no clear subject. Your eyes don't know where to land. There are power lines in the corner, a stray branch poking in from the side, and a tiny mountain somewhere in the distance that looks more like a molehill.
In photography, especially landscapes, less is almost always more. You need to simplify. Every element in your frame should have a reason for being there. If it doesn't add to the story, it's a distraction.
The Fix: Before you press the shutter, do a "border check." Run your eyes around the edges of the frame. Are there any distracting sticks, trash, or bright spots that draw the eye away from the subject? If so, reposition. Don't be afraid to use a longer focal length. Sometimes a 70-200mm lens is a better landscape tool than a wide-angle because it allows you to isolate the interesting patterns and textures in the distance. For more tips on how to handle your gear, swing by Shut Your Aperture.
3. Sky Greed: Giving Too Much Space to Nothing
We love a good sky. Big clouds, fiery oranges, deep blues: it’s tempting to point the camera up and give the sky 80% of the frame. But unless that sky is absolutely doing something spectacular (we're talking once-in-a-decade storm clouds), a massive, empty sky is just "dead space."
If the sky is clear blue or a flat, depressing grey, it’s not your friend. Including too much of it makes your foreground feel small and insignificant. On the flip side, if you have an incredible foreground: like textured rocks or a field of flowers: and you bury it at the bottom of the frame, you’re wasting the best part of your shot.
The Fix: Remember the Rule of Thirds, but don't be a slave to it. If the sky is boring, push the horizon line to the upper third of the frame and focus on the ground. If the sky is the star of the show, move the horizon to the bottom third. If both are average? Maybe it's time to reconsider the shot entirely. Learning how to balance these elements is a huge part of mastering manual mode, where you control exactly how the light is captured.
4. Midday Madness: Shooting in Harsh Light
I get it. You’re on vacation, you’re hiking at 1 PM, and the view is incredible. You take the photo, but the colors look washed out, the shadows are pitch black, and the highlights are "blown" (pure white with no detail).
Midday sun is the enemy of the landscape photographer. It’s harsh, it’s overhead, and it creates zero contrast or interesting shadows. It flattens the landscape and makes everything look like a generic postcard from 1992.
The Fix: Plan your day around the "Golden Hours": the hour after sunrise and the hour before sunset. This is when the sun is low, creating long shadows that reveal the texture and "bones" of the landscape. If you must shoot during the day, look for overcast skies. Clouds act as a giant softbox, evening out the light and making colors (especially greens in a forest) look much more saturated. You can find more deep dives into lighting over at blog.edinchavez.com.
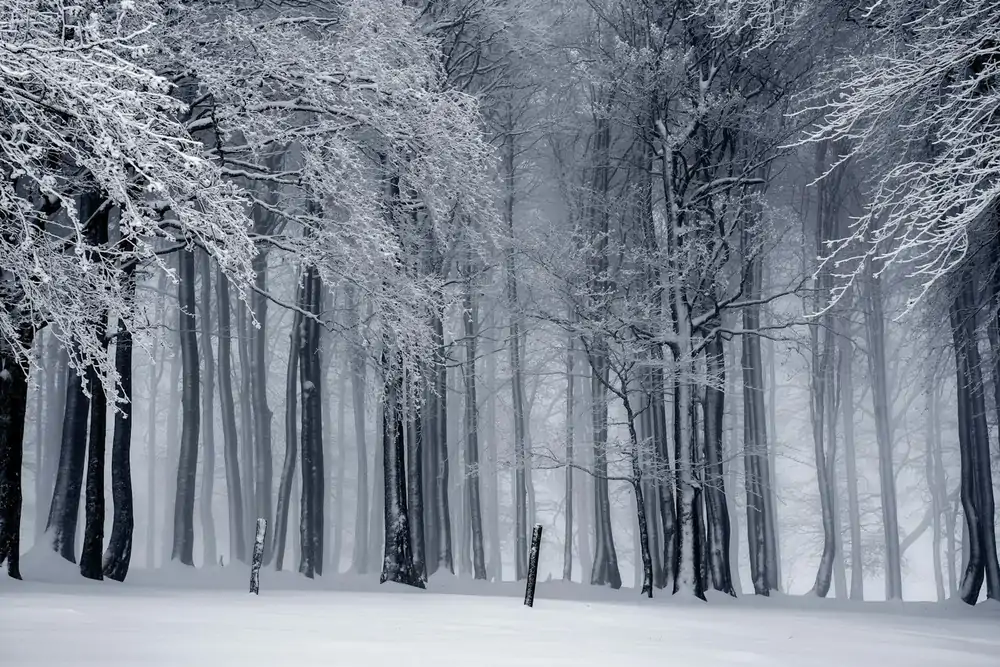
5. Lack of Depth: The Flat Earth Problem
One of the hardest things in photography is taking a three-dimensional world and squishing it onto a two-dimensional sensor. Without a clear foreground, middle ground, and background, your landscape photos will feel flat.
If you just stand up straight and point your camera at the horizon, the viewer's eye has no way to "enter" the photo. It feels like looking at a wall rather than a scene.
The Fix: Get low. Seriously, get your camera six inches off the ground. Find a "hero" foreground element: a rock, a patch of wildflowers, or a leading line like a path or a stream. This gives the viewer a place to start their visual journey. By having something close to the lens, something in the middle, and the mountains/sky in the background, you create a sense of scale and depth that pulls people into the image. If you want to see some world-class examples of depth in landscapes, check out the galleries at www.edinfineart.com.
6. Blown Highlights and "Fixing it in Post"
There is a dangerous lie in the photography world: "I'll just fix it in Lightroom."
While modern sensors are incredible, they aren't magic. If you overexpose your sky to the point where it is pure white, there is zero data there. You can slide that "Highlights" slider all the way to the left, and all you’ll get is a muddy, grey mess. The same goes for "crushed" shadows: if there’s no detail in the blacks, you can’t bring it back.
The Fix: Learn to read your histogram. That little graph on your screen is your best friend. If the "mountain" on the graph is shoved all the way to the right and touching the edge, you’re losing highlights. If it’s touching the left, you’re losing shadows. In landscapes, it’s usually better to underexpose slightly to save the sky, as modern cameras are much better at recovering shadow detail than highlight detail.
If you really want to level up your technical game, check out our structured courses at learn.shutyouraperture.com. We go way deeper into reading light than a single blog post ever could.
7. Overprocessing: The "Clarity" Slider Addiction
We’ve all done it. You open your photo, it looks a bit dull, so you crank the saturation to +50 and the "Clarity" or "Dehaze" slider to the moon. Suddenly, your photo looks like a scene from a radioactive planet. The edges of the mountains have weird glowing halos, the sky is a neon blue that doesn't exist in nature, and the trees look like they’re made of plastic.
Over-editing is the hallmark of an amateur. It screams, "The original photo wasn't good enough, so I’m trying to hide it with filters."
The Fix: Be subtle. Edit with a light touch. If you’re using powerful tools like Luminar, use the AI features to enhance what’s already there rather than creating something fake. Luminar is great for things like Sky Replacement or AI Structure, but the key is to dial back the opacity.
A good rule of thumb? Once you think the edit is perfect, go back and move every slider 20% closer to zero. Your eyes get "used" to the saturated colors as you edit, and you lose perspective. Walk away, get a coffee, come back 10 minutes later, and look at the image with fresh eyes. Does it look like a place a human could actually stand? If the answer is "only if they were on hallucinogens," dial it back.
Bonus Tip: The Wonky Horizon
I wasn't going to include this because it seems so basic, but I see it everywhere. If your horizon line is even 1 degree off, it ruins the entire shot. It makes the viewer feel like the ocean is about to leak out of the side of the frame. It’s an instant "amateur" flag.
Most cameras have a built-in electronic level (often called a virtual horizon). Turn it on. Use it. If you’re shooting handheld, it’s easy to tilt. If you’re on a tripod, double-check the legs. Even if you mess it up in the field, use the crop tool in your editing software to straighten it. There is no excuse for a crooked horizon in 2026.
Wrapping It Up
Landscape photography is a marathon, not a sprint. You’re going to have days where you do everything right: you wait for the blue hour, you find the perfect foreground, you nail the exposure: and the weather still doesn't cooperate. That’s just part of the game.
But by avoiding these seven pitfalls, you’re making sure that when the light does show up, you’re ready to capture it. Stop rushing, start simplifying, and for the love of all things holy, stop packing up the second the sun goes down.
If you're feeling a bit overwhelmed by all the settings, don't sweat it. Even pros need a refresher. Take a look at our guide on Canon EOS R6 Mark II settings: even though it's focused on weddings, the principles of button customization and focus tracking can be a game-changer for landscape work too.
The world is out there waiting. Now go out and shut your aperture (metaphorically… or literally, depending on your depth of field needs). Stay creative!
Luminar Neo’s Sky AI, atmosphere AI and SuperSharp are designed for landscape work — replace flat skies, add depth, and recover detail in seconds. Tagged as affiliate per FTC.


