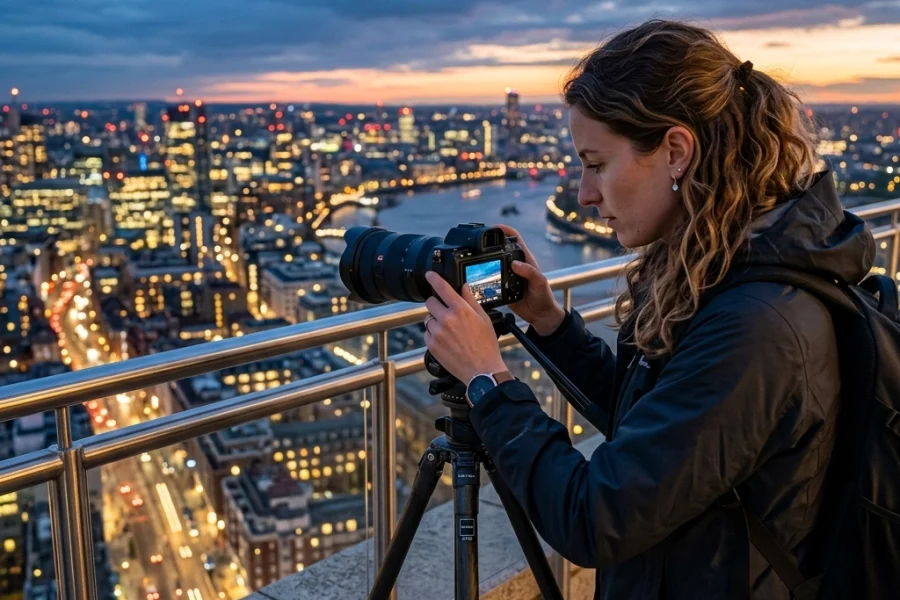
Let’s be real for a second: that little "A" on your camera dial, the one that stands for "Auto", is a trap. Sure, it’s convenient. It’s the "safe" zone. But it’s also the reason your photos might look like everyone else’s. If you’ve ever wondered why your shots aren’t popping the way you see them on Instagram or in galleries, the answer is usually simple: you’re letting the camera make the creative decisions for you.
When you flip that dial to M, everything changes. You stop being a spectator and start being the director. Mastering manual mode is the single most important milestone in a photographer's journey. It’s the difference between taking a snapshot and creating a piece of art.
Today, we’re going to tear down the wall of intimidation. I’m going to show you exactly how to take control of your exposure, understand the "Exposure Triangle," and finally get the results you’ve been dreaming of. This isn’t just about technical settings; it’s about unlocking your creative voice.
If you're serious about taking your skills to the next level, you should check out our photography tutorials for a deeper dive into the craft. Now, let’s get into it.
Why Even Bother With Manual Mode?
You might be thinking, "Penny, my camera is smarter than I am. It has a processor that can calculate light in milliseconds. Why should I override it?"
Here’s why: your camera is a computer. It doesn’t have eyes, and it certainly doesn't have a soul. It’s programmed to look at the world and try to turn everything into "18% gray", a neutral exposure. While that’s fine for a casual family picnic, it’s a disaster for artistic expression.
If you’re shooting a moody, dark portrait, your camera will try to brighten it up, ruining the vibe. If you’re shooting a bright, snowy landscape, your camera will try to darken it, making the snow look like slush. Manual mode allows you to tell the camera, "No, I want it this way."
Beyond exposure, manual mode gives you control over how the image looks. Do you want a blurry background (bokeh)? Do you want to freeze a speeding car? Do you want to capture the silky flow of a waterfall? These are creative choices that Auto mode simply can't navigate.
If you're still struggling with the basics of light, reading through 10 things you should know about mastering light is a great place to start.
The Holy Trinity: The Exposure Triangle
Every single photo you take is the result of three variables working together: Aperture, Shutter Speed, and ISO. This is known as the Exposure Triangle. Think of it like a three-legged stool, if you adjust one leg, you have to adjust the others to keep the stool level.

1. Aperture (The "Eye")
Aperture is the opening inside your lens. Think of it like the pupil of your eye. When it’s wide open, more light gets in. When it’s narrow, less light gets in.
Aperture is measured in "f-stops" (like f/1.8, f/4, f/11). This is where most beginners get confused: a smaller number means a wider opening.
- Wide Aperture (f/1.8 – f/2.8): Lets in a ton of light. This creates a "shallow depth of field," which is that beautiful blurry background everyone loves. It’s perfect for professional corporate headshots.
- Narrow Aperture (f/11 – f/22): Lets in very little light. This keeps everything in focus from the foreground to the background. This is standard for landscape photography. If you're using something like the OM System OM-1 Mark II for landscapes, you’ll likely be living in this range.
2. Shutter Speed (The "Heartbeat")
Shutter speed is how long the camera’s sensor is exposed to light. It’s measured in fractions of a second (like 1/500 or 1/30).
- Fast Shutter Speed (1/1000 and up): Freezes motion. If you’re shooting sports or birds in flight, you need this.
- Slow Shutter Speed (1/60 and down): Blurs motion. This is how you get those "streaky" car lights at night or silky water.
Be careful, though. If your shutter speed is too slow and you aren't using a tripod, your shaky hands will make the whole image blurry. A good rule of thumb is to never shoot slower than 1/60th of a second while handheld.
3. ISO (The "Sensitivity")
ISO is your sensor’s sensitivity to light.
- Low ISO (100 – 400): This is your "clean" zone. Use this when you have plenty of light (like a sunny day).
- High ISO (1600 – 6400+): Use this when it’s dark. It boosts the light signal, but it comes at a cost: "noise" or grain. High ISO can make your images look crunchy and lose detail.
When you use modern software like Luminar, you can clean up some of that noise, but it’s always better to get a clean shot in-camera first.
The Secret Weapon: Your Light Meter
When you switch to manual mode, you aren't flying blind. Every digital camera has a built-in light meter. If you look through your viewfinder or at your screen, you’ll see a little scale with a "0" in the middle, "-3" on the left, and "+3" on the right.
As you change your aperture, shutter speed, or ISO, a little "tick" mark will move along that scale.
- If it’s at 0: The camera thinks the exposure is perfect.
- If it’s in the minus (-): The image will be underexposed (too dark).
- If it’s in the plus (+): The image will be overexposed (too bright).
The goal isn't always to hit zero. Sometimes you want a dark, moody shot, so you’ll intentionally aim for -1. Other times, you want it bright and airy, so you aim for +1. But the light meter is your guide to making sure you don't accidentally lose all your detail in the shadows or highlights.
Step-by-Step: Setting Up Your Manual Exposure
Let’s put this into practice. Imagine you’re standing outside, and you want to take a portrait of a friend. Here is the workflow I recommend:
Step 1: Choose Your Aperture Based on "Look"
What do you want the background to look like? If you want that creamy bokeh, set your aperture as wide as it goes (e.g., f/2.8). If you want the background visible, go for f/5.6 or f/8.
Step 2: Set Your ISO Based on "Available Light"
Is it a bright sunny day? Set it to ISO 100. Is it getting towards sunset? Maybe bump it to 400 or 800. Try to keep it as low as possible to maintain image quality.
Step 3: Adjust Shutter Speed to "Balance"
Now, look at your light meter. Move your shutter speed dial until that little tick mark hits the "0" mark. Take a test shot. Too dark? Slow the shutter down. Too bright? Speed it up.
It really is that simple. Once you get the hang of it, you’ll be making these adjustments in seconds without even thinking. If you’re using a high-end mirrorless camera, the Canon EOS R5 vs Sony A7R V debate often comes down to how easy these dials are to reach and customize.

Beyond the Triangle: Metering Modes and White Balance
If you want to be a true master of manual mode, you need to understand the things that affect how the camera "sees" the light before you even touch the triangle.
Metering Modes
Your camera can measure light in different ways:
- Matrix/Evaluative Metering: The camera looks at the whole scene and averages it out. Great for most situations.
- Spot Metering: The camera only looks at a tiny dot in the center. This is huge for portraits where the background might be super bright, but you want your subject's face to be perfect.
- Center-Weighted Metering: It looks at the whole scene but prioritizes the middle.
Knowing which one to use can save you from a lot of frustration. For example, if you’re doing street photography, things happen fast. Matrix is usually your best bet there.
White Balance
Manual mode isn't just about brightness; it's about color. If your photos look too blue or too orange, your white balance is off. While you can leave this on Auto, setting it manually (e.g., "Daylight," "Cloudy," or "Tungsten") ensures that your colors stay consistent across a whole shoot. This saves a massive amount of time when you bring your photos into Luminar for editing.
When Manual Mode is Actually a Bad Idea
I know, I know. I just spent 1,000 words telling you to use Manual. But part of being an "expert" is knowing when to use the right tool for the job.
There are times when things are moving so fast that you physically cannot adjust your dials quickly enough. Think:
- Wedding Photography: When the bride moves from a dark church into the bright sun outside. Check out some tips on OM-1 Mark II wedding settings for more on that.
- Wildlife Photography: When a bird flies from the shade of a tree into the open sky. You can see how tricky this is in our guide to wildlife settings.
In these cases, use Aperture Priority (A or Av). You choose the aperture and ISO, and the camera handles the shutter speed. It’s a "semi-auto" mode that still gives you creative control without the risk of missing the shot.
Practical Scenarios: Manual Mode in the Real World
Let's look at how manual mode applies to different genres. Each requires a different priority within the exposure triangle.
Landscape Photography
In landscapes, you usually want everything sharp.
- Aperture: f/8 to f/11.
- ISO: 100 (always use a tripod!).
- Shutter Speed: Whatever it takes to get the exposure right.
If you’re a Sony shooter, you might want to look at Sony ZV-E10 II settings for landscapes to see how to maximize that sensor.
Street Photography
Street photography is about speed and grit.
- Aperture: f/5.6 (to give you a little room for error with focus).
- Shutter Speed: 1/250 or faster to freeze people walking.
- ISO: Auto-ISO. Yes, even in manual mode, you can set ISO to Auto. This is a pro secret! You lock your creative settings (Aperture/Shutter) and let the camera handle the brightness via ISO. For more urban tips, see our street photography secrets.
Product Photography
This is all about precision and lighting.
- Aperture: f/11 (you want the whole product sharp).
- ISO: 100.
- Shutter Speed: Controlled by your studio lights or a long exposure.
Check out the Sony ZV-E10 II product photography settings if you're building a home studio.

Common Mistakes Beginners Make in Manual Mode
- Ignoring the Histogram: Don't just trust the screen on the back of your camera. It can lie to you depending on its brightness setting. Learn to read the histogram: a little graph that shows you the distribution of light. If the graph is touching the right side, you're losing detail in the highlights (blowing them out).
- Fear of High ISO: Look, grain is better than a blurry photo. If you need to bump your ISO to 3200 to get a sharp shot, do it. You can fix grain in post, but you can't fix motion blur.
- Not Checking Settings: I can't tell you how many times I've started a shoot only to realize I was still on yesterday's sunset settings. Make it a habit: every time you turn your camera on, reset your "big three."
- Over-complicating it: If you're overwhelmed, change one thing at a time. Start by mastering Aperture Priority, then move to full Manual once you understand how Aperture affects your light meter.
For more help avoiding these traps, read our article on 7 mistakes you're making with natural light portraits.
Developing the "Muscle Memory"
Mastering manual mode is a lot like driving a stick-shift car. At first, you’re thinking about the clutch, the gas, the gear shifter, and the road all at once. It’s exhausting. But after a few weeks, you don’t think about it anymore. Your hand just moves.
The best way to get there? Practice every single day. Even if it's just in your living room. Set up a vase of flowers, change the light by opening a curtain, and see how you have to adjust your settings to keep the exposure consistent.
I’m a huge advocate for daily practice. In fact, we wrote an entire piece on why daily photography tutorials will change the way you shoot forever. It’s not about taking the best photo in the world today; it’s about being 1% better tomorrow.
Finishing the Masterpiece: Post-Processing
Here is a truth that some "purists" don't want to admit: manual mode is only half the battle. To get those jaw-dropping images, you need to process your files. When you shoot in manual, you should always shoot in RAW format. RAW files store all the data from your sensor, giving you the ability to recover shadows and highlights that would be lost in a JPEG.
When it comes to editing, I always recommend Luminar. It’s incredibly intuitive and uses AI to help you achieve the look you want without spending hours masking and layering. It’s the perfect companion to manual mode shooting. You do the hard work behind the lens, and let the software bring out the magic.
You can find more technical comparisons on gear that handles RAW files beautifully, like the Sony A7 IV vs Canon R6 Mark II, to see which sensor fits your workflow.
Final Thoughts: The Lens is Yours
Manual mode isn't a badge of honor just for the sake of being "pro." It’s a tool for freedom. It’s about walking into any lighting situation: a dark club, a bright beach, a moody forest: and knowing exactly what to do to get the shot.
Stop letting your camera tell you what the world looks like. Start telling your camera how you see the world. It’s going to be frustrating at first. You’re going to take some pitch-black photos and some completely white ones. That’s part of the process. Laugh it off, look at your light meter, and try again.
If you want to keep learning and join a community of photographers who are doing the same thing, head over to Shut Your Aperture's learning portal. We have everything you need to go from a beginner to a pro.
Also, don't forget to check out PhotoGuides.org for more technical breakdowns and external resources.
Now, go grab your camera, flip that dial to M, and go create something amazing. The world is waiting to be seen through your eyes.