If aperture still feels fuzzy, start with our deep-dive aperture photography guide — it covers everything from f-stop math to bokeh control.
Let’s be real for a second: street photography can feel like a grind. You head out with your camera, walk ten miles, and come home with five hundred photos of people just… walking. It happens to the best of us. Whether you’re a seasoned pro or you’re just getting started with photography 101, hitting a creative wall is part of the process.
But here’s the thing, the street is a living, breathing theater. If you’re bored, it’s probably because you’re looking at it the same way every time. This weekend, I want you to stop hunting for the "perfect" shot and start playing with these ten creative ideas to refresh your portfolio. We’re moving beyond the standard candid and diving into techniques that will make people stop scrolling and actually look at your work.
If you’re worried your gear is holding you back, don’t be. Whether you’re rocking the latest Sony a7c ii settings for street photography or an old DSLR, these ideas are about your eyes, not your sensor.
1. Harness the Power of Puddles (The Reflection Game)
Rain is usually the cue for most photographers to pack up and head for the nearest coffee shop. Big mistake. Rain is your best friend. Once the downpour stops and the clouds break, the world turns into a giant mirror.
Street reflections are a classic for a reason, they add a layer of abstraction that a standard eye-level shot just can't touch. Instead of shooting the person walking, shoot their reflection in a puddle. Flip the image in post-processing so the reflection is the "reality" and the actual street is at the top. It’s a simple trick, but it creates a disorienting, dreamlike vibe that is incredibly satisfying.
When you’re out there, get low. I mean really low. Put your lens right against the edge of the water. This is where those flip-out screens come in handy. If you’re struggling with getting the exposure right in these tricky lighting conditions, you might want to brush up on manual mode to ensure your highlights don't blow out against the dark asphalt.
2. The "Ghost" Effect: Master Motion Blur
If you want to capture the "hustle and bustle" of a city, frozen action sometimes feels too static. To really show the energy, you need to lean into motion blur.
This isn’t about a blurry, out-of-focus mess; it’s about intentional blur. Set your shutter speed to something slow, around 1/15th or 1/8th of a second, and try to find a subject that is perfectly still while everyone else is moving. Think of a street performer, someone waiting for a bus, or a person staring at their phone amidst a sea of commuters.
The contrast between the "frozen" subject and the "liquid" crowd creates a powerful narrative about isolation in a crowded world. If you find your images are coming out too bright, you'll need an ND filter or to stop down your aperture. If you're hitting errors here, check out these 7 mistakes you’re making with manual mode to get your settings back on track.
3. Geometric Minimalism and Harsh Shadows
Midday sun is usually considered "bad light" because it's harsh and creates deep shadows. In street photography, however, harsh light is a gift. Use it to find geometric patterns.
Look for the way shadows from buildings, staircases, or railings cut across the pavement. You’re looking for high contrast, blinding whites and pitch blacks. The goal here is to wait for a human element to enter one of these "light pockets."
This style is very minimalist. You want as few distractions as possible. Find a bright yellow wall or a stark concrete backdrop and wait. Patience is the name of the game here. If you need more inspiration on how to compose these types of shots, PhotoGuides.org has some fantastic deep dives into urban composition.
4. Shooting Through Objects (The Frame Within a Frame)
One of the easiest ways to add depth to a flat street photo is to shoot through something. This could be a window, a fence, a gap in a bus stop, or even some foliage.
By using a "frame within a frame," you lead the viewer's eye directly to the subject. It also gives the viewer a sense of being a voyeur, like they’re peeking into a private moment. If you’re shooting through glass, embrace the reflections and the grime. Sometimes the texture of a dirty window adds more character to a portrait than a clean shot ever could.
If the glass reflections are too distracting, you can always clean them up later using Luminar. Their AI tools are specifically designed to handle things like glare and haze without making the photo look fake.
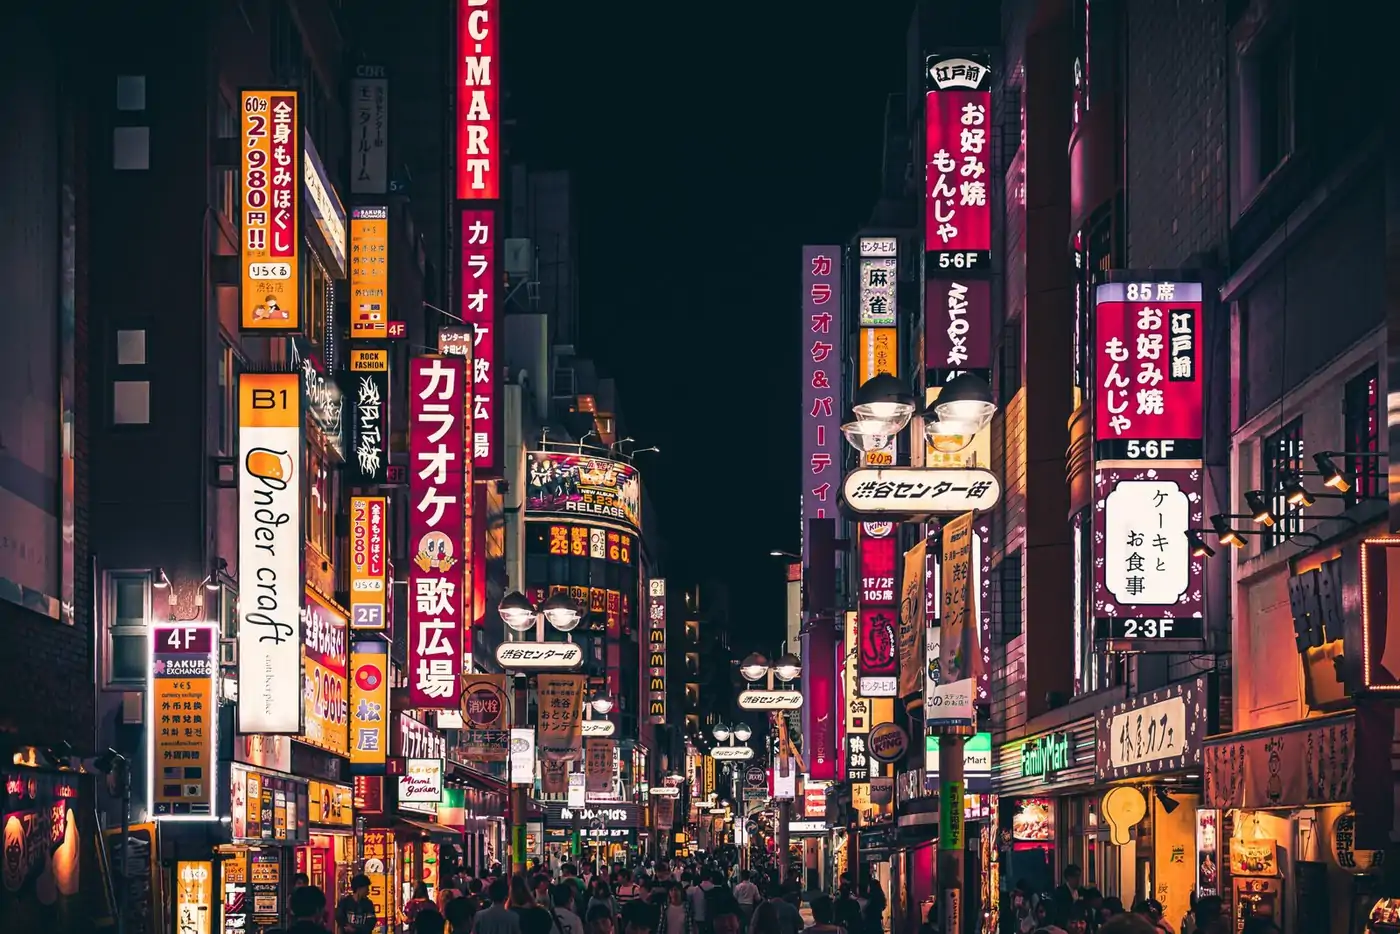
5. Night Owl: Neon and Artificial Light
When the sun goes down, the city changes its face entirely. If your portfolio is full of daytime shots, a night series will immediately stand out.
Focus on artificial light sources: neon signs, shop windows, or even the glow from a smartphone. These "pools of light" are your stage. Wait for someone to walk into the glow. The key to night street photography is embracing the grain. Don't be afraid to crank up your ISO. A grainy, atmospheric night shot is infinitely better than a blurry, "clean" one.
Editing night photos can be a bit of a nightmare if you don't know what you're doing. I see a lot of people over-processing their blacks until the image looks like a cartoon. Avoid these 7 mistakes you’re making with AI photo editing to keep your night shots looking professional and moody.
6. The "Screen Age" Series
Let's talk about the elephant in the room: everyone on the street is on their phone. Instead of complaining about it, document it.
There is a fascinating, often melancholy story to be told about how we are more connected than ever, yet more isolated in public spaces. Capture the way the blue light from a screen illuminates a face in a dark subway car. Look for the contrast between an elderly person looking at the world and a teenager looking at a screen.
This is contemporary documentary photography at its finest. It captures the "now." For more tips on telling a story through your lens, check out Edin Chavez's blog for some behind-the-scenes looks at his documentary projects.
7. Look Up (The Bird's Eye View)
We spend 99% of our lives looking at the world from five to six feet off the ground. To refresh your portfolio, you need to change your altitude.
Head to a parking garage, a bridge, or a rooftop café. Look down at the patterns people make as they cross the street. From above, the world becomes a series of shapes and lines. Shadows become longer and more dramatic. You can capture the "flow" of the city in a way that’s impossible from the sidewalk.
This perspective is also great for showing scale. A tiny person walking across a massive, painted crosswalk can make for a stunning, high-art piece that would look great on Edin Fine Art.
8. Color Blocking
Most street photographers default to black and white because it "looks classic." And while B&W is great, color is a powerful tool that often gets ignored.
Try a project where you only photograph one specific color. Maybe it's a "Red" weekend. You only shoot if there is a dominant red element in the frame, a red dress, a red car, a red fire hydrant. This forces you to look past the "action" and focus on the composition and color theory.
It’s a fantastic exercise for your brain. You’ll start seeing the city as a palette of colors rather than just a collection of buildings. If you're finding the colors in your RAW files are a bit flat, a quick pass through Luminar can help you pop those specific hues without destroying the rest of the image.
9. Urban Textures and Macro Street
Who says street photography has to be about people? The "street" itself is full of character.
Get close. Look for peeling paint, rusted metal, old posters layered on top of each other, or the way a vine is reclaiming a brick wall. These "urban still lifes" add texture and grit to a portfolio. They provide a "sense of place" that complements your human-focused shots.
Think of these as the B-roll of your photography portfolio. They set the scene and tell the story of the environment.
10. The Unposed Portrait (The "Ask")
This is the scariest one for most street photographers, but it’s the most rewarding. Stop a stranger and ask if you can take their photo.
Most people will say no. That’s fine. But the ones who say yes often have the most interesting faces and stories. A street portrait isn't a "candid," but it captures a different kind of truth, the interaction between the photographer and the subject.
Keep it brief. "Hey, I love your style, can I take a quick photo?" Usually, you have about 30 seconds before they get awkward. Make them count. If you’re nervous about the technical side of portraits, our portrait photography techniques 101 guide is a great place to start.
Bringing It All Together: The Edit
Once you’ve spent your weekend chasing shadows and dodging puddles, you’re going to have a memory card full of potential. The "refresh" doesn't stop at the shutter click; it continues in the edit.
Street photography is all about mood. Whether you want a gritty, high-contrast look or a soft, cinematic vibe, the way you process your images matters. I personally love using Luminar for my street work because the "Relight AI" and "Structure AI" tools allow me to pull detail out of shadows and direct the light where I want it to go, which is essential when you can't control the lighting on the street.
If you’re feeling overwhelmed by all these ideas, don't try to do them all at once. Pick two. Maybe this Saturday is "Reflections and Silhouettes" and Sunday is "Night and Neon."
The goal isn't to create a masterpiece every time you step outside. The goal is to keep your eyes sharp and your curiosity alive. The street is always changing, and if you're paying attention, your portfolio will too.
For those of you who really want to dive deep into the technical and creative side of things, make sure you head over to Shut Your Aperture Learn. We’ve got structured courses that go way beyond a blog post, helping you master everything from manual settings to advanced post-processing.
Now, grab your camera, get out there, and show us what you see. The city is waiting.


