Before going further, make sure your aperture fundamentals are locked in: our aperture photography guide walks through it shot by shot.
Let’s be honest: street photography can feel like hitting a brick wall. You grab your camera, head downtown, walk for three hours, and come home with fifty photos of people just… walking. It’s frustrating. You see these incredible, moody, or witty shots on Instagram or at Edin Fine Art and wonder, "What am I missing?"
The truth is, great street photography isn't just about being in the right place; it’s about having a "mission." When you go out with a specific creative constraint or a new idea to test, your brain stops scanning the crowd randomly and starts hunting for patterns, light, and stories.
If you’re feeling stuck, it’s time to shake up your routine. Whether you're shooting on a high-end mirrorless or just your phone, these 25 creative street photography ideas will help you see the world differently this weekend. And if you’re looking to master the technical side of things first, don't forget to check out our photography tutorials for a deep dive into the fundamentals.
1. The Puddle Reflection (The Low-Angle World)
Rain shouldn't keep you inside. In fact, some of the best street photography happens right after a storm. Look for large puddles on uneven pavement or cobblestones. Get your camera as close to the water as possible (without dropping it!) and flip your screen out.
By focusing on the reflection rather than the actual person, you create a surreal, painterly version of the city. It’s an easy way to turn a boring sidewalk into a work of art. If you find the colors are a bit muddy in post, you can always use Luminar to boost those reflections and make the city glow.
2. The "Fishing" Technique
Most beginners "hunt", they walk and shoot. "Fishing" is the opposite. Find a spot with incredible light, a cool background, or a perfect frame (like an archway). Then, you wait.
Stand there for 20 minutes. Eventually, the "right" person will walk through. Maybe it’s someone wearing a bright red coat, or someone with a unique hat. By letting the subject come to you, you can perfect your composition and exposure beforehand. If you're struggling with your camera settings while waiting, take a look at our guide on 7 mistakes you’re making with manual mode.
3. Shooting Through Glass and Windows
Windows are a street photographer’s best friend. They add layers of complexity. You get the subject inside the shop, the reflection of the street behind you, and the texture of the glass itself (fingerprints, raindrops, or stickers).
Try shooting through the window of a busy cafe or a subway car. The "frame within a frame" effect focuses the viewer’s eye and adds a voyeuristic, cinematic feel to the shot.
4. Intentional Motion Blur
Sharpness isn't everything. Sometimes, a perfectly sharp photo feels static and dead. To capture the "energy" of a city, you need movement.
Set your shutter speed to something slow, try 1/15th or 1/30th of a second. As a cyclist or a bus zooms past, "pan" your camera with them. If you time it right, your subject will be relatively sharp, while the background becomes a beautiful, streaky blur. It takes practice, but the results are far more dynamic than a frozen snapshot.
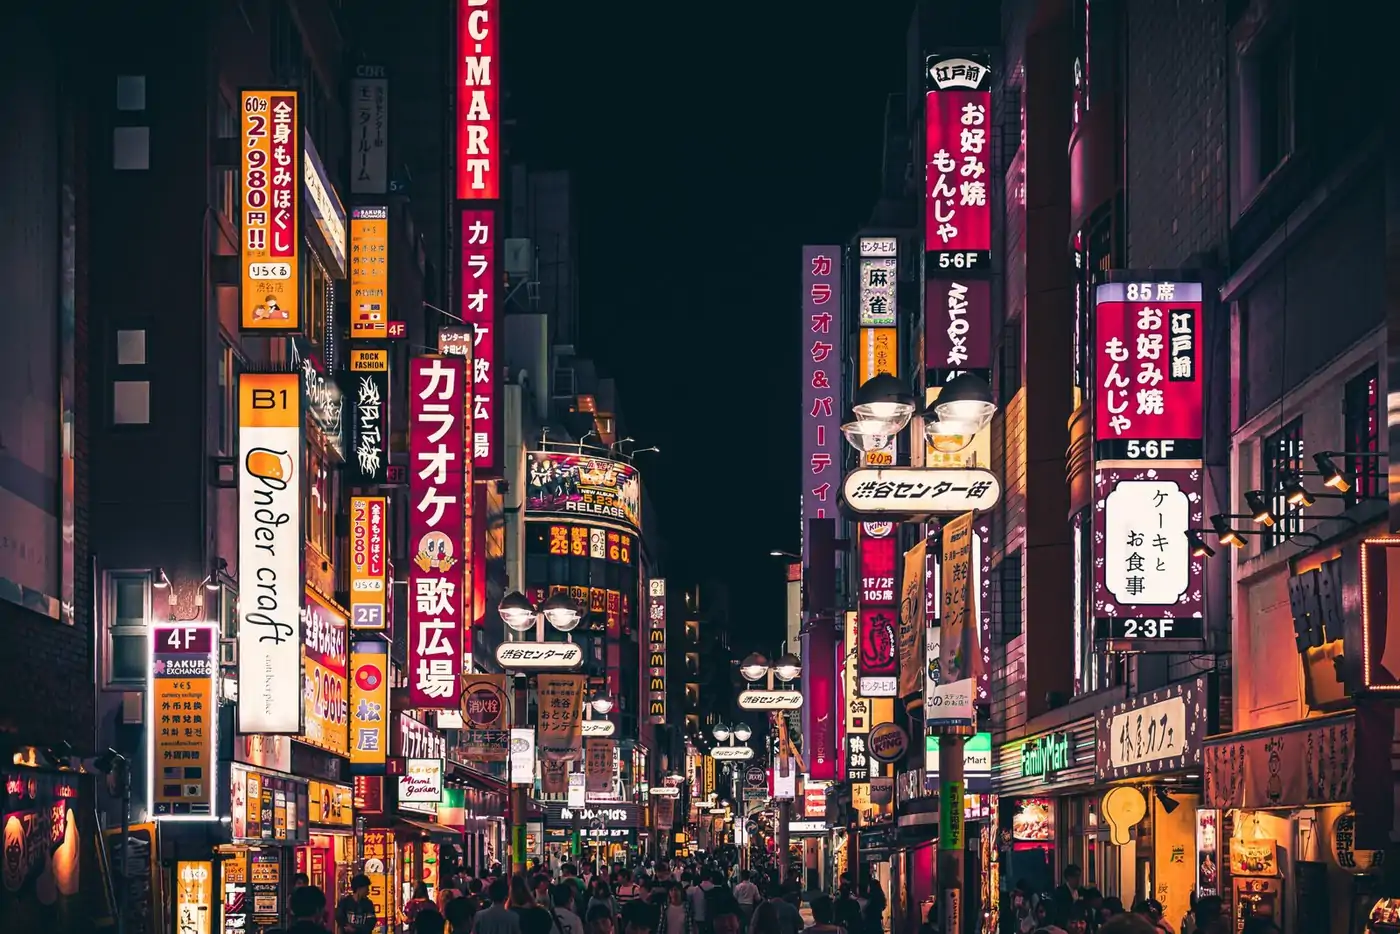
5. Silhouettes Against Neon
Night street photography is a different beast entirely. Instead of trying to light up everything, embrace the darkness. Find a bright neon sign or a backlit shop window and wait for someone to walk between you and the light.
Expose for the highlights (the bright sign), and your subject will turn into a crisp, black silhouette. This adds mystery and a "noir" vibe to your work. For more tips on gear that handles low light like a champ, check out the Sony A7C II settings for street photography.
6. The "Worm’s Eye" Perspective
We spend our whole lives seeing the world from 5 to 6 feet off the ground. That’s boring for a camera. Put your camera on the actual pavement and tilt it up.
This makes buildings look more imposing and gives pedestrians a "larger than life" appearance. It also cleans up the background by using the sky as a canvas. This perspective is a staple for many pros you'll find featured on PhotoGuides.org.
7. Minimalist Color Blocking
Sometimes, the street is too messy. To fix this, look for a single, giant block of color, a bright blue shipping container, a yellow wall, or a red brick building.
Wait for a subject to pass by that either matches that color or contrasts it perfectly. This creates a minimalist, graphic image that looks more like a painting than a photograph. It’s all about negative space.
8. Juxtaposition (The "Coincidence" Shot)
This is the holy grail of street photography. Juxtaposition is when two unrelated things in a frame create a new meaning.
Example: A person walking past a billboard where the model on the ad seems to be looking at them. Or a very short person standing next to a very tall statue. Keep your eyes peeled for signs, advertisements, and statues that can "interact" with the real people walking by.
9. High-Angle "Toy City" Shots
Find a parking garage, a bridge, or a rooftop. Looking straight down on a crosswalk turns people into little dots and crosswalk lines into graphic patterns. It’s a great way to show the scale and rhythm of city life without getting bogged down in individual faces.
10. Focus on the Hands
You don't always need a face to tell a story. In fact, hands are incredibly expressive. Try a series of photos focusing only on what people are doing with their hands: holding a coffee cup, clutching a newspaper, gesturing wildly during a phone call, or holding a lover’s hand. It’s anonymous, intimate, and deeply human.
11. Shadows as the Subject
During the "Golden Hour" (an hour before sunset), shadows become long and dramatic. Sometimes, the shadow is more interesting than the person casting it. Try composing a shot where the shadow is the main focus, perhaps stretching across a textured wall or a crosswalk.
12. Street Portraits (The "Ask")
This is the scariest one for most photographers, but also the most rewarding. See someone with an incredible look? Walk up, smile, and say, "Hi, I'm a street photographer. I love your style: could I take a quick portrait of you?"
Most people are actually flattered. If you're nervous about this, check out some tips on Edin Chavez’s blog for how to approach strangers with confidence.
13. Public Transport Stories
Subways and buses are goldmines for emotion. People are in their own little worlds, staring out windows or lost in thought. The lighting is often harsh and cinematic. Just be respectful: don't stick a giant lens in someone’s face in a cramped space. A small prime lens is your best friend here.
14. Rainy Day Umbrellas
Umbrellas provide instant "shape" and color to a photo. A sea of black umbrellas on a gray day looks depressing; one yellow umbrella in that same crowd looks like a masterpiece. Rain also creates that beautiful "slick" look on the streets that reflects city lights.
15. The "Follower" Shot
Instead of shooting people coming toward you, follow them. Shooting someone from behind as they walk into a "light at the end of the tunnel" (like an alleyway opening or a subway exit) creates a sense of journey and mystery.
16. Animals of the City
Street photography isn't just for humans. Stray cats, dogs on leashes, or even pigeons can be the stars of your urban story. They often provide a moment of levity or humor in a sterile city environment.
17. Architecture as a Frame
Use the city’s bones to your advantage. Look for alleyways, arches, or even the space between two skyscrapers. Use these "frames" to isolate your subject and create a sense of depth. For more on using your gear to capture these sharp details, read up on the OM System OM-1 Mark II settings for street photography.
18. Interaction with Street Art
Street art is already a piece of art, but you can make it yours. Wait for someone to walk past a mural in a way that completes the "story" of the mural. If there’s a giant face painted on a wall, wait for a pedestrian to look like they’re whispering in its ear.
19. Using a Prism for Light Leaks
Carry a small glass prism in your pocket. Hold it in front of your lens to reflect parts of the street back into the frame or create "rainbow" light leaks. It’s a low-tech way to get a high-concept, dreamlike look without any fancy filters.
20. Double Exposures
Many modern cameras (like the Sony A7R V) allow you to do double exposures in-camera. Combine a texture (like a brick wall or tree branches) with a street scene. It’s an abstract way to represent the "feel" of a city rather than just the "look" of it.
21. The "Mid-Action" Gesture
Look for people who are doing something. Not just walking, but pointing, laughing, arguing, or running for a bus. These "micro-moments" are what Henri Cartier-Bresson called "The Decisive Moment." You have to be fast, so keep your camera on burst mode.
22. Focus on Feet and Shoes
Similar to the hands idea, a series on footwear can tell you a lot about a city's demographic. Polished loafers in the financial district, beat-up sneakers in the park, or high heels stepping over a puddle. It’s a unique way to document the "tread" of the city.
23. Abstract Textures and Decay
Street photography doesn't always need people. The "soul" of a city can be found in a rusting gate, a peeling poster, or the way moss grows on an old brick wall. These shots work great as "filler" images in a photo book or gallery.
24. Night Market Chaos
If you live near a night market or a busy food stall area, go there. The combination of steam from the food, hanging lights, and the frantic movement of the vendors creates an atmosphere that is impossible to replicate during the day.
25. Post-Processing Mastery with Luminar
Sometimes the "creative" part happens after the shutter clicks. Street photography often suffers from distracting elements: bright trash cans, ugly signs, or a dull sky.
I use Luminar to clean up my street shots. Its AI tools can quickly remove power lines or enhance the "structure" of the buildings without making them look fake. If the sky was a flat, boring white during your shoot, you can even use their sky replacement tool to add some mood back in. It’s about taking that raw street moment and turning it into a finished piece of art.
Gear Tips for Your Weekend Mission
You don't need the most expensive camera to be a great street photographer. In fact, sometimes a smaller camera is better because it’s less intimidating to people.
- The Lens: A 35mm or 50mm prime is the classic choice. It forces you to move your feet and get into the action. If you’re deciding between systems, our comparison of the Sony A7 IV vs Canon EOS R6 Mark II covers which one might be better for your specific style.
- The Settings: In the daytime, try "Zone Focusing." Set your aperture to f/8, your focus to about 3 meters, and just shoot. Anything between 2 and 5 meters will be sharp, so you don't have to wait for the autofocus to lock on.
- The Mindset: Don't be afraid to fail. You might take 500 photos and only like two. That’s a good day! Street photography is a numbers game.
Staying Inspired
If you find yourself getting bored with the same streets, try changing your "theme" every hour. Hour one: only red objects. Hour two: only shadows. Hour three: only reflections.
Street photography is the purest form of the craft because you can't control the light, the subjects, or the background. You can only control your perspective. For more deep dives into specific camera setups and how to handle different environments, keep an eye on The Ultimate Guide to Street Photography Ideas.
Now, put down the phone (unless you're shooting with it!), grab your spare batteries, and get out there. The city is waiting to show you something you've never seen before.
And remember, if you want to take your editing to the next level, definitely give Luminar a try: it’s a game changer for bringing out the grit and glory of the streets. Happy shooting!


