Let’s be honest for a second. That little green "Auto" icon on your camera dial is like a security blanket. It’s warm, it’s safe, and it promises that you won’t mess up your photos. But here is the cold, hard truth: staying in Auto is like buying a Ferrari and never shifting out of first gear. You have this incredible piece of technology in your hands, but you’re letting a computer chip make all the creative decisions for you.
If you’ve ever wondered why your backgrounds aren’t blurry enough, why your night shots look like a grainy mess, or why your moving subjects are a blurry smudge, the answer is simple: you need to learn how to use manual mode camera settings.
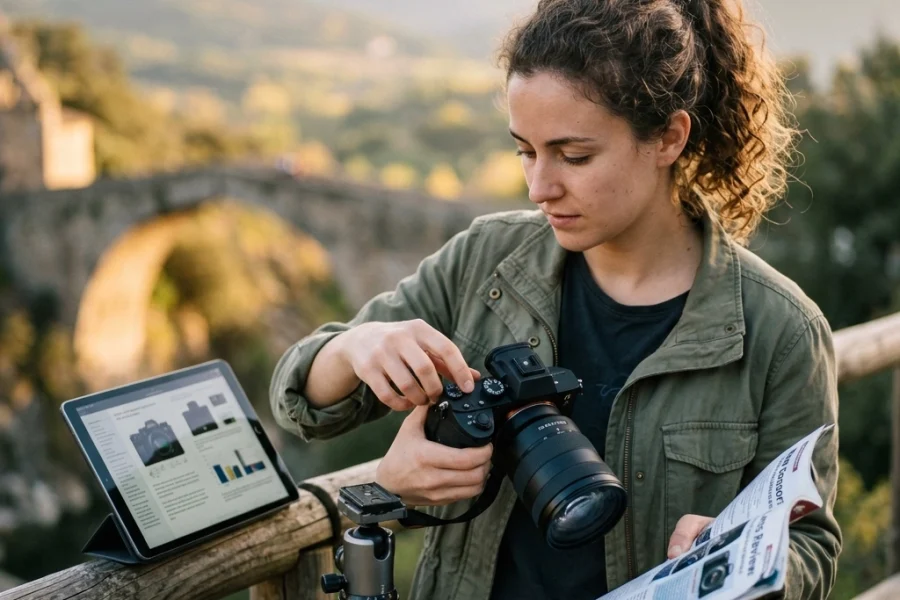
In this guide, I’m going to break down the mystery of manual mode. No boring textbook talk, just straight-up photography for beginners that actually makes sense. We’re going to master the Exposure Triangle, understand how your gear works, and finally get you taking the photos you’ve always dreamed of.
Why Manual Mode is a Game Changer
When you shoot in manual, you are the boss. You tell the camera exactly how much light to let in, how long to keep the shutter open, and how sensitive the sensor should be. This is where the magic happens. Whether you are looking for landscape photography tips or trying out new street photography ideas, manual mode is the key that unlocks the door.
Most people get intimidated by the buttons and dials. Don't be. Once you understand the relationship between Aperture, Shutter Speed, and ISO, everything clicks. It’s like learning to ride a bike, once you get the balance right, you’ll never want to go back to training wheels.
The Exposure Triangle: The Three Pillars of Photography
Think of exposure like baking a cake. If you have too much heat (light), the cake burns. If you don’t have enough, it’s raw. To get a perfect exposure, you need to balance three main settings. This is called the Exposure Triangle.
1. Aperture (The "Opening")
Aperture is the hole in your lens that lets light through to the sensor. It’s measured in "f-stops" (like f/1.8, f/5.6, or f/11).
Here is the confusing part: the smaller the number, the bigger the hole.
- f/1.8: Huge opening, lets in tons of light, creates a very blurry background (shallow depth of field).
- f/11: Tiny opening, lets in less light, keeps everything from the front to the back sharp.
If you are diving into portrait photography techniques, you’ll likely want a wide aperture (low number) to make your subject pop against a creamy background. On the flip side, if you're out capturing fine art landscapes, you’ll want a narrow aperture (high number) to keep the whole mountain range in focus.

Alt text: A side-by-side comparison of a portrait shot at f/1.8 with a blurry background and a landscape shot at f/11 where everything is sharp.
2. Shutter Speed (The "Time")
Shutter speed is how long the camera’s "eye" stays open. It’s measured in fractions of a second (1/1000, 1/60, or even 30 seconds).
- Fast Shutter Speed (1/1000 or higher): Freezes motion. Perfect for sports or birds in flight.
- Slow Shutter Speed (1/30 or lower): Blurs motion. Great for making waterfalls look silky or for Nikon Z8 settings for street photography where you want a little bit of "life" in the movement of the crowd.
Just remember, if your shutter speed is slow, you need a tripod. Otherwise, the shake of your hands will make the whole photo blurry. If you're looking for more in-depth help, check out our photography tutorials.
3. ISO (The "Sensitivity")
ISO is your camera sensor's sensitivity to light.
- Low ISO (100 or 200): Best for bright sunlight. It gives you the cleanest, highest-quality image.
- High ISO (3200 or 6400): Used for low-light situations, like a dark restaurant or night street photography.
The catch? The higher the ISO, the more "noise" or grain you get in your photo. Modern cameras, especially the best mirrorless cameras, are getting much better at handling high ISO, but you should always try to keep it as low as possible.
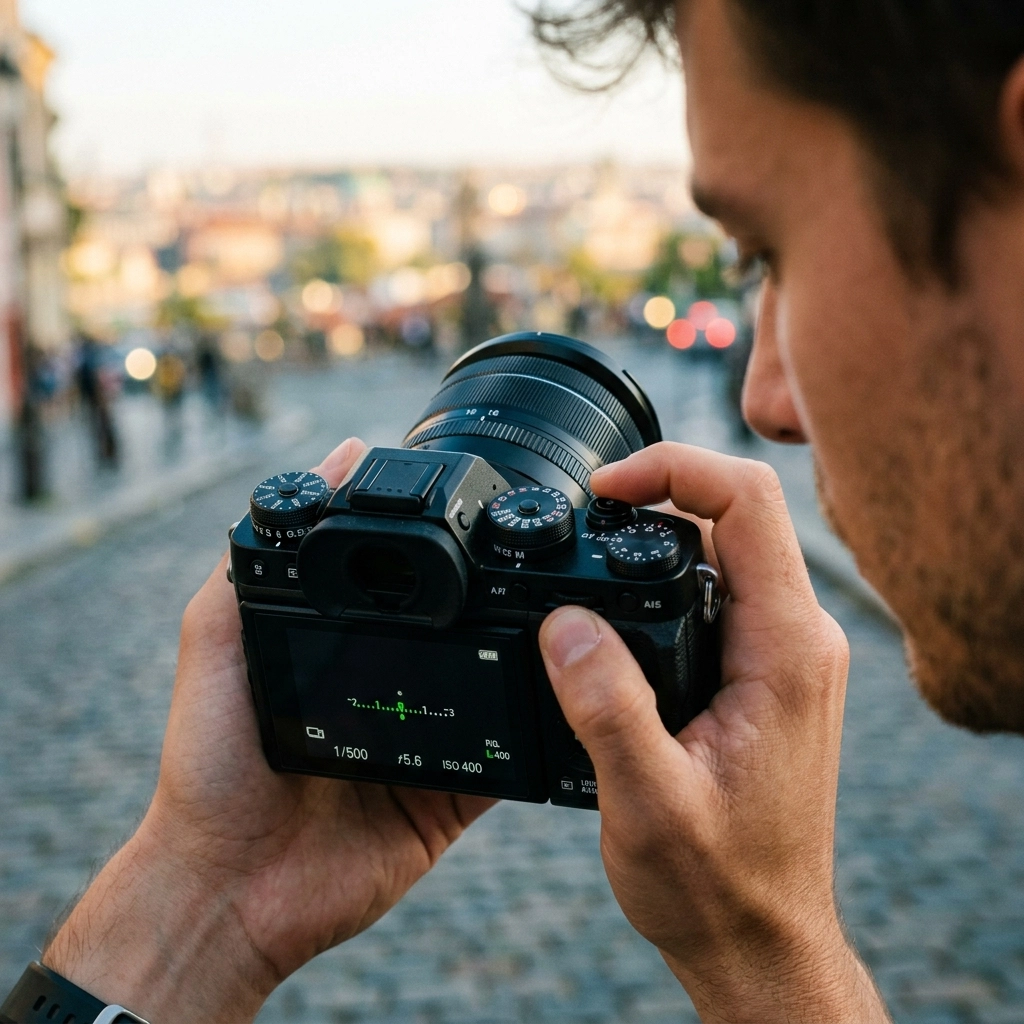
Putting it All Together: The Light Meter
Your camera has a built-in "referee" called the light meter. When you look through your viewfinder or at your screen in manual mode, you’ll see a little scale with a "0" in the middle, a "+" on one side, and a "-" on the other.
- If the marker is on the minus side, your photo is too dark (underexposed).
- If the marker is on the plus side, your photo is too bright (overexposed).
- If the marker is at zero, you’re golden.
To get to zero, you have to adjust your triangle. If you’re too dark, you can:
- Open the aperture (lower f-number).
- Slow down the shutter speed.
- Increase the ISO.
It’s a constant balancing act. Every time you change one, it affects the others.

Alt text: A photographer looking at the LCD screen of a mirrorless camera, adjusting the dials to center the light meter in a sunset setting.
Step-by-Step: How to Take Your First Manual Shot
Ready to try it? Grab your camera and follow these steps. This is the exact process I use whether I'm doing street photography ideas or professional portraits.
- Switch to "M" Mode: Turn that dial. Feel the power.
- Set your ISO: If you're outside during the day, set it to 100. If you're indoors, try 800 or 1600.
- Choose your Aperture: Ask yourself, "Do I want a blurry background?" If yes, go as low as your lens allows (like f/2.8). If you want everything sharp, go with f/8.
- Frame your shot: Point the camera at your subject.
- Adjust Shutter Speed: Look at that light meter. Turn the dial until the marker hits the middle (zero).
- Click: Take the photo.
- Review: Look at the screen. Is it too dark? Too bright? Adjust and try again.
Don't be discouraged if your first few shots look like trash. Even the pros have to take a "test shot" to see how the light is behaving. If you find yourself struggling with the tech side, looking through camera gear reviews can help you understand what your specific body and lens are capable of.
Essential Gear for Manual Mastery
While you can shoot manual on an old DSLR, the technology in the best mirrorless cameras makes life way easier. Why? Because mirrorless cameras have "Electronic Viewfinders" (EVF). This means that when you change your shutter speed or aperture, you actually see the image getting brighter or darker in real-time before you even take the shot.
If you are looking to upgrade, I’ve written a lot about how the latest photography news is changing the game. Brands like Sony, Canon, and Nikon are putting out gear that makes manual mode feel like cheating.
Advanced Tips for Manual Shooting
Once you get the basics down, you can start playing with the "feel" of your photos.
Mastering RAW vs. JPEG
If you’re shooting in manual, you should also be shooting in RAW. JPEG files are processed by the camera and a lot of data is thrown away. RAW files keep everything. This is crucial for photo editing tutorials where you might need to recover a sky that was too bright or shadows that were too dark.
Metering Modes
Your camera can "measure" light in different ways.
- Evaluative/Matrix Metering: Looks at the whole scene. Great for landscapes.
- Spot Metering: Measures light only on one tiny point (usually your subject’s face). This is one of the best portrait photography techniques for when you have a bright background but want your subject's skin to look perfect.

Alt text: Close-up of a camera dial being switched to Manual mode with a blurred city background at night.
Common Mistakes to Avoid
Even after years of shooting, I still make mistakes. Here are the ones I see most often in our photography for beginners classes:
- Forgetting to check ISO: You were shooting indoors yesterday at ISO 3200, and now you’re outside in the sun. Your photos will be pure white unless you remember to turn that ISO back down.
- Shutter speed too slow for handheld: If you’re at 1/20 of a second and don’t have a tripod, your photos will be blurry. Keep it above 1/100 if you're holding the camera.
- Over-relying on the meter: Sometimes the camera gets it wrong. If you’re shooting snow, the camera will try to make it gray. You might need to purposefully overexpose (move the meter to the "+" side) to make the snow look white.
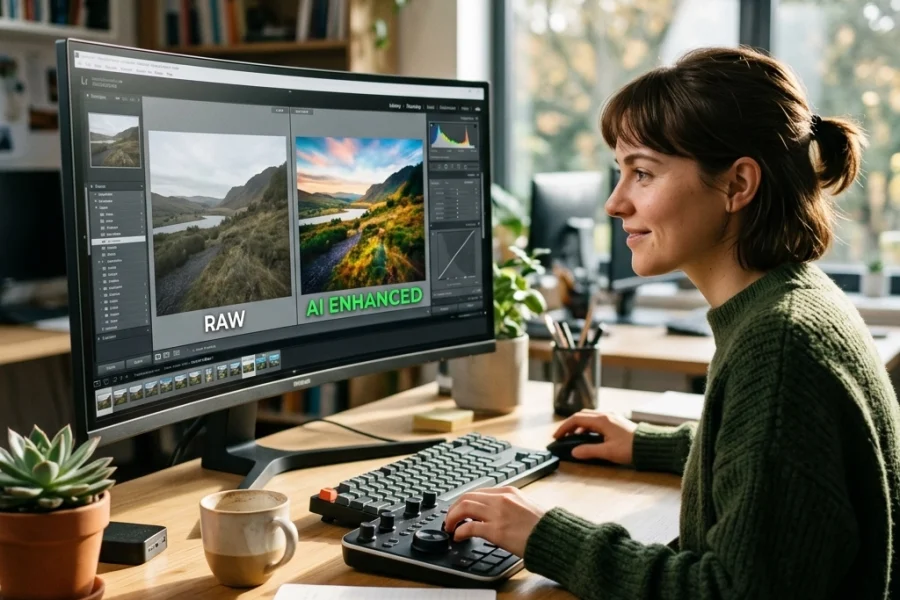
Editing Your Manual Masterpieces
Manual mode gets you 90% of the way there, but the last 10% happens in post-processing. Editing isn't about "fixing" a bad photo; it's about enhancing the mood you captured.
For beginners, I always recommend starting with software that is intuitive. Tools like Luminar (get it here) use AI to help with things like sky replacement or skin retouching without you needing a degree in Photoshop. Whether you're following photo editing tutorials or just messing around with sliders, having a solid file from your manual settings makes the process much smoother.
Real-World Scenarios
Let's look at how manual mode applies to different styles of shooting.
Scenario 1: Landscape Photography
You’re standing in front of a beautiful mountain at sunrise.
- Aperture: f/11 (You want the rocks in front and the peaks in the back sharp).
- ISO: 100 (Highest quality).
- Shutter Speed: Whatever the meter says (likely a few seconds if it's dim, so use a tripod!).
Check out these landscape photography tips for more specifics.
Scenario 2: Street Photography
You're walking through a busy market.
- Aperture: f/5.6 (A good middle ground).
- ISO: 400 (Gives you a bit of wiggle room with speed).
- Shutter Speed: 1/500 (To freeze people walking by).
For more on this, look at street photography ideas.
Scenario 3: Portrait Photography
You're taking a photo of a friend in a park.
- Aperture: f/1.8 or f/2.8 (To get that blurry background).
- ISO: 100.
- Shutter Speed: Adjust until the skin looks bright and clear on the meter.

Alt text: An ultra-realistic photo of a professional camera on a tripod during a blue hour landscape shoot, showing manual settings on the top display.
Keep Practicing
Learning how to use manual mode camera settings isn't something that happens overnight. It takes muscle memory. You have to get to the point where your fingers know which dial is which without you looking.
The best advice I can give you is to go out and shoot every single day. Even if it's just your cat in the living room or the coffee on your desk. Experiment with the settings. See what happens when you purposefully break the rules.
If you ever feel stuck, remember that we have a massive library of photography tutorials designed to take you from a total newbie to a confident shooter.
Photography is a journey, not a destination. Manual mode is just the first step in taking control of your creative voice. Stay updated with the latest photography news to see how gear is evolving, but never forget that the most important part of the camera is the person standing behind it.
Go out there, turn that dial to "M," and start shooting. You’ve got this.