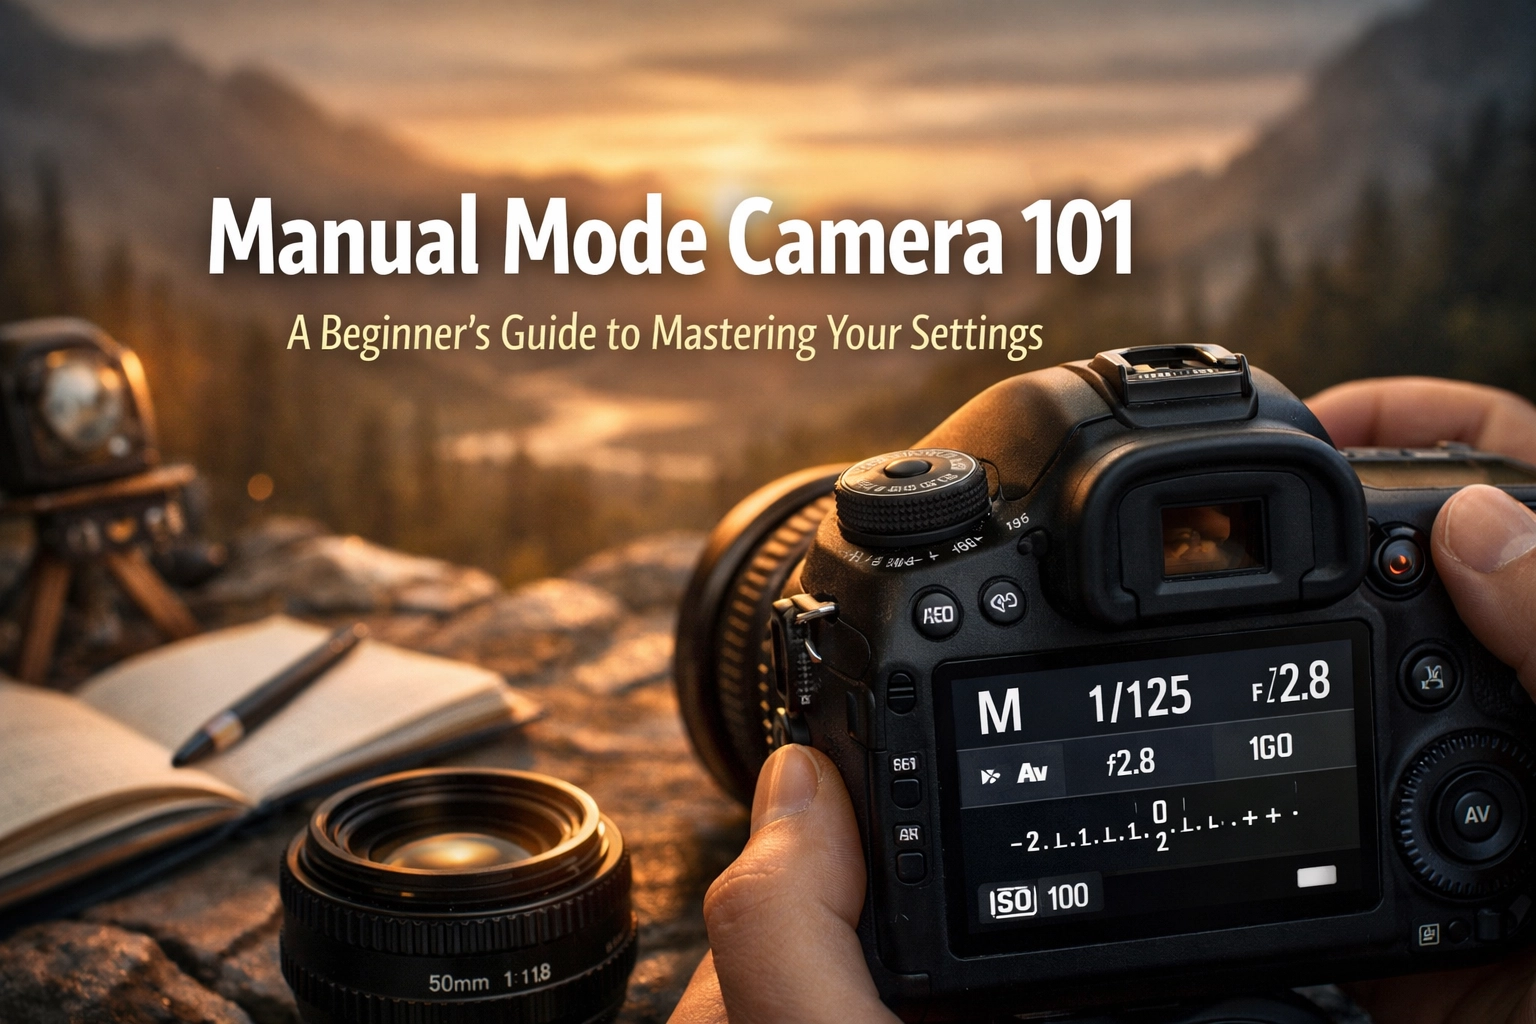
Let’s be honest: that "M" on your camera dial is intimidating. It’s sitting there, tucked between the safety of "Auto" and the specialized "Scene" modes, looking like a secret club you aren’t invited to. Most beginners treat the Manual dial like a "do not touch" button, fearing they’ll end up with a pitch-black frame or a blown-out white mess.
But here is the truth: Manual mode isn't just for the pros or the tech-obsessed. It’s the key to taking the photos you actually see in your head, rather than the ones your camera thinks you want to see. Your camera is smart, but it’s essentially a light-calculating robot. It doesn't know you want that creamy background behind a portrait or the silky flow of a waterfall.
At Shut Your Aperture, we believe in keeping things simple. This guide is your roadmap to taking off the training wheels. We're going to break down the "Exposure Triangle" without the PhD-level physics and get you shooting like a pro.
The Exposure Triangle: Your New Best Friends
Think of exposure as a recipe. To get a perfectly cooked photo, you need three main ingredients: Aperture, Shutter Speed, and ISO. If you use too much of one, you have to use less of another to keep things balanced. This relationship is called the Exposure Triangle.
Mastering these three settings allows you to control not just the brightness of your image, but the artistic "look" of the shot. If you want to dive deeper into the technicalities of gear later, check out Shut Your Aperture or proshoot.io for some heavy-duty equipment reviews.
1. Aperture: The Creative Choice
Aperture is the hole inside your lens that lets light in. It’s measured in "f-stops" (like f/1.8 or f/11).
Think of it like your own eye. In a dark room, your pupils dilate (get bigger) to let in more light. In bright sun, they constrict (get smaller).
- Wide Aperture (Small f-number like f/1.8 or f/2.8): The hole is big. Lots of light comes in. This creates a "shallow depth of field," meaning your subject is sharp but the background is a blurry dream. This is how you get those ethereal landscapes or stunning portraits.
- Narrow Aperture (Large f-number like f/11 or f/16): The hole is tiny. Less light comes in. This keeps everything from the foreground to the background in sharp focus. This is your go-to for majestic sunset photography.

2. Shutter Speed: The Speed Demon
Shutter speed is how long your camera’s "curtain" stays open to let light hit the sensor. It’s measured in fractions of a second (like 1/1000) or full seconds (like 2").
- Fast Shutter Speed (1/500 and up): Freezes motion. If you’re shooting a sports car or a bird in flight, you want a fast shutter speed so the subject isn't a blurry mess.
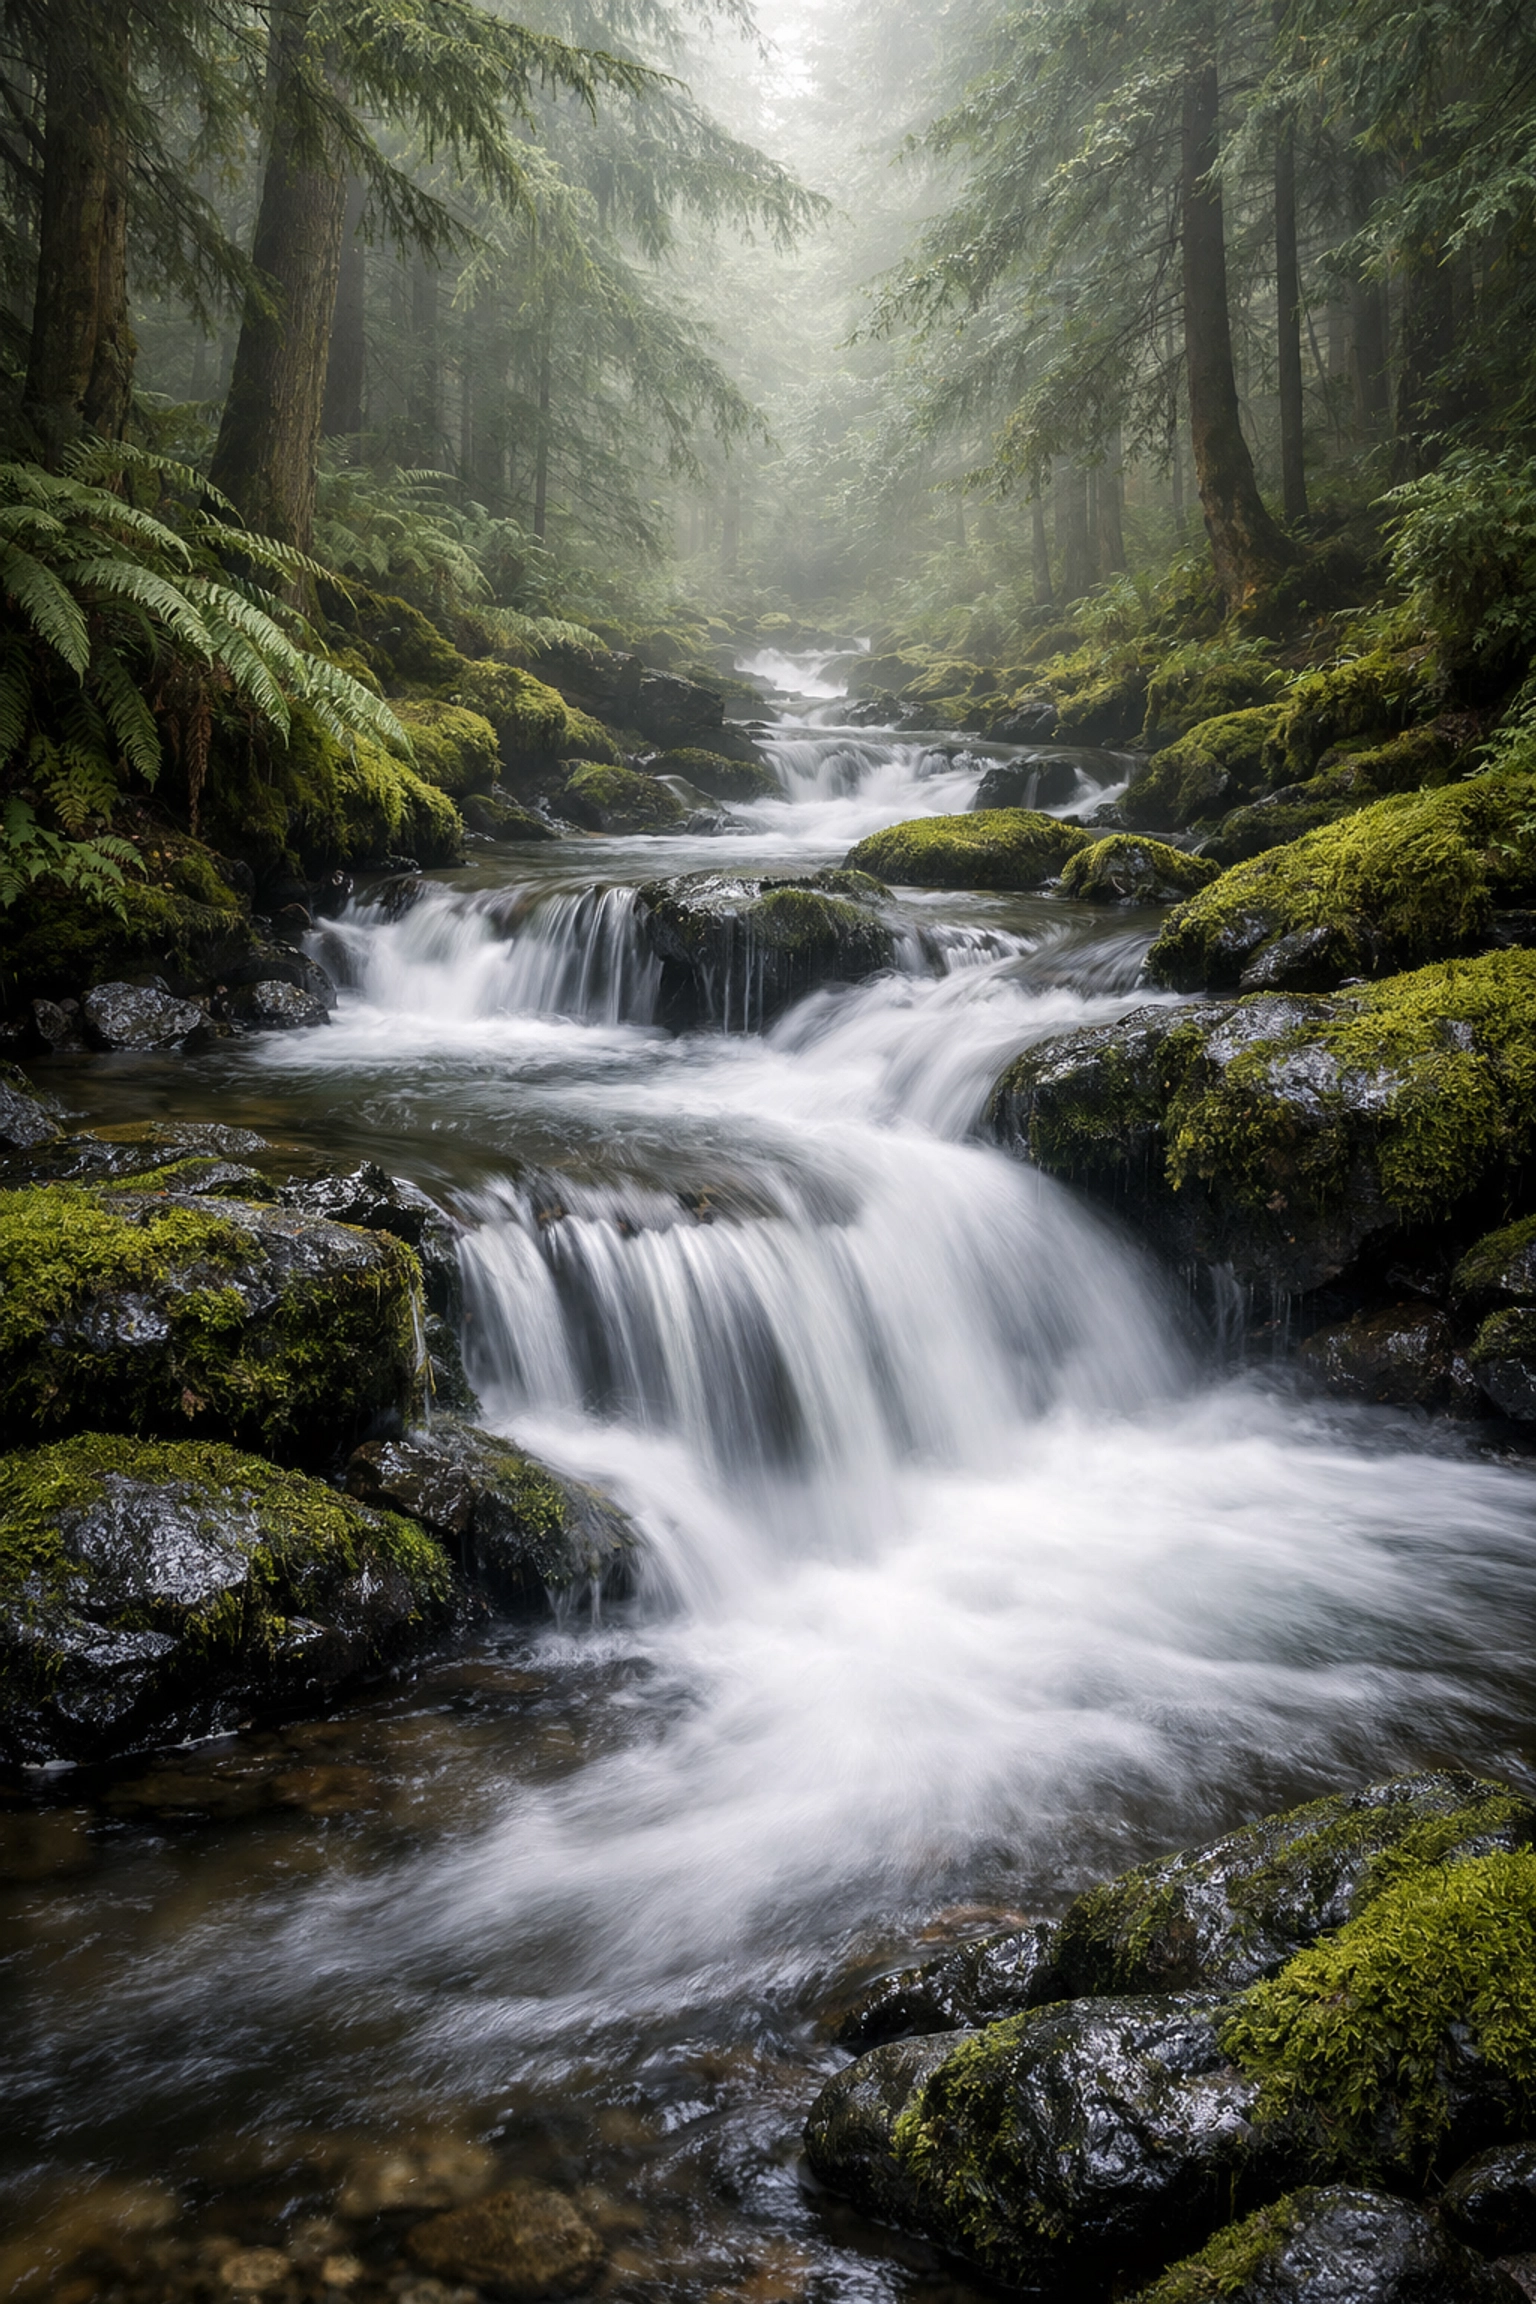
- Slow Shutter Speed (1/30 or slower): Blurs motion. This is the secret to water photography techniques. If you want a waterfall to look like silky hair, you need a slow shutter speed.
Just remember: if your shutter is slow, any movement of your hands will blur the whole photo. Use a tripod or check out our essential water photography gear guide for stability tips.
3. ISO: The Sensitivity Slider
ISO is your camera sensor's sensitivity to light.
- Low ISO (100-400): Best for bright, outdoor settings. It produces the cleanest, crispest images.
- High ISO (1600+): Necessary for dark environments like indoor parties or enchanting urban photography at night.
The catch? The higher your ISO, the more "grain" or "noise" you get. It’s like a radio, the more you turn up the volume on a weak signal, the more static you hear. Modern cameras are getting great at high ISO, but you should always aim for the lowest number possible for the best quality.
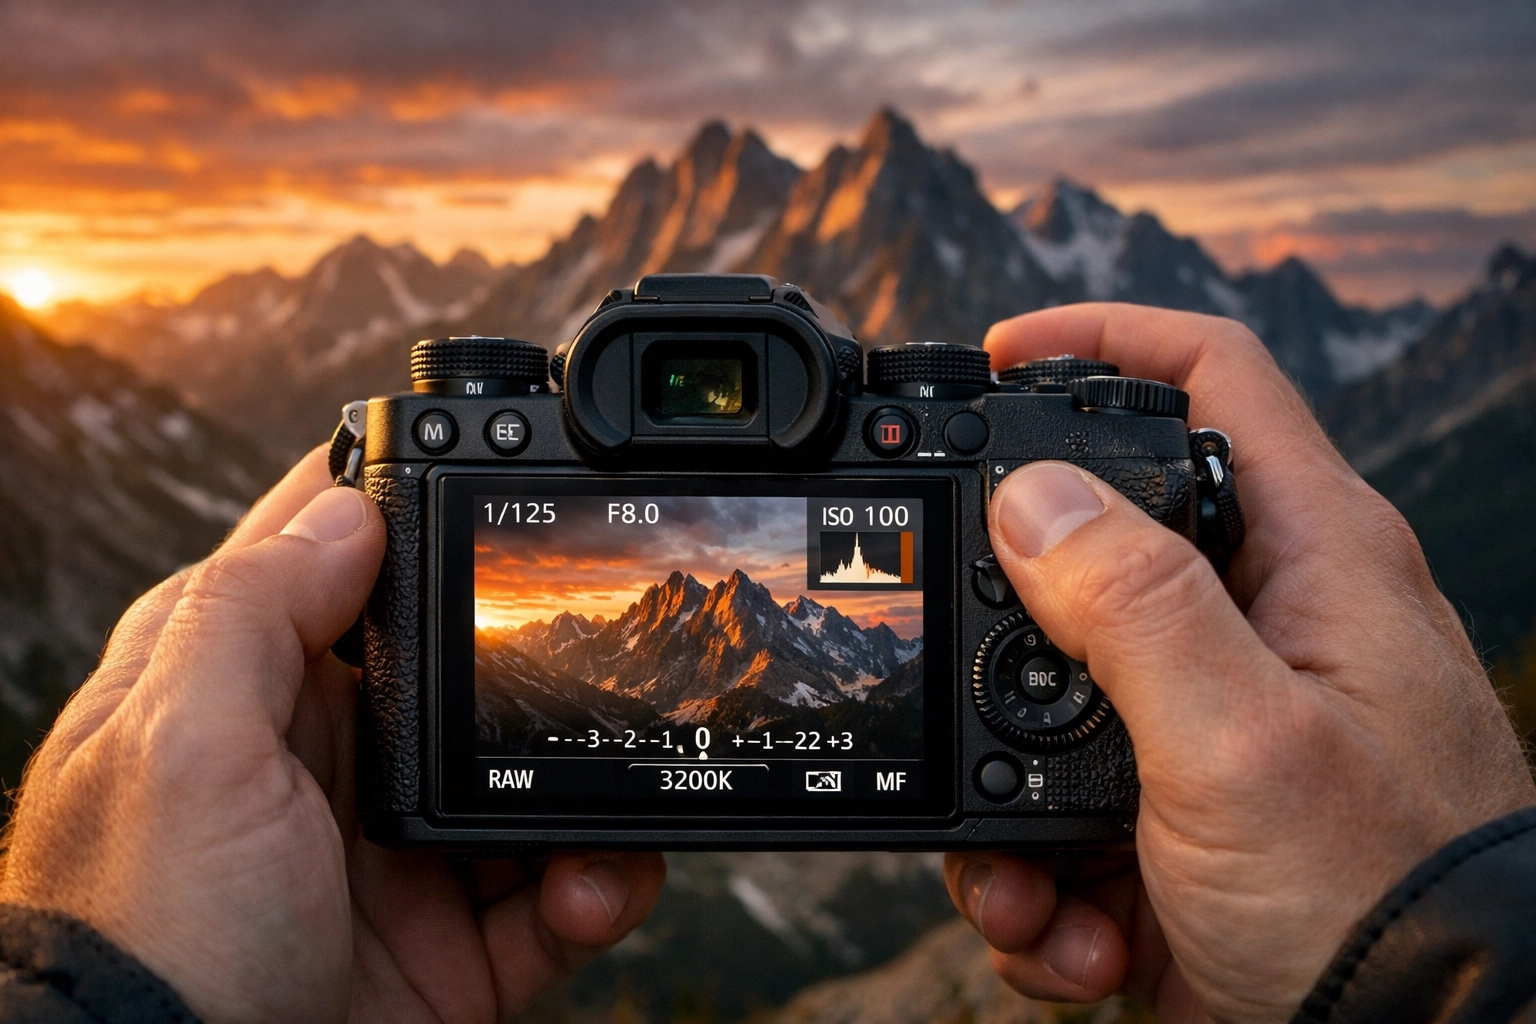
Reading Your Camera’s Mind: The Internal Meter
How do you know if your settings are "right"? Your camera has a built-in light meter (usually a little bar with a "0" in the middle) visible in your viewfinder or on the back screen.
- If the marker is at 0, the camera thinks the exposure is perfect.
- If it’s in the minus (-), your photo will be too dark (underexposed).
- If it’s in the plus (+), your photo will be too bright (overexposed).
In Manual mode, your job is to adjust the Aperture, Shutter Speed, and ISO until that little marker sits right where you want it. Sometimes, you might want it a bit dark for a moody look, or a bit bright for a "high-key" vibe. Manual mode gives you that choice.
A Step-by-Step Workflow for Manual Mode
Don't just start clicking dials at random. Have a plan. Here is a simple workflow to use when you're out in the field.
Step 1: Pick Your Aperture Based on Your Goal
Ask yourself: Do I want a blurry background or everything in focus?
If you’re shooting picturesque coastal escapes, you probably want f/11. If you're taking a photo of a single flower, maybe try f/2.8. Set this first.
Step 2: Set Your ISO Based on the Sun
If it’s a bright day, set it to 100. If you’re in a cave looking for hidden gem locations, maybe start at 800.
Step 3: Use Shutter Speed to Balance the Meter
Look through your viewfinder and adjust the shutter speed until the light meter hits "0." Take a test shot. Too dark? Slow the shutter down. Too bright? Speed it up.
Step 4: Review and Adjust
Photography is an iterative process. Check your screen. If the sky is too white and you've lost the detail in the clouds, adjust your settings to let in less light. If you can’t get the exposure right with Shutter Speed alone (because it’s getting too slow and your hands are shaking), it’s time to nudge your ISO up.
Mastering Manual in Specific Scenarios
Manual mode isn't just about technical perfection; it's about solving problems. Let’s look at how to apply this to specific styles of photography.
Capturing Water in Motion
Water is one of the best subjects to practice Manual mode. You can either freeze a crashing wave or turn a stream into a misty veil. For the latter, you’ll need a narrow aperture (f/16) and a slow shutter speed. Check out our guide on mastering light and water for perfect shots to see how the settings change between a lake and an ocean. You might even find some secluded paradises where the water is perfectly still.
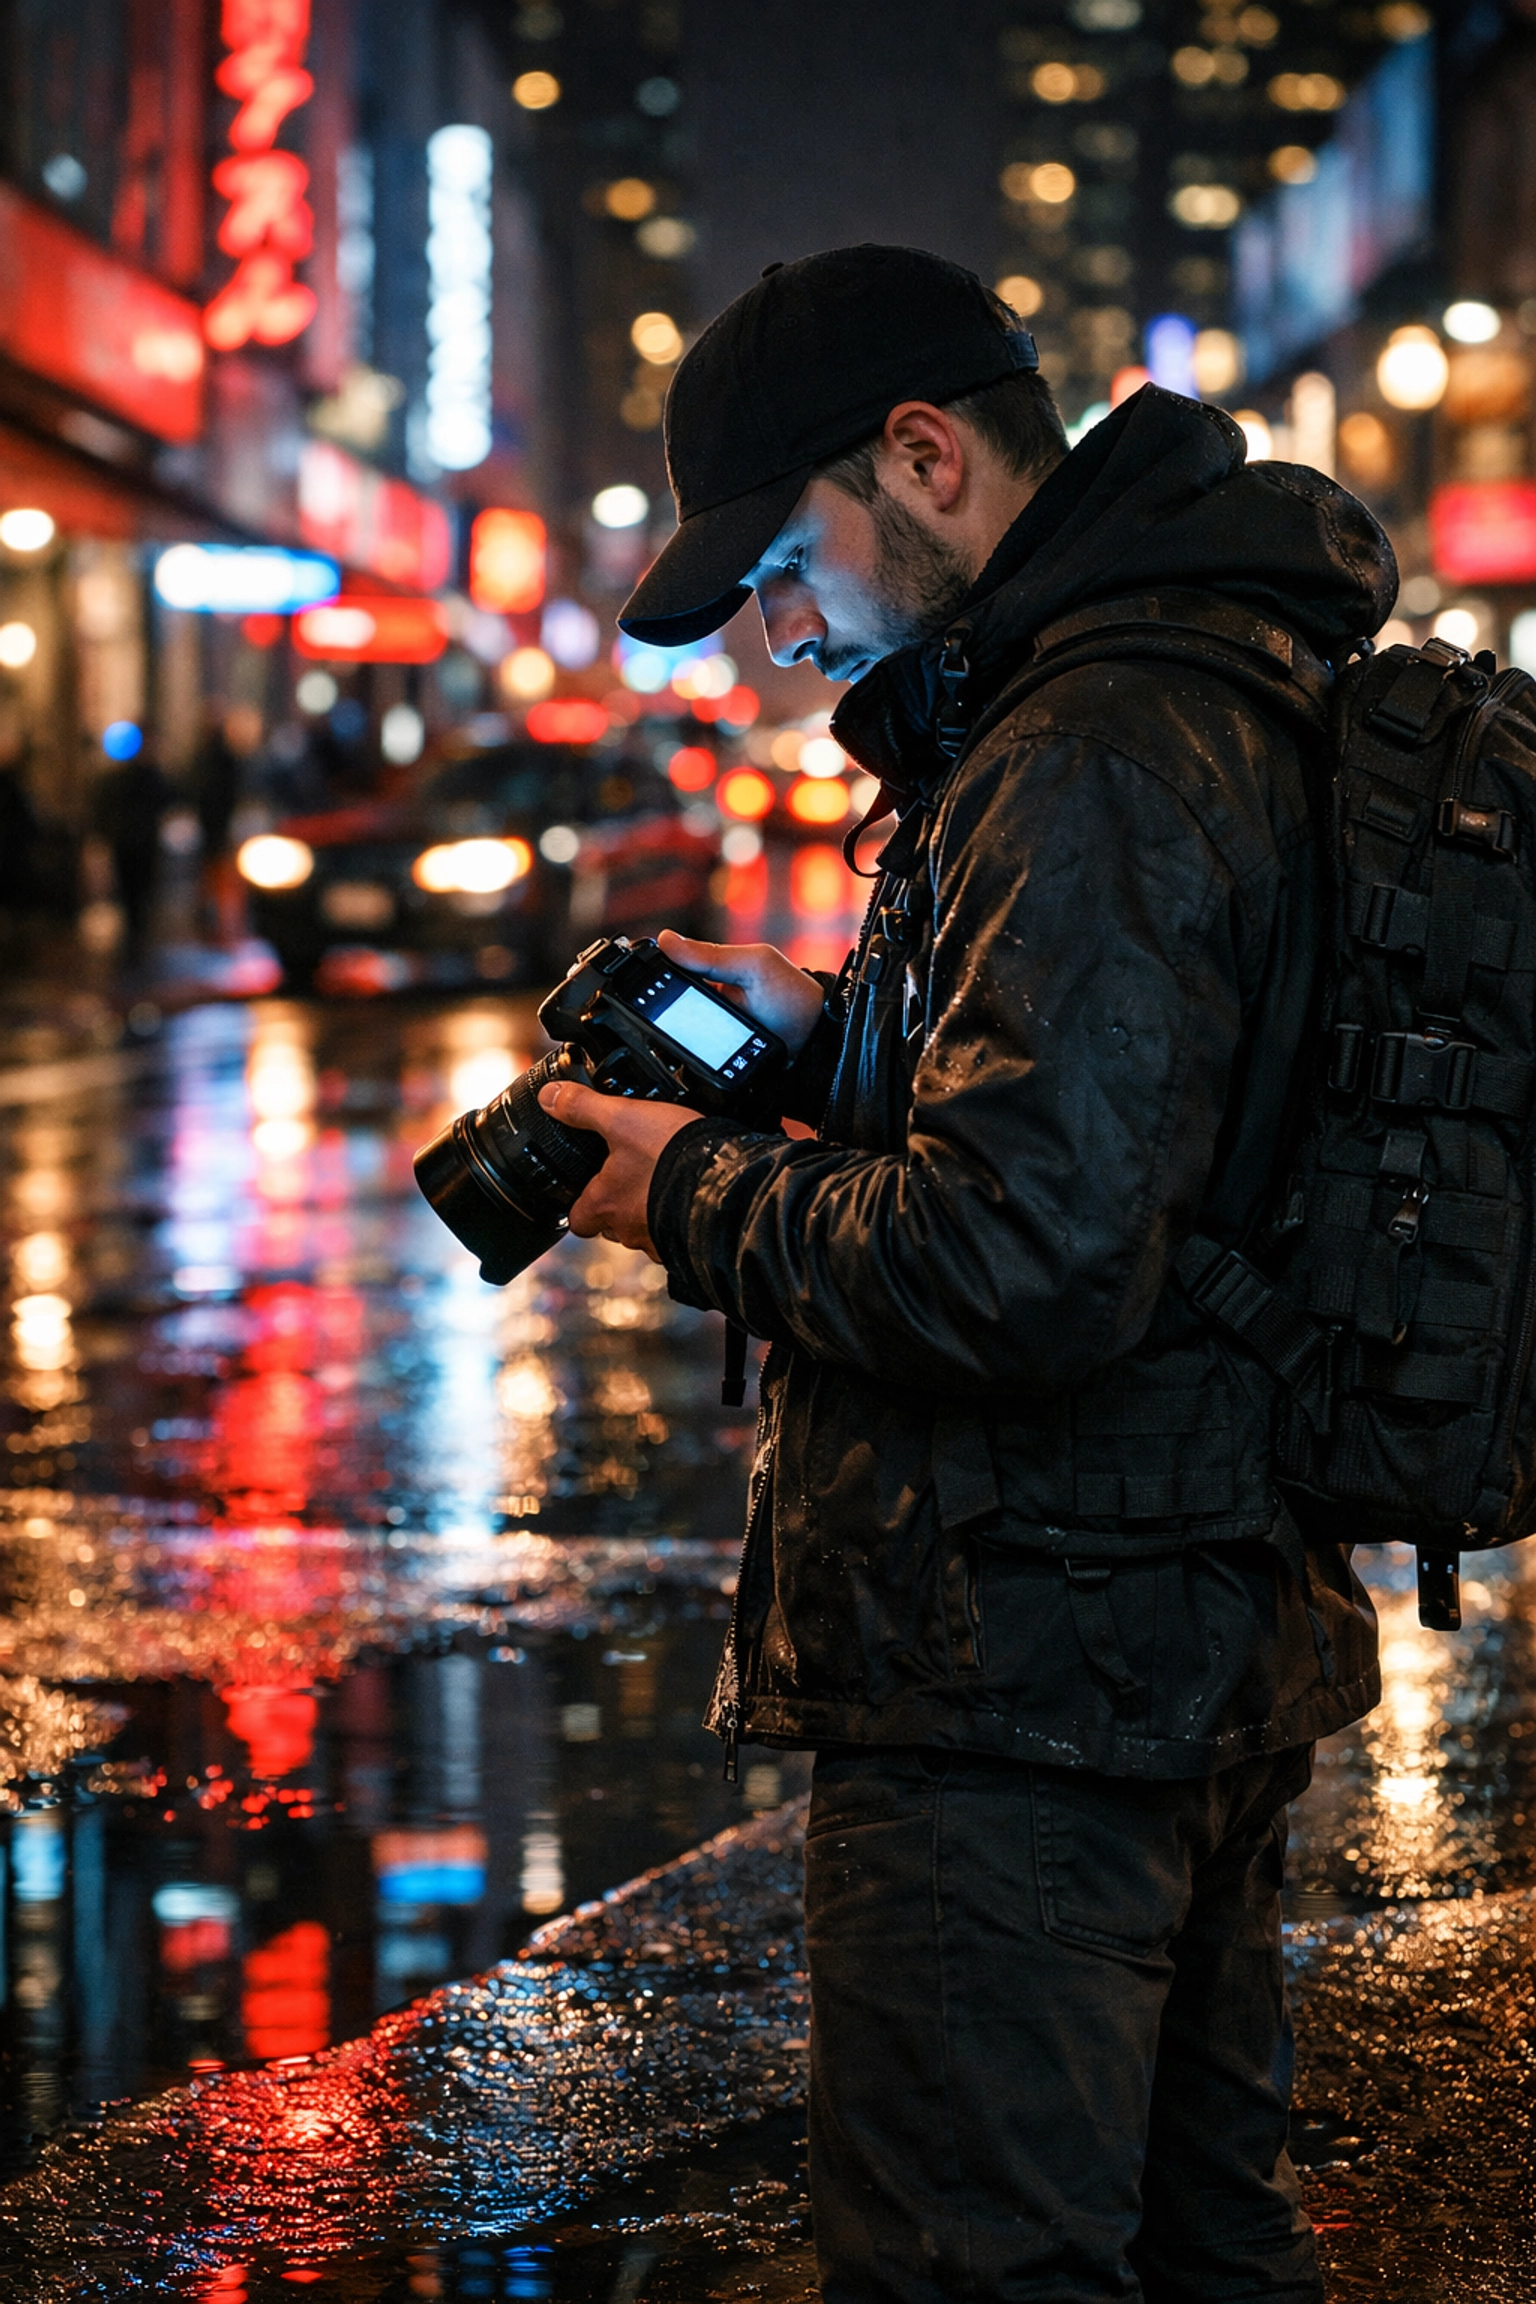
Urban and Architecture
When shooting cities, you often deal with extreme shadows and bright lights. Auto mode usually fails here, blowing out the streetlights or making the buildings look like black blobs. By using Manual mode, you can expose for the highlights, keeping the neon signs colorful, and then recover the shadows later in post-processing. Speaking of post-processing, we always recommend Luminar for its intuitive AI-driven tools that make fixing exposure a breeze.
Travel Photography
When you're exploring lesser-known vistas for enigmatic photos, light changes fast. You might walk from a bright sunlit street into a dark alleyway. In these moments, practicing "Manual with Auto ISO" can be a great middle ground. You set your Aperture and Shutter Speed to control the "look," and let the camera handle the sensitivity.
Common Pitfalls (And How to Avoid Them)
- Trusting the Screen Too Much: The back of your camera is bright and flattering. Sometimes a photo looks great there but is actually too dark when you get it home. Always check your histogram (the little graph showing light distribution).
- Forgetting to Reset: You finish a shoot at sunset with ISO 3200. The next morning, you go out in bright sun and wonder why your photos are pure white. Make it a habit to "zero out" your settings after every shoot.
- Being Afraid of "Grain": Don't be so scared of noise that you end up with a blurry photo because your shutter speed was too slow. A grainy photo is a "vibe"; a blurry, out-of-focus photo is a mistake.
Why Manual Mode Actually Saves Time
It sounds counterintuitive, right? Surely Auto is faster?
Well, in consistent lighting, like a studio or a clear day at the beach, Manual is actually faster. Once you find the settings that work, they stay there. In Auto mode, the camera might change the exposure every time you slightly tilt the lens, leading to a folder of 100 photos that all have slightly different brightness levels. In Manual, every shot is identical, which makes editing in Luminar much faster.
If you are looking for inspiration on where to take your newly mastered skills, Edin Chavez's personal blog at blog.edinchavez.com or his fine art site at www.edinfineart.com are full of examples of what’s possible when you take full control of your gear.
The Wrap-Up (Well, Almost)
The journey from "Auto" to "Manual" is the single biggest jump you will make as a photographer. It’s the moment you stop taking "snapshots" and start making "photographs."
Start simple. Go to one of our top spots for nature imagery, set your camera to M, and just play. Don't worry about getting a masterpiece on day one. Focus on understanding why the photo looks the way it does.
When you get home and see those raw files, you can use Luminar to polish them up, but the soul of the image: the depth of field, the motion, the light: that was all you.
Manual mode isn't a chore; it's freedom. Now go out there and shut your aperture (or open it wide, now that you know how). For more tips on finding the right locations for your practice, check out our category page for a wealth of resources. Happy shooting!
