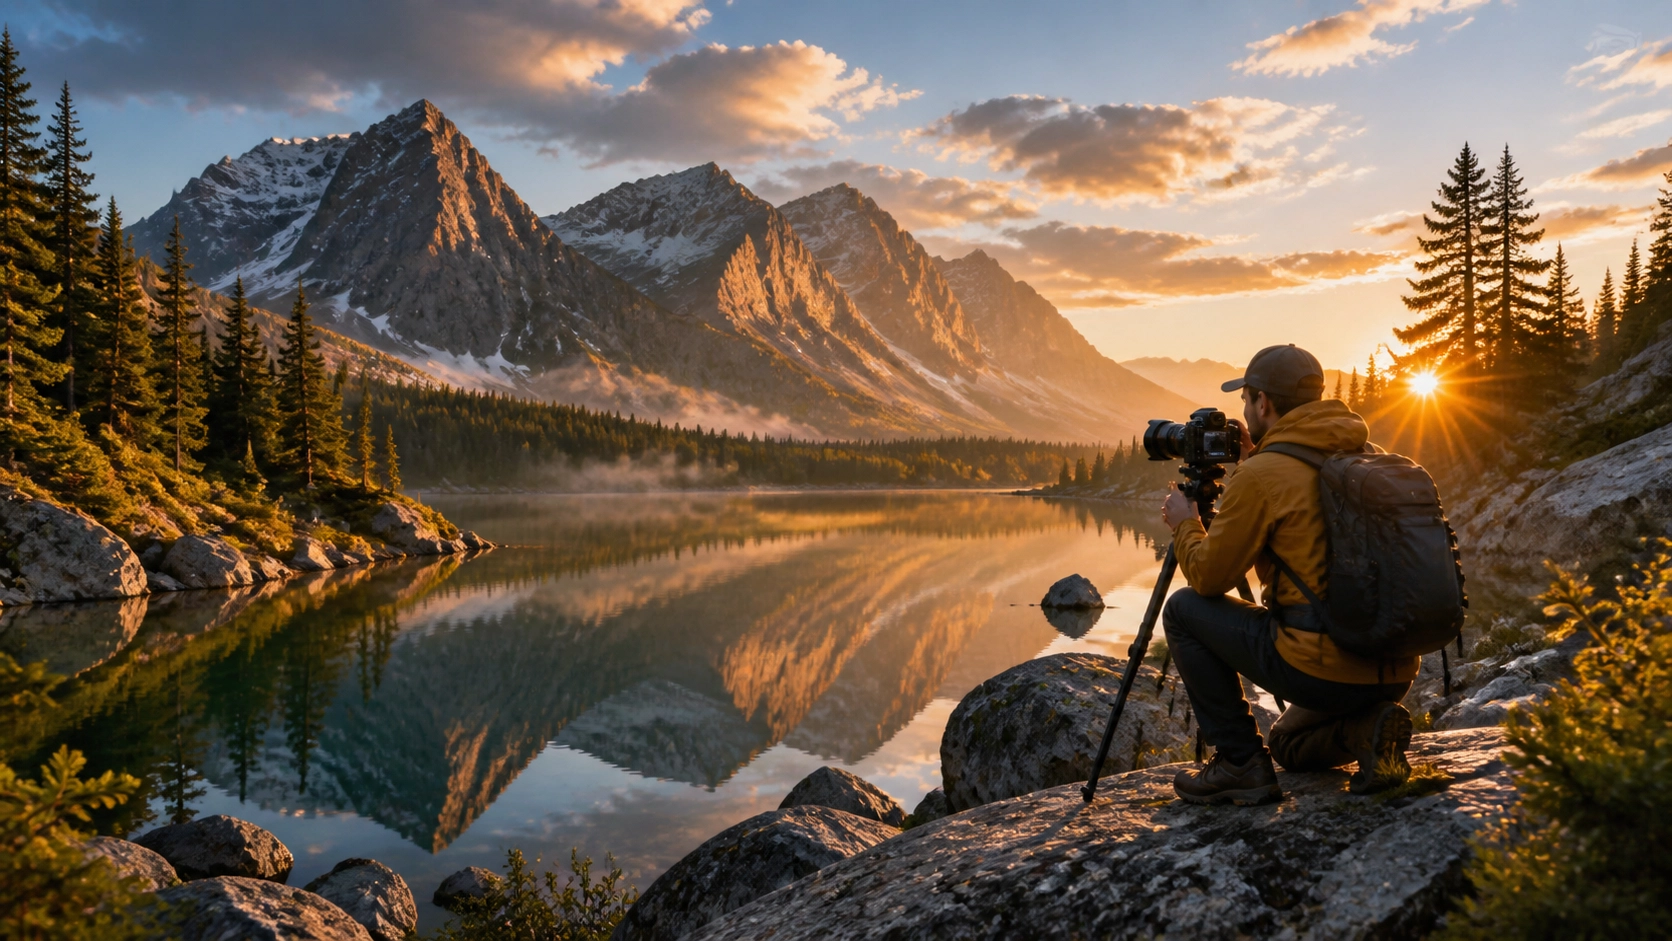
Landscape photography is more than just standing in front of a mountain and pressing a button. It’s about the chase. It’s that 3:00 AM alarm, the freezing toes, the sketchy hike in the dark, and that one split second when the sun hits the clouds and makes the world look like it’s on fire.
By 2026, the tech has changed, but the soul of the craft hasn't. We have cameras that can practically see in the dark and AI that can predict weather patterns better than a meteorologist, but you still have to be there. You still have to compose the shot. You still have to feel the scene.
If you’re looking to level up your landscape game this year, you’re in the right place. We’re going to break down everything from the gear you actually need to the settings that will make your images pop. Let’s dive in.
Why Landscape Photography Still Matters in 2026
In a world filled with short-form videos and AI-generated art, a still photograph of a natural landscape remains a powerful anchor. It’s a moment of stillness. It’s a way to document a changing planet and share the raw beauty of the outdoors with people who might never see it in person.
At Shut Your Aperture, we believe photography is about the experience. It’s about getting outside and seeing the world through your own lens. Whether you're shooting the red rocks of Sedona or the misty forests of the Pacific Northwest, landscape photography forces you to slow down and appreciate the details.
The Gear: What’s Actually Worth Your Money?
Look, gear doesn't make the photographer, but the right gear sure makes the job easier. In 2026, we’ve seen some massive leaps in sensor technology and stabilization.
1. The Camera Body
While you can take a decent photo with a phone, for professional-grade landscapes, you want a mirrorless system. High resolution is king here because you want to capture every tiny detail, every leaf, every ripple in the water, every star in the sky.
If you’re wondering what to buy right now, check out The Ultimate Guide to 2026 Mirrorless Cameras. Modern cameras now offer incredible dynamic range, allowing you to pull details out of the deepest shadows and brightest highlights without much noise.
2. Lenses: The Wide and the Tight
Most people think "landscape" and immediately grab a wide-angle lens. Don't get me wrong, a 14mm or 16mm lens is great for those massive, sweeping vistas. It lets you get close to a foreground element while still showing the big mountain in the back.
But don't sleep on telephoto lenses. A 70-200mm or even a 100-400mm lens is a landscape photographer's secret weapon. It allows you to "compress" the scene, making distant peaks look massive and helping you find intimate details in the landscape that a wide lens would miss.
3. The Trusty Tripod
A tripod is non-negotiable. You’re going to be shooting in low light, at sunrise, sunset, and during the "blue hour." To get those sharp images at low ISO settings, your shutter speed is going to be slow. If you’re hand-holding, you’re going to get blur.
Invest in a solid carbon fiber tripod. It’s light enough for hiking but sturdy enough to hold your gear steady in a windstorm.
4. Filters: Do You Still Need Them?
With modern software like Luminar, some people think filters are dead. Not quite. A Circular Polarizer is still essential for cutting glare on water and making the colors in the sky and foliage pop. While you can mimic a Graduated Neutral Density filter in post-processing, a physical 10-stop ND filter is still the best way to get those silky-smooth waterfalls or long-exposure clouds in the middle of the day.
Mastering Your Settings: The Technical Side
You can have a $6,000 camera, but if you leave it on "Auto," you’re wasting your money. For landscapes, you need to be in manual or aperture priority mode.
Aperture (The f-stop)
In landscape photography, we usually want everything from the front to the back to be sharp. This means using a "small" aperture (which is actually a higher number). Typically, f/8 to f/11 is the sweet spot for most lenses. If you go up to f/22, you might start seeing "diffraction," which actually makes the image softer.
If you're using specific gear, like a fixed-lens beast, you might want to check out Fujifilm X100VI settings for landscape photography to see how to optimize that specific sensor.
ISO
Keep it low. ISO 100 or 64 is your best friend. This ensures the cleanest possible image with the least amount of digital noise. Since you're on a tripod, you don't need to bump your ISO to get a faster shutter speed.
Shutter Speed
This is where the magic happens.
- Fast Shutter: Freezes the action (waves crashing, birds flying).
- Slow Shutter: Creates motion blur. This is how you get that "dreamy" look on water or clouds.
Focus
Manual focus is often better for landscapes. Use your camera's screen to zoom in 100% on a point about one-third of the way into the scene. This is usually where you'll get the best depth of field. If you want to get really technical, look into "Hyperfocal Distance" on PhotoGuides.org.
Composition: How to Tell a Story
Composition is what separates a snapshot from a piece of art. It’s how you lead the viewer’s eye through the frame.
The Rule of Thirds (and why to break it)
Imagine your frame is divided into a 3×3 grid. Placing your horizon on the top or bottom line, and your main subject on one of the intersections, usually looks good. It’s classic. But in 2026, we’re seeing a move toward more "centered" and "minimalist" compositions. If a mountain is perfectly symmetrical, put it right in the middle. Break the rules once you know them.
Leading Lines
Find a path, a river, a fallen log, or even a line of rocks that points toward your main subject. This creates a "road map" for the viewer’s eyes.
Foreground Interest
Don't just shoot the mountain. Find something interesting in the foreground, a colorful flower, an interesting rock formation, or some cracked mud. This adds depth and makes the viewer feel like they could step right into the photo.
Scale
Sometimes a landscape is so big it’s hard to tell how massive it really is. Adding a human element, like a person standing on a cliff, gives the viewer a sense of scale. It shows just how tiny we are compared to nature. You can see some great examples of this in the galleries at www.edinfineart.com.
Planning Like a Pro
The best landscape photographers don't just "get lucky." They plan.
- Apps are Your Best Friend: Use apps like PhotoPills or The Photographer's Ephemeris to see exactly where the sun and moon will rise and set.
- Weather Tracking: Look for "unsettled" weather. Clear blue skies are actually boring for landscapes. You want clouds, storms, and drama. If you see a storm clearing at sunset, drop everything and go.
- Scout Early: Don't show up at a location for the first time five minutes before sunset. Go during the day, walk around, find your angles, and be ready when the light hits.
For more deep dives into technical tutorials, head over to our online school. We have a whole section dedicated to the "boring" stuff that makes your photos look exciting.
Advanced Techniques: Beyond the Single Frame
Sometimes, a single click of the shutter isn't enough to capture what your eyes are seeing. That's where advanced techniques come in.
Focus Stacking
If you have a flower six inches from your lens and a mountain five miles away, it's impossible to get both perfectly sharp in one shot, even at f/11. Focus stacking involves taking 3-5 photos, each focused at a different distance, and then blending them together in post-processing.
HDR (High Dynamic Range)
If you're shooting directly into the sun, the sky might be too bright or the ground too dark. Take three bracketed shots (one underexposed, one normal, one overexposed) and merge them. Modern sensors are getting so good that we need this less often, but it's still a vital tool for high-contrast scenes.
Panoramas
When the scene is just too big for your widest lens, shoot a series of vertical shots and stitch them together. This gives you a massive, high-resolution file that you can print as large as a wall.
Post-Processing: The Digital Darkroom
Taking the photo is only 50% of the work. The other 50% happens on your computer.
In 2026, AI tools have made editing much faster. Tools like Luminar allow you to enhance skies, add atmospheric haze, and adjust lighting with incredible precision. The key is to keep it looking natural. You want people to say "Wow, what a beautiful place," not "Wow, what a crazy Photoshop job."
The Golden Rules of Editing Landscapes:
- Watch the Saturation: It’s tempting to slide that saturation bar to 100. Don't. Use "Vibrance" instead, which is more subtle.
- Check the Horizon: There is nothing more distracting than a crooked ocean. Level your horizons!
- Dodge and Burn: This is an old-school darkroom technique. Brighten the areas you want people to look at (Dodge) and darken the areas you want them to ignore (Burn).
If you want to stay updated on how the latest software is changing the game, keep an eye on our photography news section.
Ethics in Landscape Photography
This is a big one. As more people get into photography, our natural spaces are under more pressure than ever.
- Leave No Trace: Stay on the trails. Don't trample wildflowers for "the shot."
- Don't Geotag Sensitive Locations: If you find a "secret" spot, consider keeping it a secret. Mass tourism can destroy fragile ecosystems in months.
- Respect Wildlife: If you’re including animals in your landscape, give them space. A "cool shot" isn't worth stressing out an animal.
We talk a lot about the intersection of practice and ethics at blog.edinchavez.com, and it’s something every outdoor photographer should think about.
Why 2026 is the Best Year to Start
We are in a golden age of photography. The barrier to entry has never been lower, and the potential for creativity has never been higher. You don't need to be a pro to get out there and start capturing the world.
Landscape photography is a journey. You’ll have days where you hike five miles in the rain and come back with nothing. But then, you’ll have that one morning where the fog rolls in, the light turns gold, and you capture something truly magical. That one shot makes all the failed attempts worth it.
If you’re feeling stuck or don’t know where to start, check out our comprehensive photography tutorials. We’ve got everything you need to go from "clueless" to "confident."
Quick Recap for Success:
- Get a Tripod: Seriously, just do it.
- Shoot RAW: It gives you the most data to work with in post.
- Find a Foreground: Give your viewer something to touch.
- Chase the Light: Sunrise and sunset are your best friends.
- Be Patient: Nature doesn't work on your schedule.
Landscape photography isn't about the destination; it’s about the connection you build with the world around you. Every time you step outside with your camera, you’re learning something new: about light, about your gear, and about yourself.
So, what are you waiting for? Pack your bag, charge your batteries, and get out there. The world is waiting to be photographed. And remember, if you need more tips on how to stay ahead of the curve, check out our guide on integrating industry news with your practice.
Go catch that light!


