Look, I get it. You just bought a fancy new camera, you’re staring at all those buttons, and you’re wondering why your expensive piece of glass is producing photos that look worse than your iPhone shots from 2014. Don’t panic. We’ve all been there.
Photography isn't just about clicking a button; it’s about seeing the world differently. At Shut Your Aperture, we believe that anyone can become a pro if they have the right guidance. That’s why we’ve built the ultimate hub for photography tutorials. Whether you’re trying to figure out how to use manual mode camera settings or you’re diving into advanced lighting, our daily school is designed to get you from "What does this dial do?" to "Check out my gallery" in record time.
Why You Need Structured Photography Tutorials
You can spend years wandering around your backyard, hoping for a lucky shot. Or, you can follow a roadmap. The internet is flooded with information, but much of it is fragmented. You find one video on ISO and another on composition, but they don't talk to each other.
Our approach is different. We treat photography as a language. You need to learn the alphabet before you can write a poem. Our photography tutorials are structured to build your skills layer by layer. We don't just tell you what to do; we explain the why. When you understand the physics of light and the mechanics of your sensor, you stop guessing and start creating. If you're looking for even more inspiration, check out blog.edinchavez.com for some incredible stories from the field.

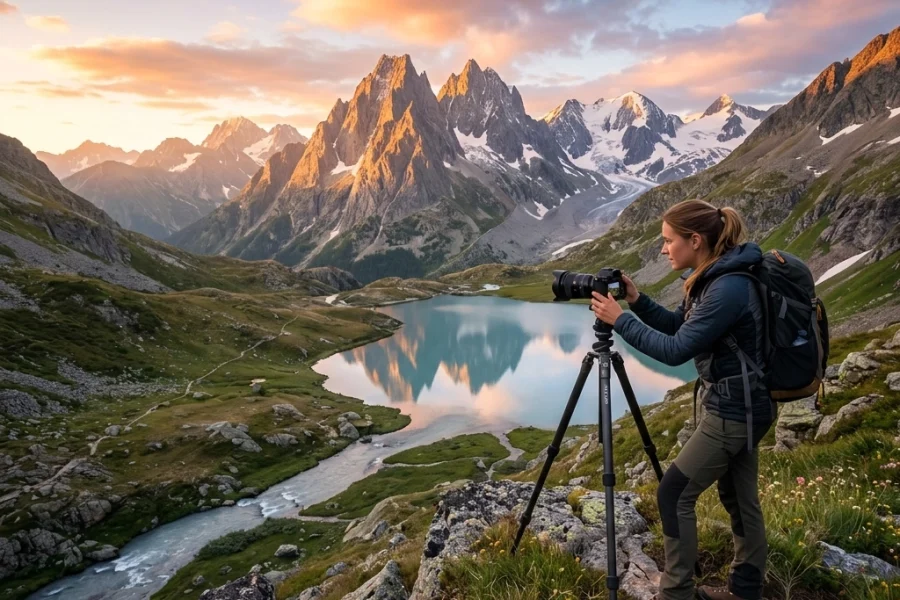
SEO Alt Text: A high-quality digital camera on a tripod during a sunset photoshoot, illustrating the professional setup used in our photography tutorials.
The First Step: How to Use Manual Mode Camera
If you want to take control of your creative vision, you have to ditch the "Green Box" (Auto Mode). Auto mode is the camera’s best guess at what a "good" photo looks like, but the camera doesn't have a soul. It doesn't know if you want a moody, dark silhouette or a bright, airy portrait.
Learning how to use manual mode camera settings is the single most important milestone in your journey. It boils down to the Exposure Triangle: Aperture, Shutter Speed, and ISO.
1. Aperture (The "Eye" of the Lens)
Aperture is the opening in your lens. It controls two things: how much light enters and your depth of field. A wide aperture (like f/1.8) lets in a ton of light and gives you that blurry, creamy background (bokeh) everyone loves. A narrow aperture (like f/16) lets in less light but keeps everything from the foreground to the background sharp: perfect for landscapes. If you're struggling with landscapes, you might be making some common mistakes.
2. Shutter Speed (Capturing Time)
Shutter speed is how long the sensor is exposed to light. A fast shutter speed (1/1000s) freezes action, like a bird in flight. A slow shutter speed (1/10s or longer) creates motion blur, making waterfalls look like silk. Just remember, if you go slow, you need a tripod.
3. ISO (Sensor Sensitivity)
ISO is your camera's sensitivity to light. In bright daylight, you want a low ISO (100). In a dark room, you might need to crank it up to 3200 or higher. The trade-off? High ISO introduces "noise" or graininess. Modern cameras are getting better at this, like we saw in our comparison of the Panasonic Lumix S5 II vs Sony A7 IV.

SEO Alt Text: A detailed diagram showing the exposure triangle: Aperture, Shutter Speed, and ISO: explained in our photography tutorials.
Mastering Composition: The Secret Sauce
Once you’ve mastered the technical side of how to use manual mode camera settings, you need to work on your eye. Composition is how you arrange elements in the frame. You can have perfect exposure, but if the composition is messy, the photo will fail.
- Rule of Thirds: Imagine a tic-tac-toe grid over your frame. Place your subject on the lines or intersections.
- Leading Lines: Use roads, fences, or shorelines to lead the viewer’s eye into the photo.
- Negative Space: Don't be afraid of empty space. It can make your subject pop and give the viewer's eyes a place to rest.
- Framing: Use natural elements like trees or windows to frame your subject.
If you are moving into professional work, like corporate portraits, composition becomes even more critical. Avoiding headshot mistakes is a great place to start refining your eye for detail.
Lighting: The Language of Photography
The word "Photography" literally means "Writing with Light." If the light is bad, the photo is bad. It’s that simple.
In our photography tutorials, we emphasize finding "Golden Hour": that hour just after sunrise or before sunset when the light is soft, warm, and flattering. But what if you have to shoot at noon? That’s where you learn about modifiers, reflectors, and using shadows to your advantage.
For those wanting to take their lighting to the next level, particularly for professional setups or commercial work, exploring resources at proshoot.io can provide the high-end perspective needed to transition from hobbyist to pro.

SEO Alt Text: A photographer using a reflector to bounce natural light onto a model, demonstrating lighting techniques from our photography tutorials.
Post-Processing: Bringing the Vision to Life
Taking the photo is only half the battle. The "digital darkroom" is where the magic happens. Many beginners feel like editing is "cheating," but every pro shoots in RAW and edits their photos. A RAW file is flat and boring by design: it’s meant to hold as much data as possible so you can bring out the colors and details later.
When it comes to editing, efficiency is key. While many use Adobe products, we’ve found that Luminar is a game-changer for photographers who want powerful AI-driven results without spending hours clicking sliders. It allows you to replace skies, enhance skin tones, and adjust lighting with incredible precision.
Our photography tutorials cover the entire workflow, from importing your photos to exporting them for web or print. We teach you how to maintain a consistent style so your portfolio looks professional and cohesive.
Gear: Don't Get Caught in the Trap
"What camera should I buy?" is the most common question we get. The truth? It doesn't matter as much as you think. A great photographer with an entry-level DSLR will always out-shoot a beginner with a $10,000 Leica.
Focus on lenses first. A "nifty fifty" (50mm f/1.8 lens) is cheap and will teach you more about photography than any expensive zoom. It forces you to move your feet and understand perspective. As you grow, you can check our sitemap to find deep dives into specific camera bodies and lens reviews.

SEO Alt Text: A collection of various camera lenses including prime and zoom lenses, showcasing the gear discussed in our photography tutorials.
Join the Shut Your Aperture Daily School
Why "Daily School"? Because photography is a muscle. If you don't use it, you lose it. Our goal at Shut Your Aperture is to make learning an everyday habit. We provide bite-sized photography tutorials that you can consume with your morning coffee and put into practice by lunch.
We cover everything from:
- Macro Photography: Seeing the tiny worlds under our feet.
- Street Photography: Capturing the raw, unscripted moments of human life.
- Astrophotography: How to photograph the Milky Way.
- Business of Photography: How to actually make money with your camera.
The path to becoming a great photographer is long, but it’s incredibly rewarding. By following our guides and learning how to use manual mode camera settings effectively, you're not just taking pictures; you're preserving memories and telling stories.
Common Photography Tutorial FAQs
Is it better to learn on a DSLR or Mirrorless camera?
Mirrorless is the future, but a used DSLR is a fantastic way to learn the basics without breaking the bank. Both will teach you the same fundamentals of manual mode.
How long does it take to learn photography?
You can learn the basics in a weekend, but mastering the art takes a lifetime. That’s the beauty of it: there is always something new to learn, a new technique to try, or a new way to see light.
Do I need expensive software to edit?
Not necessarily, but tools like Luminar significantly speed up the process and help you achieve a professional look much faster than free alternatives.

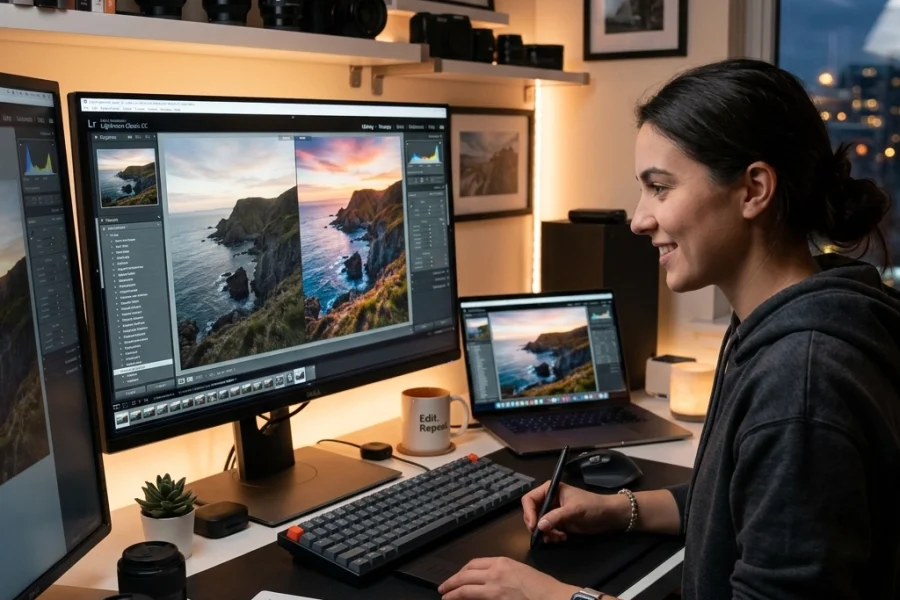
SEO Alt Text: A split screen showing a "Before and After" of a landscape photo edited using techniques from our photography tutorials.
Staying Inspired
It’s easy to get discouraged when your photos don't look like the ones on Instagram. Remember that those "perfect" shots are often the result of hundreds of failed attempts and years of practice.
The best way to stay inspired is to look at the work of others. We highly recommend checking out PhotoGuides.org for incredible technical breakdowns and creative inspiration. Surround yourself with a community that pushes you to be better.
At Shut Your Aperture, we are committed to being the number one photography school online. We aren't just selling information; we are building a community of creators who want to shut their apertures and open their minds.
Keep shooting, keep failing, and keep learning. Your best photo is the one you’re going to take tomorrow. Browse our post archives to find more specific topics and start your journey today. Success in photography isn't about the gear you have; it's about the passion you bring to the lens every single day. Let's get to work.