

Categories: News, PHOTO SERIES, TUTORIALS, TRAVEL
Tags: News, PHOTO SERIES, TUTORIALS, TRAVEL
Landscape photography is one of those things that looks incredibly easy from the outside. You just find a pretty mountain, point your camera, and click, right? Wrong. If it were that simple, everyone would be selling prints at high-end galleries.
The truth is, capturing the essence of the great outdoors is a meticulous dance between gear, timing, and artistic vision. By now, in 2026, camera technology has advanced to the point where our sensors can practically see in the dark, but even the most expensive mirrorless setup won't save you from basic compositional errors.
I’ve spent years trekking through national parks and coastal cliffs, and I’ve made every mistake in the book. Twice. If you feel like your landscape shots are lacking that "wow" factor, you’re likely falling into one of these common traps. Let’s break down the 7 biggest mistakes you're making and how to fix them so you can start creating images that actually do justice to the view.
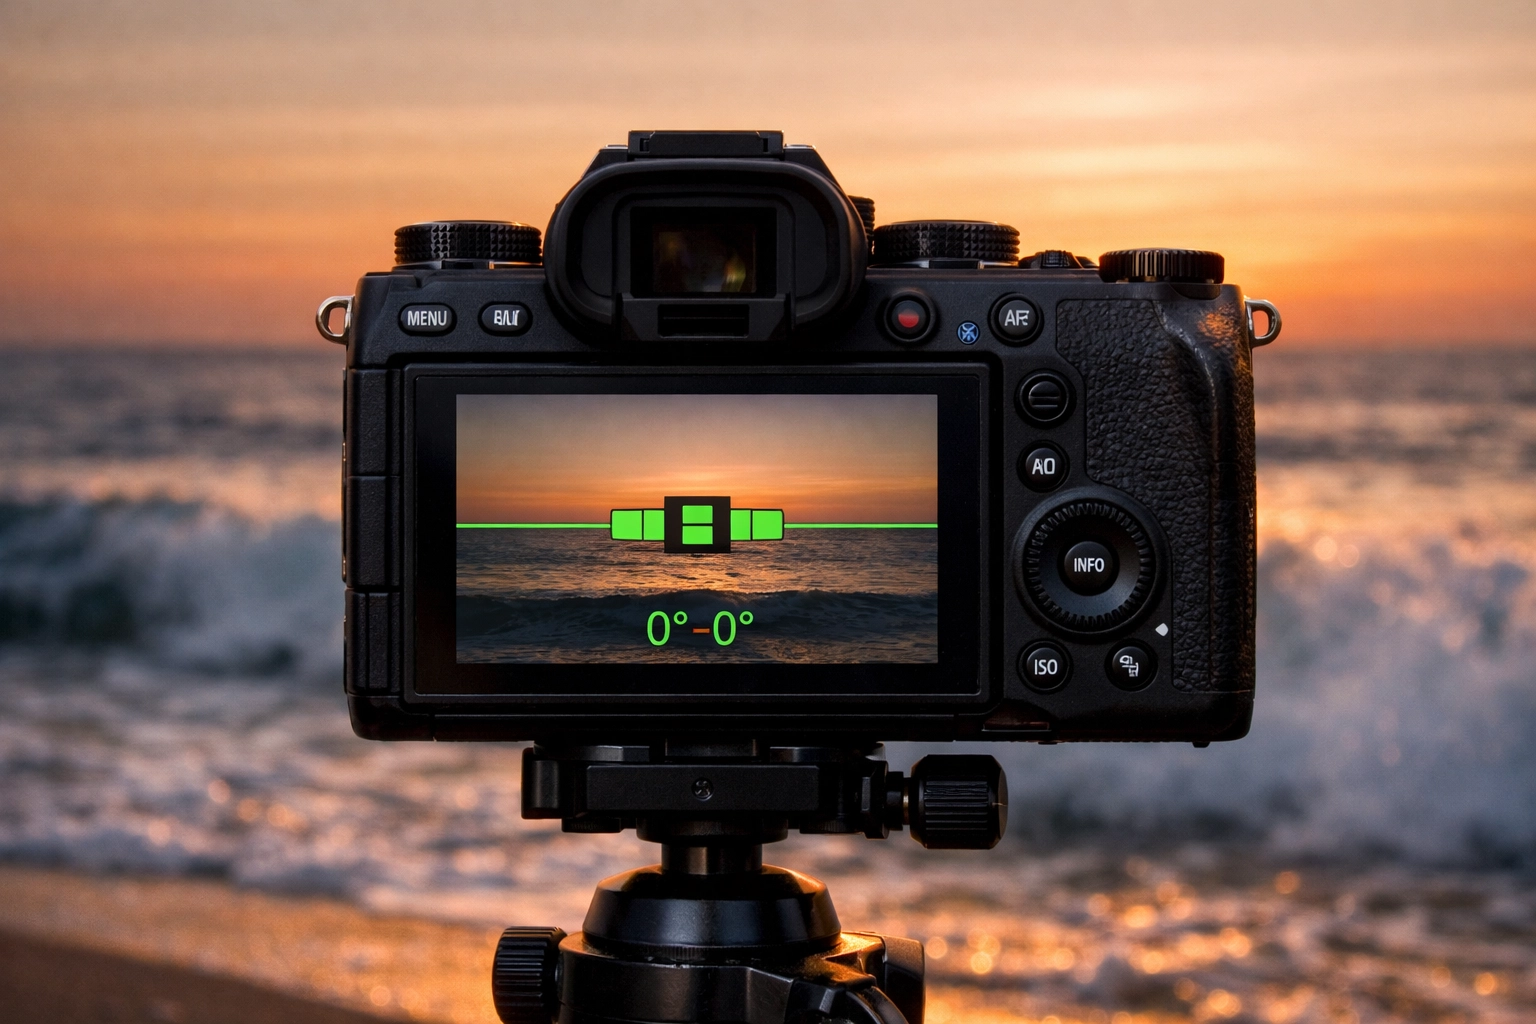
1. The Leaning Tower of Landscape (Crooked Horizons)
There is nothing that ruins a professional-looking landscape faster than a crooked horizon. It’s the visual equivalent of a pebble in your shoe: it’s small, but it makes the whole experience uncomfortable. When the ocean looks like it's about to drain out of the side of the frame, the viewer’s brain immediately flags the image as "amateur."
How to Fix It:
Most modern cameras come with a built-in electronic level. Use it! If you’re shooting with a tripod (which you should be for landscapes), check the physical bubble level on the tripod head as well. If you’re shooting handheld, turn on the grid lines in your viewfinder.
If you realize after the fact that your horizon is wonky, you can easily fix it in post-processing. However, keep in mind that rotating an image requires a slight crop, which means you might lose some of those carefully framed edge details. If you want to dive deeper into getting everything right in-camera, check out our Manual Mode 101 guide.
2. Defaulting to Wide-Angle Lenses
When people think of "landscape," they immediately think "wide-angle." It makes sense; you want to capture the whole scene. But "capturing everything" often results in "capturing nothing." When you use a 14mm or 16mm lens, objects in the distance become tiny and lose their impact. That massive mountain peak you were so excited about? It now looks like a molehill in your photo.
Wide-angle lenses also tend to pull in a lot of "clutter": messy foregrounds, distracting branches, or empty patches of dirt: that take away from the subject.
How to Fix It:
Don’t be afraid to use a telephoto lens for landscapes. A 70-200mm lens is a landscape photographer's secret weapon. It allows you to "compress" the scene, making distant mountains look larger and more imposing. Telephoto lenses help you isolate specific patterns, textures, and intimate details that a wide-angle lens would simply ignore.
If you do stick with the wide-angle, you have to get low and get close. Find a compelling foreground element: a rock, a flower, or a patch of ice: and make it a prominent part of the frame to create a sense of depth. You can find more gear insights on our camera gear reviews page.
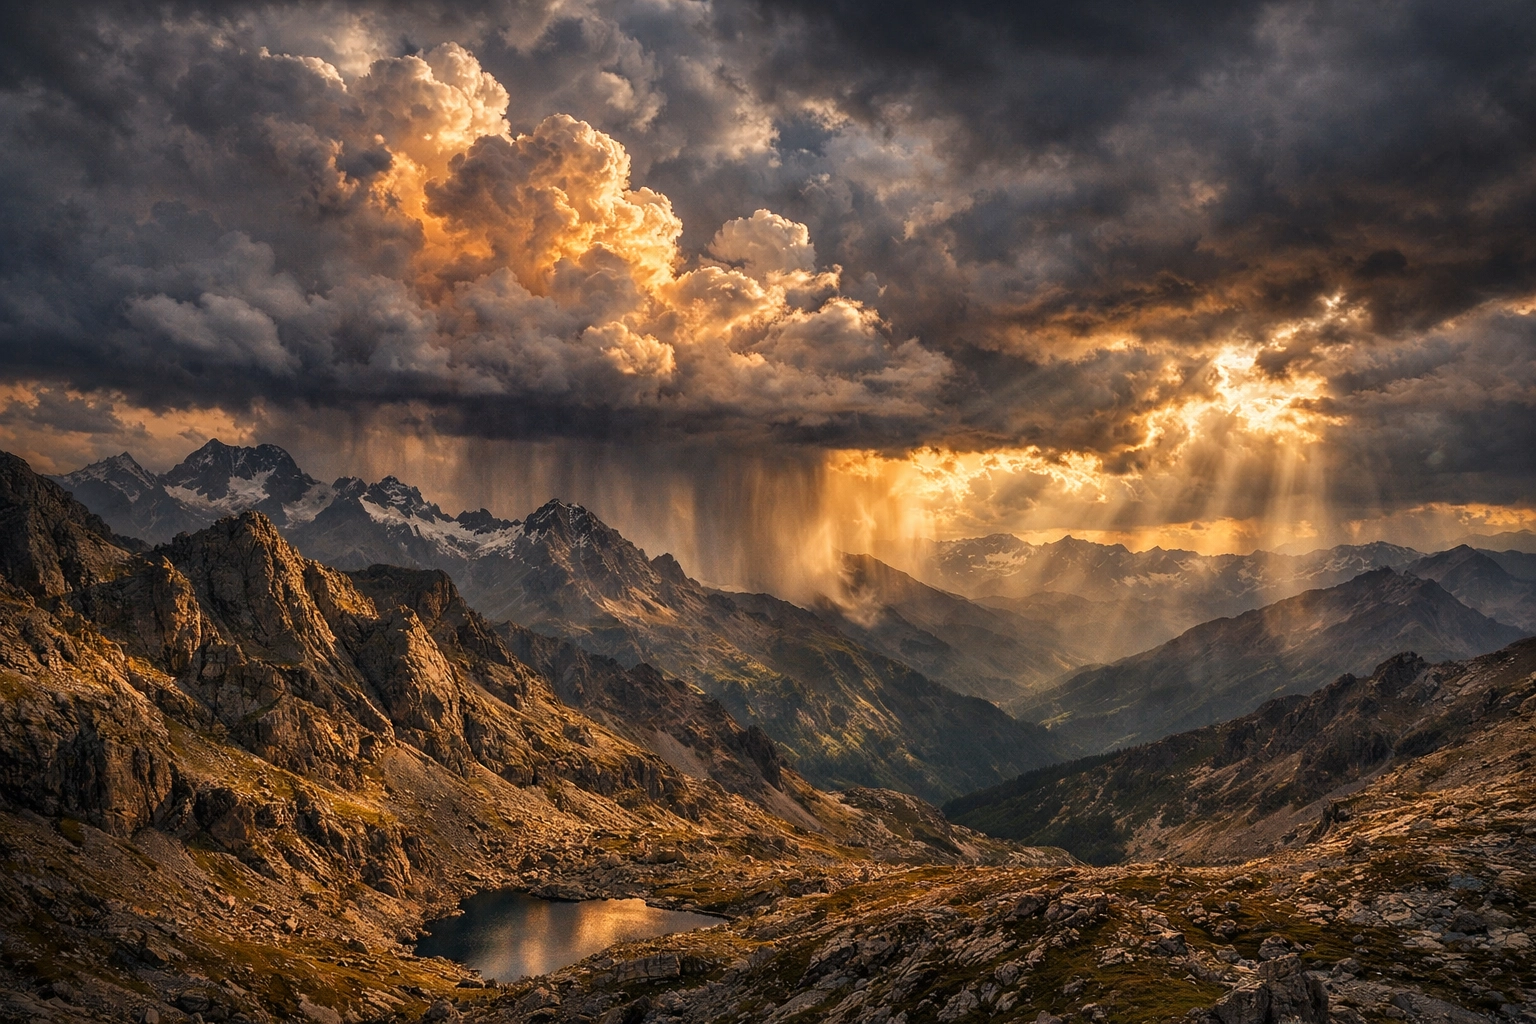
3. Photographing a Clear, "Boring" Sky
We all love a sunny day for a hike, but for photography, a cloudless blue sky is often the kiss of death. It’s flat, it’s featureless, and it’s usually much brighter than the ground, leading to exposure issues. A giant expanse of empty blue sky doesn't add anything to the story; it just takes up space.
How to Fix It:
Patience is the name of the game. The best landscape photos usually happen when the weather is "bad" or at least "interesting." Storm clouds, fog, and light breaking through a heavy overcast sky are what create drama.
If you find yourself at a location with a boring sky, try to minimize the amount of sky in your frame. Shift your composition to focus on the textures of the land or the water. Alternatively, wait for the "Golden Hour" or "Blue Hour" when the light is softer and the colors are more evocative. For more on how lighting and weather trends are evolving in the industry, take a look at why the latest photography news matters.
4. Incorrect Aperture Settings (The f/22 Fallacy)
There’s a common misconception that to get everything in focus, you should crank your aperture up to f/22. While this technically gives you a huge depth of field, it often introduces a phenomenon called "diffraction." This is where light waves begin to interfere with each other as they pass through a tiny opening, causing the entire image to lose sharpness.
On the flip side, many beginners shoot too "wide open" (like f/2.8) when they want a sharp landscape, resulting in a blurry foreground or a soft background.
How to Fix It:
Most lenses have a "sweet spot" for sharpness, usually between f/8 and f/11. For most landscape scenes, f/11 provides plenty of depth of field without the softening effects of diffraction. If you absolutely need something two inches from your lens and a mountain five miles away to both be tack-sharp, look into "focus stacking." This involves taking multiple shots at different focus points and blending them together in post-processing.
If you’re just starting out, mastering these settings is crucial. I recommend checking out resources on PhotoGuides.org for detailed lens charts.
5. Over-Editing in Post-Processing
We live in the era of the "hyper-real" edit. It’s tempting to push those sliders to the limit to make an image pop, but over-editing is a one-way ticket to a "fake" looking photo. The most common offenders are:
- Over-saturation: Making the grass look neon green and the sky look like radioactive Gatorade.
- The Clarity Slider: Cranking clarity too high creates dark halos around objects and makes textures look "crunchy" and unnatural.
- Aggressive Noise Reduction: This can turn beautiful natural details into a "plastic" or "waxy" mess.
How to Fix It:
Less is more. When you’re editing in Luminar, try to enhance the natural beauty rather than reinvent it. If you move a slider and it looks good, try backing it off by about 10-20%. Your eyes "adjust" to the colors as you edit, making you crave more intensity than is actually necessary.
Step away from your computer for ten minutes after you think you’re finished. When you come back with fresh eyes, you’ll often realize you went a bit too far with the saturation. For professional editing inspiration, see how the pros do it at ProShoot.io.
6. Overadjusting White Balance
White balance is often overlooked, but it’s the soul of your image’s mood. A lot of photographers let the camera decide (Auto White Balance), which can sometimes neutralize the beautiful warm glow of a sunset, turning it into a sterile, neutral scene. Conversely, manually setting it too "warm" can make a scene look muddy and orange.
How to Fix It:
Shoot in RAW. This is non-negotiable for landscapes. RAW files allow you to change the white balance in post-processing without losing any image quality. When you are editing, try to maintain the natural color palette of the location.
If it was a cold, misty morning, let the blues and magentas shine. If it was a golden sunset, don’t let the camera "fix" the warmth away. You can see examples of perfect color balance in the galleries at Edin Fine Art.
7. Following Composition Rules Mindlessly
The "Rule of Thirds" is the first thing every photographer learns. It’s a great starting point, but if every single one of your photos has the horizon on the bottom third and the subject on the right-hand vertical line, your portfolio is going to look incredibly predictable.
Mechanical composition leads to "soulless" photos. You’re following a formula instead of reacting to what’s in front of you.
How to Fix It:
Use the rules as a baseline, but don't be afraid to break them. Sometimes a perfectly centered subject creates a powerful sense of symmetry. Sometimes placing the horizon at the very top of the frame emphasizes a stunning foreground texture.
Think about "visual weight" and "balance" rather than just lines on a grid. Does the image feel "heavy" on one side? Is there "breathing space" for the viewer’s eye to move through the frame? Composition should be about emotional intent. If you want to learn more about advanced techniques, our post on portrait photography techniques actually has some great tips on framing that apply to landscapes as well.
Bonus Tip: Keeping Up with the Tech
In 2026, the landscape of photography is shifting faster than ever. From AI-assisted focusing to new sensor architectures, staying informed is half the battle. If you aren't keeping up with the latest trends, you might be missing out on tools that could simplify your workflow and improve your results.
Whether it’s a new firmware update for your mirrorless body or a breakthrough in drone technology for those aerial landscapes, stay curious. We cover a lot of this in our breakdown of today's camera gear news.
Landscape photography is a journey, not a destination. You’re going to have days where you hike five miles in the dark only for the fog to roll in and ruin the shot. You’re going to have days where you forget your tripod plate and have to balance your camera on a pile of rocks. But by avoiding these seven common mistakes, you’ll find that your "hits" start to far outnumber your "misses."
Keep your horizons straight, keep your edits subtle, and most importantly, keep shooting. For more inspiration and behind-the-scenes looks at professional shoots, head over to Edin Chavez’s personal blog or check out the work coming out of Edin Studios.
Now get out there and shut your aperture!


