Landscape photography seems like the easiest thing in the world until you actually try to do it. You see a majestic mountain range, the sun hitting the peaks just right, and you think, "This is it. This is my National Geographic moment." You click the shutter, go home, open it on your monitor, and… it looks like a flat, messy pile of rocks.
Don't worry; we’ve all been there. Even the pros at Shut Your Aperture started by making these exact same mistakes. The difference between a "meh" snapshot and a fine art piece (like the ones you’ll see at Edin Fine Art) often comes down to a few small adjustments in how you see the world through your lens.
I was chatting with Sonny, our Social Media Manager, about this the other day. He sees thousands of tags every week, and the same errors keep popping up. We decided it was time to lay it all out. If you want to stop taking "tourist" photos and start creating landscapes that actually stop the scroll, here are the seven most common mistakes and exactly how to fix them.
1. The "Leaning Tower" Horizon
This is the absolute king of beginner mistakes. You’re so focused on the mountain or the sunset that you forget to check if your camera is actually level. A horizon line that is even slightly tilted (we’re talking half a degree) can make the viewer feel like the ocean is about to drain out of the side of the frame. It’s distracting and ruins the "zen" of a great landscape.
The Fix:
Most modern cameras have a built-in electronic level. Turn it on! It usually looks like a little green line in your viewfinder or on your LCD screen. If your camera doesn’t have one, use the grid lines (Rule of Thirds grid) to align the horizon with a horizontal line.
If you already messed up and the shot is tilted, don't sweat it. You can fix this easily in post-processing. Tools like Luminar have an "Auto Horizon" feature that detects the line and levels it for you instantly. Just remember that straightening an image in post will crop the edges slightly, so it’s always better to get it right in the field.
2. Being Too Lazy for a Tripod
I get it. Tripods are heavy, they’re clunky, and they’re a pain to carry up a mountain. But if you want those tack-sharp images that look crisp even when printed large, you need stability. Many people think they can just "handhold" a shot because it looks bright enough outside. But for landscapes, we often want a narrow aperture (like f/11 or f/16) to keep everything from the front to the back in focus. This usually means a slower shutter speed.
The Fix:
Carry the tripod. It’s a non-negotiable tool for serious landscape work. If you’re worried about weight, look into carbon fiber options. Beyond just holding the camera, a tripod forces you to slow down and actually think about your composition.
Also, once you’re on the tripod, don’t press the shutter button with your finger: that tiny movement can cause "shutter shake." Use a remote trigger or the built-in 2-second timer on your camera. For more on the latest gear that won't break your back, check out our guide on today's top gear and software updates.

3. Shooting in the "Ugly" Light
One of the biggest mistakes is thinking that a "sunny day" is the best time for photography. In reality, high noon on a clear day is usually the worst time. The sun is directly overhead, creating harsh, black shadows and blown-out highlights. It makes the landscape look flat and takes away all the drama.
The Fix:
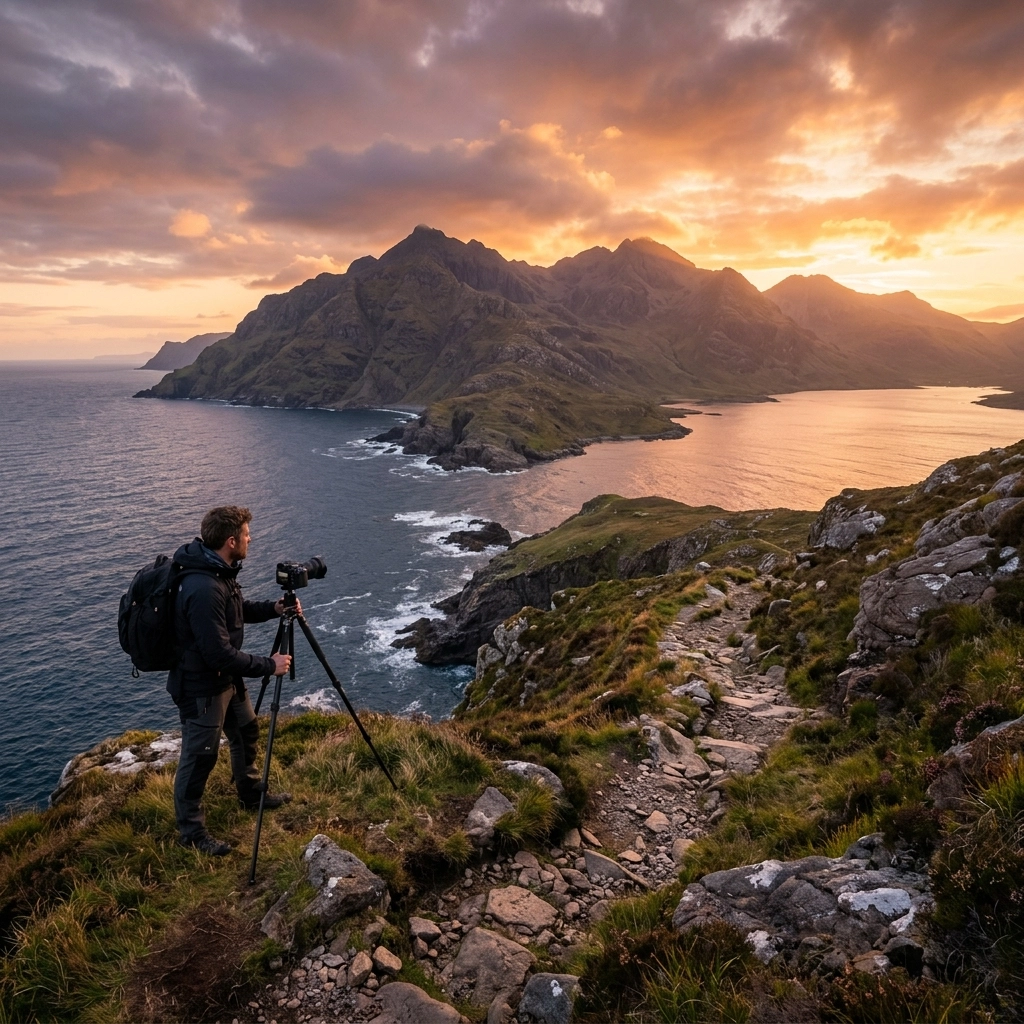
Chase the "Golden Hour": that window of time shortly after sunrise or just before sunset. The light is softer, warmer, and hits the landscape from a side angle, which creates shadows that define the shape of the terrain.
If you find yourself stuck in harsh light, look for "Blue Hour" (just after the sun goes down) or wait for a cloudy day. Clouds act as a giant softbox, evening out the light. If the sky is still looking a bit "blah" even after your best efforts, you can use the AI sky replacement tools in Luminar to add some atmosphere, but try to capture the soul of the light in person first. You can find more lighting tips on Shut Your Aperture.
4. Having No Clear Focal Point
You find a beautiful forest, you point your camera at it, and you click. But when you look at the photo, your eyes just wander around aimlessly. There’s no "hook." A common mistake is assuming that the "view" is enough. A great landscape needs a subject: a lone tree, a jagged rock, a winding path, or even a person for scale.
The Fix:
Before you press the shutter, ask yourself: "What is the subject of this photo?" If you can’t answer that in one word, you need to recompose. Use the "Rule of Thirds" to place your subject off-center to create a more dynamic feel.
Think of your photo like a story. The subject is the main character. Without a main character, you just have a bunch of background scenery. For more inspiration on how to find a subject in the wild, head over to Edin’s personal blog where he breaks down his scouting process.

5. The "Flat" Composition (Ignoring the Foreground)
Landscape photography is the art of taking a 3D world and squashing it into a 2D image. If you just stand at eye level and shoot toward the horizon, your photo will look flat. Many beginners forget that the bottom third of their photo (the foreground) is just as important as the mountains in the distance.
The Fix:
Get low! If you see some cool rocks, interesting flowers, or even a patch of cracked mud, put your camera close to the ground. This creates "leading lines" that draw the viewer's eye from the bottom of the frame up into the distance. This layering: foreground, midground, and background: is what gives a photo depth and makes the viewer feel like they could walk right into the scene.
A wide-angle lens is your best friend here. It exaggerates the distance between the foreground and the background, making the scene feel epic. If you're looking for lens recommendations, we've covered plenty in our archives.

6. Not Practicing "Border Patrol"
You’ve got the perfect lighting, a great subject, and a straight horizon. You get home, and you notice a bright white trash can in the bottom left corner or a stray tree branch poking into the top of the frame. These distractions pull the eye away from your subject and make the shot feel cluttered.
The Fix:
Before you take the shot, do a "lap" around the edges of your viewfinder. Scan the four corners and the four sides. Is there anything there that doesn't belong? If so, move your tripod a few inches or zoom in slightly to crop it out. This is a habit that separates the pros from the amateurs. It’s much easier to move a branch in the field than it is to spend an hour in Photoshop trying to clone it out perfectly.
7. Over-Processing Your Images
We’ve all seen those photos on Instagram where the grass is neon green and the sky looks like a radioactive purple explosion. This is "Saturation Overload." When you first start editing, it’s tempting to push every slider to 100. But over-processing makes your work look cheap and unnatural.
The Fix:
Less is more. Instead of using the Saturation slider, try using the "Vibrance" slider: it's more subtle and protects skin tones and already-saturated colors. Focus on contrast and "Dehaze" rather than just color.
If you’re using Luminar, utilize their AI tools like "Structure AI" or "Enhance AI." These are designed to intelligently analyze the photo and only apply changes where they are needed. The goal of editing should be to make the photo look like how you remember the scene feeling, not like a scene from a sci-fi movie.

Bonus: Failing to Plan
A lot of people think landscape photography is about luck. While luck plays a part, the best shots are usually planned weeks in advance. If you just show up at a location at 2 PM and hope for the best, you’re likely to be disappointed.
The Fix:
Use apps like PhotoPills or The Photographer’s Ephemeris. These tools tell you exactly where the sun will rise and set, where the Milky Way will be, and even how long the shadows will be at any given time. Check the weather. Sometimes a "bad" weather forecast (like a storm clearing) leads to the most dramatic light you’ll ever see.
Sonny and I were talking about how much planning goes into the posts he shares. It’s not just "point and shoot." It’s "point, shoot, wait three hours for the clouds to move, then shoot again."
Wrapping It Up
Landscape photography is a journey. You’re going to make these mistakes: I still make them sometimes if I’m rushing! The key is to catch yourself. Keep this checklist in the back of your mind next time you’re out in the wild:
- Is my horizon straight?
- Is my tripod steady?
- Is the light working for me?
- Do I have a clear subject?
- Did I include a foreground?
- Are the edges clean?
- Am I going to over-edit this?
If you can answer "yes" to these, you’re well on your way to capturing something spectacular. For more tips on mastering your camera settings, dive into our tutorial section or check out the wealth of knowledge over at Shut Your Aperture.
Now, get out there, shut your aperture (maybe to f/11), and start shooting!
Luminar Neo’s Sky AI, atmosphere AI and SuperSharp are designed for landscape work — replace flat skies, add depth, and recover detail in seconds. Tagged as affiliate per FTC.