So, you want to capture the world. Not just a selfie in front of a monument, but the kind of epic, wall-worthy vistas that make people stop and say, "Wait, is that real?"
Welcome to the club. Landscape photography is one of the most rewarding genres out there, but it’s also one of the most frustrating. You hike four miles at 4:00 AM, get to the peak, and it’s nothing but fog. Or worse, the sun is out, but your photo looks like a flat, overexposed mess.
Don't worry. Whether you’re looking for photography for beginners or you’ve been shooting for years and want to level up, this guide is for you. We’re going to dive deep into the gear, the settings, and the "secret sauce" compositions that transform a boring snapshot into a work of art.
The Right Gear: Do You Need a $10,000 Setup?
Let’s get this out of the way: No, you don’t need the most expensive camera on the market to take great photos. However, having the right tools makes the job a lot easier. When we talk about camera gear reviews, the conversation usually starts with the body.
In 2026, the debate is almost entirely about the best mirrorless cameras. Why? Because they are lighter, faster, and the electronic viewfinders let you see exactly what your exposure looks like before you hit the shutter. If you’re torn between brands, you might want to check out our breakdown of the Nikon Z6 III vs Sony A7 IV to see which fits your style better.
Essential Kit for Landscapes:
- A Sturdy Tripod: If you buy a cheap, plastic tripod, you will regret it the first time the wind blows. You need something rock-solid for long exposures.
- Wide-Angle Lens: Think 16mm to 35mm. This allows you to capture the scale of a mountain range or the sweep of a coastline.
- Telephoto Lens: Don't sleep on the 70-200mm. Sometimes the best landscape is a tight crop of a distant peak.
- Filters: A Circular Polarizer (CPL) is a must-have to cut glare on water and make those clouds pop.
For more deep dives into equipment, I always recommend checking out Shut Your Aperture or reading the latest photography news on ProShoot.io.

Alt text: A professional mirrorless camera mounted on a carbon fiber tripod overlooking a dramatic mountain range at sunrise.
Mastering Your Camera: How to Use Manual Mode
If you’re still shooting on "Auto," it’s time to stop. Truly. Landscape photography is about control. You need to tell the camera exactly what to do because it doesn't know you’re trying to blur that waterfall or keep the foreground flowers sharp.
Learning how to use manual mode camera settings is the biggest hurdle for most people, but it’s simpler than it looks. It’s all about the Exposure Triangle:
- Aperture (F-stop): For landscapes, you usually want a high F-number (like f/8 or f/11) to ensure everything from the rock at your feet to the mountain in the distance is in focus.
- ISO: Keep this as low as possible (usually ISO 100) to avoid "noise" or grain in your images.
- Shutter Speed: This is where the magic happens. Use a fast shutter speed to freeze a crashing wave, or a slow shutter speed (several seconds) to make the water look like silk.
If you’re struggling with these basics, we have some great mastering photography tips that break it down even further. It’s all about practice. Think of these photography tutorials as your foundation.
Composition: Thinking Like an Artist
Composition is what separates a "picture of a place" from a "photograph." Even if you have the best light in the world, a bad composition will kill the vibe.
One of the masters of this craft is Peter Lik. His work has influenced how many of us view the natural world. If you want to see how the pros do it, take a look at the techniques behind Peter Lik’s landscape photography. He often uses "leading lines": roads, rivers, or fences that lead the viewer's eye into the frame.
Key Landscape Photography Tips for Composition:
- Foreground Interest: Don't just shoot the mountain. Find a cool rock, a flower, or a patch of ice to put in the bottom third of your frame. It adds depth.
- The Rule of Thirds: Imagine a grid on your screen. Place your horizon or your main subject along those lines.
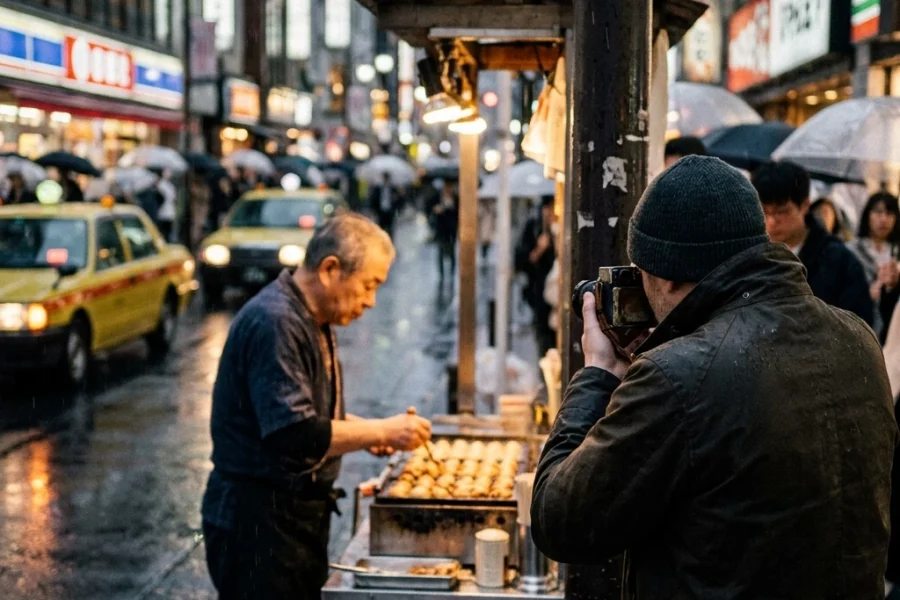
- Scale: Sometimes, adding a person (in a red jacket, usually!) can show just how massive a landscape really is. This is a common trick in street photography ideas that translates perfectly to the wilderness.

Alt text: A stunning landscape photo using the rule of thirds, featuring a lone tree in a field of purple lavender under a dramatic sunset.
Chasing the Light: Timing is Everything
You can be the best technical photographer in the world, but if you show up at high noon on a cloudless day, your photos will probably look flat and boring.
Landscape photography is a waiting game. We live for the Golden Hour (the hour after sunrise and the hour before sunset) and the Blue Hour (the time just before sunrise and just after sunset). This is when the light is soft, the shadows are long, and the colors are insane.
But don't be afraid of "bad" weather. Stormy skies, fog, and mist create mood. A clear blue sky is actually a landscape photographer's worst enemy because it’s visually uninteresting. Check out Edin Fine Art to see how dramatic lighting can completely transform a scene into something gallery-worthy.
Post-Processing: Bringing the Vision to Life
Let’s be honest: the RAW file coming out of your camera is going to look a bit dull. That’s okay. The RAW file is just the ingredients; post-processing is the cooking.
If you’re looking for photo editing tutorials, start by learning the basics of color correction and contrast. You don't need to fake the scene, but you should enhance what was already there.
One of my favorite tools for this is Luminar. It uses AI to help with things like sky replacement (if you really did get stuck with that boring blue sky) and accentuating details without making the photo look "crunchy." It’s a game-changer for speeding up your workflow.
For more advanced users, looking into the role of luminosity can help you understand how to balance highlights and shadows, a skill that is just as important in landscapes as it is in high-end real estate shots.

Alt text: A split-screen comparison showing a raw landscape photo next to a professionally edited version with enhanced colors and contrast.
Broadening Your Horizons: Beyond the Mountains
While we usually think of mountains and oceans, landscape techniques apply to many other fields. For example, if you’re interested in portrait photography techniques, you’ll find that understanding natural light and background composition is vital.
Similarly, the world of real estate has been heavily influenced by landscape pros. Techniques like aerial photography and vistas and perspectives are essentially landscape photography applied to a property. If you can shoot a forest, you can shoot a luxury estate.
If you’re looking to turn your hobby into a business, checking out Edin Studios or blog.edinchavez.com can give you a glimpse into the professional side of the industry.
Common Mistakes to Avoid
Even the pros mess up. Here are a few things to keep an eye on:
- Crooked Horizons: Nothing ruins a photo faster than the ocean leaking out the side of the frame. Use your camera’s built-in level.
- Over-Processing: It’s easy to go overboard with the saturation slider. If it looks like a neon sign, pull it back 20%.
- Ignoring the Midground: We often focus so much on the foreground and the background that the middle of the photo is just a "dead zone." Try to find elements that connect the two.
- Not Checking Your Corners: Before you click, look at the edges of your frame. Is there a random tree branch or a piece of trash poking in? Shift your position slightly to clean it up.
The Importance of Patience
I’ve spent hours sitting in the rain waiting for a five-second break in the clouds. Sometimes it happens, sometimes it doesn't. That’s the beauty of it. Landscape photography forces you to slow down and actually look at the world around you.
If you’re just starting out with photography for beginners, don’t get discouraged if your first few trips don’t yield a masterpiece. Even the iconic works of Peter Lik were the result of decades of trial and error.

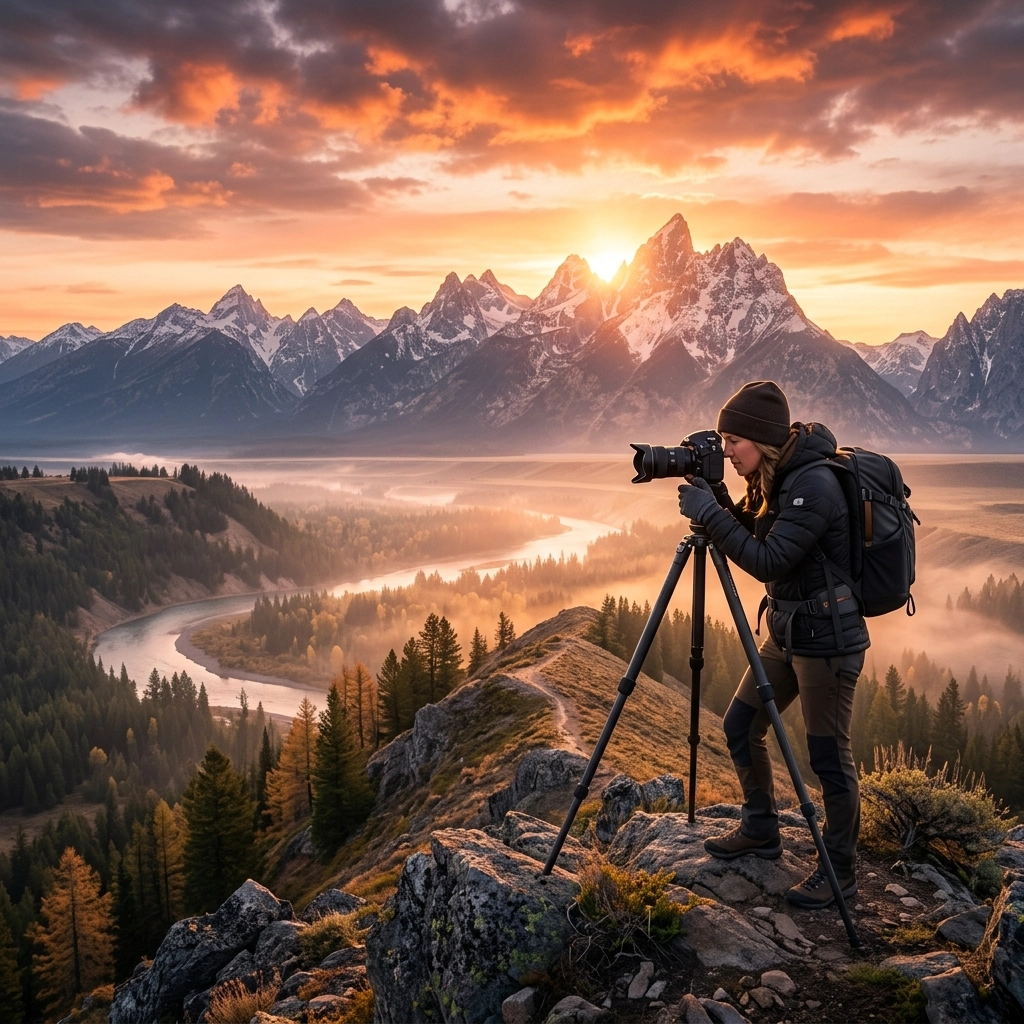
Alt text: A photographer standing on a cliff edge with a camera on a tripod, silhouetted against a massive orange sun rising over the ocean.
Wrapping It Up
Landscape photography is a journey, literally and figuratively. It requires a mix of technical knowledge, artistic vision, and a whole lot of endurance.
To recap the essentials:
- Invest in a solid setup, but focus on the best mirrorless cameras and glass.
- Get out of Auto and master how to use manual mode camera settings.
- Use composition to tell a story, not just show a location.
- Edit your work with tools like Luminar to bring out the best in your RAW files.
- Keep an eye on photography news and camera gear reviews to stay ahead of the curve.
If you want more inspiration, dive into our other articles, like the impact of Peter Lik on photography trends or explore the creative process behind some of the world's most famous shots.
Now, grab your gear, check the weather, and go find your own perfect vista. The world is waiting for you to capture it.
Luminar Neo’s Sky AI, atmosphere AI and SuperSharp are designed for landscape work — replace flat skies, add depth, and recover detail in seconds. Tagged as affiliate per FTC.