35Mm Portrait Photography Pros And Cons
35mm Portrait Photography: A Practical Shooting Guide
The 35mm focal length is not the typical portrait focal length recommendation — that’s usually the 85mm — but it produces portraits that look nothing like anything you’d get from a longer lens. Slightly wider, more environmental, more intimate when used close up. Understanding when and how to use a 35mm for portraits will expand your range as a shooter without adding complexity.
shutyouraperture-20). Buying through these links costs you nothing extra and helps fund our free guides.
 Save
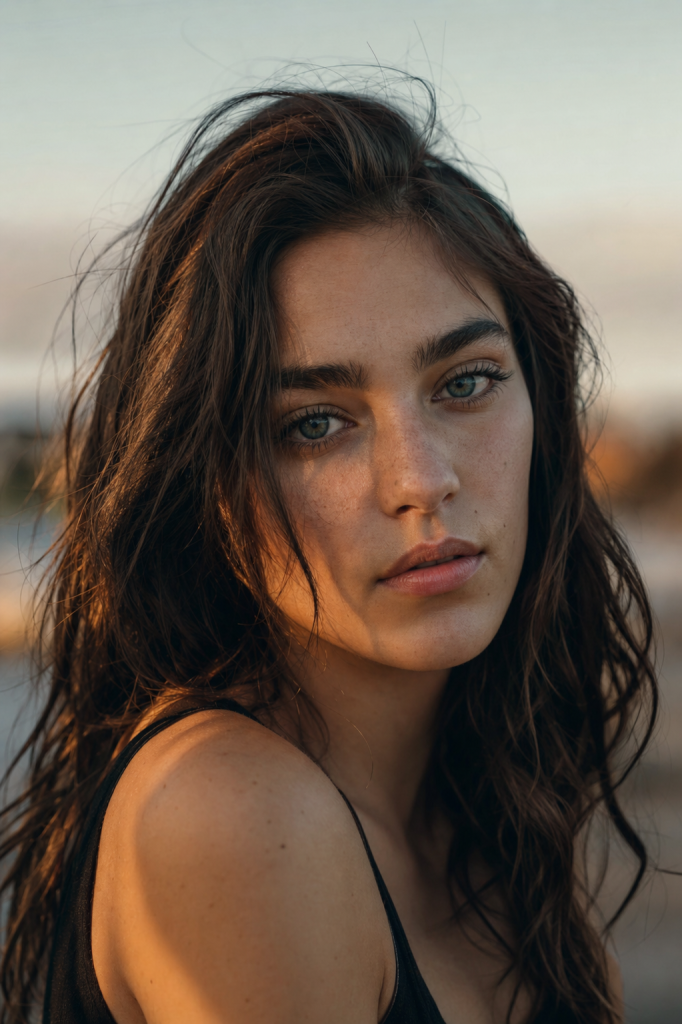
SaveWhat a 35mm Lens Does to a Portrait
Focal length changes two things in a portrait: perspective and depth of field. On a full-frame camera, 35mm is moderately wide — similar to how a wide human field of view sees a scene. On an APS-C crop body, 35mm becomes approximately 52mm equivalent, which is closer to a “normal” lens.
The perspective effect is where 35mm portraits differ from longer focal lengths. To fill the frame with a head-and-shoulders composition at 35mm, you need to get close — typically 2.5 to 4 feet from your subject. At that distance, the relative distance difference between elements that are near and far to the camera becomes more pronounced. The nose reads as slightly larger relative to the ears; the background has more apparent space between elements. This is mild — it’s not the extreme distortion you’d get from a 16mm fisheye — but it reads as a distinct look.
At the same time, the wider field of view means you capture more environment. Even in a tight head-and-shoulders shot, the background fills the edges of the frame differently than it would on an 85mm, giving you a sense of place that longer lenses compress away.
This is why 35mm portraits tend to read as more documentary or editorial — they include the world around the subject rather than isolating against a soft background.
For a complete overview of how focal length affects portrait work across the range, the portrait photography guide is the right starting point.
When to Reach for a 35mm Over a Longer Lens
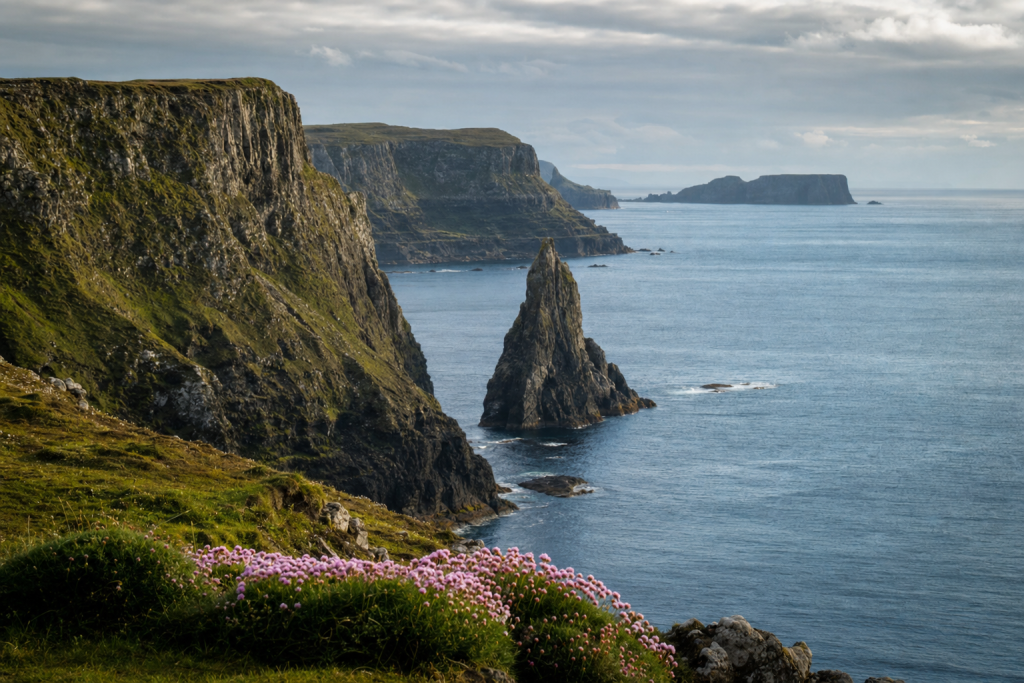
Environmental portraits. You want the subject sharp and recognizable, but the location — a workshop, a kitchen, a cityscape — is essential to the story. On an 85mm you’d have to stand back far enough that either the subject gets small or the environment disappears. A 35mm at 6–8 feet from your subject frames both.
Tight spaces. Shooting in a small studio, apartment, or office corridor, you simply don’t have 10–15 feet of working distance that an 85mm requires. A 35mm lets you work at half that distance.
Street portraits. Approaching a stranger and asking to photograph them works better at a distance that feels conversational — 3 to 5 feet. A 35mm works perfectly at that distance. An 85mm at that range would fill the frame with a single eye.
Couple and lifestyle work. Two people together in a frame benefit from a slightly wider perspective that shows their interaction without requiring you to be so far back that you lose connection.
Documentary and photojournalism. The 35mm is the classic photojournalist lens for good reason — it lets you be close to the action while capturing context.
When you don’t reach for it: pure headshots and beauty work where the goal is facial detail with maximum background compression. In those cases, 85mm portrait photography is the standard choice.
Practical 35mm Portrait Settings
| Situation | Aperture | Shutter Speed | ISO | Notes |
|---|---|---|---|---|
| Outdoor environmental portrait | f/2.0 | 1/640s | 100 | Moderate separation, context visible |
| Indoor natural light | f/1.8 | 1/200s | 800 | Shoot near a window |
| Studio with strobe | f/4.0 | 1/200s (sync) | 100 | More of scene in focus than 85mm setup |
| Street portrait, daylight | f/2.8 | 1/500s | 400 | Slightly stopped down for sharpness margin |
| Couple at reception, dim light | f/2.0 | 1/160s | 3200 | Keep both faces sharp, use eye-AF |
| Documentary/editorial (daylight) | f/4.0–5.6 | 1/500s | 200 | More depth, sharper edges throughout |
One important setting consideration: at f/1.4 or f/1.8 at close range on a 35mm, the depth of field is thin enough that focus precision matters. If you’re at 3 feet from your subject at f/1.8, your depth of field is roughly 2–3 inches. Focus on the near eye precisely — don’t let the camera guess between the eyes and the nose.
The Look: What You Get and What You Sacrifice
You get: environmental context, an intimate feeling when shooting close, a perspective that works in tight spaces, and images that read as less formally “portrait-y.”
You give up: background compression. A 35mm at f/1.8 at 3 feet produces noticeably less background blur than an 85mm at f/1.8 at 8 feet, because the subject-to-background distance ratio is different. If you’re expecting creamy bokeh behind your subject, 35mm will often disappoint compared to longer lenses. This is a physics issue, not a lens quality issue.
You also give up the flattering compression that longer focal lengths provide. The 35mm’s mild wide-angle perspective slightly exaggerates facial proportions when used at close range — it’s subtle, but some subjects notice it or prefer the “tighter” look of an 85mm rendering.
For a direct comparison of how focal length affects both look and working distance, 85mm vs 50mm portrait photography gives you a clear breakdown of both options, which also helps contextualize where 35mm sits in relation to them.
 Save
SavePractical Differences from 50mm
The question of 35mm vs. 50mm for portraits comes up often. Here’s the practical difference:
A 50mm lens for portraits gives you a slightly narrower view that’s often described as closest to natural human vision. At comparable distances, 50mm portraits have less perspective exaggeration than 35mm and more background compression. The 50mm is the more “neutral” choice for portraits — it neither adds the environmental context of 35mm nor the background compression of an 85mm.
If you’re choosing one lens for mixed work that includes portraits, the 50mm is usually the safer all-rounder. If you’re choosing a second lens to complement an 85mm, a 35mm gives you the environmental and documentary capability that the 85mm lacks.
Getting Better Results with 35mm Portraits Right Now
Three adjustments that improve 35mm portrait results immediately:
1. Use distance deliberately. At 3 feet, you’re in documentary mode. At 5–6 feet, you get a more traditional head-and-shoulders framing. At 8 feet, you’re doing a half or full-length shot that benefits from the environmental context. Choose your distance based on the story, not just the composition.
2. Watch the edges. A 35mm wide enough to include background elements at the frame edges. Those edges matter compositionally. Don’t let a distracting lamp or doorframe appear at the edge of the frame — reposition slightly or adjust your angle.
3. Open up the aperture for close portraits, stop down for environmental. At 3 feet from a face at f/1.8, you’re getting subject separation. At 8 feet with a background you want to include, f/4 or f/5.6 keeps more of the scene sharp and readable.
The 35mm Portrait in Practice
The 35mm portrait lens rewards intentionality. It’s not the easiest focal length for classic portraiture, and it won’t produce the background blur that an 85mm does. But it produces images that feel present in the world — images where the person exists somewhere, not just in front of a tasteful blur. Some of the most compelling portrait work in the last 50 years has been shot on 35mm for exactly this reason.
Know your genre, understand the trade-offs, and use 35mm when environment and intimacy serve the image more than background compression does.
For everything you need to know about lens choice, distance, aperture, and light for portraiture, the complete portrait photography guide covers all of it.
Related Reading – Portrait Photography: The Complete Guide – 50mm Portrait Photography – 85mm Portrait Photography – 85mm vs 50mm Portrait: Which to Choose?
 Save
SaveTake Your Skills Further — Shut Your Aperture School
Learn portrait lighting, posing, and editing from scratch inside Shut Your Aperture School — $29/mo, cancel anytime at https://learn.shutyouraperture.com/
Explore Shut Your Aperture School →Finish your portrait edits in seconds with our skin-tone-friendly Lightroom presets at https://shutyouraperture.com/shop/
Browse Lightroom Presets →All links go to B&H Photo Video, the trusted pro source. Tagged as affiliate per FTC.
Skylum’s Aperty is purpose-built for portrait retouching with AI skin, eye and detail enhancement. Luminar Neo’s Portrait AI complements it for full-body and editorial work. Tagged as affiliate per FTC.
Related deep dive: artistic nude photography techniques.
Related deep dive: how to avoid the unnatural look in AI portrait retouching.
Amazon search shortcuts for the lens categories discussed above. Same lenses, often eligible for Prime. As an Amazon Associate ShutYourAperture earns from qualifying purchases.