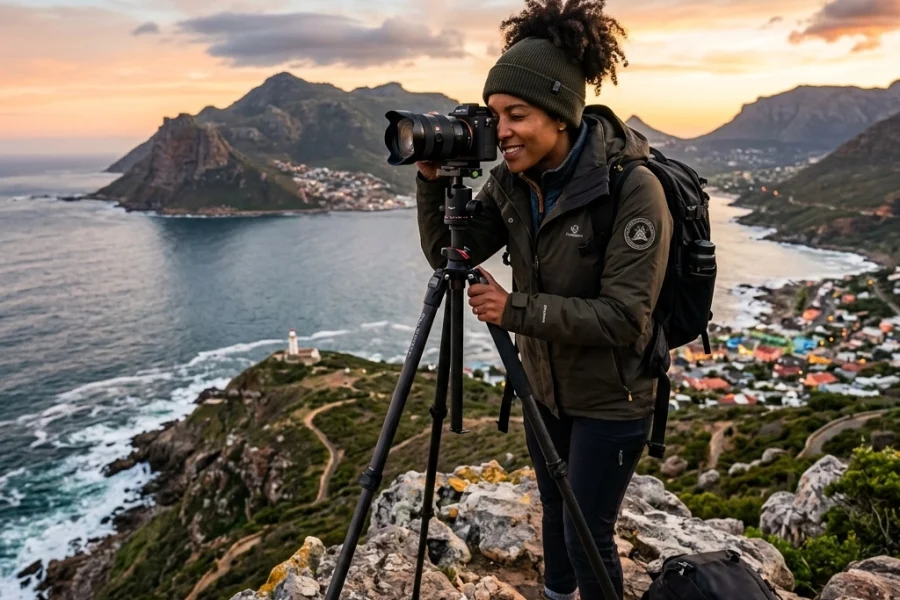
Taking a photo of a person should be easy, right? You point the camera, they smile, and you click. But then you look at the screen and realize the background is a mess, their skin looks like plastic, or, worst of all, the eyes are out of focus. We’ve all been there.
Portrait photography is one of those things that’s easy to learn but takes a lifetime to master. Whether you are shooting with a smartphone or the best mirrorless cameras for your 2026 kit, the goal is the same: you want to capture a person’s essence, not just their face.
At Shut Your Aperture, we believe in keeping things simple. You don't need a degree in physics to understand light, and you don't need to be a psychologist to get a great expression out of someone. You just need a few solid techniques in your pocket.
Here are 20 pro tips to take your portraits from "okay" to "whoa."
1. Choose the Right Focal Length
The lens you choose changes everything. If you use a wide-angle lens (like a 24mm) and get close to someone's face, their nose will look huge and their ears will disappear. Not exactly a flattering look.
For portraits, longer focal lengths are your best friend. An 85mm or a 105mm lens is often considered the "sweet spot" because it compresses facial features in a way that looks natural and attractive. If you’re just starting, a 50mm "nifty fifty" is a great, affordable place to begin. If you want more gear advice, check out our guide on how to choose the best mirrorless camera in 2026.
2. Focus on the Eyes
If the eyes aren't sharp, the photo is a bin-job. It’s that simple. Humans are hardwired to look at eyes first. If the tip of the nose is sharp but the eyes are soft, the viewer’s brain will feel like something is wrong.
Most modern cameras have "Eye Autofocus." Turn it on. It’s like magic. If you’re shooting manually, always aim your focus point at the eye closest to the camera.
3. Master the Shallow Depth of Field
You know those photos where the person is crisp but the background is a beautiful, blurry mess? That’s "bokeh." You get this by using a wide aperture (a low f-number like f/1.8 or f/2.8).
Blurring the background helps the subject pop. It removes distractions. If you're struggling with this, you might need to brush up on manual mode basics to understand how aperture works.

4. Get Out of Auto Mode
If you leave your camera on the "Green" auto mode, it's going to make decisions for you. Usually, those decisions involve firing a nasty pop-up flash or choosing a weird focus point.
To take professional portraits, you need control. Start with Aperture Priority (A or Av) or, better yet, go full manual. If you’re nervous about it, we’ve got a guide on how to use manual mode without getting overwhelmed.
5. Use Natural, Diffused Light
Harsh sunlight is the enemy of a good portrait. It creates deep shadows under the eyes (raccoon eyes) and makes people squint.
Instead, look for "open shade", the area just inside the shadow of a building or under a tree. You still get plenty of light, but it’s soft and even. Overcast days are actually a portrait photographer’s dream because the clouds act like one giant softbox. For more on this, read our beginner's guide to mastering natural light.
6. Mind the Background
A great portrait can be ruined by a tree branch looking like it’s growing out of your subject’s head. Before you click the shutter, do a quick scan of the edges of the frame.
Is there a trash can in the corner? Is there a bright red car distracting the eye? Move yourself or move your subject. A simple background is usually a better background.
7. Build Rapport with Your Subject
This is probably the most important "non-technical" tip. If your subject is uncomfortable, it will show in their face. Their shoulders will be tight, and their smile will look forced.
Talk to them. Tell a joke. Ask them about their day. When people feel like they are just hanging out with a friend who happens to have a camera, the photos become infinitely better. This is especially true for professional corporate headshots, where people are usually extra nervous.
8. Catch the "Catchlights"
Catchlights are those tiny reflections of light in a person’s eyes. They make the eyes look "alive." Without them, eyes can look flat and dead.
To get them, make sure there is a light source in front of the subject. It could be the sky, a window, or a reflector. Even a tiny bit of light makes a massive difference.

9. Use a Reflector
You don't need expensive studio lights to fill in shadows. A simple, cheap 5-in-1 reflector can bounce natural light back onto your subject’s face.
If you’re on a budget, even a white piece of foam board from an art store works. Hold it below the subject’s face to bounce light upward and fill in chin and neck shadows. It’s a game-changer for skin tones.
10. Change Your Angle
Most people shoot portraits from their own standing height. This is boring because it's how we see the world every day.
Try getting low and shooting slightly upward to make the subject look more powerful. Or, stand on a stool and shoot downward for a more intimate, flattering look (this also helps slim the face and emphasize the eyes). Don't be afraid to move around.
11. The "Shoulder Turn" Trick
Shooting someone straight-on (shoulders square to the camera) can make them look wider than they are. It can also feel a bit like a mugshot.
Ask your subject to turn their body about 45 degrees away from the camera and then look back at you. This creates a more dynamic, slimming silhouette and adds depth to the image.
12. Use the Rule of Thirds (and then break it)
Don't always stick the person's nose right in the center of the frame. Use the rule of thirds: place their eyes or their body along the vertical grid lines.
Giving the subject "lead room", empty space in the direction they are looking, makes the composition feel much more natural. Once you master this, feel free to break the rule for a more avant-garde look.
13. Frame Your Subject
Use the environment to create a "frame within a frame." This could be an archway, some overhanging tree branches, or even a doorway. Framing helps lead the viewer's eye directly to the subject and adds a sense of layers and depth to the photo.

14. Watch the Clothing and Colors
You want the focus to be on the person’s face, not their loud Hawaiian shirt. Suggest that your subjects wear solid colors or subtle patterns.
Coordinate the outfit with the location. If you’re shooting in a lush green park, a red dress will provide a beautiful contrast. If you’re in an urban setting, neutral tones often work best.
15. Capture Candid Moments
Some of the best portraits happen when the subject thinks you aren't looking. After you take a "posed" shot, keep your camera up.
When they laugh or look away to adjust their hair, that’s often when the real personality comes out. These "in-between" moments are pure gold. If you want to learn more about the art of the shot, check out Photography 101.
16. Shoot in RAW
If you’re still shooting in JPEG, you’re throwing away half your data. Shooting in RAW allows you to recover shadows and highlights that would otherwise be lost.
It gives you the freedom to fix white balance issues and fine-tune skin tones during the editing process without losing quality. It’s a safety net every pro uses.
17. Don't Over-Process the Skin
We’ve all seen those portraits where the person’s skin looks like a Barbie doll. It’s creepy.
When editing, the goal should be to enhance, not erase. Remove temporary blemishes (like a stray pimple), but leave the character lines and freckles. Using AI-powered tools like Luminar can make this process way faster and more natural-looking. Just remember: less is usually more.
18. Experiment with Props
Props shouldn't be a distraction, but they can give the subject something to do with their hands.
A hat, a pair of glasses, a musical instrument, or even a cup of coffee can add a layer of story to the portrait. It makes the photo feel less like a "session" and more like a moment in a person's life.

19. Use Burst Mode for Expressions
Micro-expressions happen in a fraction of a second. A person might have a great smile, but their eyes might be half-closed in one frame.
By shooting in a short burst, you give yourself 3 or 4 options for every pose. You’re much more likely to catch that perfect "sparkle" in the eye.
20. Learn from the Mistakes
You're going to take some bad photos. It’s part of the process. Maybe the lighting was too flat, or you accidentally cut off someone's feet (don't do that, by the way, always crop at joints, not between them).
Take a look at your bad shots and figure out why they didn't work. Was it the gear? The settings? The interaction? For a head start on what to avoid, read about 7 mistakes you’re making with your corporate headshot.
Refinement and Post-Processing
Once you’ve nailed the shot in-camera, the final 10% happens in the edit. This is where you can really define your style.
Modern AI tech is changing the game here. Whether it's swapping a boring sky or using AI to subtly enhance facial features, the tools available in 2026 are incredible. Many photographers are using Luminar to handle the heavy lifting of retouching, which saves hours behind the screen. If you're curious about how this tech is evolving, you should see why everyone is talking about AI-powered mirrorless tech.
Practice Makes… Well, Better
You don't need a professional model to practice these tips. Grab a friend, a family member, or even use a mirror for some self-portraits. The more you shoot, the more these 20 techniques will become second nature.
Portrait photography is about connection. All the technical settings in the world won't save a photo if there's no soul in it. So, keep your settings simple, keep your subject comfortable, and don't be afraid to experiment.
For more deep dives into photography techniques, check out PhotoGuides.org or see some of Edin’s latest work over at blog.edinchavez.com and his fine art collection at www.edinfineart.com.
Now, go out there, grab your camera, and shut your aperture!