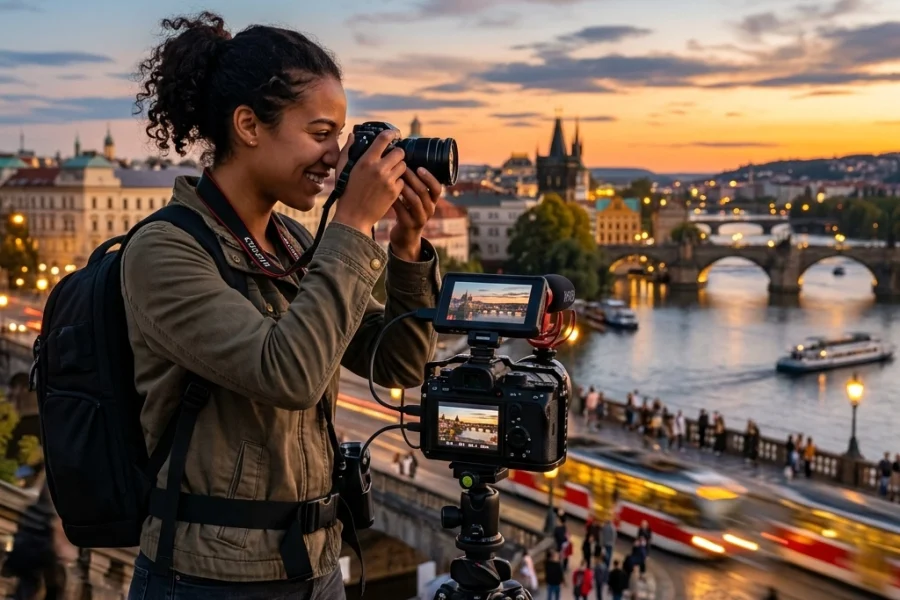
Let’s be honest for a second. You bought that shiny new camera: maybe it’s a Canon EOS R5 or a Sony A7R V: because you wanted to take professional-grade photos. You wanted that blurry background, that crisp movement, and those colors that pop. But then you looked at the top dial, saw the "M," and felt a cold sweat break out.
So, you switched it back to "Auto" and told yourself you’d learn Manual Mode "eventually."
The truth is, most photography tutorials suck. They’re either too technical, buried in 40-minute monologues about sensor physics, or they’re so oversimplified that you don't actually learn how to solve problems when the lighting changes. If you want to stop guessing and start creating, you need a specific type of guidance.
After years of shooting and teaching, I’ve found that the fastest way to master your camera isn’t by reading the manual (seriously, put it away). It’s by following specific styles of tutorials that bridge the gap between "I think I get it" and "I can do this in the dark."
Here is why these five types of photography tutorials actually work and how they will shave months off your learning curve.
1. The "Reverse Engineering" Tutorials
The biggest mistake beginners make is trying to learn settings in a vacuum. You learn what aperture is, but you don’t know why you’d use it at 4:00 PM in a forest.
The tutorials that actually work are the ones that start with a finished image and work backward. This is the "Result-First" method. Instead of saying "Aperture controls light," these tutorials say, "To get this exact creamy background in this portrait, here is where the dial was, and here is why."
When you see the direct correlation between a setting and a visual result, your brain clicks. It stops being math and starts being art. If you're looking to dive deeper into specific genres, checking out The Ultimate Guide to Landscape Photography is a great place to see how settings translate to epic vistas.

2. The Exposure Triangle "Three-Pillar" Framework
You’ve heard of the exposure triangle: Aperture, Shutter Speed, and ISO. Most tutorials treat them like three separate subjects. The ones that work treat them like a seesaw.
If you change one, the others must move. This is the fundamental "Fastest Way" to manual mode.
Why this approach works:
- Aperture (The Eye): It’s not just about light; it’s about depth.
- Shutter Speed (The Heartbeat): It’s not just about light; it’s about motion.
- ISO (The Sensitivity): It’s the "last resort" that makes the sensor more sensitive to what’s coming in.
The tutorials that stick are the ones that give you a hierarchy. For example, if you’re shooting landscapes, you usually set your Aperture first for sharpness. If you’re shooting sports, you set Shutter Speed first. Knowing which pillar to "lock-in" first is the secret sauce. For more on this, you can check out specialized training at learn.shutyouraperture.com.
3. The "Hands-On" Incremental Tutorials
Passive learning is the enemy of photography. You can watch 100 hours of YouTube and still be a "Green Box" shooter. The tutorials that work are the ones that give you "homework."
I call these "The 10-Minute Drills." A good tutorial will tell you: "Go into your living room, set your ISO to 400, and try to take three different exposures by only changing your shutter speed."
This builds muscle memory. You need to be able to find those dials without looking. If you’re staring at your camera buttons, you’re missing the shot. We talk about this a lot over at PhotoGuides.org, where the focus is on practical, real-world application rather than just theory.

4. The "Mistake-Based" Learning Guides
We learn more from a ruined photo than a perfect one. The best tutorials don’t just show you how to do it right; they show you how it looks when you do it wrong.
Why is my photo blurry? Why is it grainy? Why is it completely white?
When a tutorial shows you a "blown-out" sky and explains that your shutter speed was too slow, you recognize that mistake the next time you’re in the field. This is especially true when dealing with tricky lighting. For instance, if you're struggling with sunset shots, seeing 7 mistakes you’re making with golden hour landscapes can be more helpful than any "how-to" guide.
5. The Post-Processing Integration Tutorials
Manual mode doesn’t end when you click the shutter. The best tutorials teach you that Manual Mode is about capturing the most data, not necessarily the "perfect" looking image on the back of the LCD.
When you shoot in Manual and use RAW files, you’re giving yourself the most flexibility for editing. Tutorials that show the "Before and After" between a RAW manual exposure and a finished edit in Luminar are eye-opening. You realize that you don’t need to get the colors perfect in-camera; you need to get the exposure perfect so you have the dynamic range to play with later.
Learning how to choose the best photo editing tutorials for your skill level is a massive part of this journey.
Breaking Down the "M" Dial: A Simple Strategy
If you want the fastest route, stop trying to master everything at once. Use this "Staircase Method" derived from the most effective tutorials:
Phase 1: Aperture Priority (Av or A)
Wait, isn't this a Manual Mode post? Yes. But the fastest way to get to Manual is to master one variable at a time. Spend a week in Aperture Priority. You control the Aperture (the f-stop), and the camera handles the rest. Learn how f/2.8 looks compared to f/11.
Phase 2: Shutter Priority (Tv or S)
The next week, switch to Shutter Priority. Control the motion. Learn that 1/1000 freezes a bird in flight, while 1/10 makes water look like silk.
Phase 3: The Full Manual Leap
By the time you get to Phase 3, you already know what the Aperture does and what the Shutter Speed does. Now, you’re just the one balancing them.

Why Most Beginners Give Up (And How to Avoid It)
People give up because they get one "black photo" or one "white photo" and think they’re broken. They aren't. Your camera is just a tool, and tools require calibration.
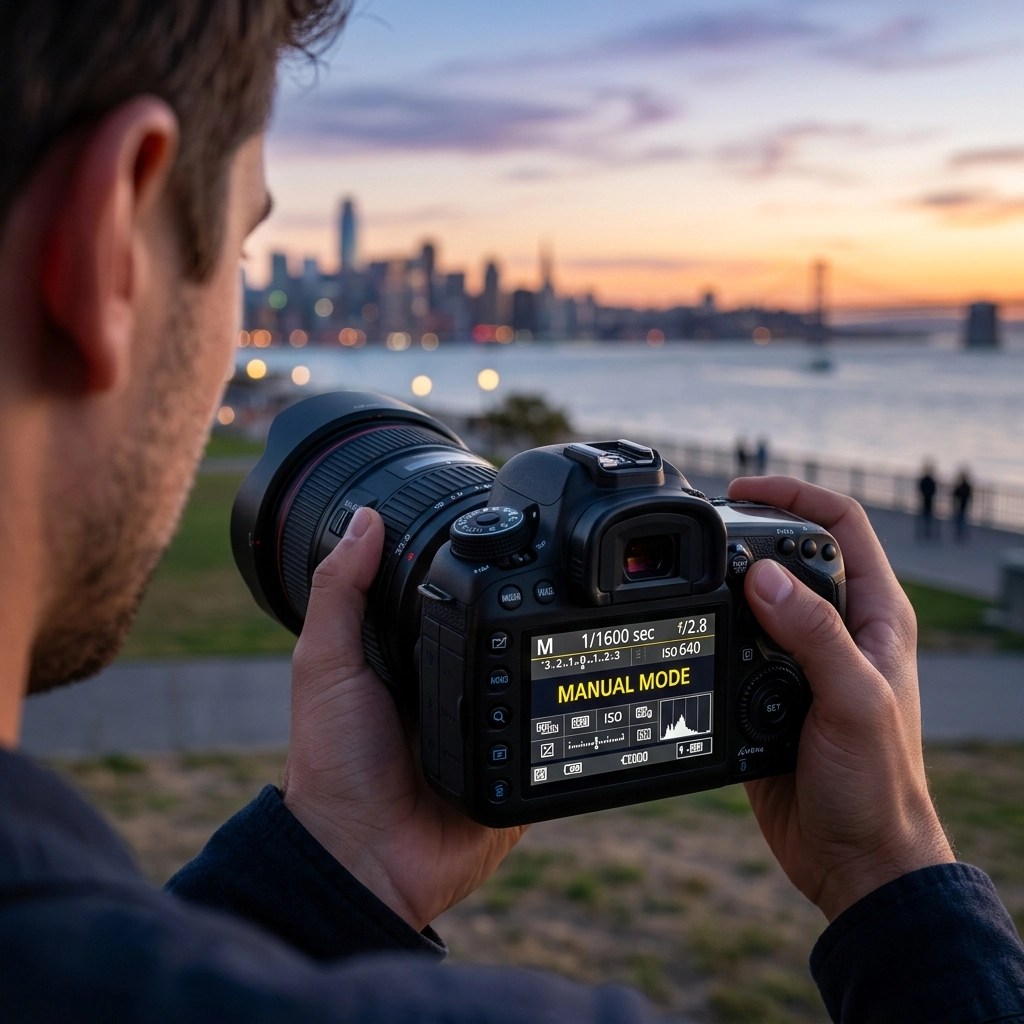
The tutorials that actually work emphasize the Light Meter. That little bar at the bottom of your viewfinder? That’s your best friend. It’s telling you exactly what the camera thinks about your settings. If the little tick-mark is in the middle, you’re "correct" (according to the camera). If it’s to the left, you’re underexposed.
Mastering the light meter is the "cheat code" to Manual Mode. Once you understand that, you can start intentionally breaking the rules: like underexposing a bit to keep the detail in a bright sky, a common technique in landscape composition.
The Role of Modern Gear in 2026
We live in an era where AI photo editing tools can save a lot of mistakes, but they can't fix a fundamentally bad capture. Whether you're reading the latest photography news or looking at high-end gear reviews on blog.edinchavez.com, the consensus is the same: The photographer's intent is the only thing that hasn't been automated yet.
Manual mode is how you communicate that intent to the machine.

Practical Tips to Get Better Today
If you want to see immediate improvement, do these three things:
- Turn off Auto-ISO: It’s a crutch. Set it to 100 or 400 and leave it there while you figure out the other two.
- Shoot in the same light: Don’t try to learn Manual Mode during a changing sunset. Go out at 10:00 AM on a cloudy day when the light is consistent. It removes a variable.
- Use a tripod: This allows you to slow down. Manual Mode is a slow process at first. Speed comes with time.
The Philosophy of the "Perfect" Tutorial
The five tutorials mentioned: Reverse Engineering, Three-Pillar, Hands-On, Mistake-Based, and Post-Processing: all share one thing in common: They treat you like a creator, not a technician.
Photography is about a feeling. You want the viewer to feel the cold of the snow or the heat of the sun. You can't do that if you're letting a computer decide how bright the image should be.
If you're ready to stop being an "Auto" shooter, head over to learn.shutyouraperture.com. We don't do boring. We do effective. We also keep you updated with daily photography news so you’re always in the loop with how the industry is moving.

Final Thoughts
Manual mode isn't about being a "purist." It's about being in control. When you understand why these 5 types of tutorials work, you stop looking for a "magic setting" and start looking for the light.
You’ve got the gear. You’ve got the vision. Now, go take that dial and click it over to "M." Your best photos are waiting on the other side of that button.
And remember, if you make a mess of it, there's always Luminar to help bring that vision back to life. But try to get it right in the camera first: it feels a whole lot better. For more inspiration, check out the fine art work at EdinFineArt.com to see what's possible when you truly master your craft.