Let’s be real for a second. It’s 2026, and your smartphone probably has more processing power than the computer that sent humans to the moon. We have AI-driven autofocus that can track a bird's eye through a forest and computational photography that makes a midnight shot look like noon. So, why on earth would you want to switch your expensive mirrorless camera over to that intimidating "M" on the dial?
Because you’re a creator, not just a button-pusher.
Manual mode is where the "magic" happens. It’s the difference between the camera guessing what you want and you telling the camera exactly what to do. If you’ve ever looked at the stunning work over at Edin Fine Art and wondered how those colors and textures feel so intentional, it’s because the photographer took the reins.
In this guide, we are going to strip away the jargon and get down to the brass tacks of how to master manual mode this year. No gatekeeping, no fluff: just the stuff you need to know to stop being afraid of your settings.
The Soul of the Camera: The Exposure Triangle
You’ve probably heard of the Exposure Triangle. If you haven't, think of it as a three-legged stool. If one leg is too short, the whole thing falls over. Exposure is just a fancy word for how much light hits your camera sensor. To get a "perfect" exposure, you have to balance three things: Aperture, Shutter Speed, and ISO.
1. Aperture (The "Eye")
Aperture is the opening in your lens. Think of it like the pupil of your eye. When it’s dark, your pupil gets big to let in more light. When it’s bright, it shrinks.
In photography, we measure this in f-stops (like f/1.8, f/4, or f/16). Here is the confusing part: a small number (f/1.8) means a huge opening. A big number (f/16) means a tiny opening.
- Wide Aperture (f/1.8 – f/2.8): Lets in tons of light. This creates that "blurry background" (bokeh) look we all love for portraits or professional corporate headshots.
- Narrow Aperture (f/11 – f/16): Lets in very little light. This keeps everything from the foreground to the background in sharp focus. This is your go-to for landscapes.

2. Shutter Speed (The "Time")
Shutter speed is how long the "curtain" stays open to let light hit the sensor.
- Fast Shutter Speed (1/1000s or faster): Freezes motion. If you’re shooting sports or a dog running, you need this.
- Slow Shutter Speed (1/30s or slower): Blurs motion. This is how people get those silky-looking waterfalls or light trails at night.
If you’re hand-holding your camera, be careful. If your shutter speed is too slow, the tiny shakes of your hands will make the whole image blurry. A good rule of thumb is to never go slower than 1/60s unless you’re on a tripod.
3. ISO (The "Sensitivity")
ISO used to be about the film you bought. Now, it’s a digital gain. It tells your sensor how hard it needs to work to "see" the light.
- Low ISO (100 – 400): Use this when you have plenty of light (sunlight). It gives you the cleanest, sharpest images.
- High ISO (3200+): Use this when it’s dark. It lets you take photos in low light, but the trade-off is "noise" or grain.
In 2026, cameras are incredible at handling high ISO. If you’re shooting with something like a Nikon Z8, you can push the ISO way higher than we could five years ago without ruining the shot. If you're curious about how to dial that in, check out our guide on Nikon Z8 settings for street photography.
Why Manual Mode is Better in 2026
Back in the day, shooting manual was a guessing game. You’d take a photo, look at the back of the screen, realize it was black, and try again.
Today, we have Electronic Viewfinders (EVF). When you turn a dial in manual mode, you see the image getting brighter or darker in real-time before you even click the shutter. It’s like having a cheat code. This real-time feedback is the ultimate way to learn. You can see exactly how prime lenses affect your depth of field just by glancing through the glass.

The Step-By-Step Workflow to Shooting Manual
Ready to try it? Grab your camera, set that dial to M, and follow these steps.
Step 1: Set Your ISO First
Unless you are in a weird lighting situation, start by setting your ISO to its base (usually 100 or 200). You want the highest quality possible. Only raise this if you can't get enough light using the other two settings.
Step 2: Choose Your Aperture Based on Your Goal
What are you shooting?
- If it’s a person and you want that creamy background, set it to the lowest number your lens allows (f/1.8 or f/2.8).
- If it’s a mountain range, set it to f/8 or f/11. If you're using a Fujifilm camera, you might want to look at specific Fujifilm X100VI settings for landscape photography to maximize that sensor.
Step 3: Adjust Your Shutter Speed
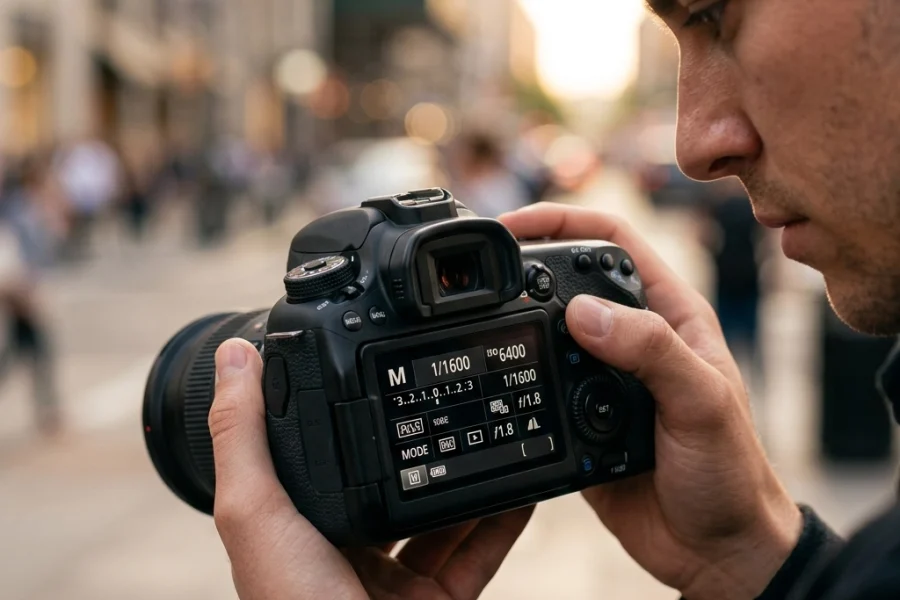
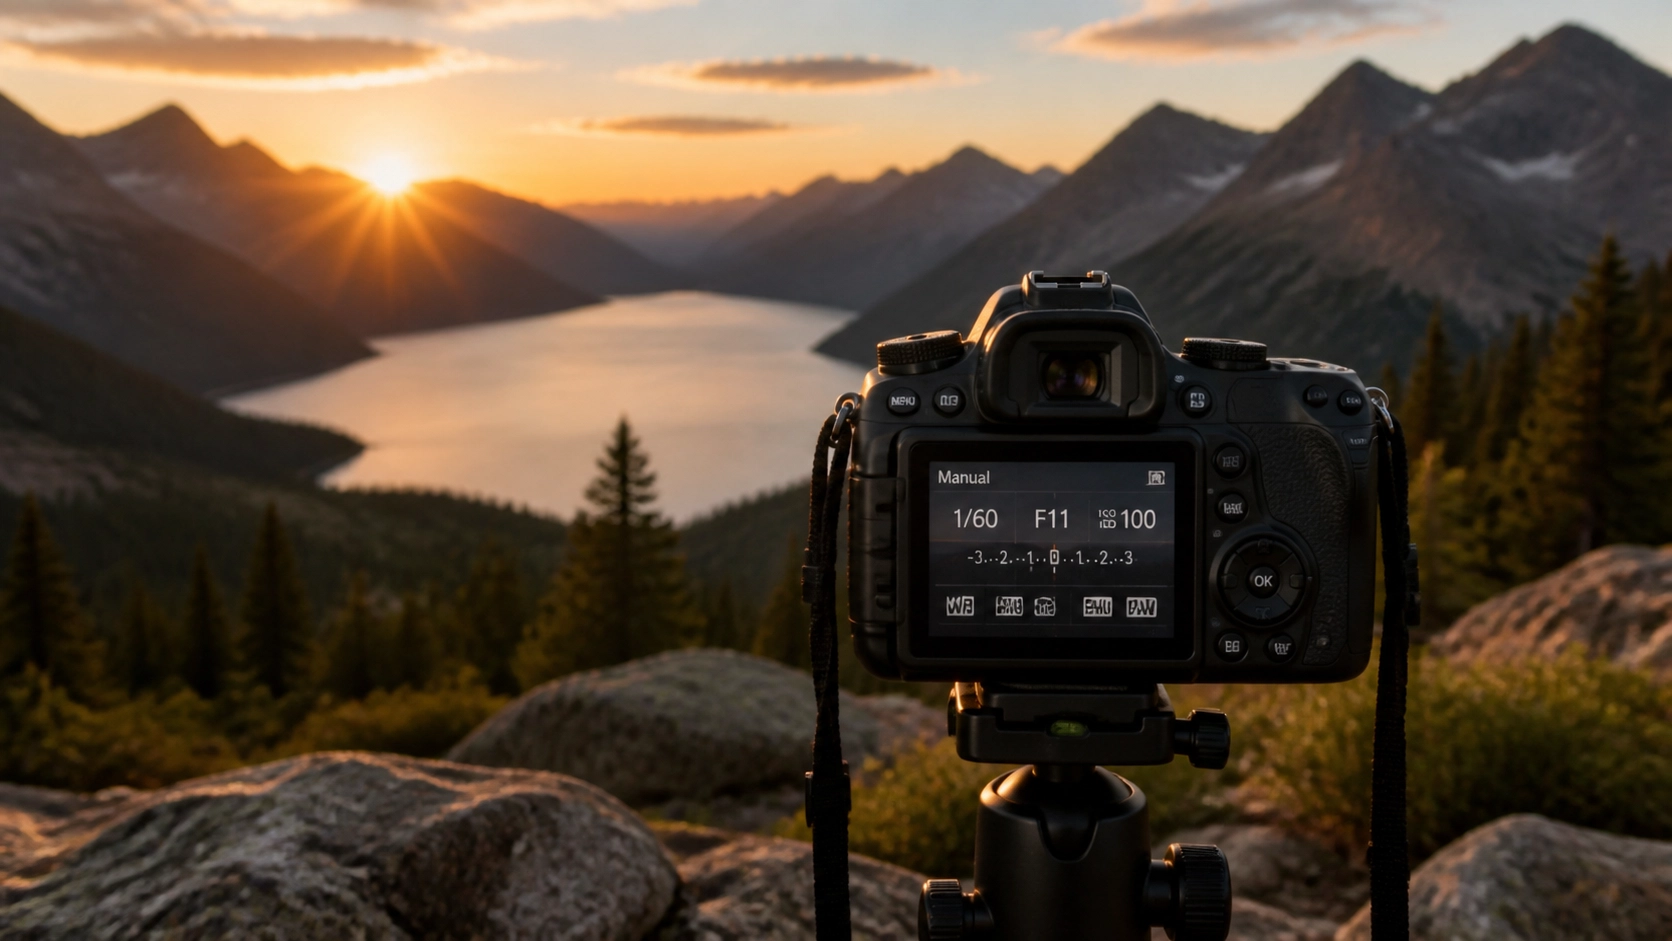
Look through your viewfinder. You’ll see a little scale with a "0" in the middle. This is your light meter.
- If the "tick" is to the left (-), your photo is too dark. Slow down your shutter speed.
- If the "tick" is to the right (+), your photo is too bright. Speed up your shutter speed.
- Aim for the middle.
Step 4: Take the Shot and Evaluate
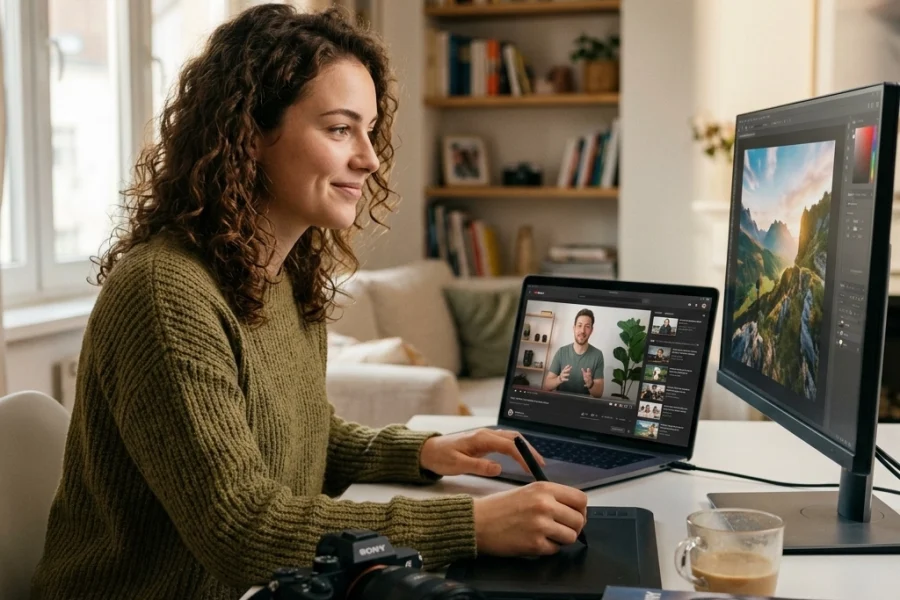
Click. Now, look at the screen. Is it what you wanted? If it’s too dark, don't panic. This is where modern editing comes in. Using software like Luminar allows you to recover shadows and highlights that you might have missed in the moment. Manual mode gives you the "raw" data you need to make those edits look professional.
Mastering the "Light Meter"
The light meter is your best friend, but it can be a bit of a liar. It tries to make everything "middle gray." If you’re shooting a snowy landscape, the camera will think it’s too bright and try to turn the white snow into gray mush.
This is where you have to be smarter than the machine. If you’re at PhotoGuides.org, you’ll see plenty of tutorials on exposure compensation, but the short version is: trust your eyes in the EVF more than the little needle on the meter.

When Should You NOT Use Manual Mode?
I know, I know. I just told you to master it. But even the pros don't use it 100% of the time.
If you are at a wedding and the bride is walking from a dark church into the bright sun, you don't have time to faff with dials. In those cases, use Aperture Priority (A or Av). You pick the aperture, and the camera handles the rest.
But for everything else: landscapes, portraits, studio work, or learning the latest industry news through practice: Manual is king. It forces you to slow down. It forces you to think about the light.
The Secret Ingredient: Shooting in RAW
If you’re going to shoot manual, you must shoot in RAW.
JPEGs are like a finished meal: you can’t take the salt out once it’s cooked. A RAW file is like the ingredients. If you messed up your exposure slightly in manual mode, a RAW file has enough data to let you fix it in Luminar without the image falling apart.
If you're looking for more hands-on training, we have a whole vault of knowledge over at the Shut Your Aperture Online School. It’s designed to take you from "I don't know what this button does" to "I just sold my first print."

Common Mistakes Beginners Make (And How to Avoid Them)
- Ignoring the Histogram: Don't just trust the screen on the back of your camera; it can be misleading depending on how bright your screen brightness is set. Learn to read the histogram. If the "mountain" is touching the right side, you're losing detail in the highlights.
- Forgetting to Reset Settings: You were shooting at night at ISO 6400. The next morning, you go outside in the sun and start shooting. Your photos will be pure white. Get into the habit of resetting your camera to "base" settings (ISO 100, f/5.6, 1/125s) before you put it away.
- Being Afraid of "Noise": Don't be so afraid of grain that you end up with a blurry photo because your shutter speed was too slow. A grainy photo is "artistic." A blurry photo is usually just a mistake.
Putting it All Together
Manual mode isn't about being a "purist." It’s about having the tools to translate what you see in your head onto the sensor. Whether you’re following The Ultimate Guide to Photography Tutorials or just out for a walk in your neighborhood, every time you take control of your settings, you are becoming a better photographer.
The tech in 2026 is going to keep getting crazier. Cameras will get faster, sensors will get better, and AI will do more of the heavy lifting. But the fundamentals of light: Aperture, Shutter Speed, and ISO: haven't changed since the 1800s. Master those, and you can pick up any camera, from any era, and create something beautiful.
If you want to keep diving deep into the world of photography, check out more tips and stories on Edin Chavez’s personal blog.
Now, quit reading this and go shoot something. Turn that dial to M, find some interesting light, and see what happens. You might just surprise yourself.
For more structured learning and deep dives into every setting mentioned here, don't forget to visit Shut Your Aperture University. We’ve got the roadmap to help you master your gear, no matter what you’re shooting.