So, you finally worked up the nerve to click that dial over to the dreaded "M." You’ve watched the YouTube videos, you’ve read the manuals, and you’re ready to take full creative control. But then you get home, load your photos onto the computer, and… they’re a mess. Some are blurry, some are grainy, and some look like they were taken in a coal mine.
Switching to Manual Mode is like learning to drive a stick shift. At first, you’re stalling out at every green light, and the engine is making noises you’ve never heard before. But once you get the hang of it, you’ll never want to go back to "Auto." The problem is that most beginners (and even some seasoned pros) fall into the same traps when they start tweaking their own settings.
If you’re struggling to get the results you want, don't sweat it. Most of the time, the fix is simpler than you think. Here are the seven most common mistakes people make with manual mode camera settings in 2026 and, more importantly, how to fix them so you can start shooting like a pro.
1. Blindly Trusting the Camera’s Meter
This is the number one mistake I see. You look through the viewfinder, see that little line sitting right at "0," and think, "Perfect, the exposure is spot on."
Here’s the cold, hard truth: your camera is kind of an idiot. It’s a very sophisticated machine, but it doesn’t actually know what you’re looking at. It’s programmed to think that the entire world should be a neutral, middle gray (often called 18% gray).
If you’re shooting a bride in a white dress against a white wall, your camera is going to see all that brightness and panic. It thinks, "Whoa, way too bright! I need to darken this down to gray." The result? A muddy, gray wedding dress. Conversely, if you’re shooting a black dog on a dark rug, the camera thinks, "Too dark! Let’s brighten this up," and you end up with a noisy, washed-out image.
The Fix: Use the Meter as a Suggestion, Not a Law
Stop aiming for "0" on the meter and start looking at the actual scene. If you’re in a bright environment, like a snowy landscape or a beach, you usually need to overexpose (go to +1 or +2) to keep the whites white. If you’re in a dark environment, you might need to underexpose (-1 or -2) to keep the shadows deep and moody.
A great way to verify this is by checking your histogram. That little graph doesn't lie. If all the data is smashed against the left side, you’re losing detail in the blacks. If it’s smashed against the right, you’re blowing out your highlights. If you want a deeper dive into these basics, check out our Photography 101: A Beginner’s Guide to Mastering Your First Camera.

2. Choosing a Shutter Speed That’s Too Slow
We’ve all been there. You’re in a low-light situation, you don’t want to crank your ISO because you’re afraid of "noise," so you keep your shutter speed low to let in more light. Then you look at your photos later and realize every single one of them is slightly soft.
There are two types of blur: motion blur (your subject moved) and camera shake (you moved). Manual mode gives you the power to control both, but only if you know the limits of your gear and your own hands.
The Fix: Follow the Reciprocal Rule (and then some)
The old-school rule for handheld shooting is that your shutter speed should be at least 1 / [your focal length]. If you’re using a 50mm lens, you shouldn’t shoot slower than 1/60s. If you’re on a 200mm lens, you need at least 1/250s.
However, with the high-resolution sensors we have in 2026, even the slightest vibration is visible. I usually recommend doubling that rule. If you're shooting at 50mm, try to stay above 1/125s if you're handheld.
If you are shooting people, 1/60s isn't going to cut it even if you have "surgical hands." People move. They blink, they breathe, they shift their weight. For portraits, I rarely go below 1/200s. For kids or pets? You’re looking at 1/500s or faster. If you’re using the latest mirrorless tech, you might have great in-body image stabilization (IBIS), but that won't stop your subject from moving. Learn more about the latest tech in The Ultimate Guide to 2026 Mirrorless Cameras.
3. The "Wide Open" Aperture Trap
When people get their first "fast" lens (like a 50mm f/1.8), the first thing they do is set it to f/1.8 and leave it there forever. Why? Because bokeh. We all love that blurry background that makes the subject pop.
But shooting "wide open" all the time is a recipe for out-of-focus disasters. When you shoot at f/1.4 or f/1.8, your depth of field (the area in focus) is razor-thin. If you’re shooting a portrait and the person tilts their head slightly, you might get one eye sharp while the other is a blurry mess. If you’re shooting a group of people, the person in the front will be sharp and everyone else will look like they’re standing in a fog bank.
The Fix: Stop Down for Sharpness
Aperture isn't just about brightness; it's about depth.
- Single Portraits: If you want that blurry background, f/2.2 or f/2.8 is often "safer" than f/1.4. You still get great bokeh, but you have a better chance of getting the whole face sharp.
- Couples: Use at least f/4.0 to make sure both people are in the focal plane.
- Groups: Go for f/5.6 or f/8.0.
- Landscapes: Usually f/8.0 to f/11 is the sweet spot for lens sharpness and deep focus.
Don't be afraid to close that aperture. Sharpness is usually more important than the amount of blur in the background. For more specific tips on this, our guide on Portrait Photography Techniques 101 is a lifesaver.

4. Being Terrified of High ISO
Many photographers treat ISO like a monster under the bed. They’ve been told that high ISO equals "noise" and noise ruins photos. So, they keep their ISO at 100 even when they’re shooting in a dark room, which forces them to use a shutter speed that is way too slow.
Here is the truth: A noisy photo is often usable. A blurry photo is garbage.
In 2026, camera sensors are incredible. The noise produced at ISO 3200 or even 6400 on a modern mirrorless camera is often barely noticeable, especially if you’re using modern AI-driven editing tools like Luminar to clean it up in post-production.
The Fix: Use ISO to Save Your Shutter Speed
ISO should be the last thing you adjust, but don't be afraid to use it. If you’ve set your aperture for the depth of field you want and your shutter speed is as slow as you dare go, crank that ISO up until the exposure looks right.
Think of ISO as the "support" for your other settings. It’s better to have a sharp, well-exposed image with a little bit of grain than a clean image that is pitch black or blurry. If you're interested in how software is changing this game, read Why the Latest AI Photography News Will Change the Way You Edit Forever.
5. Changing Every Setting for Every Shot
One of the biggest frustrations with Manual Mode is feeling like you have to be a human calculator. You move two inches to the left, and suddenly you’re frantically spinning all three dials: shutter, aperture, and ISO: trying to get the light right again. By the time you’re ready, the moment has passed.
This "fiddling" is a sign that you don't have a workflow. Manual mode doesn't mean you have to change everything all the time.
The Fix: Set Your Priorities
When you start a shoot, decide what is the most important element for that specific environment.
- If you’re shooting sports or kids: Your priority is Shutter Speed. Set that first (e.g., 1/1000s) and leave it.
- If you’re shooting portraits: Your priority is Aperture. Set it to f/2.8 and leave it.
Once your "priority" setting is locked in, use your ISO or Shutter Speed as your "adjuster." Usually, the light in a room doesn't change every two seconds. Once you find the settings that work for a specific room or lighting setup, keep them there! You only need to change them when the light itself changes. For a step-by-step approach, check out our 5 Steps to Master Manual Mode.

6. Forgetting to Watch the Light
It’s easy to get so caught up in the numbers on your screen that you forget to look at the light in the actual world. Manual mode allows you to capture light perfectly, but it can’t create good light where none exists.
I’ve seen photographers spend ten minutes dialing in the "perfect" exposure settings while their subject is standing under a harsh fluorescent light that’s creating ugly shadows under their eyes. No setting in the world can fix bad light.
The Fix: Light First, Settings Second
Before you even touch your camera, look at your subject. Where is the light coming from? Is it harsh (sunlight) or soft (shade/clouds)?
- If the light is too harsh, move your subject into the shade.
- If the light is too flat, find a window to create some direction.
Once the light looks good on the subject's face, then dial in your manual settings to capture that light. Remember, the camera is just a tool to record what your eyes see. If you're doing professional work, like headshots, understanding this is vital. See our 10 Corporate Headshot Tips for more on lighting.
7. The "Set and Forget" Mentality
You take a test shot, it looks great, and you spend the next twenty minutes shooting away. But while you were shooting, the sun went behind a cloud, or you moved from the sun into the shade.
In Manual Mode, the camera won't compensate for these changes. If you don't adjust, you’ll end up with a series of photos that get progressively darker or lighter until they’re ruined.
The Fix: Review and Re-Meter Constantly
Get into the habit of "chimping" (checking your screen) every few minutes, but do it purposefully. Don't just look at the image; look at the exposure. Is it still hitting where it needs to hit?
Modern mirrorless cameras have a huge advantage here. You can see the exposure in real-time through the electronic viewfinder (EVF). If you see the image getting dark in your eye, spin a dial! If you want to know more about how AI is making this even easier, take a look at Why Everyone is Talking About AI-Powered Mirrorless Tech.

How to Practice Without Getting Overwhelmed
Transitioning to Manual Mode doesn't have to happen overnight. In fact, if you try to do it all at once during a high-stakes shoot, you’re going to hate it.
Start by practicing in low-stakes environments. Go for a walk in a park or practice on your cat at home. Pick one setting to control at a time. Maybe today you only focus on Shutter Speed while letting the camera handle ISO and Aperture (this is called Shutter Priority, but you can do it in Manual by just ignoring the other two).
Once you feel comfortable with how Shutter Speed affects your image, add in Aperture. Pretty soon, the "Exposure Triangle" will become second nature, and you won't even have to think about it.
A Quick Cheat Sheet for Manual Settings
If you're stuck, here's a quick starting point for common scenarios:
- Sunny Day Outdoors: ISO 100, f/8, 1/500s.
- Shady Spot Outdoors: ISO 400, f/4, 1/250s.
- Indoors with Good Window Light: ISO 800, f/2.8, 1/200s.
- Low Light Event: ISO 3200, f/2.8, 1/125s (be careful of blur!).
The Role of Modern Tech in Manual Shooting
In 2026, the line between "Manual" and "AI-assisted" is blurring. Many of the latest cameras from Sony, Canon, and Nikon have AI-powered exposure aids that can suggest settings based on the scene's composition. While we call it "Manual," we are often using tools that help us make better decisions faster.
For instance, AI-driven autofocus allows you to worry less about your f-stop being "too wide" because the camera is locked onto the subject's eye with 100% accuracy. This allows you to push your settings further than photographers could ten years ago. If you want to stay up to date on these releases, check out Photography News Matters: 5 Major Camera Releases to Know.
Beyond the Camera: Post-Processing
Even the most perfect manual exposure usually needs a little love in post-processing. Whether it's bringing up the shadows slightly or adding a bit of contrast, editing is the second half of the photography equation.
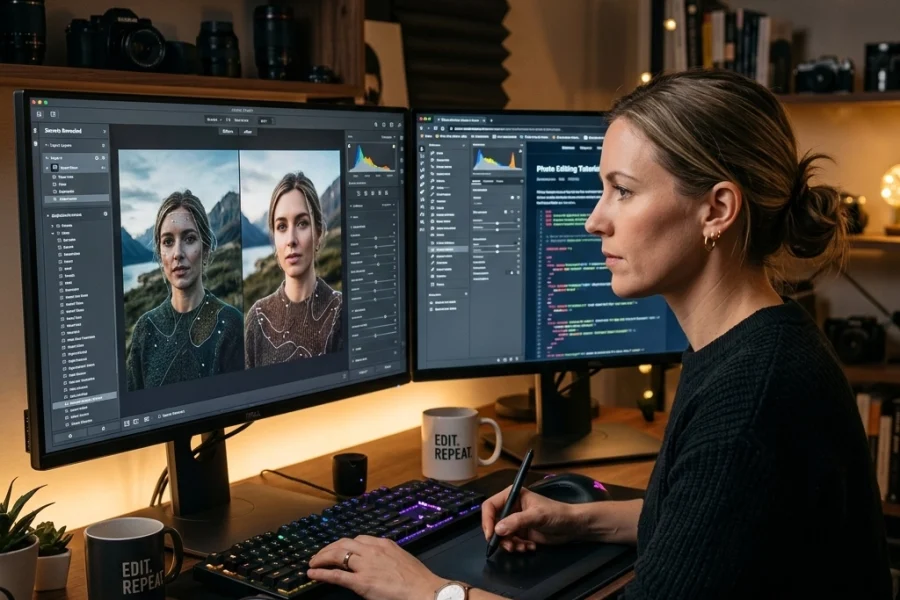
As mentioned earlier, I’m a huge fan of using Luminar for this. Its AI tools can automatically detect if you’ve slightly missed your exposure and correct it in a way that looks natural, not "Photoshopped." It’s a great safety net for those times when you make one of the seven mistakes listed above. Just don't overdo it: check out 7 Mistakes You're Making with AI Photo Editing to keep your edits looking professional.
Wrapping It Up
Mastering Manual Mode isn't about being a "purist." It's about having the tools to translate the vision in your head into a digital file. When you stop making these seven mistakes, you stop fighting your camera and start using it as an extension of your creativity.
It takes time. You’re going to mess up. You’re going to take a whole series of photos with the lens cap on or at ISO 12,800 in bright sunlight. It’s part of the process. The key is to keep shooting, keep reviewing, and keep learning.
For more hands-on training and deep dives into the technical side of things, head over to Learn Shut Your Aperture. We’ve got courses and guides designed to take you from "Auto" to "Pro" without the headache.
And if you’re looking for more inspiration, don’t forget to visit PhotoGuides.org or check out the latest work on Edin Chavez’s blog.
Manual mode is the key to the kingdom. Now go out there, shut your aperture (or open it!), and start shooting.