
You just bought a camera. Maybe it’s a high-end mirrorless, or maybe you’re rocking a compact setup. It’s shiny, it’s new, and you’re ready to take photos that make people stop scrolling. But then you press the shutter, look at the screen, and… well, it looks a bit like a potato. The colors are muddy, the shadows are harsh, and your subject looks like they’ve aged twenty years in a single frame.
Welcome to the reality of photography: gear is great, but light is king.
At Shut Your Aperture, we talk a lot about the latest tech. We’ve discussed how to choose the best mirrorless camera for 2026 and whether new camera gear really matters. But the truth is, the most expensive sensor in the world can't fix bad lighting. Mastering natural light is the single most important skill you can develop. It’s free, it’s everywhere, and once you know how to use it, your photos will level up instantly.
Seeing the Light (Before You Even Pick Up the Camera)
The biggest mistake beginners make is thinking that light is just "there." You’re in a park, it’s daytime, so there’s light, right? Technically, yes. But for a photographer, light isn't a binary "on or off" switch. It has direction, quality, and color.
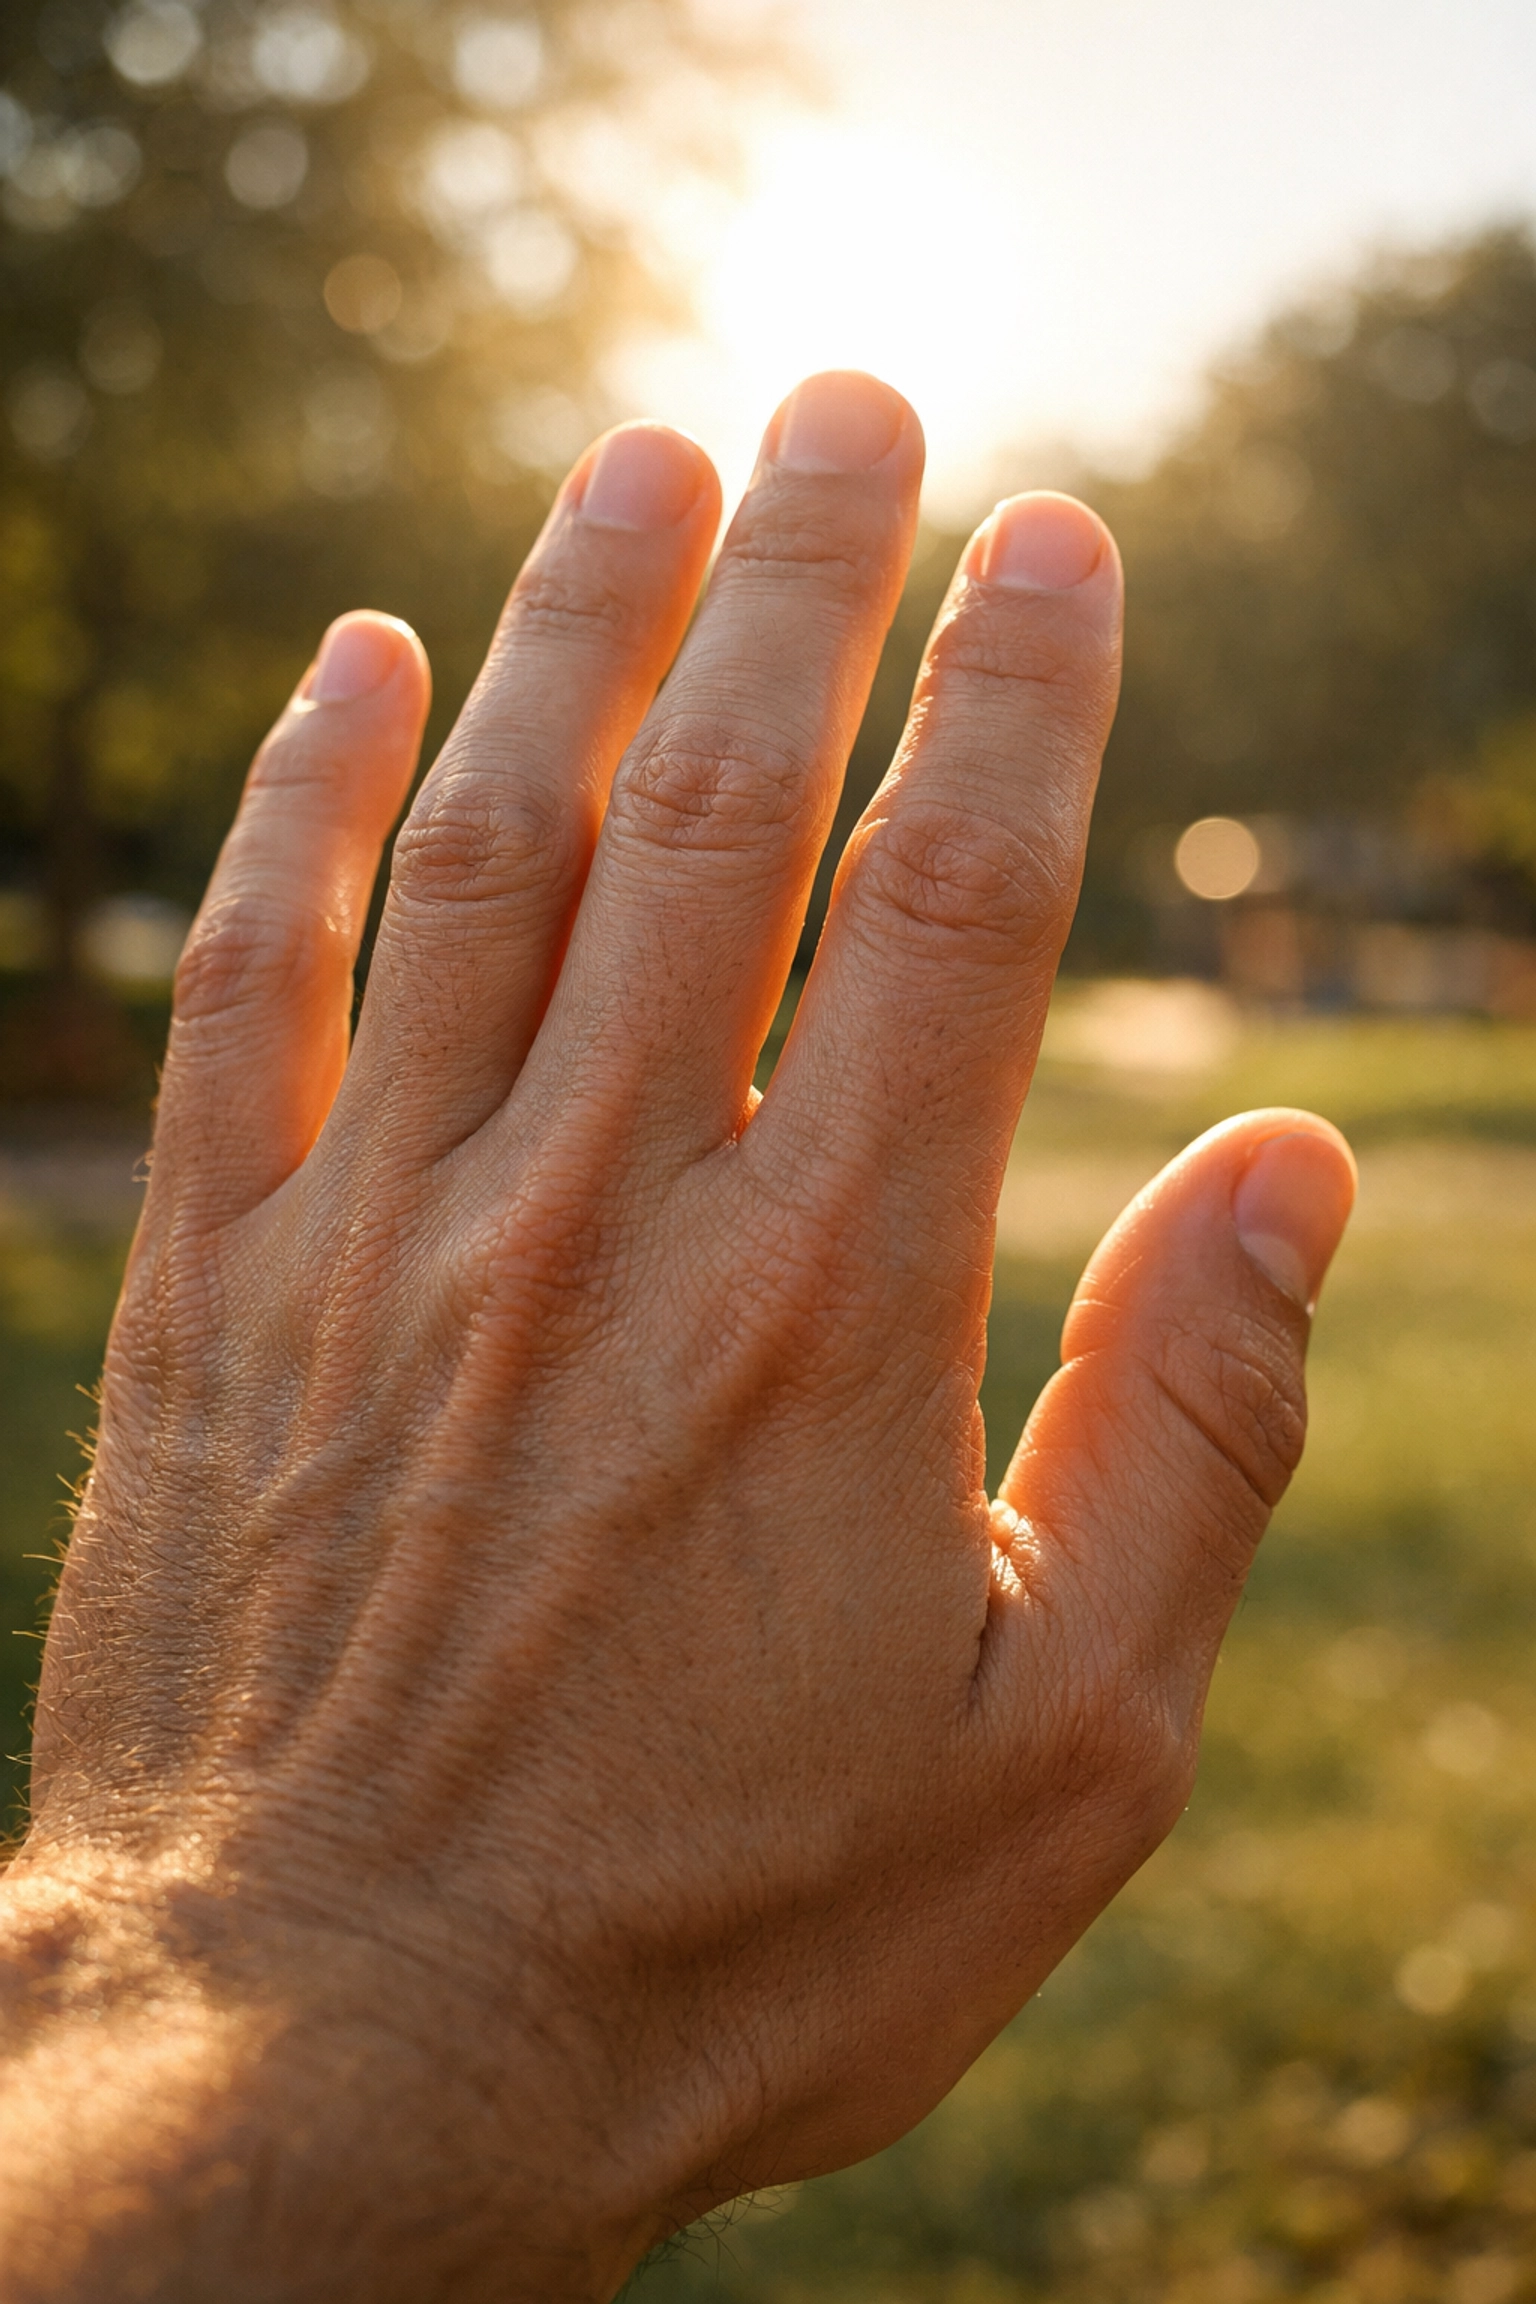
To start "seeing" light, try the hand trick. Hold your hand out in front of your face and slowly spin in a circle. Look at how the shadows move across your knuckles and palm. In one position, your hand might look flat and bright. In another, you’ll see deep shadows that reveal every tiny wrinkle and texture. This is exactly what’s happening to your subject’s face.
Before you start worrying about how to master your camera’s manual mode in 5 minutes, you need to decide where your subject stands in relation to the sun.
The "When" of Natural Light: Timing is Everything
If you’ve spent five minutes on a photography forum, you’ve heard of "Golden Hour." There’s a reason it’s a cliché: it works.
Golden Hour: The Photographer's Cheat Code
This is the hour just after sunrise and just before sunset. The sun is low in the sky, which means the light has to travel through more of the Earth’s atmosphere. This scatters the blue light and leaves you with a warm, soft, golden glow. It’s incredibly flattering for portraits and adds a dreamy quality to landscapes. If you're looking for top spots for majestic sunset photography, you’re already halfway to a masterpiece just by showing up at the right time.
Blue Hour: The Moody Alternative
Right after the sun dips below the horizon (or just before it pops up), you get the Blue Hour. The sky turns a deep, cool blue, and the light becomes extremely soft and even. This is a fantastic time for urban photography or capturing water photography in motion. It’s moody, quiet, and sophisticated.
Midday: The "Danger" Zone
High noon is generally the enemy. The sun is directly overhead, creating "raccoon eyes": harsh shadows in the eye sockets and under the nose. Most beginners quit during this time, but you don't have to. You just need to find "Open Shade."
The Secret Weapon: Open Shade
If you take away only one thing from this guide, let it be this: Find the shade.
Open shade is an area that is blocked from direct sunlight but still has plenty of light reflecting into it. Think of the shadow cast by a large building, or under a dense tree (as long as the light isn't "dappled").
When you place a subject in open shade, the entire sky becomes your softbox. The light is even, soft, and flatters everyone. It’s the easiest way to get professional-looking portraits without a single piece of lighting gear. For more tips on finding these spots in the wild, check out our guide on finding hidden gems for stunning travel photography.
Direction Matters: Where is the Sun?
Now that you know when to shoot, let’s talk about where to point the camera.
1. Front Lighting
The sun is behind you, shining directly on your subject. This is the "safe" choice. It fills in shadows and makes colors pop. However, it can look a bit flat and sometimes causes your subject to squint. It’s great for high-detail shots but lacks the "drama" of other techniques.
2. Side Lighting
The sun is hitting your subject from the side. This is where the magic happens for storytelling in photography. Side lighting creates shadows, and shadows create depth and texture. It makes objects look three-dimensional. If you’re shooting landscapes or architectural details, side lighting is your best friend.
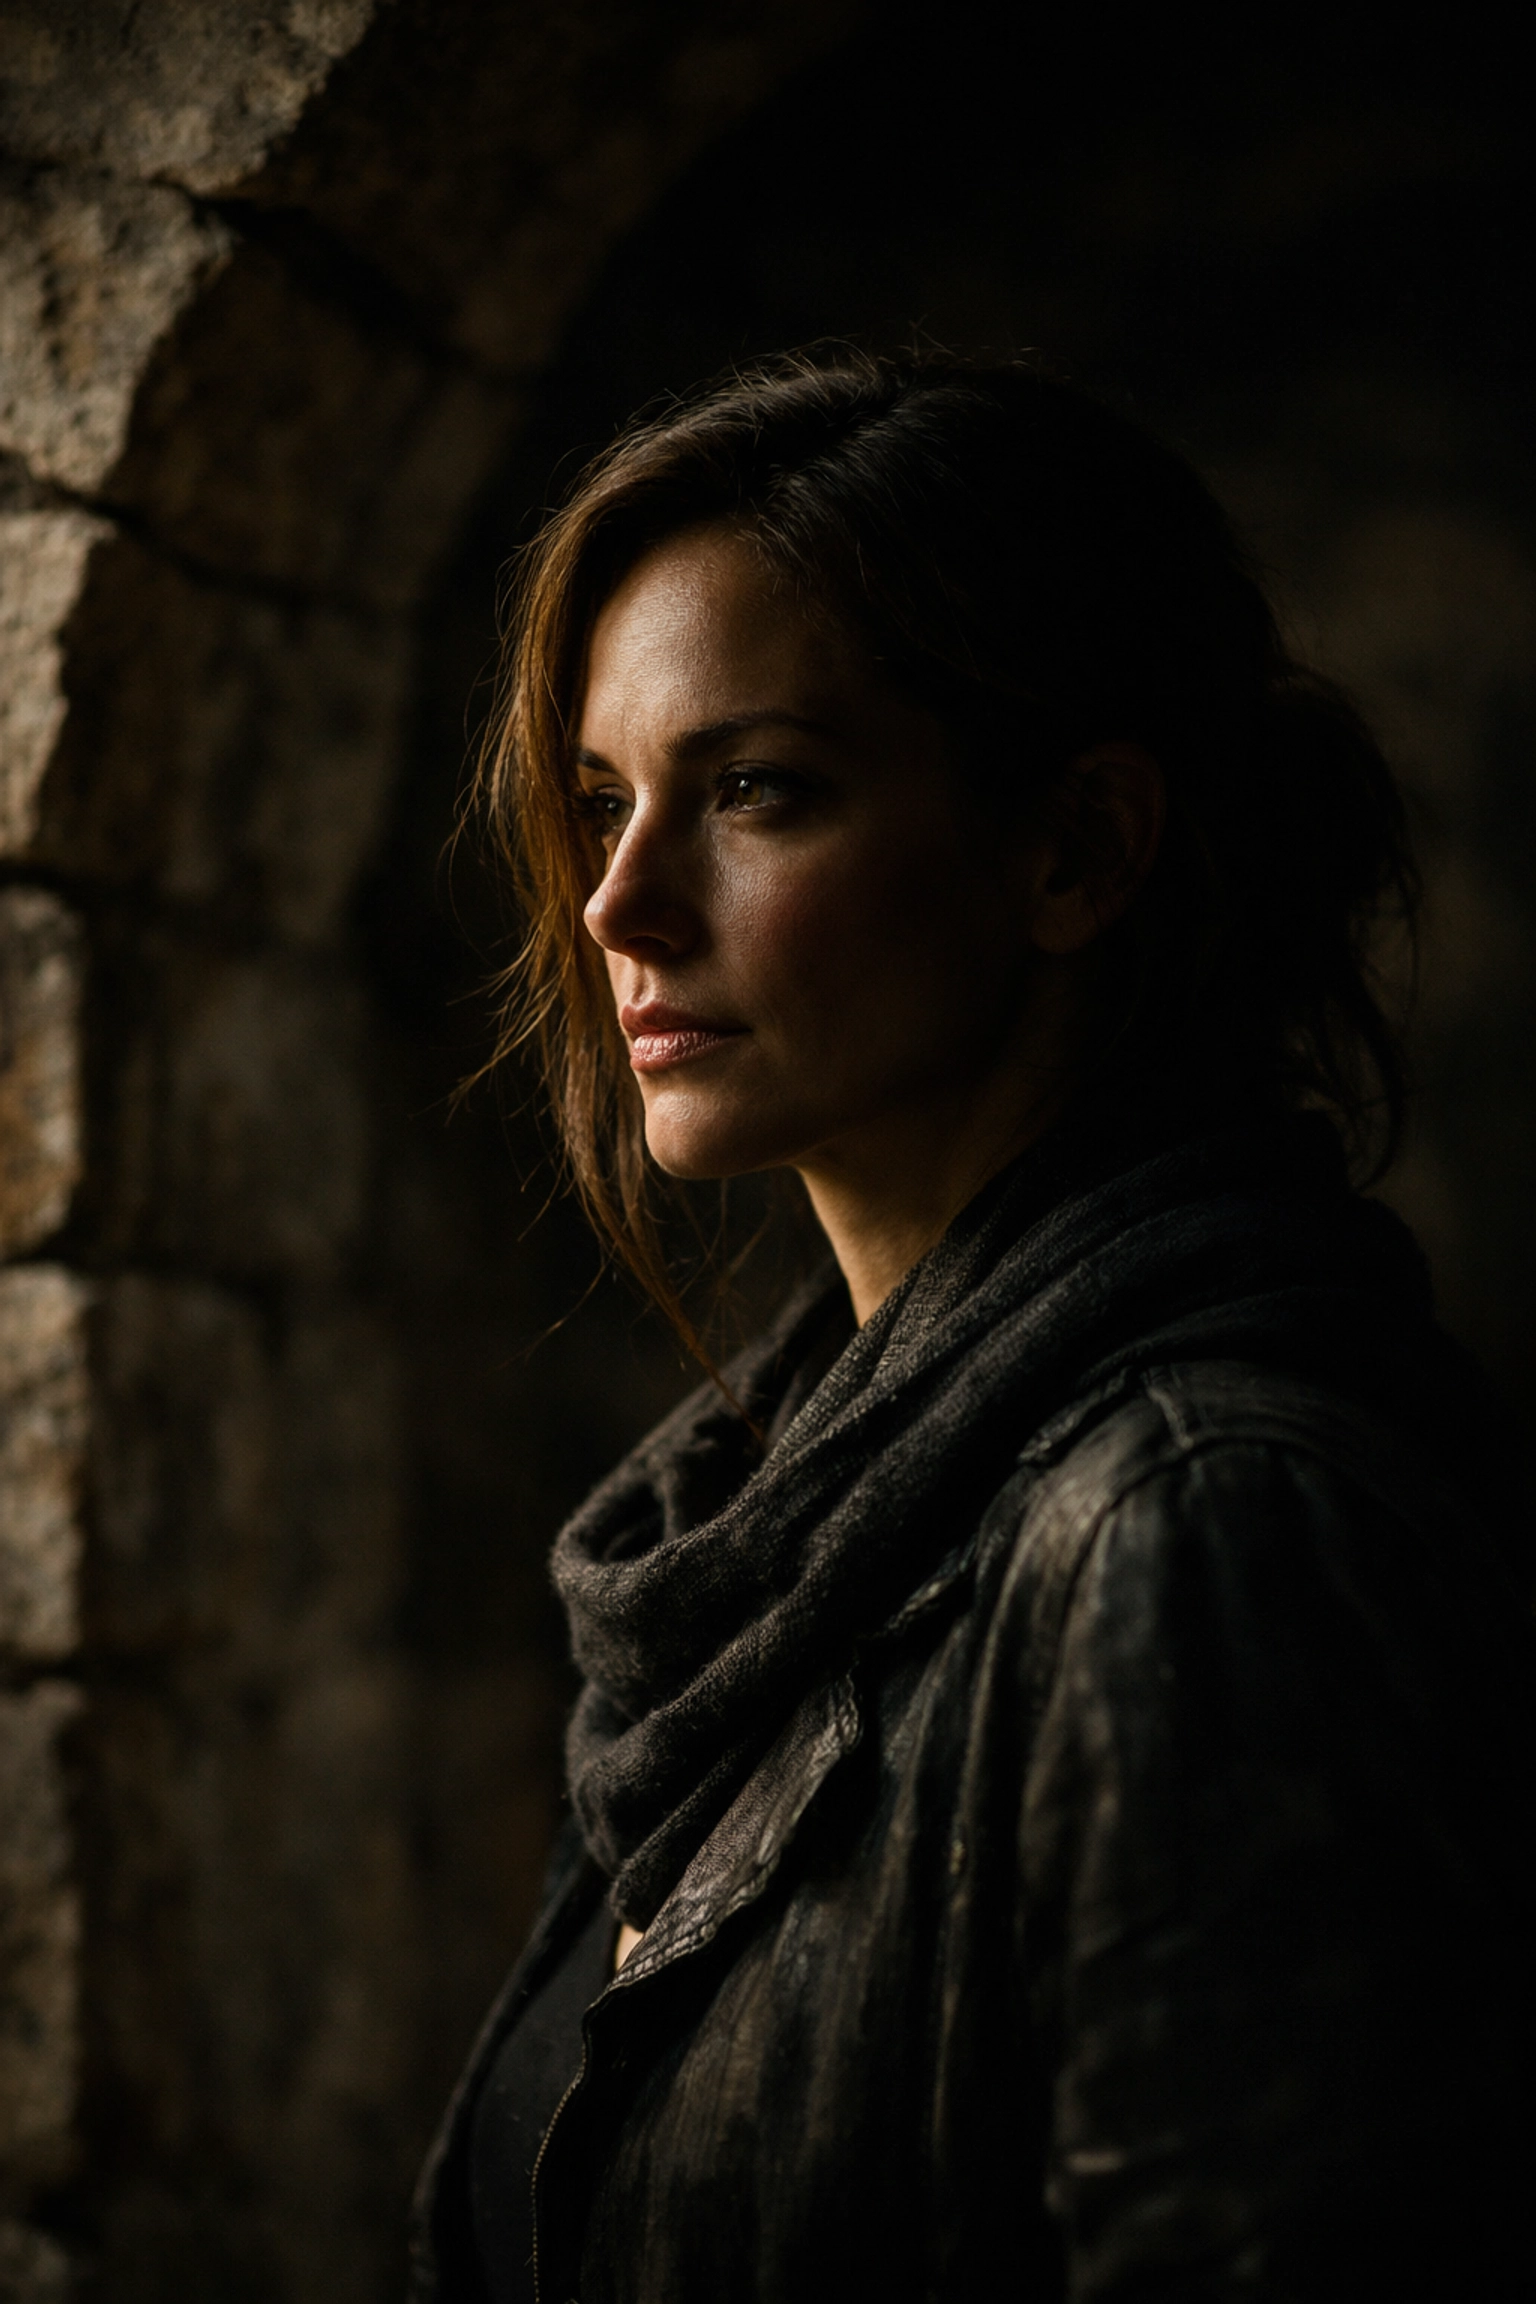
3. Backlighting
The sun is behind your subject, facing you. This is the hardest to master but the most rewarding. It creates a "rim light" or "halo effect" around your subject’s hair or silhouette. To do this right, you might need to overexpose slightly or use a reflector to bounce some light back onto your subject’s face.
Using Natural Reflectors
You don't need to carry a giant silver disc to reflect light. The world is full of natural reflectors.
- White Walls: Standing your subject next to a bright white wall can act as a massive, soft light source.
- Sand and Water: If you're at the beach, the sand and water reflect a ton of light back up, filling in those pesky shadows.
- Sidewalks: Light-colored concrete is a great natural reflector for portraits.
Learning to use these elements separates the amateurs from the pros. If you’re interested in more advanced environmental techniques, you should look into mastering water photography in any environment.
Indoor Natural Light: The Window is Your Friend
You don't even have to go outside to master natural light. A simple window is one of the best light sources in existence.
North-facing windows are particularly prized because they provide soft, consistent light all day long. If the sun is coming directly through the window and creating harsh lines, you can use a "diffuser": even a cheap white bedsheet or a sheer curtain will work. This spreads the light out, making it much softer on the skin.
For more technical advice on indoor settings, you can find great resources at PhotoGuides.org.

Camera Settings for Natural Light
While your eyes are great at adjusting to different light levels, your camera needs a little help.
- ISO: In bright natural light, keep your ISO as low as possible (usually ISO 100). As the light fades during blue hour, you'll need to bump it up.
- Aperture: If you want that blurry background (bokeh) that everyone loves, use a wide aperture (like f/1.8 or f/2.8). This is especially beautiful during golden hour.
- White Balance: Natural light changes color. Golden hour is warm (yellow/orange), while shade is cool (blue). Don't be afraid to use your camera’s presets or, better yet, shoot in RAW so you can adjust it later.
If you’re still struggling with these concepts, we have a breakdown of 7 mistakes you’re making with landscape photography that covers how to handle exposure in the wild.
The Role of Post-Processing
Even if you nail the lighting in-camera, a little post-processing can take it from "good" to "wow."
When you’re working with natural light, you often want to enhance the glow of a sunset or bring back details in the shadows of a backlit portrait. This is where tools like Luminar become essential. Luminar uses AI to help identify the light source in your photo and can actually help you "relight" a scene if the natural light was slightly off. It’s a great way to fix those mistakes you’re making and bring your vision to life.
For those looking for high-end inspiration on how light should look in a finished piece, I always recommend checking out the galleries at Edin Fine Art or Edin Studios. Seeing how professional light translates to print is a masterclass in itself.
Dealing with Overcast Days
Many beginners stay home when it's cloudy. Don't.
Clouds are essentially a giant, world-sized diffuser. They take the harsh, directional light of the sun and spread it out perfectly. Overcast days are actually the best time for flower photography, forest shots, and portraits where you want zero harsh shadows. The colors are often more saturated and truer to life because there’s no "yellow" sun tinting everything.
If you're out in the clouds, it’s a great time to experiment with using rare textures for tangible aesthetic photography. Without the distraction of high-contrast shadows, the physical texture of your subject really shines.
Practical Exercise: The 360-Degree Challenge
To really master this, go outside tomorrow with a friend (or a patient dog). Find a single spot and take a photo of them. Then, have them stay put while you move 45 degrees around them. Take another photo. Keep moving until you’ve gone all the way around.
When you get home and look at those photos on a big screen, you’ll see exactly how the "quality" of the subject changes. You’ll see when the light makes their eyes sparkle and when it makes them look like they haven’t slept in a week.
This simple exercise is worth more than ten hours of YouTube tutorials. You can find more practical drills and industry insights over at ProShoot.io and Edin Chavez’s personal blog.
Final Thoughts on Mastering the Sun
Photography is literally "drawing with light." If you don't understand your ink, you can't draw a masterpiece.
Natural light is unpredictable, frustrating, and sometimes completely uncooperative. But it’s also the most beautiful light source you will ever use. It has a soul that artificial strobes often struggle to replicate.
Start paying attention to the way the sun hits the buildings on your commute. Notice how the light changes in your living room at 4:00 PM. The more you observe, the better your photos will become.
Don't get bogged down in the gear race. Whether you're using a phone or a $5,000 camera, the sun treats you the same. Learn to work with it, and you'll be amazed at what you can capture.
For more inspiration on where to take your newly found lighting skills, explore some picturesque coastal escapes for discerning travelers or unlock the secrets to enchanting urban photography. The world is out there, and the light is waiting.
Keep shooting, keep experimenting, and most importantly, keep your aperture open (except when you shouldn't: but that's a different blog post).


