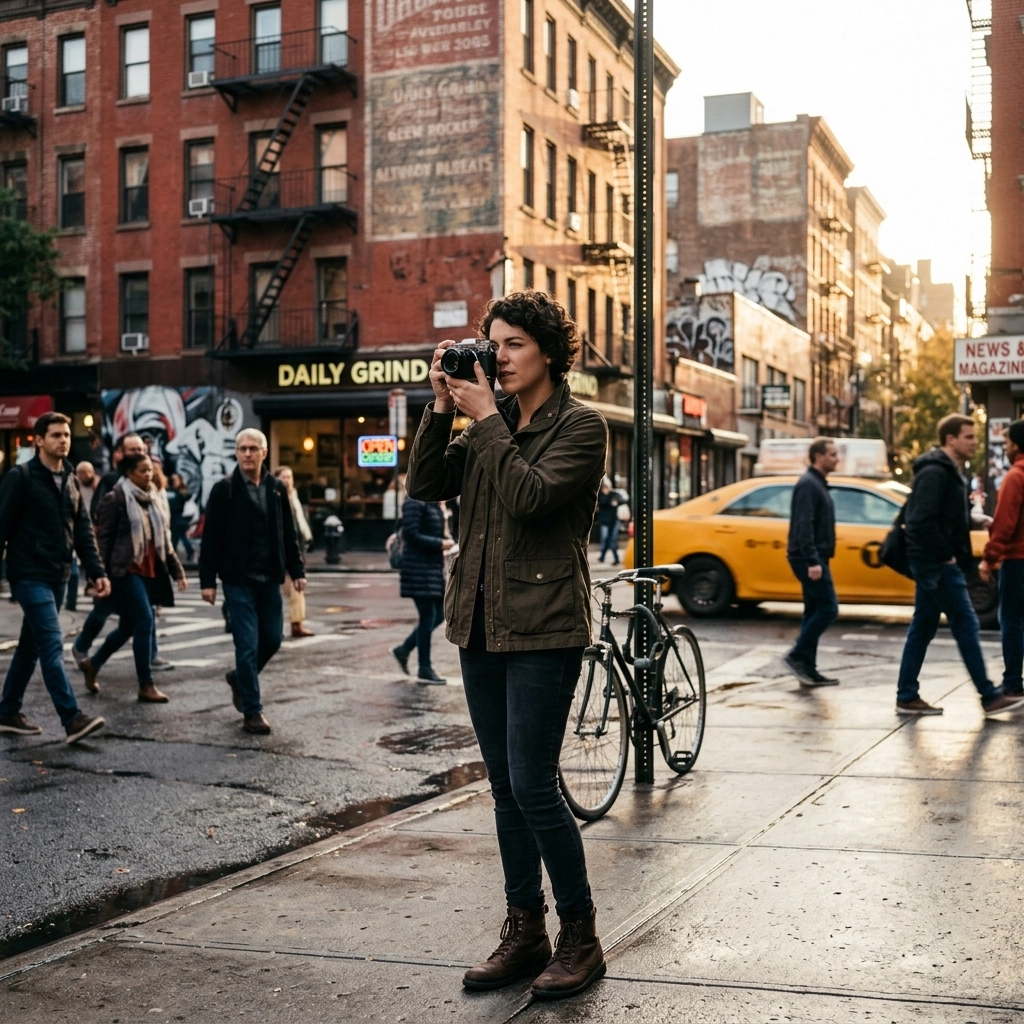
Let’s be real: street photography is intimidating. It’s not like landscape photography where the mountains don’t stare back at you or real estate photography where the house doesn’t ask, “Hey, why are you taking a picture of my windows?” In the street, everything is moving, the light is unpredictable, and people are, well, people.
But that’s exactly why it’s the most rewarding genre out there. Street photography is about capturing the "decisive moment": that split second where light, composition, and human emotion collide to tell a story that will never happen again. If you’ve been hovering on the edge of the sidewalk, camera in hand but too nervous to press the shutter, this guide is for you. We’re going to break down the gear, the settings, and the mindset you need to master the sidewalk.
What Exactly is Street Photography?
Before we dive into the "how," let’s talk about the "what." At its core, street photography is candid photography conducted in public spaces. It doesn’t actually have to be on a "street." It could be in a park, a subway station, a mall, or a beach. The goal is to document everyday life and society.
Think of it as visual sociology. You aren’t looking for perfection; you’re looking for truth. Sometimes that truth is messy, blurry, or weird. That’s okay. In fact, that’s usually where the magic happens.
The Gear: Does Size Matter?
If you ask ten street photographers what the best camera is, you’ll get twelve different answers. But at Shut Your Aperture, we believe in keeping it simple. The best camera for street photography is the one that doesn’t get in your way.
Mirrorless vs. DSLR
In the old days, everyone used rangefinders or film SLRs. Today, mirrorless is king. Why? Because they are smaller, quieter, and less threatening. If you walk up to a stranger with a giant Canon 1D and a 70-200mm lens, they’re going to think you’re with the press or a private investigator. If you use a compact mirrorless camera, you just look like a tourist.
If you’re currently looking to upgrade, you might be stuck in the Nikon Z6 III vs Sony A7 IV debate. Both are incredible for street work because of their fast autofocus and "silent shutter" modes. Being able to take a photo without a loud "clack" is a game-changer when you’re three feet away from your subject.
The Lens Choice
Most street photographers swear by prime lenses. A 35mm or a 50mm lens is the gold standard.
- 35mm: Wide enough to show the environment and the "scene," but not so wide that it distorts people.
- 50mm: The "nifty fifty" mimics the human eye’s field of vision. It’s great for isolating subjects.
Using a prime lens forces you to "zoom with your feet." This is a crucial skill. It makes you more engaged with your surroundings and helps you anticipate moments rather than just reacting to them. Check out Shut Your Aperture for more deep dives into lens selection.
Camera Settings for the Chaos
The street moves fast. If you’re fumbling with your dials, you’re going to miss the shot. Here is the "set it and forget it" setup most pros use.
Aperture Priority (A or Av)
Don't shoot in full manual unless you really know what you're doing. The light changes every time you turn a corner or a cloud passes by. In Aperture Priority, you choose the depth of field, and the camera handles the shutter speed.
A good rule of thumb is "f/8 and be there." At f/8, your depth of field is wide enough that most things will be in focus, which is helpful when you’re shooting quickly. If you want that creamy background blur, drop it to f/2.8, but be prepared for more missed focus shots.
Shutter Speed
In street photography, motion blur is usually the enemy (unless it’s intentional). You want a shutter speed of at least 1/250th of a second. If people are moving quickly or running, bump it up to 1/500th.
Auto ISO
This is the secret sauce. Set your Auto ISO with a "Minimum Shutter Speed" of 1/250th. This tells the camera: "Keep my shutter speed fast, and if it gets dark, just raise the ISO to make it work." Modern cameras handle high ISO beautifully, so don't be afraid of a little grain.
Composition: Beyond the Rule of Thirds
Once you’ve got your settings dialed in, you need to think about how to frame the chaos. Street photography can be messy, so composition is your tool to create order.
Leading Lines and Geometry
City streets are full of lines: curbs, shadows, power lines, and crosswalks. Use these to lead the viewer’s eye toward your subject. Look for triangles or squares created by the architecture to "frame" your subject.
The Frame within a Frame
Look for windows, doorways, or even gaps between people to frame your main subject. This adds depth and makes the viewer feel like they are "peeking" into a private moment. This is a technique often used to manipulate perception in other fields, but in street photography, it adds a layer of mystery.
Juxtaposition
This is the "clever" side of street photography. It’s when you place two things in the frame that contrast with each other. Think of a tired businessman sitting under a colorful "Joy" billboard, or a tiny child standing next to a massive statue. These photos tell a story without needing a caption.
Overcoming the Fear (The "Mind" Game)
The biggest hurdle for every beginner isn't the gear; it's the fear of being "caught." Taking photos of strangers feels like a violation of social norms. Here’s how to get over it:
- The "Fishing" Technique: Find a great background: maybe a cool mural or a dramatic patch of light. Stand there and wait. Eventually, someone will walk into your frame. Since you were already there, you aren't "approaching" them; they are entering your space. It’s much less stressful.
- Wear Headphones (Even with No Music): It acts as a "do not disturb" sign. You look like you’re in your own world, which makes you less conspicuous.
- The "Tourist" Play: If someone catches you taking their photo, don’t look away guiltily. Look past them at a building, or smile and nod. If you act like you’re just taking a photo of the "vibe" of the street, people generally don't care.
- Be Kind: If someone asks why you took their photo, be honest. "I’m a photographer and the light was hitting you perfectly." Most people are flattered. If they ask you to delete it, just do it. It’s not worth the fight.
For more on developing your eye and confidence, check out these 10 essential photography tips.
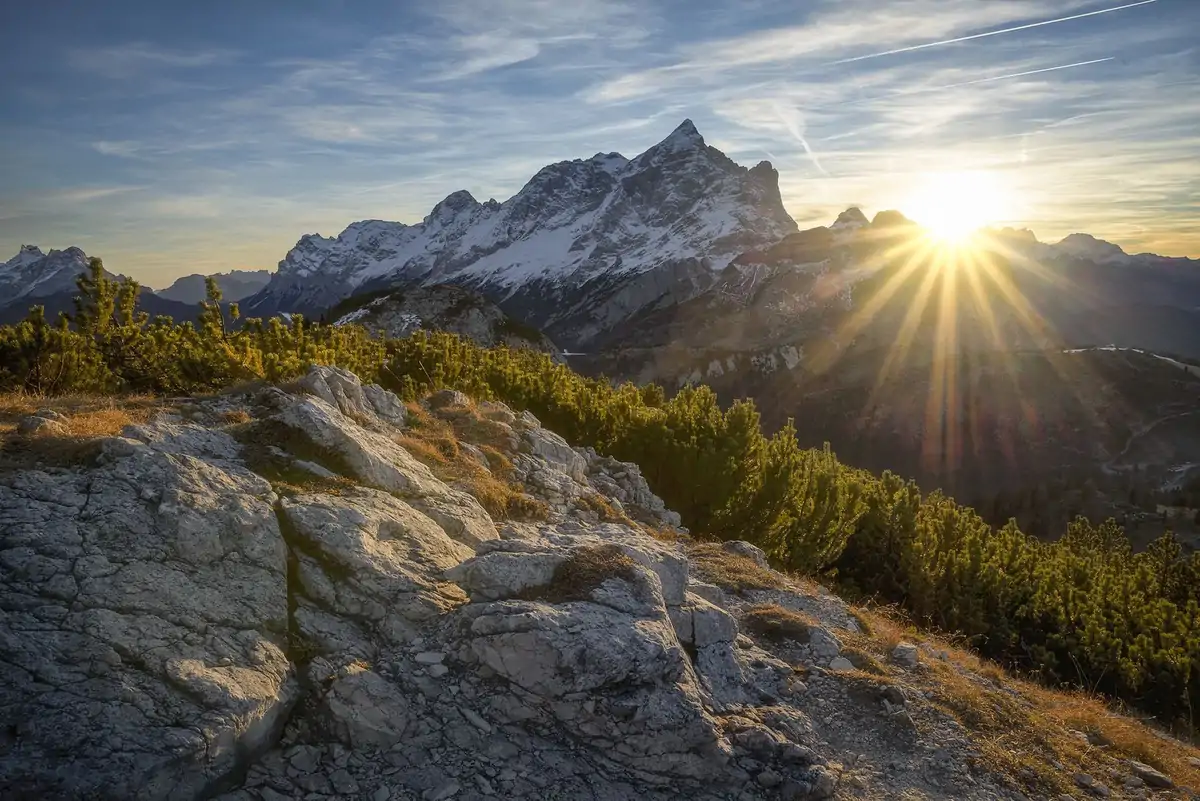
Looking for the Light
In street photography, light is your best friend and your worst enemy.
Golden Hour
The hour after sunrise and the hour before sunset. This provides long shadows and a warm glow. In the city, this light bounces off glass buildings and creates "pockets" of light on the sidewalk. These pockets are street photography gold.
Harsh Midday Light
Most photographers hate midday sun, but street photographers love it for the high contrast. Use the black shadows to hide distracting backgrounds. Focus on the highlights. This is where you can get really creative with silhouettes.
If you’re looking for inspiration on how to use light and shadow, look at some landscape photography techniques. While the subjects are different, the way light interacts with shapes is a universal principle.
Post-Processing: Less is More
When you get home and dump your SD card, it’s tempting to go crazy with the sliders. Resist the urge. Street photography should feel authentic.
A little bit of contrast, some cropping to fix your composition, and maybe a slight vignette to draw the eye in is all you need. If the colors are distracting, try converting the shot to Black and White. Removing color forces the viewer to focus on the light, the shapes, and the emotion of the scene.
I personally love using Luminar for my street edits. Their AI tools are great for quickly balancing out harsh shadows or enhancing the textures of urban grit without making the photo look "fake."
The Ethics of the Street
Is it legal? In most Western countries (like the US, UK, and Canada), if you are in a public place, you have the legal right to photograph anything that is in plain view. However, "legal" doesn't always mean "ethical."
Avoid taking photos of people in vulnerable situations: like the homeless or people in distress: unless you have a very specific journalistic reason for doing so. Don't be a creep. Use common sense. If your gut tells you it’s a bad idea, it probably is. For more on the professional side of things, visit proshoot.io.
Practice Exercise: The One-Block Challenge
Want to get better fast? Try the "One-Block Challenge."
Go to a single city block and stay there for one hour. Don't leave the block. Your goal is to find 10 interesting photos within that small space.
This forces you to look deeper. You’ll start noticing the way the light hits a particular doorknob, or how the reflection in a shop window changes as people walk by. It trains your brain to see photos where others see nothing. You can find more inspiration for your shoots at Edin’s personal blog.
Final Thoughts
Street photography is a marathon, not a sprint. You’re going to have days where you walk for five miles and come home with absolutely nothing. That’s part of the game. But then, you’ll have that one day where everything clicks. The light hits, the subject walks into the frame, and you capture a moment of pure, unscripted humanity.
The sidewalk is the greatest stage in the world, and it’s free to watch. So, grab your camera, put on some comfortable shoes, and go see what the world has to show you.
If you’re interested in how photography influences other markets, like real estate, check out our piece on the importance of photography in marketing. But for now, get out there and start shooting the street. The decisive moment is waiting.


