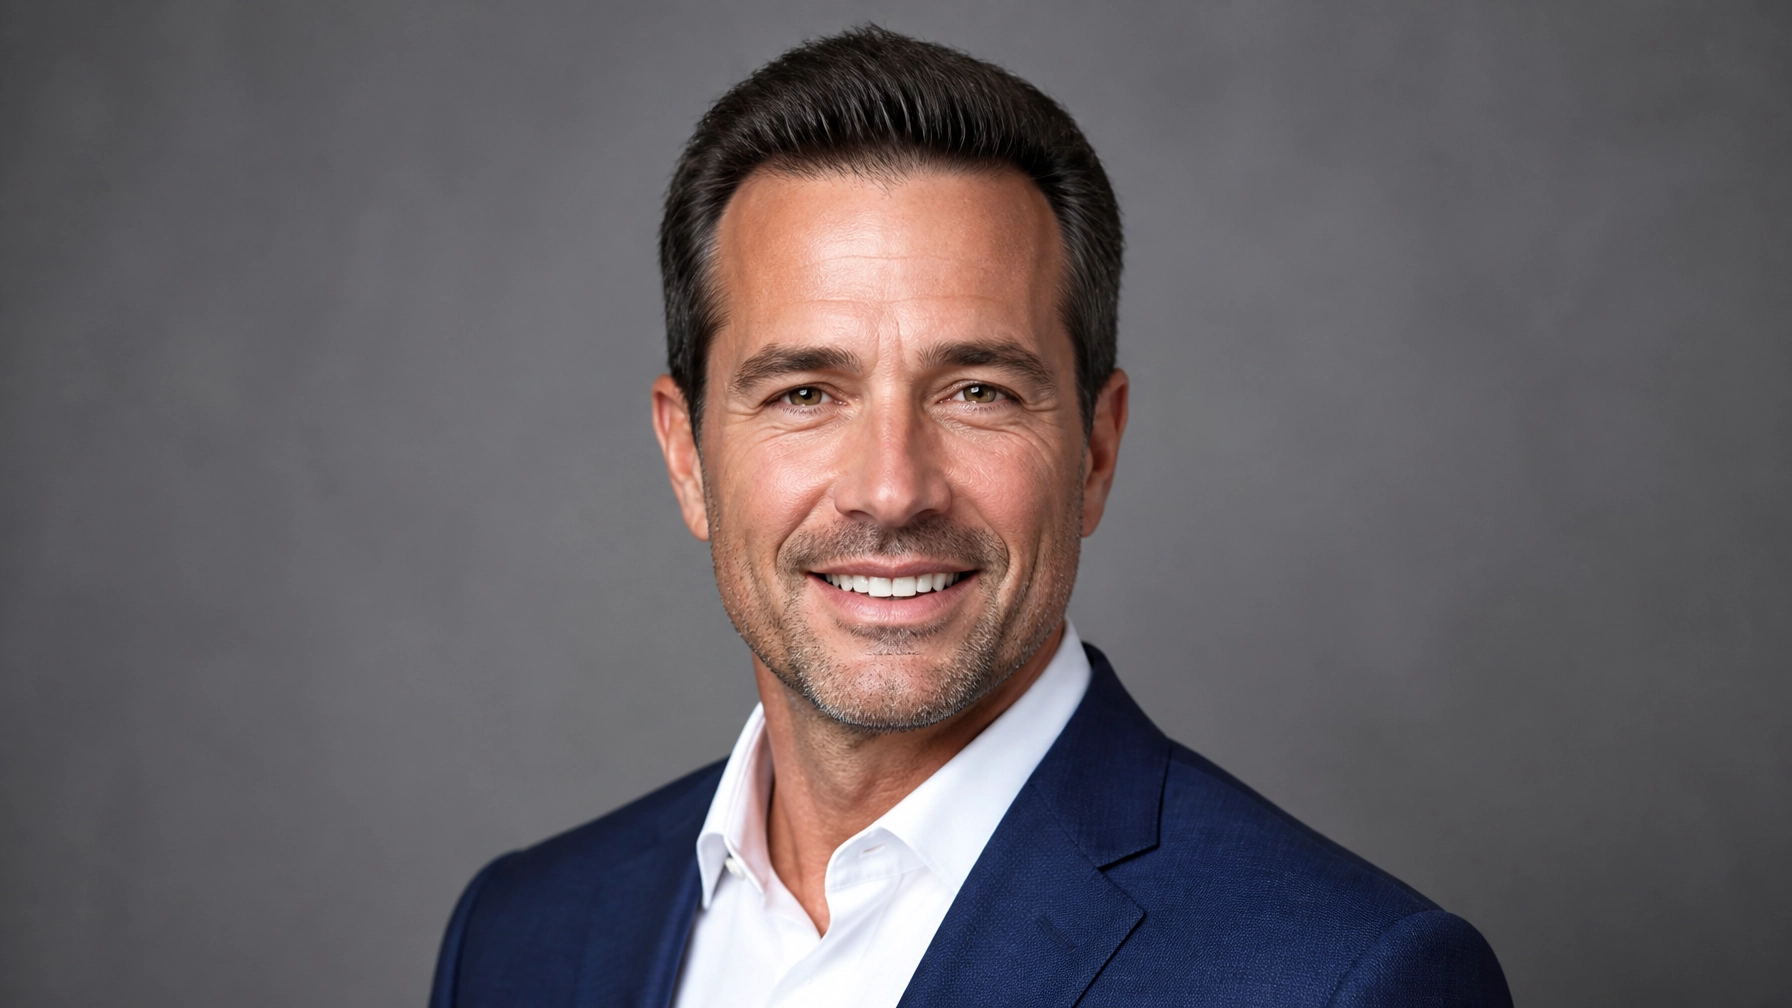
Getting a professional headshot isn't just about showing people what you look like. It’s about showing them who you are as a professional. In today’s digital-first world, your headshot is often your first handshake, your first introduction, and your first opportunity to build trust. Whether it’s for LinkedIn, a company website, or a speaking engagement, having a high-quality image is non-negotiable. If you want to stand out, you need to follow specific professional corporate headshot tips that go beyond just standing in front of a camera and saying "cheese."
To get the most out of your session, you need a mix of preparation, the right wardrobe, mastery of posing, and technical excellence. This guide will walk you through every single step to ensure you look like the leader you are. If you are looking for more deep dives into the world of photography, check out our Ultimate Guide to Portrait Photography to round out your skills.
Why Your Headshot is Your Digital Currency
In a world where we spend more time looking at screens than at each other's faces, your headshot is doing the heavy lifting for your personal brand. A bad headshot: one that is blurry, poorly lit, or includes a cropped-out shoulder of a friend from a wedding: tells the world you don’t pay attention to detail. On the flip side, a sharp, well-executed portrait signals competence and confidence.
When we talk about professional corporate headshot tips, the most important one is consistency. Your photo should reflect the current you. If your headshot is ten years old, you’re essentially lying to your clients before you even meet them. Stay current, stay professional, and let’s get into how to prepare for a headshot session that actually works.
How to Prepare for a Headshot Session
Preparation starts long before you arrive at the studio. You can’t just roll out of bed and expect a miracle. Here is the breakdown of how to prepare for a headshot session to ensure you are camera-ready.
Hydration and Sleep
It sounds like a cliché, but your skin is the first thing that shows exhaustion. Drink plenty of water in the three days leading up to your shoot. This plumps the skin and reduces the appearance of fine lines and dark circles. Aim for at least eight hours of sleep the night before. No amount of editing in Luminar can fully replace the natural glow of a well-rested face.
Grooming Timing
Don't get a haircut the day before your shoot. Hair often needs a few days to "settle" into its natural look after a cut. Aim for 5 to 7 days before the session. For men, if you’re going for the clean-shaven look, shave on the morning of the shoot to avoid five o’clock shadow. If you have a beard, make sure it is neatly trimmed and oiled.
For women, keep your makeup natural but slightly more defined than your everyday look. Cameras tend to "wash out" features, so a bit of extra definition on the eyes and a subtle lip color can go a long way. However, avoid heavy contouring or glittery eye shadows, as these can look strange under studio lights.

Wardrobe: Dressing for Success
What you wear is the second most important element after your expression. The goal is to have the viewer look at your face, not your clothes.
Stick to Solid Colors
Patterns are the enemy of a good headshot. Busy prints, stripes, and logos distract the eye and can cause "moiré" (that weird shimmering effect) on digital screens. Stick to solid, mid-tone colors. Navy blue, charcoal grey, deep green, and burgundy are universally flattering. Avoid wearing solid white as a primary top unless it’s under a jacket, as it can overexpose easily. Similarly, solid black can sometimes lose detail in the shadows, making you look like a floating head.
Fit is Everything
A suit that is too big will make you look sloppy, and a shirt that is too tight will look uncomfortable on camera. Ensure your clothes are tailored and pressed. Wrinkles are surprisingly hard to fix in post-production, even with advanced tools like Luminar. Bring a lint roller and a steamer if you can.
Necklines and Layers
For men, a well-fitted blazer over a collared shirt is the gold standard. For a more "tech-casual" look, a high-quality sweater or a simple polo can work. For women, a V-neck or a modest scoop neck is usually the most flattering as it elongates the neck. Adding layers like a blazer or a cardigan adds depth and structure to the photo.
If you want to see how the pros handle large-scale corporate shoots, head over to Perfect Corporate Headshots for some world-class inspiration.
Best Lighting for Executive Portraits
Lighting is the "make or break" factor. You can have the best suit and the best pose, but if the lighting is harsh or unflattering, the photo is a failure.
Softness is Key
The best lighting for executive portraits is almost always soft and diffused. Large light sources, such as an octagonal softbox or a large umbrella, create gentle transitions between highlights and shadows. This hides skin imperfections and prevents harsh "specular highlights" (shiny spots) on the forehead or nose.
Classic Lighting Patterns
- Rembrandt Lighting: This is characterized by a small triangle of light on the cheek opposite the light source. It’s a classic, dramatic look that adds a sense of authority and depth.
- Paramount (Butterfly) Lighting: The light is placed directly in front of and slightly above the subject's face. It creates a small shadow under the nose and is very flattering for high cheekbones.
- Clamshell Lighting: A favorite for beauty and high-end corporate work. One light is above the face, and a reflector or second light is below. This fills in all the shadows and makes the skin look flawless.
Using Natural Light
If you don't have a studio, window light is your best friend. Find a large window that doesn't have direct sunlight hitting it. Face the window or stand at a 45-degree angle to it. This "north-facing" light is incredibly soft and flattering. For more technical tips on handling light manually, don't miss our guide on fixing manual mode mistakes.

Posing Like a Pro
Most people hate being in front of the camera because they don’t know what to do with their bodies. As a photographer, or as the subject, knowing a few "power poses" can change everything.
The Turtle
This is the most famous headshot trick. To define the jawline and get rid of any hint of a double chin, push your forehead slightly forward and down toward the camera. It feels incredibly awkward: like a turtle sticking its neck out: but from the camera's perspective, it looks sharp and defined.
Angle the Body
Never stand flat-footed, chest-on to the camera. It makes you look wider than you are. Turn your shoulders about 45 degrees away from the lens, then turn your head back toward the camera. This creates a more dynamic, slimming silhouette.
The Lean
Lean slightly: and I mean slightly: toward the camera. This shows engagement and interest. If you lean back, you appear distant or even arrogant. A slight forward lean is the physical embodiment of "approachable confidence."
Hands and Arms
In a traditional headshot, you won't see your hands, but how you use them affects your shoulders. If your hands are in your pockets, your shoulders might hunch. Try resting your hands on your thighs or crossing your arms loosely. Crossing your arms can project power, but make sure your hands are visible and relaxed, not clenched into fists.

Technical Excellence: Gear and Settings
You don't need a 100-megapixel camera to take a great headshot, but you do need the right lens.
The Lens Choice
The best focal length for headshots is between 85mm and 135mm (on a full-frame sensor). These "telephoto" lengths are flattering because they compress facial features slightly, making noses look smaller and faces look more proportional. A 35mm or 50mm lens can sometimes distort the face if you get too close.
Aperture and Focus
You want a shallow depth of field to make the subject pop, but don't go too crazy. Shooting at f/1.2 might sound cool, but if one eye is in focus and the tip of the nose is blurry, the photo looks "off." Aim for f/2.8 to f/5.6. This ensures the entire face is sharp while the background stays buttery smooth.
If you’re just starting out and want to master these settings, our photography tutorials are designed to get you up to speed fast.

The Art of Post-Processing
A professional headshot isn't finished until it’s been edited. The goal is to look like you on your very best day, not like a plastic mannequin.
Natural Retouching
Remove temporary distractions: a stray hair, a blemish that popped up this morning, or lint on a jacket. Do not remove permanent features like moles or deep character lines unless the client specifically asks. Those lines show experience and wisdom.
Using AI Tools
Modern software has made retouching much easier. Using Luminar allows you to use AI-driven tools like "Face AI" and "Skin AI" to subtly enhance eyes and smooth skin texture without losing the natural "pore" detail. It’s about enhancement, not reconstruction.
Color Grading
A slight warm tint can make a subject look more healthy and approachable, while a cooler tint can feel more corporate and "blue-chip." Match the color grade to the industry the subject works in. Creative industries can handle more "vibey" edits, while law and finance usually require clean, true-to-life colors.
Common Headshot Mistakes to Avoid
- The "Deer in Headlights" Look: This happens when you try to open your eyes too wide. Relax your face, and try a "squinch": squinting slightly with the lower eyelids to add a look of confidence.
- Bad Backgrounds: Avoid busy office backgrounds or trees growing out of people's heads. A simple, neutral background is always the safest bet.
- Wrong Height: The camera should usually be at eye level or slightly above. Shooting from below is a "hero" angle often used in movies, but in a corporate setting, it can look intimidating or show off the inside of the subject's nostrils.
Wrapping It Up
A professional corporate headshot is an investment in yourself. By following these professional corporate headshot tips, you’re ensuring that your first impression is a powerful one. Remember: prepare well, dress thoughtfully, master your posing, and don't skimp on the lighting.
Whether you’re the photographer or the one in front of the lens, the goal is the same: authenticity. People want to do business with people, not logos. Show them who you are.
For those looking to take their professional image to the absolute next level, check out the portfolio at Perfect Corporate Headshots. And if you're ready to master the craft of photography yourself, dive into our lessons at Shut Your Aperture Tutorials. Now get out there and stop your aperture down( it's time to get to work.)