
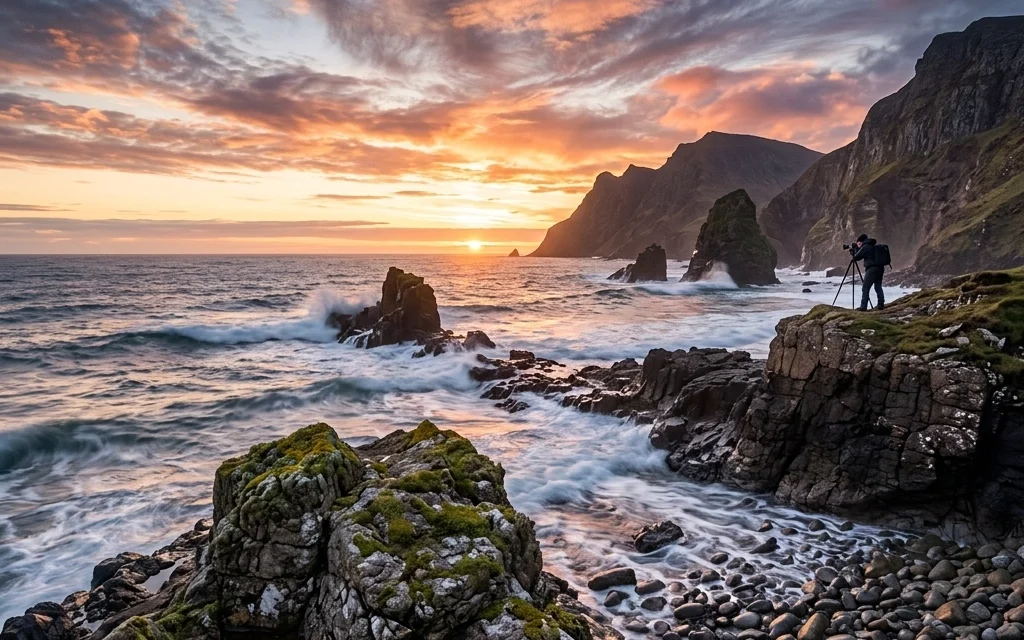
We’ve all been there. You’re standing on the edge of a massive canyon, the sun is dipping below the horizon, painting the sky in colors you didn’t even know existed, and you’re clicking away like crazy. You feel like a world-class pro. Then, you get home, load the photos onto your computer, and… womp womp. The mountain looks tiny, the colors look muddy, and the whole vibe is just "meh."
Landscape photography seems easy because the subject doesn’t move and it’s already beautiful, right? Wrong. Nature is a tricky beast to capture. If you aren't careful, you’ll end up with a folder full of digital clutter instead of wall-worthy art.
At Shut Your Aperture, we want you to stop taking snapshots and start making photographs. Here are the seven most common mistakes people make in landscape photography and, more importantly, exactly how to fix them so your next trip results in epic shots.
1. The "What Am I Looking At?" Problem (No Clear Subject)
The biggest mistake beginners make is thinking that a "pretty view" is enough for a good photo. It isn't. A photo needs a soul, and that soul is your subject. When you look at a vast mountain range, your eyes dart around, but a camera needs to tell the viewer exactly where to look.
If you don't have a clear subject, your viewer’s eyes will wander aimlessly around the frame until they get bored and move on. Is the subject that specific jagged peak? Is it the lone tree in the valley? Is it the way the light hits a specific rock?
The Fix: Before you even press the shutter, ask yourself: "What is this photo actually about?" Once you identify the star of the show, use your composition to highlight it. If you're struggling with the technical side of making your subject pop, check out our guide on how to use manual mode to get your settings dialed in.
2. The Drunken Horizon
There is nothing, and I mean nothing, that ruins a professional-looking landscape faster than a crooked horizon. It’s the visual equivalent of a fork scratching a plate. Even if the tilt is only one or two degrees, the human brain notices it, and it makes the whole image feel "off" or unstable.
Sometimes we get so caught up in the clouds or the foreground that we forget to check if our camera is actually level. If you're shooting handheld, it's even easier to let that line slip.
The Fix: Use the tools you already have! Most modern mirrorless cameras have a built-in electronic level (the "virtual horizon"). Turn it on. If your camera doesn’t have that, turn on the grid lines in your viewfinder. Align your horizon with one of those lines. And hey, if you still mess it up in the field, fix it immediately in post-processing. A straight horizon is the bare minimum for a great shot. If you're looking for more technical gear advice, you might want to see how to choose the best mirrorless camera in 2026 to find a body with the best stabilization and leveling tools.
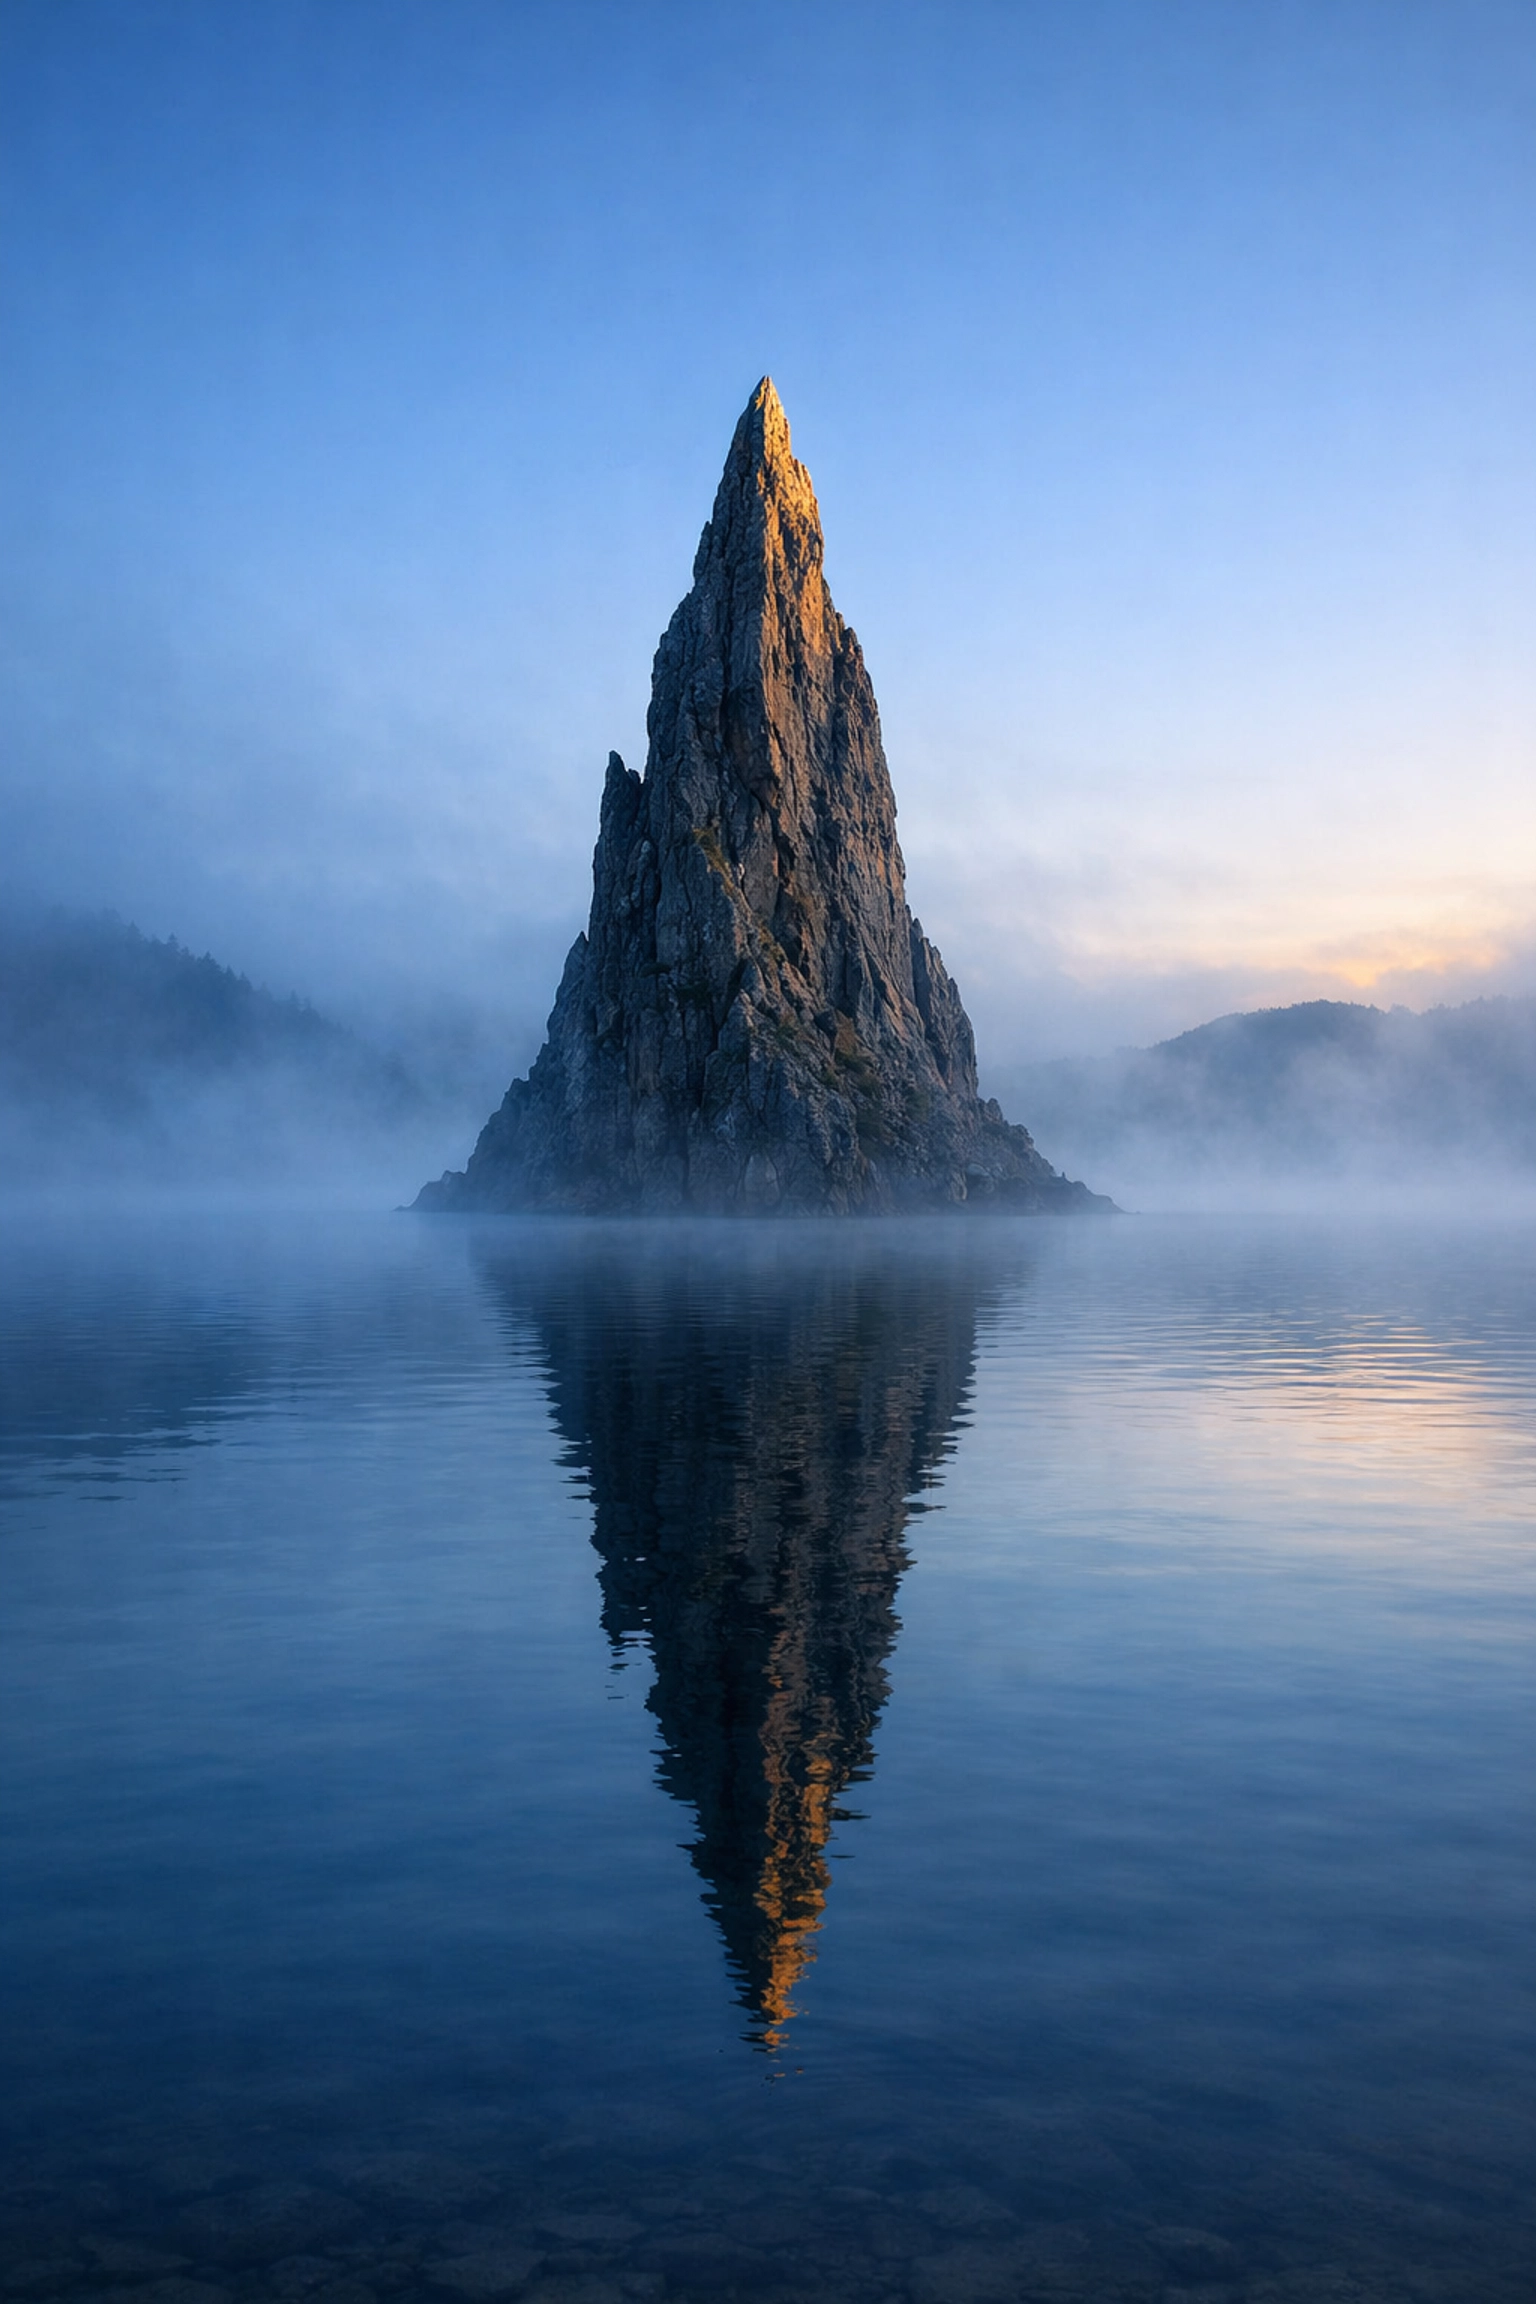
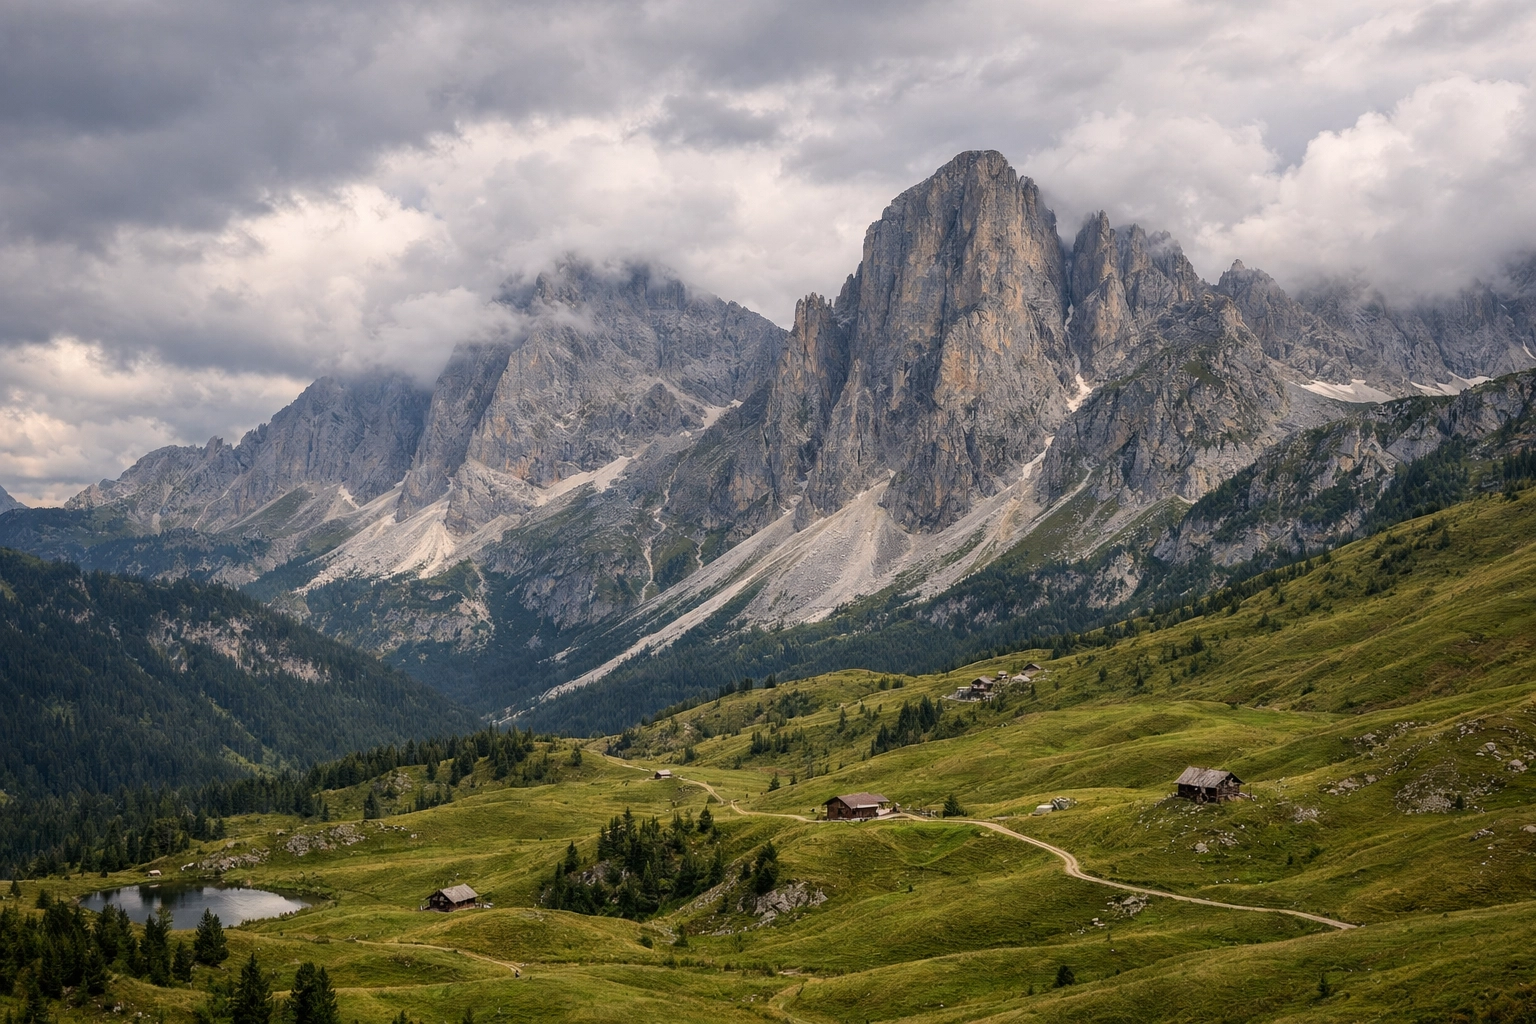
3. The Empty Middle Ground (Ignoring Depth)
Landscape photography is the art of squeezing a 3D world into a 2D rectangle. To do that successfully, you need depth. A lot of people find a great mountain, point their camera at it, and shoot. The result? A flat image where the mountain looks like a sticker on a blue background.
The secret to those "epic" shots you see on Instagram isn't just the mountain; it's the foreground. Without a strong foreground, the viewer has no way to "enter" the image.
The Fix: Think in layers: Foreground, Middle ground, and Background. Find a rock, a patch of flowers, or a winding stream to put in the lower third of your frame. This leads the eye from the front of the image all the way to the back, creating a sense of scale and immersion. This technique is especially effective when you're trying to discover ethereal landscapes where the atmosphere is everything.
4. The "Branch of Doom" (Not Checking the Edges)
You’ve got the perfect mountain, the perfect light, and a straight horizon. You take the shot. Later, you realize there’s a random, blurry tree branch sticking into the top left corner. Or maybe there’s a trash can just barely visible on the right edge.
These are "edge distractions," and they are total mood killers. They pull the viewer's attention away from your subject and make the composition feel cluttered.
The Fix: Before you click the shutter, do a "border patrol." Run your eyes along all four edges of the frame in your viewfinder or on your LCD screen. If you see something that doesn't belong, move your camera slightly or zoom in to crop it out. It’s much easier to fix this in the field than to try and Photoshop it out later. For more tips on cleaning up your compositions, visit PhotoGuides.org.
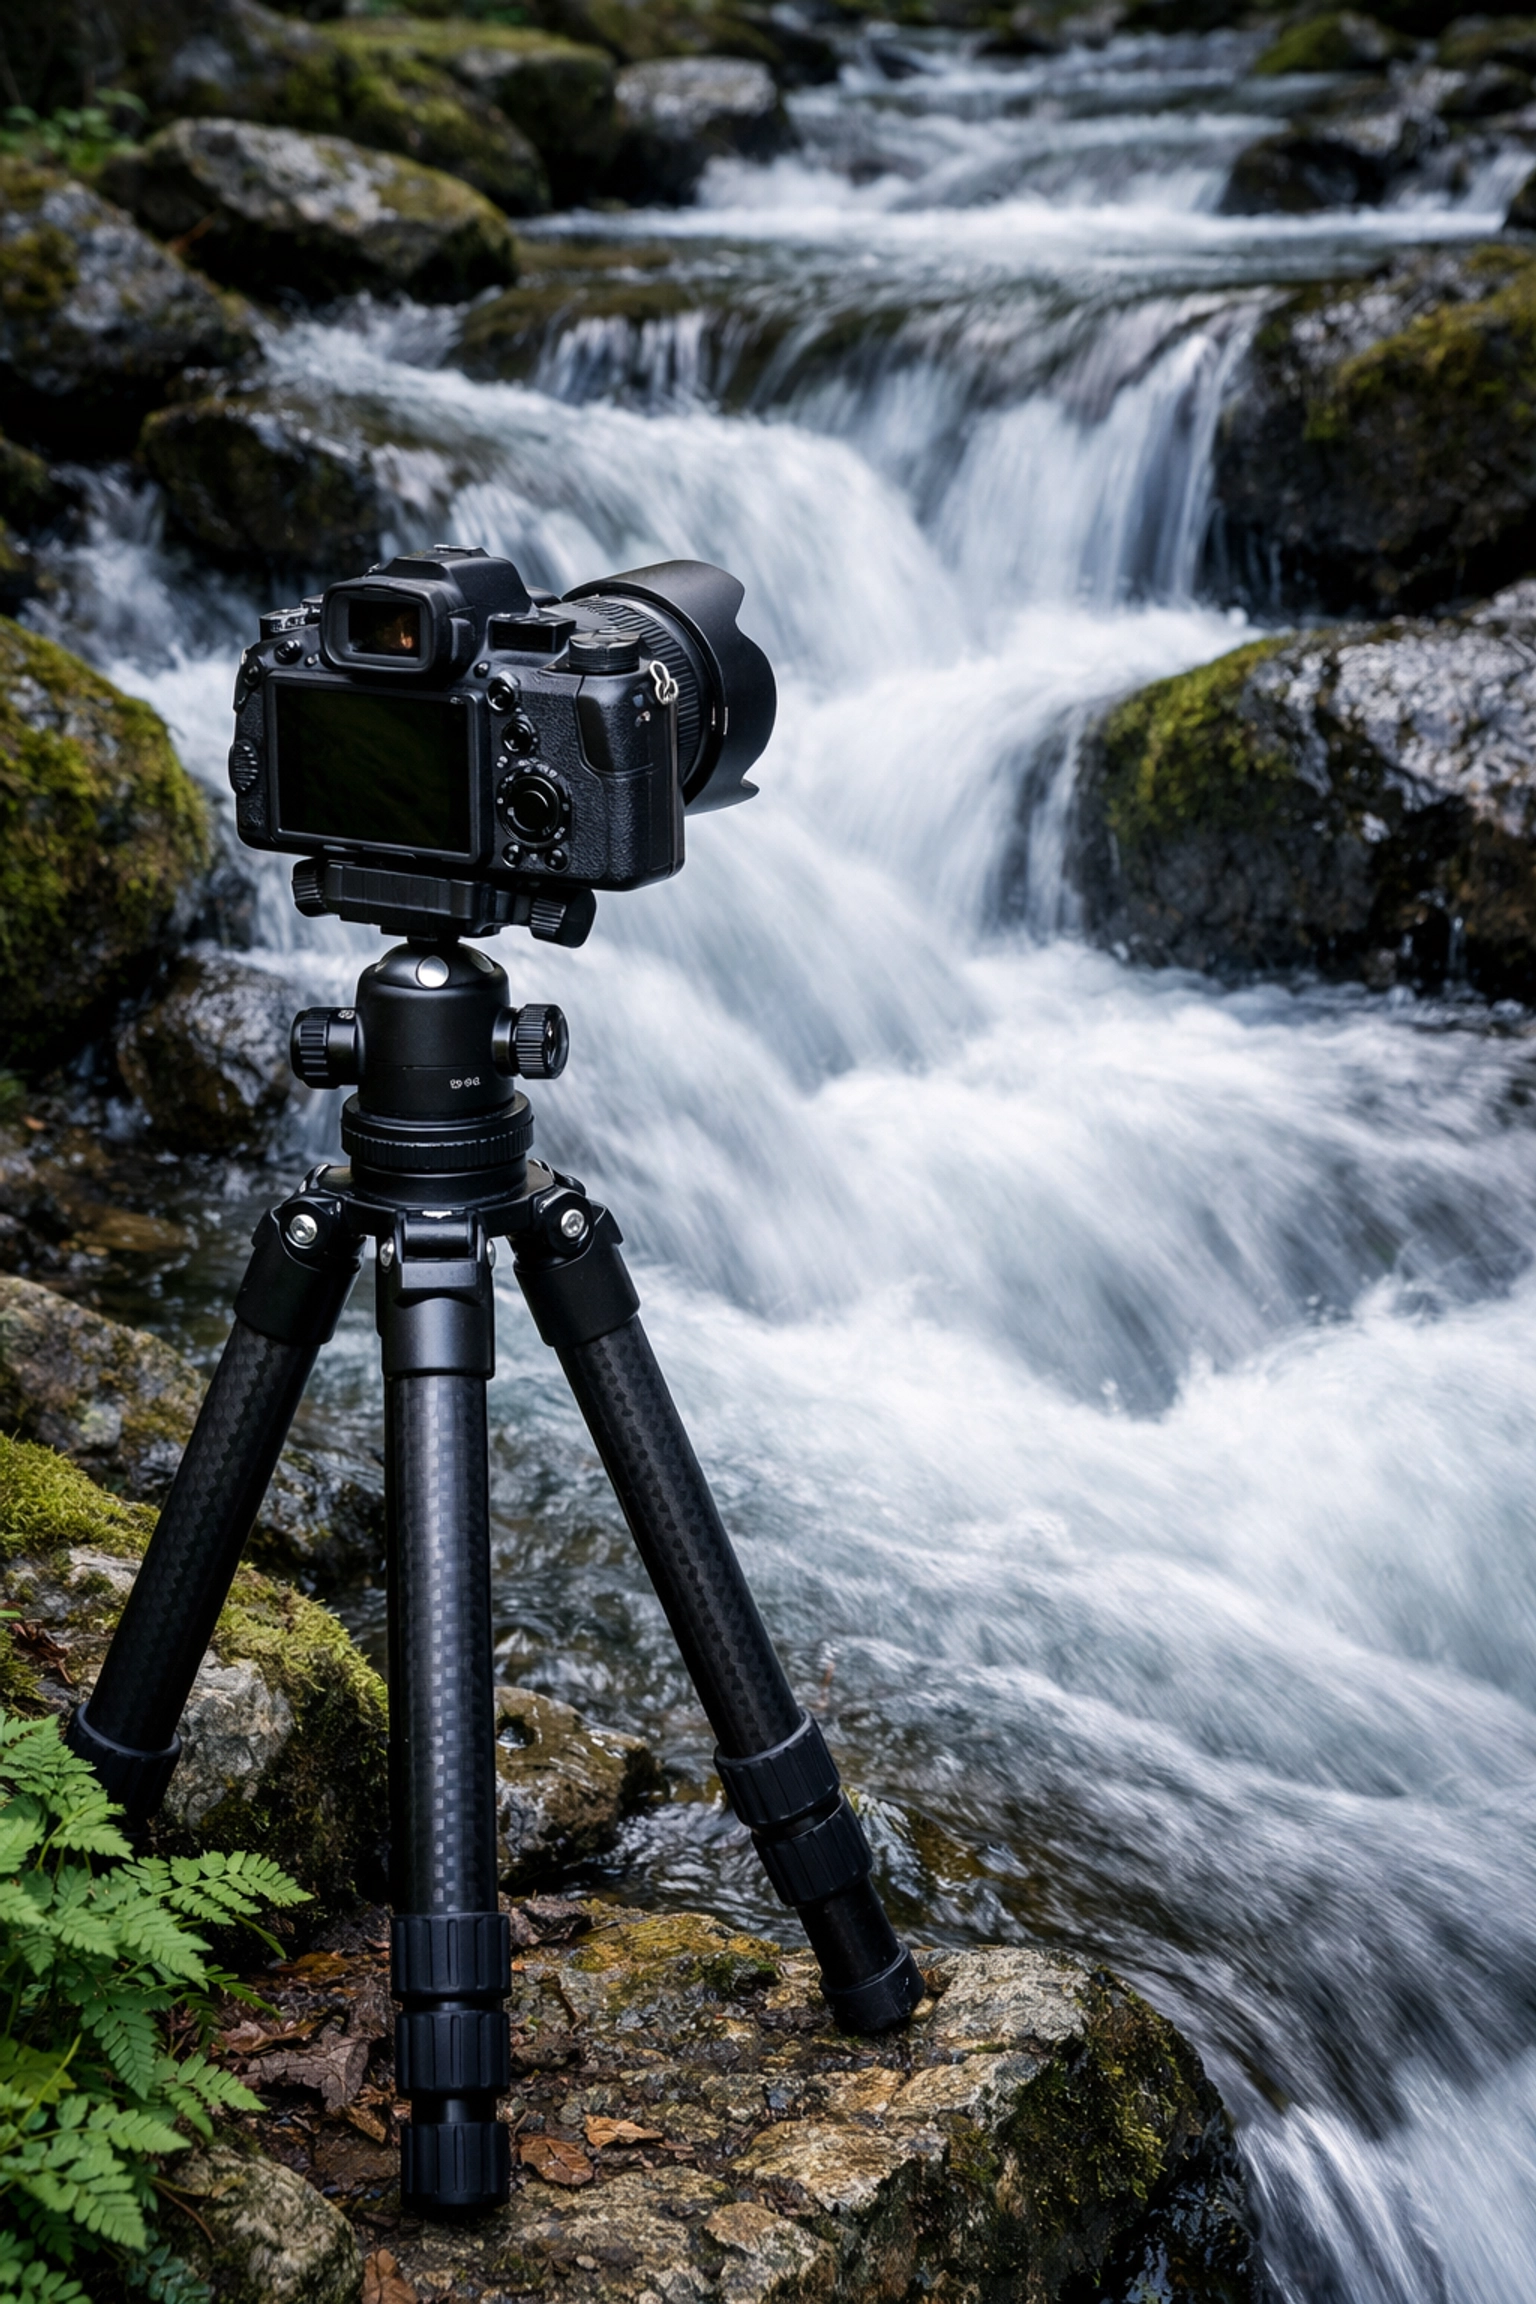
5. The "I Can Hold It Still" Myth
"I have steady hands, I don't need a tripod." Famous last words.
While modern IBIS (In-Body Image Stabilization) is incredible, it’s not magic. In landscape photography, we often want to shoot during the "Golden Hour" or "Blue Hour" when light is low. To keep your ISO low and your image quality high, you need longer shutter speeds. If you're shooting at 1/10th of a second or slower, your heartbeat is enough to cause motion blur.
Even if you think your shot is sharp on the tiny 3-inch screen on your camera, you’ll likely see the blur once you get it on a big monitor.
The Fix: Use a tripod. Always. A sturdy tripod is the most important piece of gear for a landscape photographer after the camera itself. It doesn't just keep the camera still; it slows you down and forces you to be more intentional with your composition. If you're looking to capture water photography with that silky-smooth look, a tripod isn't optional, it's a requirement.
6. Over-Cooking the Edit (The Crunchy Sky)
Post-processing is half the fun of photography. However, it’s very easy to go overboard. We’ve all seen those photos where the sky is so blue it looks radioactive, or the shadows are pushed so hard there’s a weird glow around the trees (the "halo effect").
Over-sharpening is another big one. It makes the grass look like needles and the clouds look "crunchy." When you over-edit, you lose the natural beauty that made you want to take the photo in the first place.
The Fix: Be subtle. When you're using software like Luminar, use the AI tools to enhance the image, but don't let them take over. A good rule of thumb is to push a slider until it looks "right," and then pull it back by 20%. You want people to say "What a beautiful place," not "What a crazy edit." If you’re new to editing, check out our photo editing tutorials 101 to learn how to keep things looking natural.
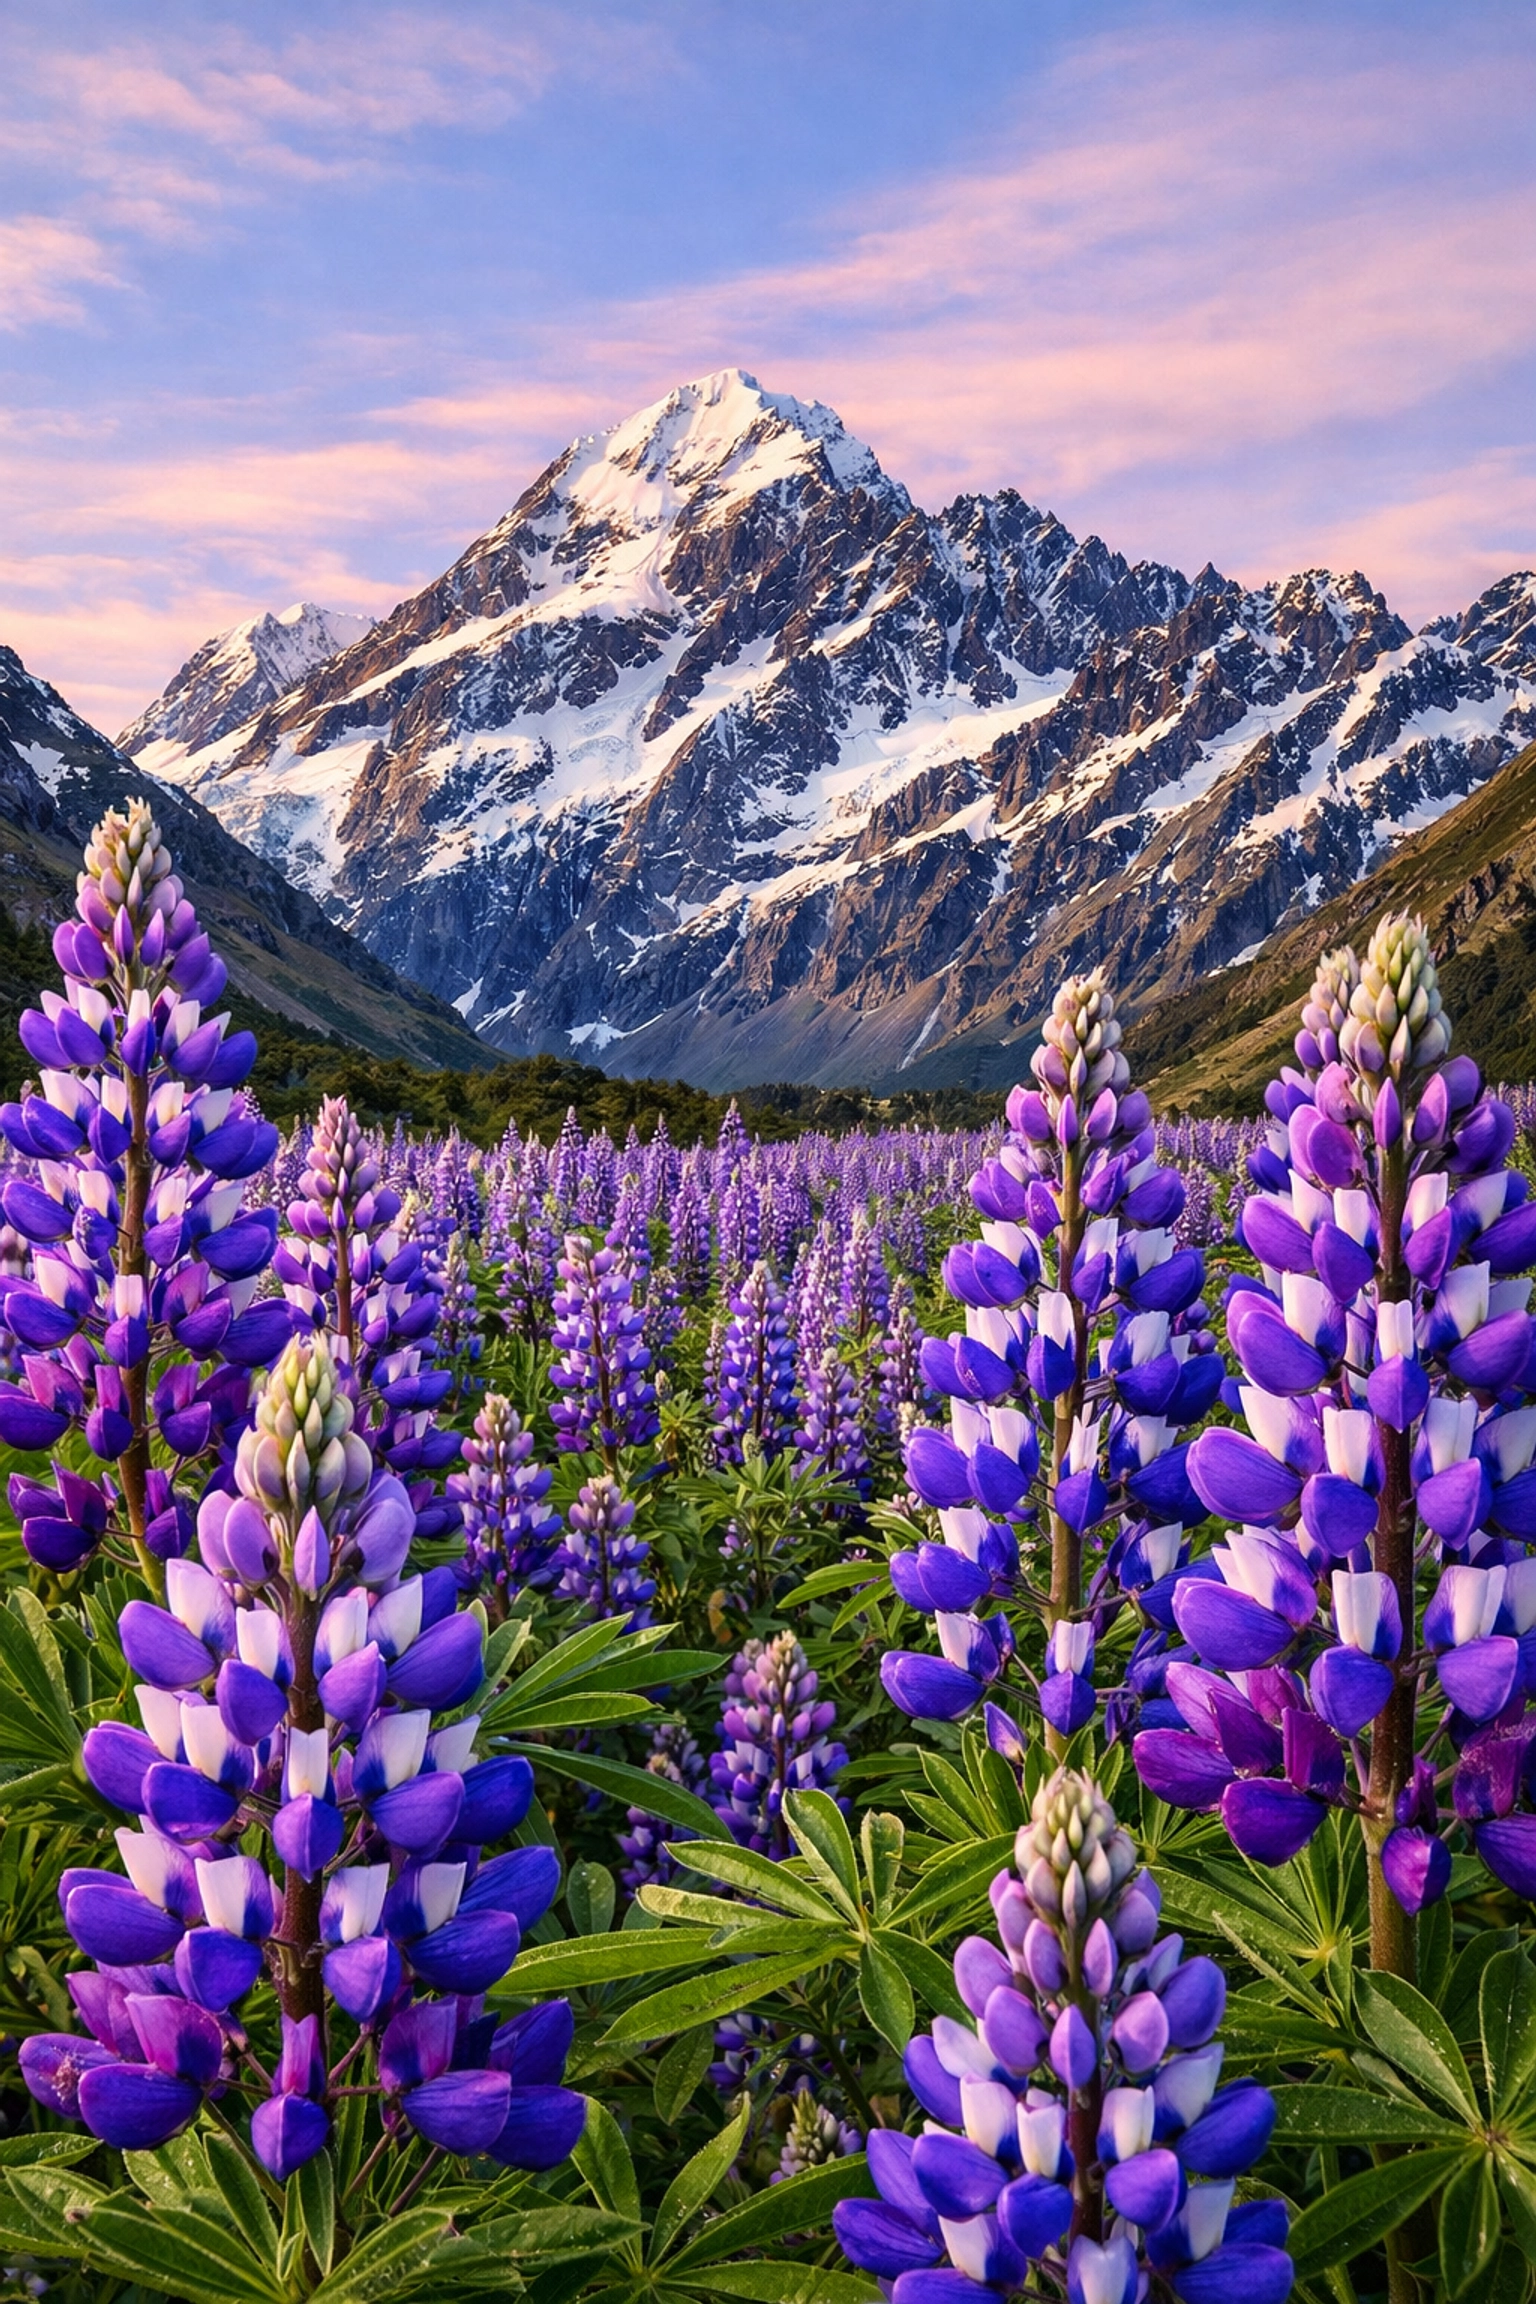
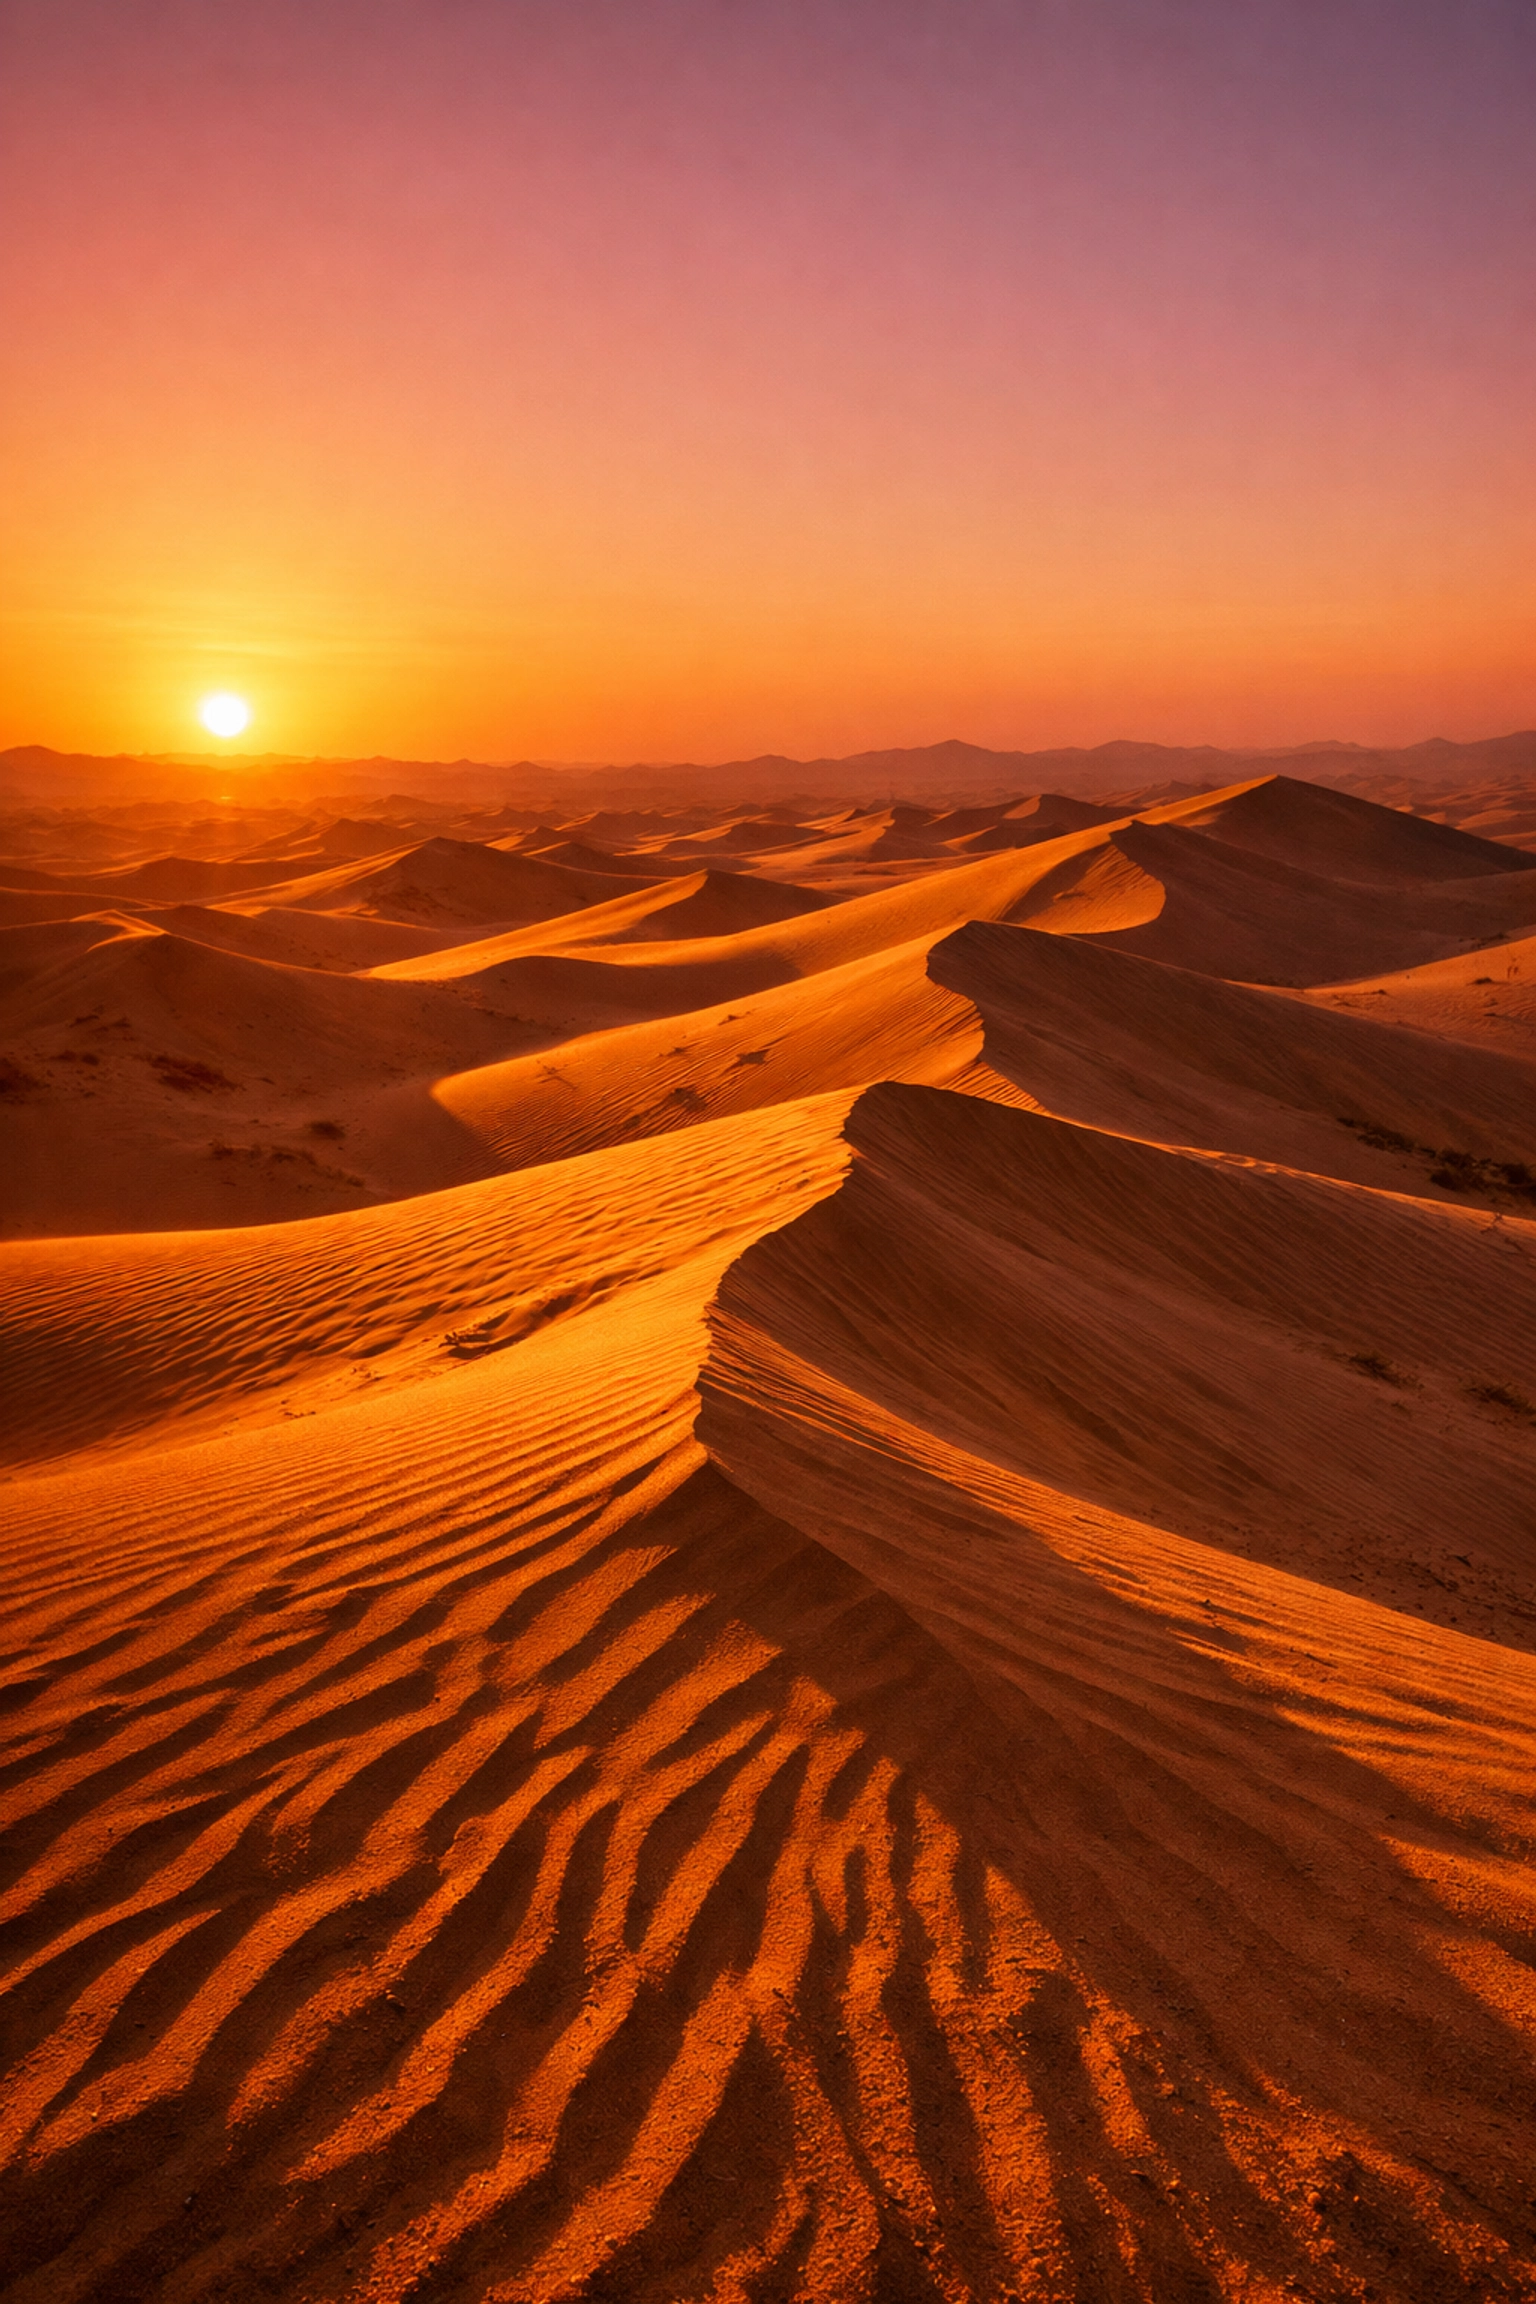
7. Shooting at High Noon
The sun is your best friend and your worst enemy. Shooting landscapes at 12:00 PM on a clear day is a recipe for disaster. The light is harsh, the shadows are pitch black, and the colors get washed out. This is the #1 reason why your photos look like "snapshots" instead of professional art.
Great landscape photography is 90% about the light. If you show up at the wrong time, it doesn't matter how expensive your lens is; the photo will be flat.
The Fix: Chase the light. Plan your shoots around sunrise and sunset. The hour before and after the sun crosses the horizon provides soft, directional light that creates texture and warmth. If you’re looking for inspiration on where to go, we’ve put together a list of top spots for majestic sunset photography that will blow your mind. Also, don't be afraid of "bad" weather. Stormy clouds and mist often make for much more dramatic shots than a plain blue sky.
Bonus Tip: Stop Going Where Everyone Else Goes
We love a good shot of Horseshoe Bend or the Eiffel Tower as much as the next person, but if you want your portfolio to stand out, you need to find something unique. The world is full of hidden gem locations for travel photography that haven't been photographed to death.
When you go to a popular spot, don't just stand where the "photo here" sign is. Walk around. Look for a different angle. Put your camera low to the ground or climb a little higher. Use lesser-known vistas to create something that feels fresh and original.
Putting It All Together
Landscape photography is a journey. You’re going to make mistakes, heck, I still make them sometimes. The key is to learn from them. Next time you're out in the wild, remember:
- Find a clear subject.
- Level that horizon.
- Add some foreground interest.
- Watch your edges.
- Bring the tripod.
- Edit with a light touch in Luminar.
- And for the love of all things holy, get out of bed early for that sunrise light.
If you keep these seven things in mind, you'll see a massive jump in the quality of your work. For more tips on gear, technique, and the latest in the industry, stay tuned to our photography news.
Now, quit reading this and go outside. The light is waiting! For even more inspiration, check out blog.edinchavez.com or see some world-class examples at www.edinfineart.com. You can also find some great professional tips over at www.proshoot.io. Happy shooting!


