

Landscape photography seems easy on paper. You find a mountain, you point your camera, and you click the shutter. But then you get home, pull the files up on your monitor, and realize that the "epic" scene you saw with your eyes looks like a flat, boring, cluttered mess on the screen.
Trust me, we’ve all been there. Even the pros at PhotoGuides.org will tell you that capturing the grandeur of nature requires more than just a high-megapixel sensor. It requires intent. Most of the time, the difference between a "meh" photo and a "wow" photo isn't the gear, it's avoiding a handful of common traps that trap even experienced shooters.
I was chatting with Sonny, our Social Media Manager, about the flood of landscape tags we see every day. We noticed that the most common errors aren't technical failures of the camera, but failures of vision. If you want to stop taking snapshots and start making art, you need to fix these seven mistakes right now.
1. The Ultra-Wide "Everything" Trap
The most common mistake in landscape photography is thinking that an ultra-wide-angle lens is a magic "make it epic" button. You get to a beautiful vista, slap on a 14mm lens, and try to cram the entire horizon into one frame.
The problem? When you try to include everything, you often end up with nothing.
Ultra-wide lenses make distant objects, like those massive mountains you’re looking at, look tiny and insignificant. They also create a lot of empty "dead space" in the middle of your frame. If you aren't careful, your viewer’s eye will wander around the photo with nowhere to land.
The Fix:
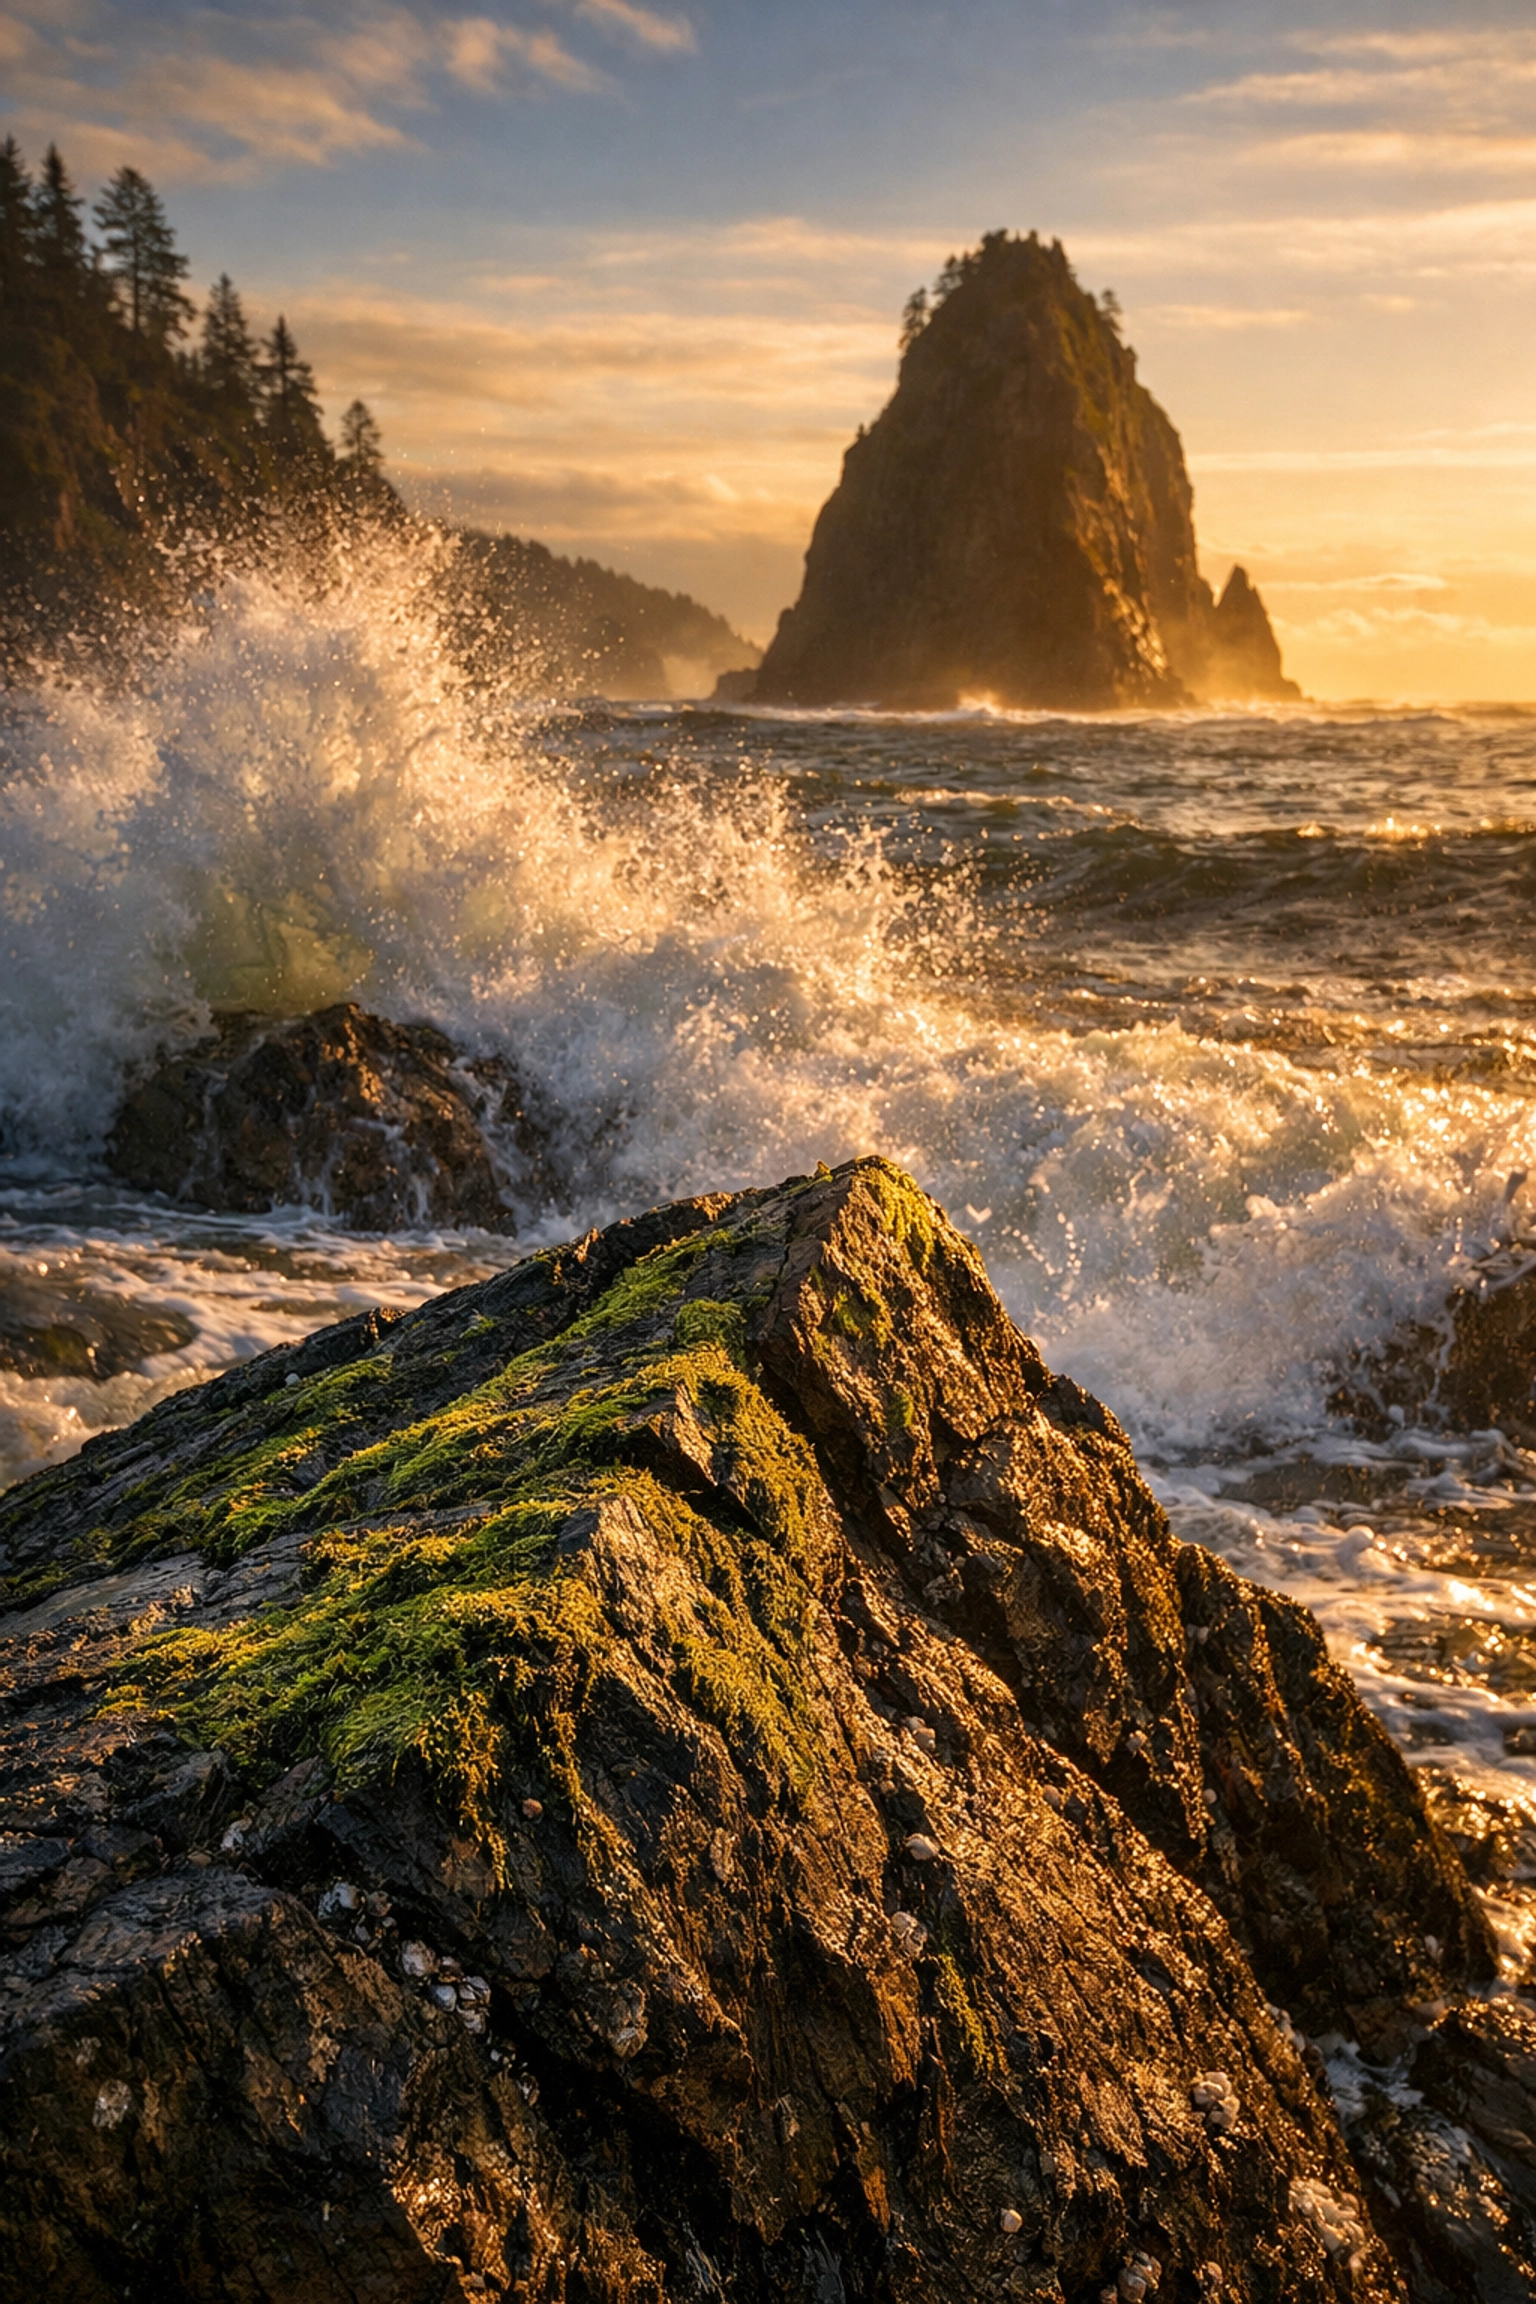
Step back and think about your focal length. Sometimes, a telephoto lens (70mm to 200mm) is actually a better choice for landscapes because it compresses the scene, making those distant peaks look huge and imposing. If you do use a wide-angle lens, you must find a strong foreground element to anchor the shot. Get low and get close to a rock, a flower, or a patch of ice. This creates a sense of scale and leads the eye into the distance.
For more ideas on finding the right perspective, check out our guide on discovering ethereal landscapes for captivating shots.
2. Neglecting the "Border Patrol"
You’re so focused on the beautiful sunset or the waterfall in the center of your frame that you completely ignore what’s happening at the edges. This is a classic mistake. You get home and realize there’s a stray tree branch poking into the top left corner, a piece of trash in the bottom right, or half of a tourist's head leaning into the shot.
Messy edges distract the viewer and pull their eyes away from your subject. It makes the photo feel accidental rather than intentional.
The Fix:
Before you hit that shutter button, perform a "Border Patrol." Slowly scan the entire perimeter of your viewfinder or LCD screen. Look at all four corners. If there’s a distracting element, move your camera slightly, zoom in a tiny bit, or physically move the distraction if it’s something like a loose twig. Clean edges make for a professional, polished image. This is especially important when you’re shooting picturesque coastal escapes where driftwood or debris can easily clutter the frame.
3. The "f/22 Only" Myth
There’s a persistent myth that for landscape photography, you need to use the smallest aperture possible (like f/22) to get everything in focus. While a small aperture does increase your depth of field, it comes with a hidden cost: lens diffraction.
When you stop down to f/22, the light waves begin to interfere with each other as they pass through the tiny opening, which actually makes your entire image look softer. You might get "more" in focus, but the "sharpness" of that focus will be lower than if you shot at f/8 or f/11.
The Fix:
Find your lens’s "sweet spot." For most lenses, this is between f/8 and f/11. This usually provides enough depth of field to keep a landscape sharp from front to back without the softening effects of diffraction. If you have a subject very close to the lens and want the background sharp too, learn a technique called "focus stacking." Take one shot focused on the foreground and another on the background, then blend them later.
If you’re struggling with the technical side of things, our breakdown of the best camera settings for stunning water landscapes covers aperture choices in depth.
4. Flat Light and Mid-Day Laziness
Lighting is 90% of a great landscape. Many beginners make the mistake of shooting in the middle of the day when the sun is high and the light is harsh. This creates deep, ugly shadows and blown-out highlights. It makes even the most beautiful mountain range look flat and uninspiring.
If you’re just showing up at 1:00 PM and expecting a masterpiece, you’re going to be disappointed.
The Fix:
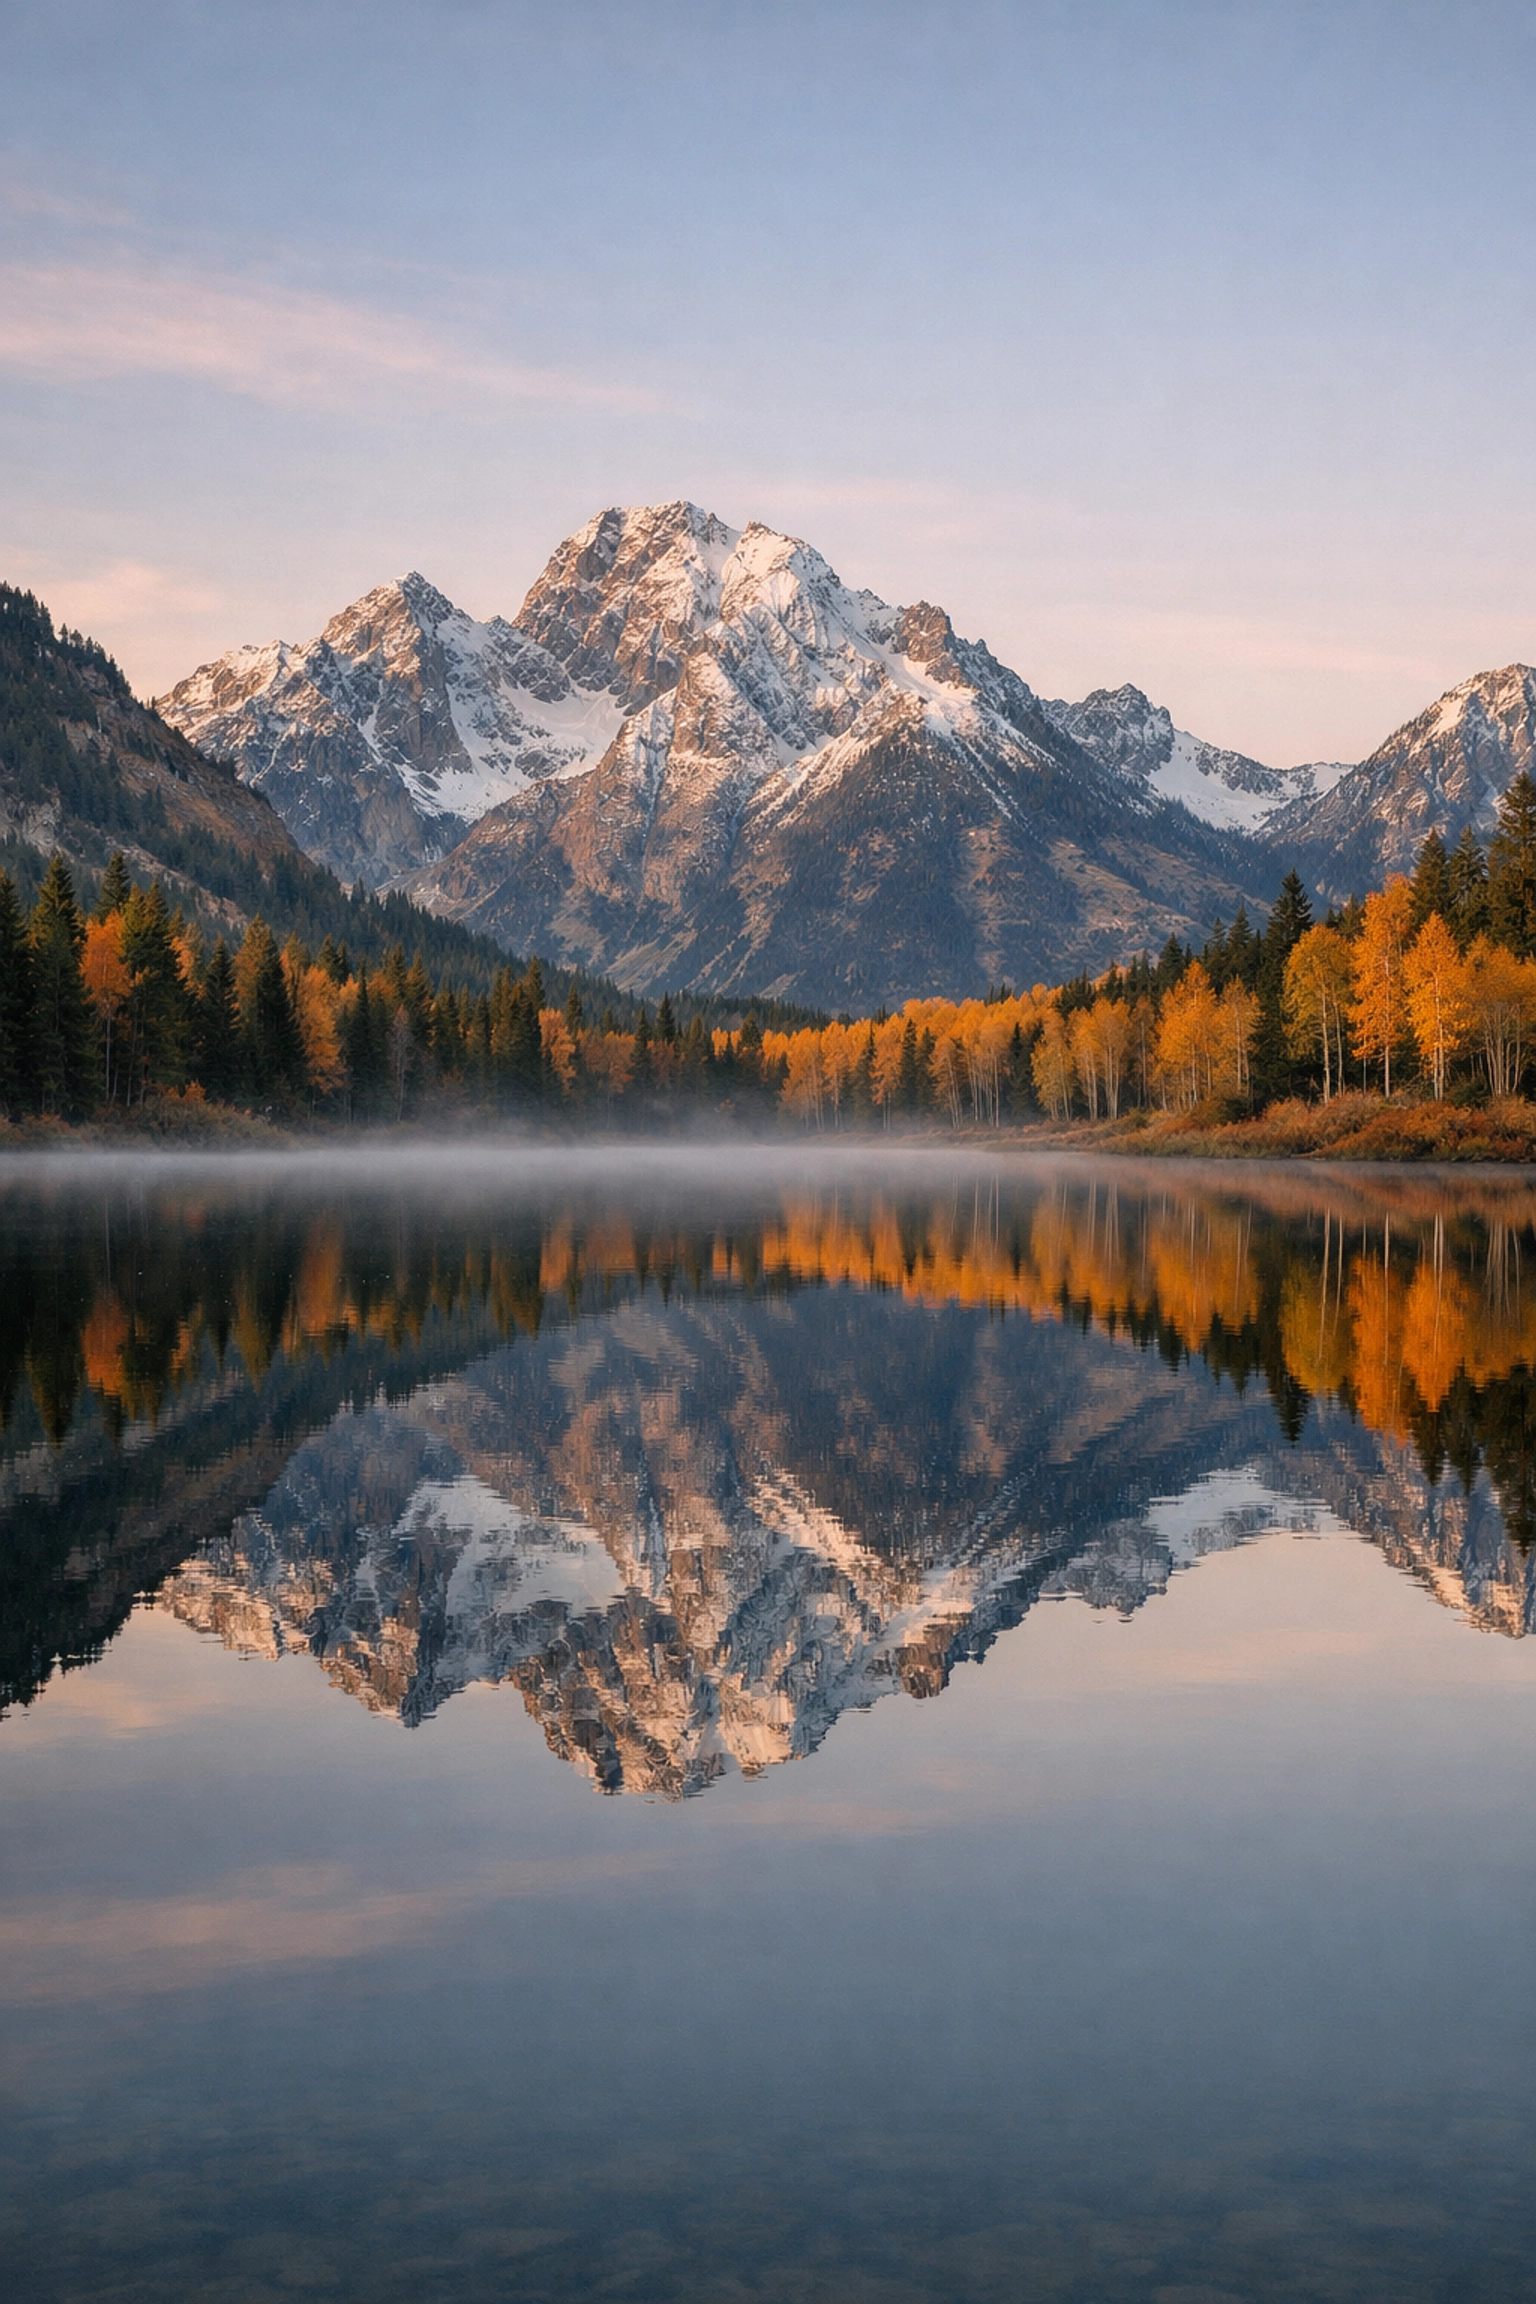
Chase the "Golden Hour", the hour after sunrise and the hour before sunset. The light is softer, warmer, and hits the landscape at an angle, creating textures and shadows that give your photo 3D depth. If you really want to level up, try the "Blue Hour" (just before sunrise or after sunset) for moody, ethereal tones.
For those looking to master the timing of their shots, we have a great resource on top spots for majestic sunset photography that highlights how light changes the game.
5. Over-Processing and "HDR Puke"
We’ve all seen them: landscape photos where the colors are so saturated they hurt your eyes, and the shadows are so bright they look like they were lit by a stadium lamp. With modern software like Luminar, it’s incredibly easy to push a slider too far.
Over-processing, specifically excessive clarity, saturation, and aggressive HDR, strips the soul out of a landscape. It makes the photo look like a video game render rather than a piece of nature. When you over-sharpen or add too much "crunch," you lose the natural atmospheric haze that gives a landscape its sense of scale.
The Fix:
Subtlety is your friend. When using Luminar, use the "Accent AI" or "Sky Enhancer" tools sparingly. A good rule of thumb is to push a slider until it looks "right," and then pull it back by 20%. Aim for a look that enhances what was actually there rather than creating a neon fantasy world. If you find yourself needing to fix textures specifically, check out our piece on using rare textures for tangible aesthetic photography.
6. Lacking a Clear Subject (The "Where Do I Look?" Problem)
A landscape isn't just a collection of trees or rocks; it needs a story. A common mistake is taking a photo of a general area without a clear focal point. The viewer looks at the photo and thinks, "Okay, it’s a forest… now what?"
Without a subject, the eye has nowhere to rest. The photo feels "busy" and disorganized.
The Fix:
Ask yourself: "What is the hero of this shot?" Is it that lone tree? That specific jagged peak? The way the water curves around that rock? Once you identify the subject, use composition rules like the Rule of Thirds or leading lines to point the viewer directly at it.
If you’re shooting near the coast, use the tide or the shoreline to guide the eye. We dive deep into this in our guide on water photography and capturing beauty in motion.
7. Staying on the Beaten Path
If you only take photos from the designated "viewpoint" at a national park, your photos are going to look exactly like the millions of other photos taken from that exact spot. The mistake here is a lack of exploration.
Great landscape photography often requires a bit of sweat. If you aren't willing to walk a few miles past the parking lot or wake up at 3:00 AM to hike in the dark, you’re missing out on the unique perspectives that make an image stand out.
The Fix:
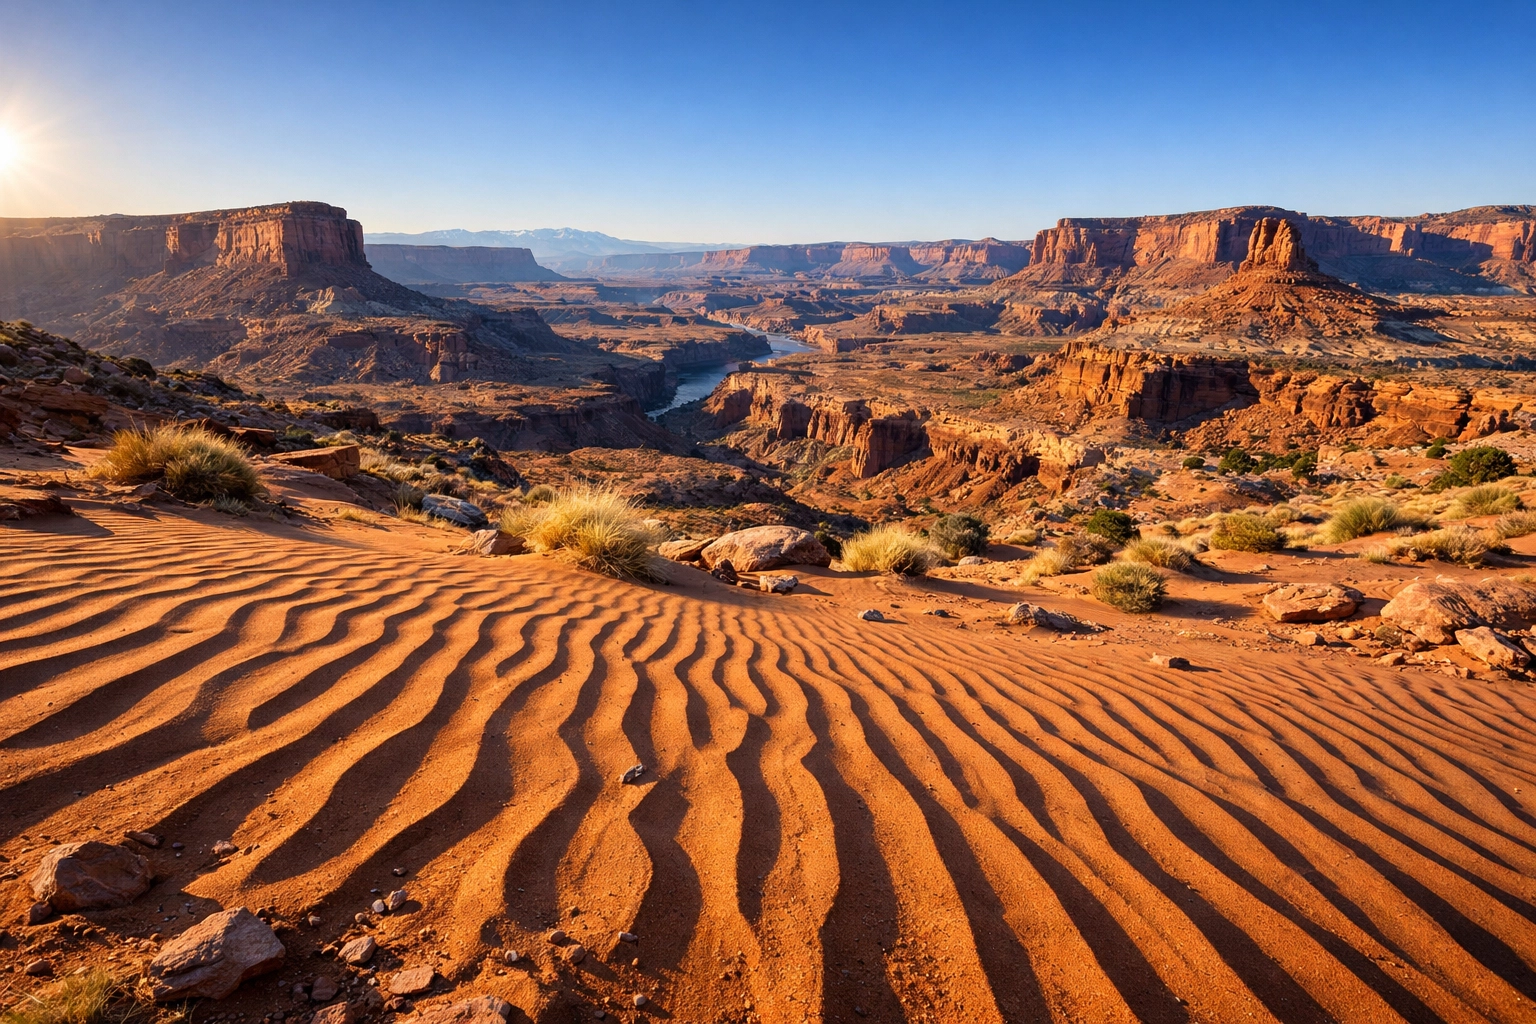
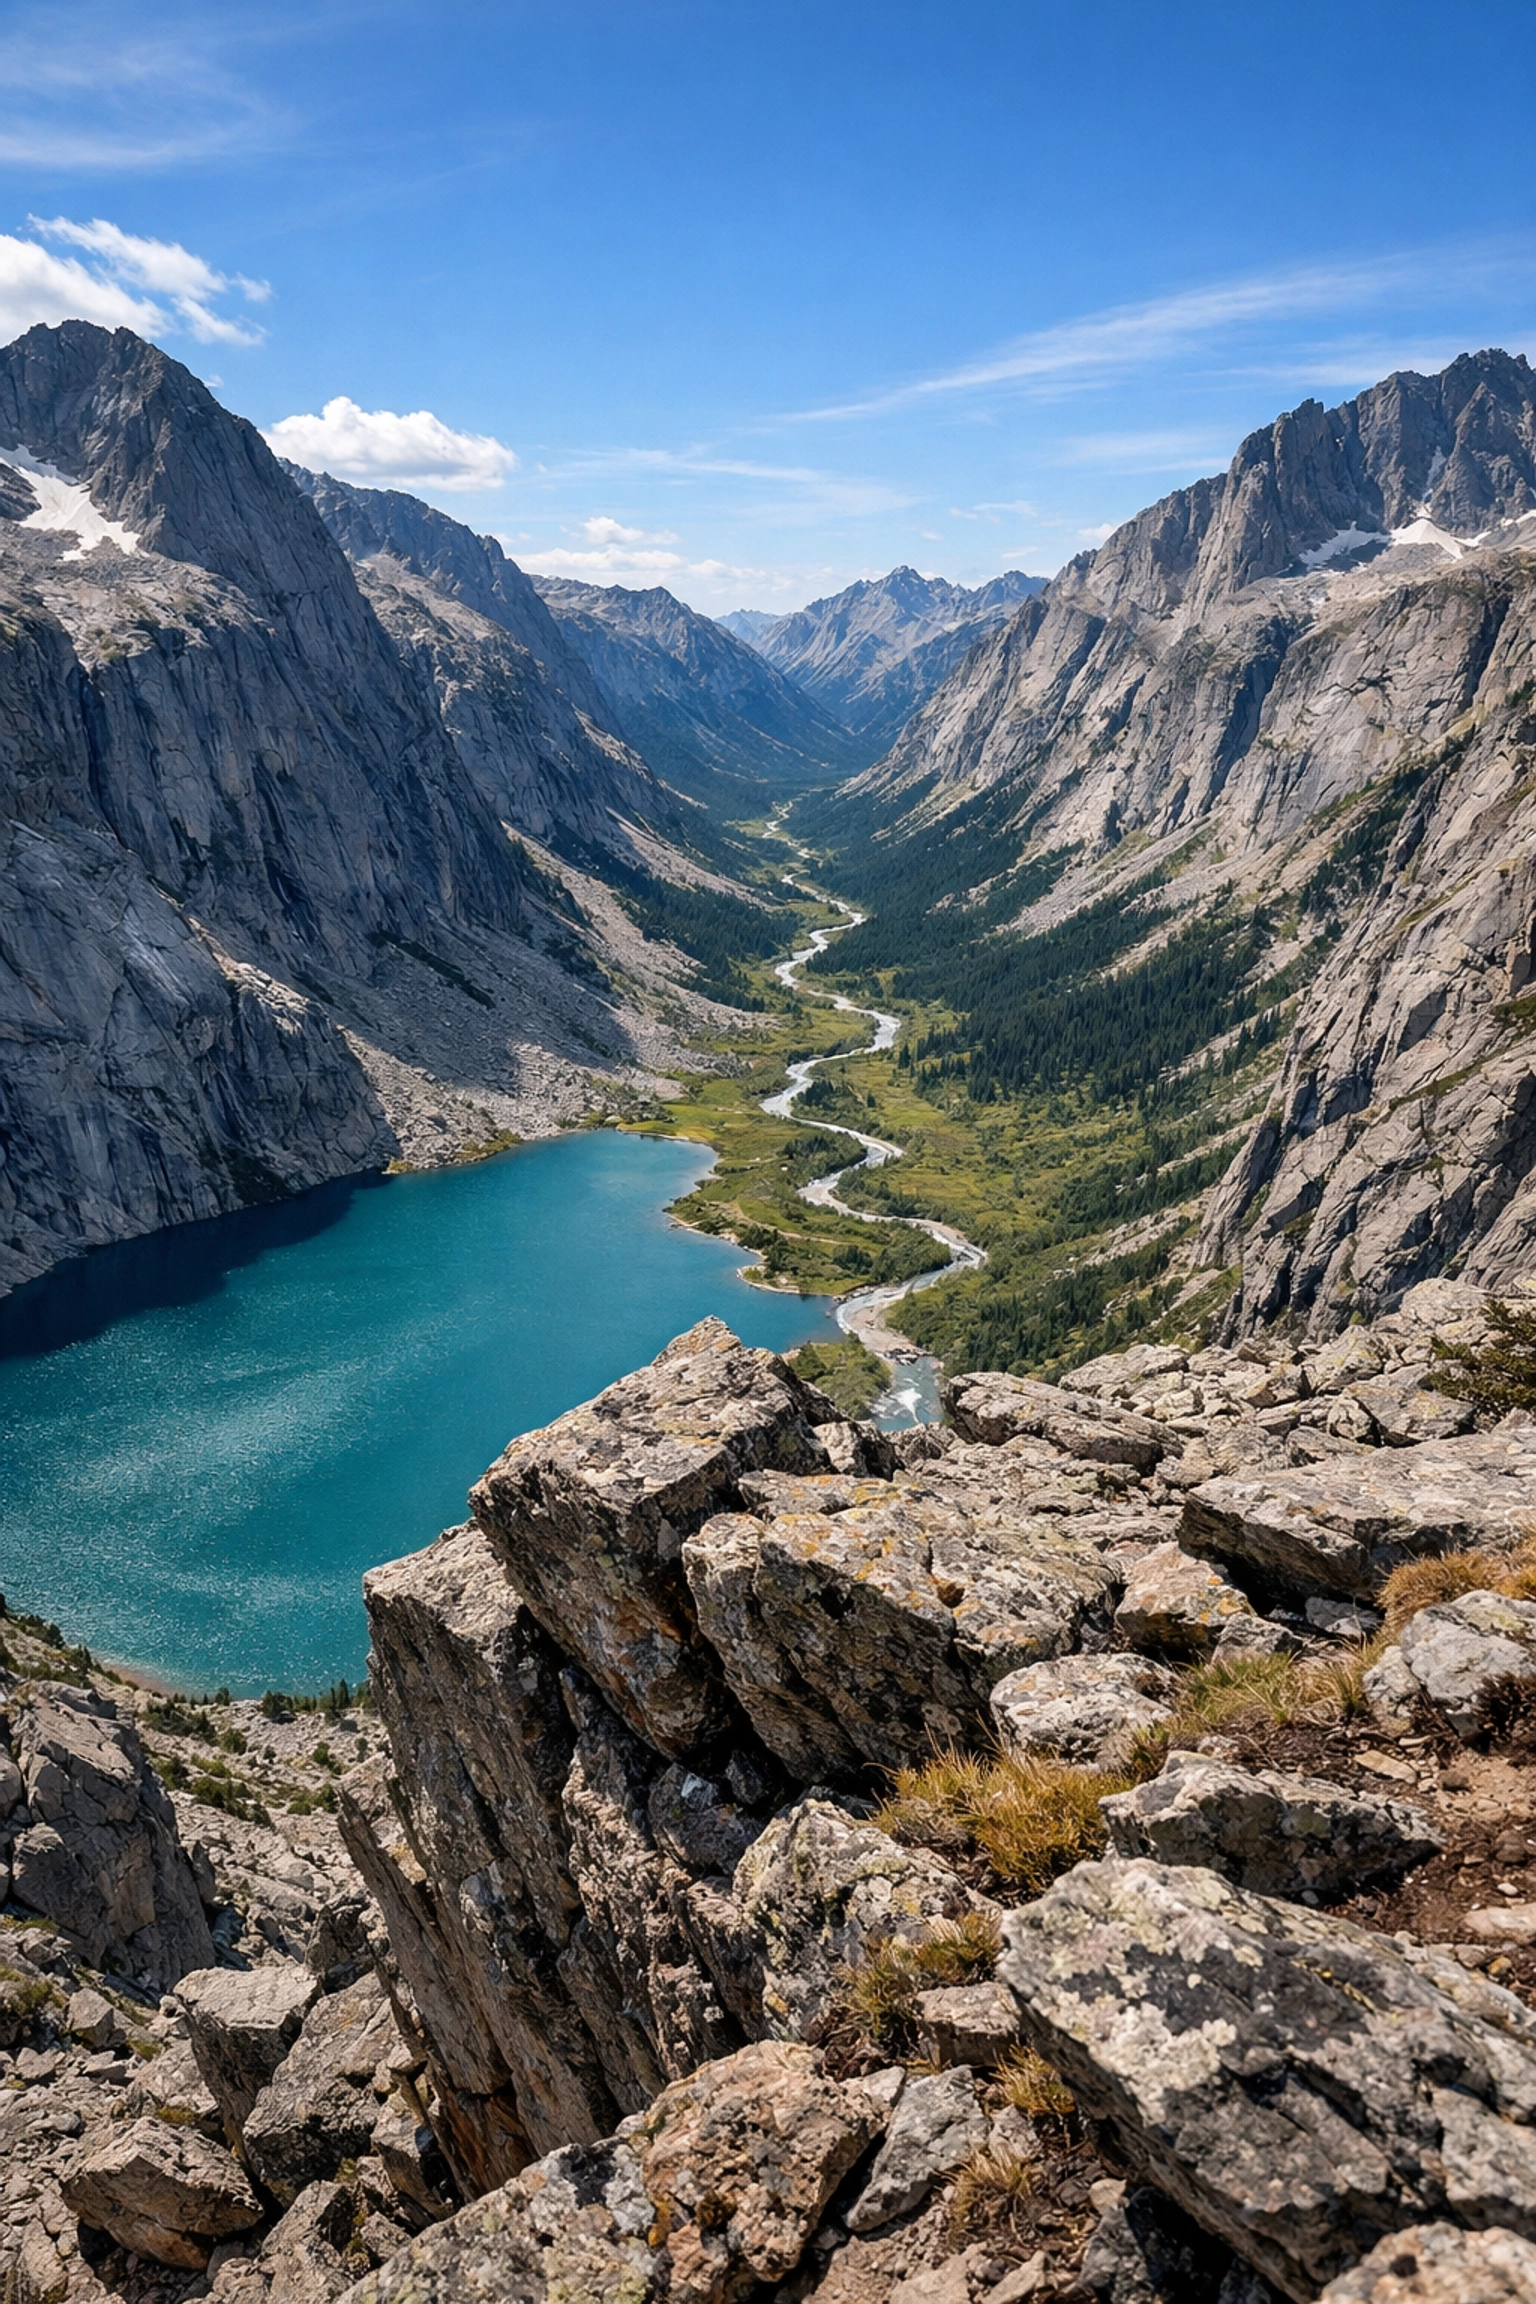
Do your research. Use tools like Google Earth or scouting apps to find hidden gem locations for travel photography. Look for lesser-known vistas that haven't been over-photographed. Sometimes, just walking 50 yards off the main trail (where allowed!) can give you a completely different and more compelling foreground.
The Secret Ingredient: Patience
Beyond these seven mistakes, the biggest hurdle is often just a lack of patience. Nature doesn't perform on a schedule. You might go to a perfect location, have the perfect gear, and follow all the rules, only for the clouds to stay grey and the wind to ruin your reflections.
The pros don't just get lucky; they show up over and over again until the conditions align. They study the weather, they understand how water moves: as seen in our techniques for stunning water photography guide: and they wait.
Landscape photography is a meditative process. It’s about being present in the environment as much as it is about the technical settings. If you’re rushing, you’re making mistakes. Slow down. Look at the edges of your frame. Check your aperture. Think about your subject.
When you stop making these common mistakes, you’ll find that your "hit rate" goes up significantly. You’ll stop coming home with a memory card full of "okay" shots and start bringing back images that you’ll actually want to print and hang on your wall.
For more inspiration on what’s possible when you get it right, take a look at the work over at Edin Fine Art or Edin Studios. And if you’re looking for more technical deep dives, ProShoot.io and Edin’s Blog are always packed with fresh insights.
Now, stop reading this, grab your gear, and go find a secluded paradise to shoot. Just remember: watch your borders, find a subject, and for the love of all things holy, go easy on the saturation slider in Luminar. Happy shooting!


