We’ve all been there. You read a dozen "top ten" lists about landscape photography, you buy the expensive wide-angle lens, you hike four miles into the wilderness at 4:00 AM, and you come back with… a photo that looks like a flat, boring postcard. It’s frustrating. You followed the tips, so why does the shot look like it was taken by a tourist on a bus?
The problem usually isn’t the tips themselves; it’s the execution. Most landscape photography tips are simplified for mass consumption, leaving out the nuance that actually makes a photo "art." We get so caught up in the technical jargon that we forget how to actually see the landscape. We’re checking boxes instead of telling stories.
If you’re ready to stop taking "okay" photos and start creating images that people actually want to hang on their walls, you need to look at the subtle errors you’re making. Here are 7 common mistakes you’re likely making with those landscape photography tips and exactly how to fix them.
1. The "Empty Foreground" Syndrome
The most common tip in landscape photography is "use a wide-angle lens." So, you slap on your 16mm, point it at a mountain, and click. The result? A tiny mountain in the distance and a massive, empty field of grass or dirt in the bottom two-thirds of your frame.
Wide-angle lenses are notorious for "pushing" the background away. If you don't have something interesting right in front of the lens, the photo feels hollow. You’re following the tip of using a wide lens, but you’re ignoring the physical reality of how that lens works.
How to Fix It:
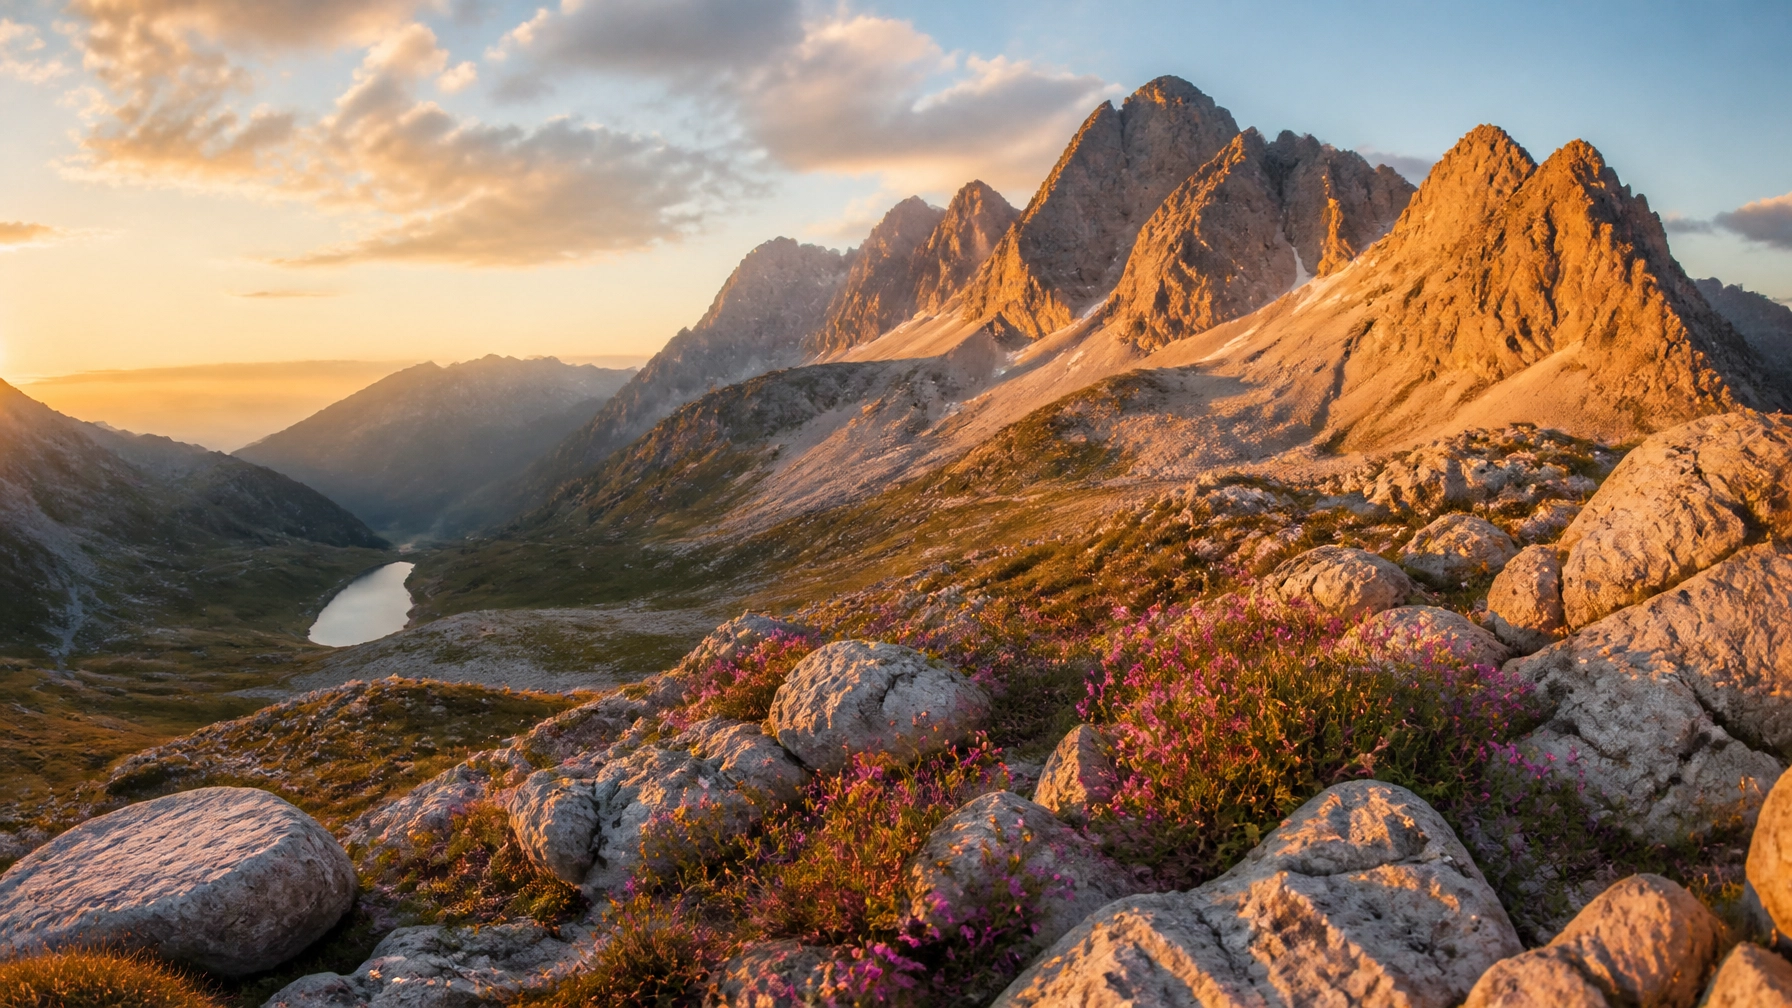
You have to get uncomfortably close to your foreground. If there’s a cool rock, don’t stand five feet away from it; get six inches away from it. Use your foreground as a "doorway" into the rest of the image. This creates a sense of depth that makes the viewer feel like they could step right into the scene.
Think about layers. You want a clear foreground, a distinct mid-ground, and a powerful background. If you’re struggling with this, check out our guide on how to master landscape photography for a deeper dive into composition layers. Don't just show us the mountain; show us the journey to the mountain.

2. Chasing the Wrong Light (The Midday Mistake)
"Shoot during the Golden Hour" is the most repeated tip in history. But here’s where photographers mess up: they think any light during that hour is good light. Or worse, they spend all day shooting under a harsh, midday sun because they’re already at the location.
Midday sun creates "flat" images with harsh, vertical shadows that kill the texture of the landscape. It makes colors look washed out and highlights look blown. Even if you’re at the Grand Canyon, midday light can make it look like a pile of dusty rocks.
How to Fix It:
Light is king. Period. If the light isn't working, the photo isn't working. You need to prioritize the direction and quality of the light over the subject itself. Low-angled light, which happens just after sunrise and just before sunset, casts long shadows that reveal the "shape" of the land.
If you find yourself stuck in a beautiful place at noon, don't waste your battery on wide vistas. Instead, head into a forest or find a waterfall. Overcast days are actually a blessing for "intimate" landscapes because the clouds act like a massive softbox, evening out the light. If you're looking for more advanced techniques on handling tricky lighting, PhotoGuides.org has some killer resources on natural light management.
3. The Wide-Angle Trap
We’ve been conditioned to think that landscapes = wide angle. This is a trap. Sometimes, the most powerful landscape photo is the one you take with a 200mm lens. By always shooting wide, you’re often including way too much "junk" in your frame, power lines, distracting bushes, or just too much empty sky.
When you try to capture everything, you often end up capturing nothing. The viewer’s eye doesn’t know where to land because there are fifteen different "subjects" competing for attention.
How to Fix It:
Try a telephoto lens for your next landscape session. A longer focal length "compresses" the scene, making distant mountains look larger and more imposing. It allows you to isolate a specific pattern, a single peak, or a lone tree on a ridge.
Simplicity is the ultimate sophistication in photography. If you can’t find a clean composition with your wide-angle lens, zoom in. Find the "story within the story." For those who want to really get into the nitty-gritty of gear settings, mastering your manual mode is essential when you start playing with different focal lengths.

4. Aperture Anxiety (f/22 Isn't Always the Answer)
A common tip is to "use a small aperture for maximum depth of field." So, photographers crank their lens to f/22, thinking it will make everything from the front of the lens to the horizon razor-sharp.
The mistake? Lens diffraction. Most lenses actually lose sharpness when you stop them down to their absolute limit. At f/22, the light "bends" around the aperture blades in a way that creates a slight fuzziness across the whole image. You’re trading overall sharpness for a depth of field you might not even need.
How to Fix It:
Find the "sweet spot" of your lens, which is usually around f/8 or f/11. For 90% of landscapes, f/11 provides plenty of depth of field without the softening effects of diffraction. If you absolutely need more focus (like when you have a rock two inches from your lens), look into "focus stacking" rather than just stopping down to f/22.
Understanding the relationship between aperture and sharpness is a game-changer. I highly recommend spending some time over at Edin Chavez’s blog to see how pros balance technical settings with artistic vision. It’s not just about the numbers; it’s about how the image feels.
5. Over-Editing & The "Neon Grass" Effect
Post-processing is where good photos become great, but it’s also where many photographers go to die. We’ve all seen them: the photos where the sky is an impossible shade of purple, the grass looks like it’s glowing under a radioactive lamp, and every shadow has been pushed so hard it’s full of "grainy" noise.
The tip "edit your RAW files" doesn't mean "move every slider to 100." When you over-process, you lose the soul of the place you visited. You create a digital composite that feels fake and uninviting.
How to Fix It:
Subtlety is your best friend. Your goal in editing should be to recreate the feeling of being there, not to create a new planet. Start by getting your white balance right. If the shadows look orange, you’ve gone too far.
If you want a tool that helps you stay realistic while still giving your photos that professional "pop," I always recommend using Luminar. It uses AI to handle the tedious stuff (like sky replacement or structure enhancement) in a way that looks way more natural than manual hacking. Just remember: if someone’s first comment on your photo is "cool edit," you failed. If their first comment is "wow, I want to go there," you won.

6. Ignoring Stability (The Shaky Hand Mistake)
"You need a tripod" is a tip everyone hears, but many ignore because tripods are heavy and annoying to carry. So, photographers try to "hand-hold" a sunset shot at 1/10th of a second. They look at the small screen on the back of the camera and think, "Looks sharp to me!"
Then they get home, open it on a 27-inch monitor, and realize the whole thing is a blurry mess. Camera shake is the silent killer of landscape photography. Even a tiny bit of movement can destroy the fine details in the trees or the texture of the rocks.
How to Fix It:
If the sun is low, the tripod is out. No exceptions. If you absolutely can't carry a tripod, you need to boost your ISO and use a faster shutter speed to compensate. But remember, higher ISO means more noise.
In landscape photography, we want "clean" files. That means ISO 100, a solid tripod, and a remote shutter release (or a 2-second timer) to ensure the camera doesn't move when you press the button. For more gear-specific advice, check out the latest camera gear reviews on our site to find a lightweight setup that won't break your back.
7. The Cluttered Composition
We’re often told to "capture the beauty of nature." This leads photographers to stand in front of a forest and just… take a picture of the forest. The result is a chaotic mess of branches, leaves, and light with no clear place for the eye to rest.
A good landscape photo needs a "hook." It needs a single subject that anchors the entire frame. If your photo is just a "jumble of stuff," the viewer will scroll right past it.
How to Fix It:
Before you click the shutter, ask yourself: "What is the subject of this photo?" If the answer is "the whole forest," you’re doing it wrong. Find the tree. Find the path. Find the light beam.
Exclude everything that doesn't support that subject. If there’s a distracting branch in the corner, move your camera. If there’s a bright spot of light that leads the eye away from your subject, crop it out. You can see examples of world-class composition over at Edin Fine Art: pay attention to how he uses negative space to make his subjects breathe.

Putting It All Together
Landscape photography is a marathon, not a sprint. You aren't going to get a masterpiece every time you step outside. But by avoiding these seven mistakes, you’ll significantly increase your "hit rate."
Stop just reading the tips and start understanding the why behind them. Why do we want a foreground? To create depth. Why do we shoot at sunset? To create shape and texture. Why do we use Luminar? To enhance the natural beauty without destroying it.
If you’re serious about taking your skills to the next level and want a structured way to learn all this, you should check out our photography courses. We break down everything from the basics of exposure to advanced editing workflows in a way that actually makes sense.
Photography is about the joy of being out in nature and capturing a moment that will never happen again in exactly the same way. Don't let technical mistakes get in the way of that. Fix your composition, respect the light, and keep shooting.