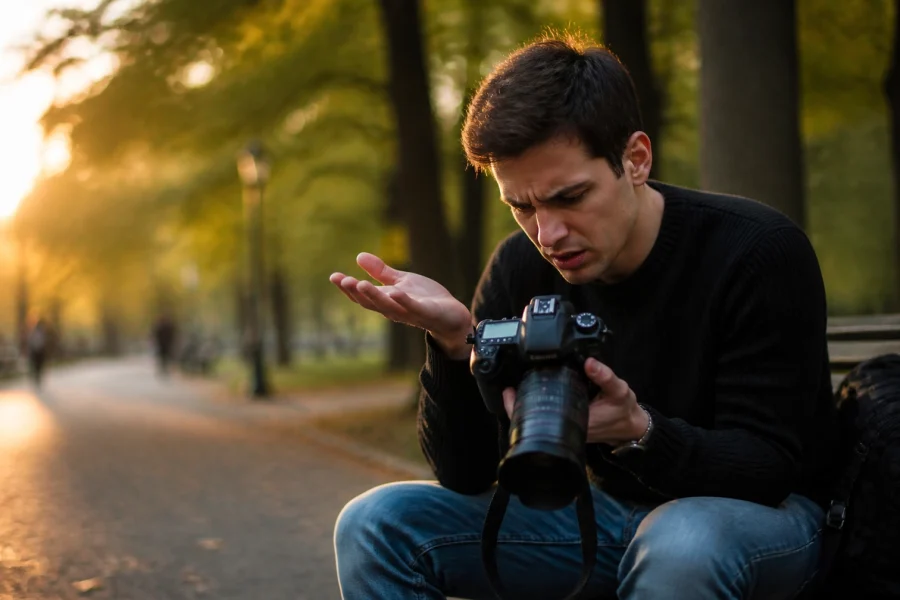
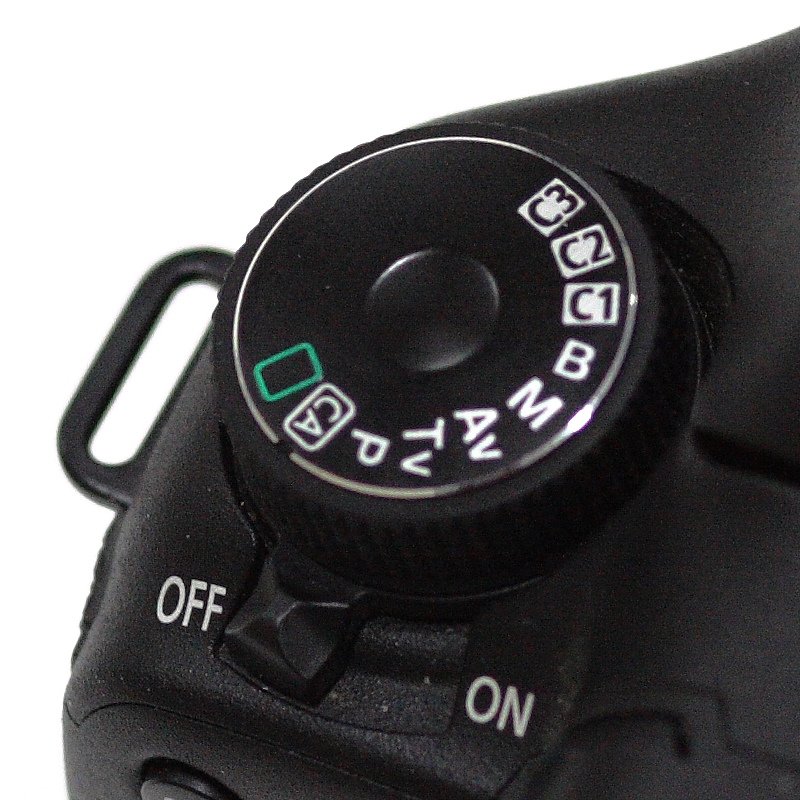
So, you finally did it. You took a deep breath, twisted that little dial on top of your camera away from the "Green Square of Boredom" and landed firmly on "M." Welcome to the club. Shooting in Manual Mode is like learning to drive a stick shift; it’s frustrating, you’ll probably stall a few times, and there’s a good chance you’ll want to throw your gear into a lake at some point. But once you master it, the control you have over your art is unparalleled.
The problem is, most photographers treat Manual Mode like a math test. They get so caught up in the numbers, shutter speed, aperture, ISO, that they forget they’re actually trying to make a beautiful image. I’ve seen seasoned pros and fresh beginners alike fall into the same traps. They make the same mistakes, over and over, wondering why their photos look flat, blurry, or just plain "meh."
If you’re struggling to make your manual shots look the way you imagined them, don't worry. I’ve been there, and so has everyone else. Let’s break down the seven most common mistakes you're making with Manual Mode and, more importantly, how to fix them before your next shoot.
1. The "Zero-Centered" Metering Obsession
When you start shooting in manual, the first thing your eyes gravitate toward is that little horizontal scale in your viewfinder. You know the one. It has a "0" in the middle, a "+" on the right, and a "-" on the left. Most people think their job is to keep that little needle perfectly centered at zero.
The Mistake: Your camera’s light meter isn't actually "smart." It’s designed to look at the world and turn everything into 18% gray. If you’re shooting a bride in a white dress against a white wall, your camera will see all that brightness and think, "Whoa, way too bright! Let's dial it down." It will tell you the exposure is "zero" when, in reality, the white dress looks like a muddy, grayish mess. Conversely, if you're shooting a black cat in a coal cellar, your camera will try to brighten it up to gray, leaving you with a washed-out, noisy image.
The Fix: Use the meter as a guide, not a god. Learn about different metering modes (evaluative, spot, and center-weighted). If you’re shooting a high-contrast scene, you might need to intentionally "overexpose" (move the needle to the +1 or +2 side) to keep your whites white, or "underexpose" to keep your blacks deep and rich. If you want to dive deeper into these fundamentals, check out our easy beginner’s guide to manual mode.
2. The Shutter Speed "Hand-Hold" Trap
You’ve got your aperture set for that sweet bokeh, and your ISO is nice and low. To get the exposure right, you dial your shutter speed down to 1/30th of a second. You hold your breath, click the shutter, and… it’s blurry. Not a "cool artistic blur," but a "my-hands-are-shaking-and-I-drank-too-much-coffee" blur.
The Mistake: Beginners often forget the relationship between focal length and shutter speed. There is a "Reciprocal Rule" that states your shutter speed should be at least 1/focal length. If you're using a 100mm lens, you shouldn't be shooting slower than 1/100th of a second handheld. Even with modern Image Stabilization (IS) or Vibration Reduction (VR), people push their luck way too far.
The Fix: Always keep an eye on that shutter speed. If it starts dipping below 1/100, you better have a tripod or some seriously steady hands. In Manual Mode, it’s easy to get tunnel vision on one setting and forget that another is ruining your shot. If you find your shutter speed is too slow, you have to compensate by opening your aperture or, scary as it sounds, bumping up your ISO. For more on avoiding these types of errors, see our list of landscape photography mistakes.
 Save
Save
3. Aperture Anxiety (Shooting Everything at f/1.8)
We all love that blurry background. It’s the reason many of us bought a DSLR or mirrorless camera in the first place. You get that fancy 50mm f/1.8 lens, and you keep it at f/1.8 for three years straight.
The Mistake: Shooting "wide open" all the time is a recipe for soft images. Most lenses are actually at their sharpest when stopped down a bit, usually around f/5.6 or f/8. Furthermore, when you shoot at f/1.8, your depth of field is so thin that if your subject moves half an inch, their eyes are out of focus while their nose is sharp. If you’re shooting a group of three people at f/1.8, I guarantee someone’s going to be blurry.
The Fix: Use the right tool for the job. If you’re shooting a single portrait and want that dreamy look, fine, go wide. But if you’re shooting a landscape or a group of people, stop it down. Learn the "sweet spot" of your lens. Most of the time, f/4 or f/5.6 will give you plenty of background separation while keeping your subject tack-sharp. Understanding these nuances is exactly what we cover in our photography tutorials and masterclasses.
4. Fearing the ISO "Ghost"
ISO is the boogeyman of the photography world. We’re taught from day one that ISO 100 is "clean" and anything above ISO 800 is "grainy garbage."
The Mistake: Photographers will often choose a shutter speed that’s too slow or an aperture that’s too wide just to keep their ISO at 100. They end up with a blurry image or a shallow depth of field they didn't want, all because they were afraid of a little digital noise. Here’s a secret: an underexposed photo at ISO 100 that you "fix" in post-processing will actually have more noise and uglier artifacts than a properly exposed photo taken at ISO 3200.
The Fix: Don’t be afraid to crank it up. Modern cameras are incredible at handling high ISOs. It is always better to have a sharp, properly exposed image with a little grain than a clean, blurry image that belongs in the trash. If the grain really bothers you, you can easily clean it up using AI-powered tools like Luminar. Their noise reduction is basically magic and allows you to shoot in much darker conditions than you’d think possible.
5. The "Lying" LCD Screen
You take a shot, look at the back of your camera, and it looks beautiful. Bright, colorful, perfect. Then you get home, load it onto your computer, and it’s as dark as a cave. What happened?
The Mistake: You relied on the LCD screen to judge exposure. The brightness of your LCD is adjustable. If you’re shooting outside on a sunny day, you probably have your screen brightness cranked up to 100% just to see it. This makes your photos look much brighter than they actually are. Conversely, if you’re shooting at night and your screen is dim, you might overexpose your shots.
The Fix: Use the Histogram. The Histogram is a mathematical representation of the light in your frame. It doesn't lie. If the "mountain" is all the way to the left, you're underexposed (crushing the blacks). If it’s all the way to the right, you’re overexposed (blowing out the highlights). Aim for a nice, balanced distribution. If you want to see how the pros use the histogram to nail exposure every time, check out some of the deep dives over at PhotoGuides.org.
6. Auto White Balance in Manual Mode
"I'm in Manual Mode, so I'm in control!" you say, while leaving your White Balance on "Auto."
The Mistake: Auto White Balance (AWB) is great for snapshots, but in a professional workflow, it can be a nightmare. AWB changes from shot to shot based on what’s in the frame. If you’re shooting a model and she moves slightly so more of a green wall is behind her, the camera might shift the white balance to compensate, making her skin tones look sickly in one frame and perfect in the next. When you go to edit, you’ll have to fix every single image individually because the color temperature is inconsistent.
The Fix: Pick a preset or set a custom Kelvin temperature. If you’re outside, set it to "Daylight" or "Cloudy." If you’re indoors under tungsten lights, set it to "Tungsten." This ensures that every photo in that sequence has the exact same color base, making your post-processing life ten times easier. Consistency is the hallmark of a pro. You can see examples of perfect color consistency in the galleries over at Edin Fine Art.
7. Manual Mode Elitism (When it's Hurting You)
There is a weird "macho" culture in photography that suggests if you aren't shooting in full Manual 100% of the time, you aren't a "real" photographer.
The Mistake: Using Manual Mode when the situation calls for speed. If you are shooting a wedding, a sports event, or street photography where the light is changing every two seconds (clouds moving in and out, moving from sun to shade), fiddling with your dials will make you miss the shot. The "decisive moment" doesn't wait for you to balance your meter.
The Fix: Use Semi-Auto modes like Aperture Priority (Av or A) or Shutter Priority (Tv or S). These modes allow you to control the most important variable while letting the camera’s powerful computer handle the rest. You can still use Exposure Compensation to tweak the results. Even the most elite pros use Aperture Priority when they're on the move. Don't let your ego get in the way of a great photo. For more tips on when to use which mode, Edin often talks about his field workflow on blog.edinchavez.com.
How to Practice Manual Mode Without Losing Your Mind
If you’re feeling overwhelmed, don’t try to master everything at once. Manual mode is a language, and you need to learn the vocabulary before you can write a novel. Here is a simple 3-step exercise to get you comfortable:
- Stationary Subject, Constant Light: Start indoors with a lamp and a vase of flowers (or a coffee mug, I’m not picky). Because the light isn't changing, you can take your time. Set your ISO to 400, your Aperture to f/4, and then adjust your shutter speed until the meter is at zero. Take the shot. Now, change your aperture to f/8. Watch the meter drop. Adjust your shutter speed to bring it back to zero. See how the settings "talk" to each other?
- The Priority Pivot: Go outside. Put your camera in Aperture Priority. Set it to f/2.8. Look at what shutter speed the camera chooses. Now, switch to Manual and dial in those exact same settings. Take a shot. Then, adjust one setting manually to see how it changes the mood of the photo.
- Review the Metadata: After a shoot, look at your "bad" photos. Most people delete them immediately, but your mistakes are your best teachers. Check the EXIF data. Was the shutter speed 1/20? That’s why it’s blurry. Was the ISO 6400 in bright daylight? That’s why it’s grainy.
Elevating Your Manual Shots in Post-Processing
Even when you nail the exposure in manual mode, the "RAW" file coming out of your camera is designed to be flat. It’s a digital negative that needs developing. This is where most people get discouraged; they see their manual shots and think they look worse than their iPhone photos.
The secret is that pro photos are made in the edit. Because you shot in manual and (hopefully) in RAW format, you have all the data you need to make that image pop. Using a program like Luminar allows you to take that perfectly exposed manual shot and add the "sauce." You can enhance the sky, lift the shadows without adding noise, and use AI to emphasize the details that matter. It's the final step in the manual workflow.
Final Thoughts
Manual Mode isn't about being a "purist." It’s about having the keys to the kingdom. When you understand why your camera is making certain decisions, you can decide when to listen to it and when to tell it to shut up.
Stop obsessing over the "zero" on your meter. Stop fearing ISO. Start looking at the light and the histogram. Most importantly, give yourself permission to mess up. Every "failed" exposure is just a lesson in how the exposure triangle works.
If you’re ready to stop guessing and start creating, come join us over at Shut Your Aperture Academy. We have everything you need to go from "clueless with a camera" to "confident creator."
Now get out there, turn that dial to M, and go make something awesome.
Summary of Manual Mode Fixes
| Mistake | The Quick Fix |
|---|---|
| Meter Obsession | Use the Histogram instead of just the "0" mark. |
| Slow Shutter Speed | Follow the Reciprocal Rule (1/Focal Length). |
| Wide Open Aperture | Find your lens's sweet spot (usually f/5.6 – f/8). |
| ISO Fear | A bright high-ISO shot is better than a dark low-ISO shot. |
| LCD Reliance | Your screen brightness lies; trust the data. |
| Auto White Balance | Set a preset for consistency across your shoot. |
| Manual Elitism | Use Aperture Priority for fast-paced action. |